

 A good bathroom-cleaning system starts with order: ventilation, decluttering, dry soil removal, washing, rinsing, drying, and only then targeted disinfection when it is actually needed. Image: DiegoKR, Wikimedia Commons, CC BY-SA 4.0.
Quick answer: The safest way to deep-clean a bathroom is to use the fewest products necessary, work from dry to wet and high to low, clean before you disinfect, and never mix bleach or disinfectants with other cleaners. Start by ventilating the room and removing clutter. Dust vents and high surfaces, wash ordinary dirt with detergent and water, use a product that is compatible with the specific surface for soap scum or mineral deposits, rinse where the label requires it, and dry the room thoroughly. Reserve disinfection for situations where it adds value, such as illness in the household or contamination of high-touch surfaces. Most importantly, treat moisture control as part of cleaning: recurring mold or mildew is usually a sign that the bathroom is staying damp too long.
A bathroom is a small room with unusually complicated cleaning chemistry. Hard water leaves mineral deposits. Soap combines with body oils and minerals to create film. Toothpaste dries into splatter. Hair collects in corners and around drains. Toilets create a different kind of soil from showers. Metal finishes can discolor under harsh acids. Natural stone can be etched by acidic products. Grout can hold moisture. Silicone seals can become stained. A strong product that works beautifully on one surface can damage the surface beside it.
The answer is not to use more chemicals. It is to build a sequence that separates problems instead of attacking everything at once. This guide gives you that sequence. It explains what to do, why it works, how to verify that the room is actually cleaner, what commonly goes wrong, and what to do instead when the first method does not solve the problem.
1. Start With the Safety Rule That Overrides Every Cleaning Shortcut
Before opening a bottle, make one rule non-negotiable: do not mix cleaning or disinfecting products unless the product labels explicitly tell you that the combination is safe. This matters especially with chlorine bleach. CDC guidance warns never to mix household bleach or disinfectants with other cleaners because hazardous vapors can be released. Mixing bleach with ammonia is particularly dangerous, and acidic cleaners can also react with chlorine products.
This rule applies even when two products are not poured into the same bucket. Residue matters. For example, cleaning a toilet bowl with an acidic descaler and then immediately adding a chlorine-based toilet product without thoroughly flushing can create an unsafe reaction. Spraying an ammonia-containing glass cleaner onto a surface that still has bleach solution on it can create the same basic problem.
What to do: Choose one chemical task at a time. Read both the front and back label. If you change product type, remove the previous product according to its directions—usually by rinsing or wiping with clean water—and allow the area to ventilate before applying something different.
How to verify success: You should be able to identify exactly which product is on each surface at any moment. If you find yourself thinking, “I sprayed something here earlier, but I do not remember what,” stop and rinse rather than layering another chemical on top.
Common mistake: People assume that combining two cleaners will make a stronger super-cleaner. In household cleaning, that can create a chemical hazard without improving the result. Cleaning performance depends on matching chemistry, dwell time, agitation, and rinsing to the soil—not on combining random ingredients.
2. Know the Difference Between Cleaning and Disinfecting
Cleaning and disinfecting are not synonyms. Cleaning uses water, detergent or soap, and physical action to remove dirt, films, and many germs from a surface. Disinfecting uses a chemical product to kill many of the germs that remain after cleaning. CDC guidance states that routine cleaning with soap and water is sufficient for many household situations and that routine disinfection is generally most useful when someone is sick or when there is a specific reason to reduce pathogens on a surface.
This distinction improves both safety and results. A disinfectant sprayed onto a layer of soap scum is not a substitute for removing the soap scum. Organic soil and deposits can interfere with how well a disinfectant reaches the surface. That is why public-health guidance consistently says to clean visibly dirty surfaces before disinfecting.
Practical rule: If the problem is grime, residue, hair, toothpaste, dust, hard-water film, or soap scum, the first job is cleaning. If the problem is that a sick household member has used the bathroom, then cleaning may be followed by disinfection according to the disinfectant label.
Expected result: A clean surface should look and feel free of visible soil before you ask a disinfectant to do anything else.
3. Build a Small Product Kit Instead of a Cabinet Full of Bottles
You can clean most bathrooms with a compact kit. More products usually increase the chance of duplication, incompatible chemistry, surface damage, and expired bottles.
A practical kit can include:
- a mild general-purpose bathroom or surface cleaner compatible with your materials;
- a dishwashing detergent or other mild detergent for washable surfaces;
- a dedicated toilet-bowl cleaner if needed;
- a mineral-deposit remover that is specifically safe for the surface you plan to use it on;
- an EPA-registered disinfectant if your household has a reason to disinfect;
- microfiber or other washable cleaning cloths;
- a non-scratch sponge or soft scrub pad;
- a small detailing brush or old soft toothbrush reserved for cleaning;
- a toilet brush used only for the toilet;
- rubber or other suitable cleaning gloves;
- a squeegee for shower glass or tile;
- a dry dusting cloth or vacuum attachment;
- a small bucket or basin for clean rinse water.
EPA’s Safer Choice program can help consumers identify products formulated with ingredients that meet the program’s human-health and environmental criteria. A Safer Choice label does not mean a product can be mixed with another product; you still need to follow the individual label.
What not to buy automatically: You do not need a separate chemical for every fixture. Often, changing the tool or contact time is more effective than changing the cleaner. A soft brush may remove dirt from grout joints that a spray-and-wipe approach leaves behind.
4. Identify Your Bathroom Materials Before You Choose Chemistry
The same bathroom can contain porcelain, ceramic tile, glass, chrome, stainless steel, acrylic, fiberglass, painted drywall, natural stone, engineered stone, laminate, vinyl, grout, silicone, and wood. Cleaning advice that ignores the material is incomplete.
Before using a new product, identify the surface and read both the cleaner label and, when available, the fixture or material manufacturer’s care instructions.
Natural stone
Marble, travertine, limestone, and other acid-sensitive stones can be etched by acidic products. Vinegar is popular in DIY cleaning advice, but popularity does not make it safe for every material. If you have natural stone, use a stone-safe, pH-appropriate product recommended for that material.
Acrylic and fiberglass
Bathtubs and shower enclosures made from acrylic or fiberglass can scratch if you use abrasive powders, aggressive scrub pads, or tools designed for harder surfaces. Use non-scratch tools and cleaners approved for the fixture.
Metal finishes
Brushed, plated, matte-black, brass, and specialty faucet finishes can be damaged by harsh acids, chlorine, abrasives, or long chemical dwell times. A cleaner that is safe for a ceramic sink may not be safe for the faucet attached to it.
Grout and silicone
Grout is porous compared with tile, while silicone is flexible and nonporous but can discolor over time. Repeated aggressive scrubbing can erode grout. Stained silicone may remain discolored even after it is sanitary; if growth has penetrated or the seal has failed, replacement can be more appropriate than endless bleaching.
Verification step: When trying a new product, test an inconspicuous area first, especially on specialty finishes or stone.
5. Ventilate Before You Create Moisture or Fumes
Bathroom cleaning adds moisture and may release odors or vapors from cleaning products. Open a window if practical, run an exhaust fan that vents outdoors, or increase fresh-air movement in another safe way. CDC recommends good ventilation when using disinfectants or bleach indoors, and EPA emphasizes ventilation as part of controlling bathroom moisture and recurring mold.
Do not confuse “strong smell” with “strong cleaning.” A powerful odor can be a warning that ventilation is inadequate. If a product irritates your eyes, throat, or breathing, leave the area and get fresh air rather than trying to finish quickly.
Useful habit: Turn the exhaust fan on before you start, not only after the room becomes steamy or chemical-smelling.
6. Remove Clutter Before You Spray Anything
A cluttered bathroom forces you to clean around bottles, toothbrush holders, cosmetics, towels, bath toys, razors, and appliances. That creates missed dirt and unnecessary chemical exposure to personal-care items.
Remove movable objects from counters, shower ledges, tub edges, and the floor. Put dirty towels and bath mats in the laundry. Empty the trash. Move medications and cosmetics away from the cleaning area. Remove electrical devices such as hair dryers and trimmers from wet zones.
As you clear items, wipe or wash the bottoms of bottles and containers that have accumulated sticky residue. There is little value in cleaning a shelf and returning a dirty bottle to it.
Expected result: You should be looking at surfaces rather than collections of objects. The room becomes faster to clean and easier to inspect.
7. Remove Dry Dirt Before Wet Cleaning
Hair, dust, lint, and loose debris are easier to remove dry. If you wet them first, they turn into clumps that smear across floors and corners.
Use a dry microfiber cloth, duster, or vacuum attachment on exhaust grilles, light fixtures that are safe to access, high ledges, the top of the medicine cabinet, window trim, shelves, and baseboards. Vacuum or sweep loose hair from the floor.
Pay special attention to the exhaust fan cover. A thick layer of lint can restrict airflow. If the cover is removable according to the manufacturer, turn power off as instructed before cleaning it. Do not reach into electrical fan components with a wet cloth.
Common mistake: Starting with the floor. Dust and droplets from every later task will fall onto it again. Save the final floor cleaning for near the end.
8. Work High to Low and Clean to Dirty
A logical route prevents recontamination. Start with mirrors, upper shelves, and relatively clean fixtures. Move to sink and counter. Then tackle the shower or tub. Clean the toilet later. Finish with the floor.
“Clean to dirty” also applies to cloths. Do not wipe the vanity and then use the same unwashed cloth around the toilet. Assign different cloths to different zones or change cloths as you move to higher-contamination areas.
A simple color system helps in a shared household: one color for mirrors and counters, another for shower surfaces, another reserved for the toilet exterior. The exact colors do not matter; separation does.
9. Clean the Mirror Without Creating a Haze
Bathroom mirrors often develop toothpaste mist, fingerprints, hairspray, and aerosol residue. The common problem is not lack of cleaner; it is using too much.
First dust the mirror lightly. Apply a small amount of glass-safe product to a clean cloth or according to label directions rather than saturating the whole mirror. Wipe in overlapping passes and finish with a dry lint-free cloth.
If streaks remain, inspect your cloth. Fabric softener and oily residue can leave haze. Use a freshly washed cloth that has not been heavily treated with softener.
If the lower mirror edge is damaged: Black or cloudy deterioration behind the glass may be deterioration of the mirror backing, not dirt. No amount of surface cleaning will restore missing reflective coating.
10. Clean the Sink as a System, Not Just the Bowl
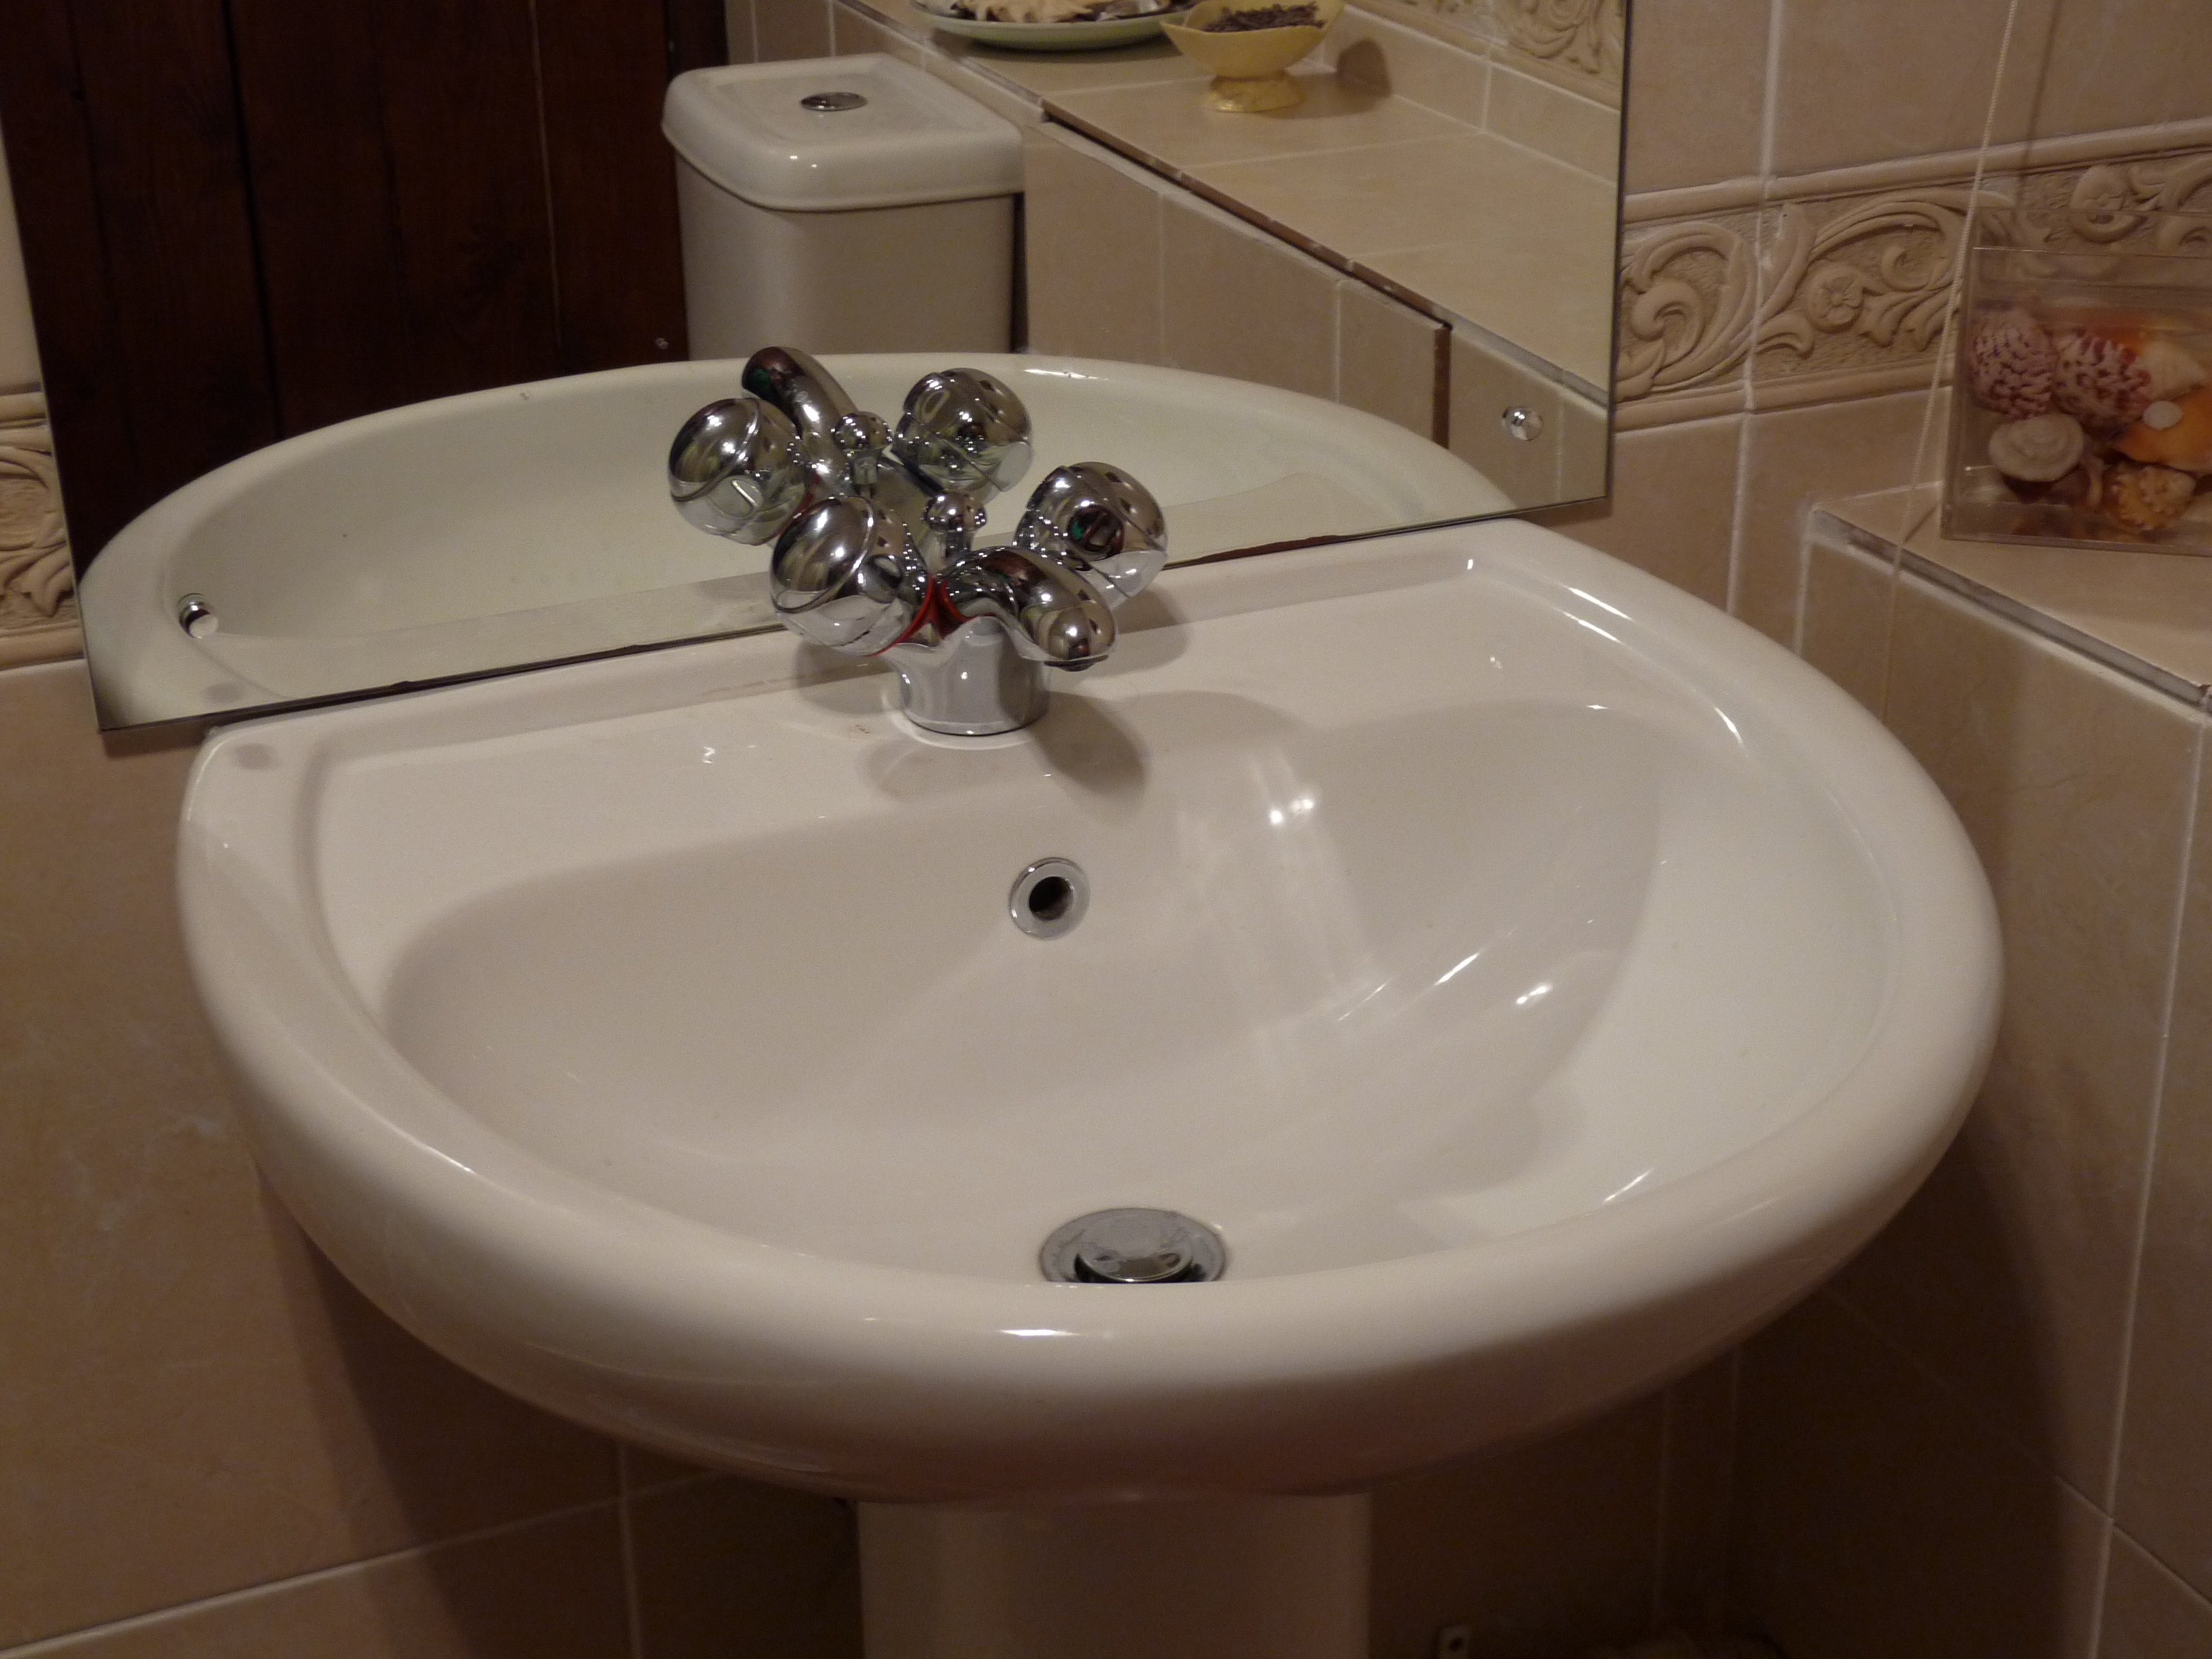 Cleaning the sink means more than wiping the basin: include the faucet base, handles, drain area, overflow area where accessible, backsplash, counter edge, and the underside of the rim. Image: Chris McKenna (Thryduulf), Wikimedia Commons, public domain.
Most sink cleaning failures happen in the edges. The bowl looks white, but grime remains around the faucet base, under the rim, at the backsplash joint, around the drain stopper, and on the overflow opening.
Start with a mild cleaner appropriate for the sink material. Let it sit for the label-approved time if it needs dwell time to soften residue. Use a soft cloth or non-scratch sponge across broad areas. Use a small brush around faucet bases and tight seams. Rinse if required, then dry the faucet and metal trim to reduce spotting.
If the stopper is removable according to its design, lift it out periodically and remove hair and biofilm. Do not force plumbing parts you do not understand. If the sink drains slowly because of a deeper blockage, repeated chemical drain cleaner is not the same as cleaning the sink and can create plumbing or safety problems. Mechanical removal of accessible hair or appropriate plumbing service is often a better path.
11. Treat Hard-Water Deposits Separately From Ordinary Dirt
Mineral deposits are not the same as soap or grease. Calcium and magnesium compounds can build around faucet aerators, showerheads, glass, tile, and drains. A general detergent may remove body oils but leave the white mineral crust behind.
Use a surface-compatible mineral-deposit remover. Protect acid-sensitive stone and specialty finishes. Follow the product’s dwell-time limit; leaving an acid on a metal finish longer is not automatically better.
For removable faucet aerators or showerheads, consult the manufacturer before soaking. Some finishes tolerate mild descaling solutions while others can be discolored.
Do not combine a descaler with bleach. Many descaling products are acidic. Rinse the first chemistry away completely and ventilate before using any unrelated chlorine product in the same area.
If hard water is a recurring problem, prevention is more efficient than monthly restoration. Wipe standing water from fixtures and shower glass after use. This does not eliminate dissolved minerals in the water, but it reduces the amount left behind when droplets evaporate.
12. Clean the Shower in Layers
A shower can contain several different soils at the same time: loose hair, soap residue, body oils, mineral scale, shampoo splatter, and microbial growth in chronically damp areas. Do not expect one pass to remove all of them.
Layer 1: Remove loose material
Take out bottles and accessories. Remove hair from the drain cover and corners. Rinse loose dirt if the surface manufacturer allows it.
Layer 2: Remove ordinary film
Apply a compatible bathroom cleaner or detergent to tile, enclosure walls, or tub surfaces. Give the product time to loosen film if the label specifies dwell time. Agitate with a non-scratch pad or brush. Work in small sections so product does not dry unexpectedly.
Layer 3: Target minerals only where needed
If white scale remains after detergent cleaning, use a compatible descaling product only on the affected material. This is more controlled than bathing the entire shower in acid.
Layer 4: Rinse and dry
Rinsing removes loosened soil and cleaner residue. Drying reveals whether you actually removed the film; a wet surface can look spotless until it dries hazy.
Success check: After drying, glass should feel smooth rather than chalky, tile should not feel greasy, and corners should not contain hair or loose debris.
13. Use Mechanical Action Before Escalating Chemistry
Cleaning has four main variables: chemistry, time, temperature, and mechanical action. In a home bathroom, increasing mechanical action safely is often better than increasing chemical strength.
If a mild cleaner does not remove soap film after a quick wipe, try a longer label-approved dwell time and a suitable non-scratch scrub pad. Use a detail brush on textured surfaces and grout lines. Reapply a small amount of product if necessary rather than flooding the area.
The key word is suitable. Steel wool, razor blades, pumice stones, and abrasive powders can permanently scratch many fixtures. A tool that appears in one online cleaning video may be safe only on a specific material under specific conditions.
14. Clean Grout Without Destroying It
Grout lines can collect soap residue and discoloration because they are lower than the tile face and often more porous. Start with detergent and a nylon or other manufacturer-approved brush. Scrub along the grout line rather than aggressively across surrounding finishes.
If discoloration remains, determine whether it is surface soil, mineral staining, mold growth, or permanent pigment change. Different problems require different responses. Constantly using a harsh acidic cleaner can erode cement-based grout over time. Chlorine can discolor some materials and should not be treated as a universal grout cleaner.
After cleaning, rinse and dry. If grout repeatedly darkens because the shower never dries, ventilation and water management matter more than another chemical treatment.
15. Understand Recurring Bathroom Mold as a Moisture Problem
EPA’s central message on mold is straightforward: moisture control is the key to mold control. If visible growth in a shower repeatedly returns, cleaning frequency may be part of the issue, but persistent moisture is usually the larger system problem.
Increase ventilation during and after bathing. Run the exhaust fan, open a window when conditions allow, and leave the shower enclosure open enough to dry. Squeegee or wipe wet walls if the bathroom dries slowly. Repair plumbing leaks. Do not leave wet bath mats piled on the floor.
EPA recommends scrubbing mold from hard surfaces with detergent and water and drying completely. It does not recommend routine use of biocides such as chlorine bleach as the default solution for every mold-cleanup situation. Killing growth without removing it and correcting the moisture problem does not solve the system that allowed it to return.
When the problem is bigger: Widespread growth, hidden moisture inside walls, sewage contamination, or recurring dampness from a building defect can require professional remediation or repair rather than household surface cleaning.
16. Clean Shower Doors Without Damaging Coatings
Modern glass shower doors may have factory-applied protective coatings. Before using acidic cleaners, abrasive pads, razor blades, or specialty sealants, check the door manufacturer’s care instructions.
For ordinary film, use a compatible glass or bathroom cleaner and a soft non-scratch pad. Rinse thoroughly. Use a squeegee and dry cloth to remove remaining water.
If a cloudy appearance remains even after scale and soap film are removed, the glass may be etched or permanently mineral-damaged. The difference is important: residue sits on top of the surface; etching is damage to the surface itself.
17. Clean the Toilet Last Among the Major Fixtures
The toilet deserves its own tools and sequence. Keep the toilet brush and toilet cloth separate from sink and shower tools.
Start with the exterior before the bowl if you want to avoid splashing bowl cleaner onto an already-clean outer surface. Wipe the tank top, flush handle or button, seat lid, seat top and underside, hinges, rim exterior, bowl exterior, pedestal, and the floor around the base.
For the bowl, apply a dedicated toilet-bowl cleaner according to the label. Do not assume that every toilet cleaner is compatible with every other product. Let it work for the specified time, scrub under the rim and around the waterline, then flush as directed.
Important: Never add bleach or another chemical on top of an unknown toilet-bowl cleaner. Some bowl cleaners are acidic. Flush thoroughly and follow label directions before using anything else.
 Targeted tools and controlled methods are usually safer than layering multiple chemicals. Image: Saveonclean, Wikimedia Commons, CC BY-SA 4.0.
18. Do Not Use a Toilet Brush as a Whole-Bathroom Tool
This sounds obvious, but cross-contamination happens through tools. A brush used inside the toilet bowl should never be used on shower grout, floor drains, or other fixtures.
After use, rinse the toilet brush according to its design and let it dry before storing when possible. A constantly wet brush sealed in a holder becomes an odor and microbial problem of its own.
If the brush is damaged, permanently soiled, or difficult to clean, replace it. Tools are consumables when they can no longer perform hygienically.
19. Clean High-Touch Surfaces Deliberately
Door handles, cabinet pulls, faucet handles, toilet flush controls, light switches, and frequently touched shelves often get less attention than large shiny surfaces. Yet they are touched repeatedly throughout the day.
For routine cleaning, a compatible cleaner and cloth can remove hand oils and soil. When disinfection is appropriate—for example, when someone in the household is ill—clean the surface first, then use an EPA-registered disinfectant according to its label.
Contact time matters. A disinfectant that requires the surface to remain wet for several minutes cannot be sprayed and immediately wiped dry while still being used according to that disinfecting claim. Read the label and keep the surface wet for the required contact time.
20. Use Bleach Only When You Have a Reason and a Plan
Bleach can be an effective disinfectant when used properly, but it is not a universal bathroom cleaner. It can discolor fabrics, corrode metals, damage finishes, irritate eyes and airways, and create dangerous gases when mixed with incompatible products.
If you choose bleach for disinfection, follow the current product label. CDC guidance for household disinfection states that many regular unscented household bleaches contain 5%–9% sodium hypochlorite, but formulations vary. Do not assume a recipe from an old article applies to a bottle with a different concentration. Use the bottle directions whenever available.
Ventilate the room, wear any protective equipment recommended by the label, clean the surface first, prepare only what you need, and never mix the solution with other cleaners. CDC also notes that diluted bleach solutions lose effectiveness over time, so do not keep an unlabeled homemade bottle indefinitely.
21. Avoid the “Homemade Cleaner Means Harmless” Myth
Vinegar, baking soda, lemon juice, ammonia, and other household chemicals are often described as natural alternatives, but “natural” is not a safety category. EPA notes that homemade cleaners vary in effectiveness and that household chemicals can still be hazardous when used incorrectly.
Vinegar is acidic and can damage acid-sensitive stone or finishes. Ammonia is a hazardous chemical and must never be mixed with chlorine bleach. Baking soda is mildly abrasive and can scratch some glossy or soft materials if scrubbed aggressively.
The safer approach is not “commercial equals dangerous, homemade equals safe.” The safer approach is: identify the material, identify the soil, use a product compatible with both, and follow verified directions.
22. Clean the Floor Last
By the time you finish the fixtures, hair, dust, droplets, and cleaner residue may have reached the floor. That is why floor cleaning belongs near the end.
Vacuum or sweep again if necessary. Then use a floor cleaner compatible with the flooring material. Ceramic tile, natural stone, sheet vinyl, luxury vinyl plank, sealed wood, and laminate do not share identical care rules.
Work from the farthest corner toward the exit so you do not walk across the wet floor. Use only enough liquid to clean the surface; flooding edges can push water under baseboards, toilets, cabinetry, or floating floors.
Pay attention around the toilet base and vanity toe-kick, where hair and dust collect. Dry any puddles that remain after mopping.
23. Wash Bath Mats and Towels as Part of the Room
A sparkling bathroom can still smell damp if towels and mats remain wet. Follow their care labels and wash them frequently enough for your household’s use pattern. Let towels dry fully between uses.
Rubber-backed mats may have heat or drying restrictions, so do not assume they can go into a hot dryer. If backing is cracking or crumbling, replacement may be safer than continuing to shed material into the washer and floor.
Do not return damp textiles to a freshly cleaned room. Moisture control is part of cleanliness.
24. Inspect the Exhaust Fan Instead of Assuming It Works
An exhaust fan can make noise without moving enough air. After cleaning the visible grille safely, perform a simple nontechnical check: hold a small piece of tissue near the grille while the fan operates. It should be drawn toward the vent. Do not insert paper into the fan.
If airflow seems weak, check whether the grille is obstructed and whether the fan is being used long enough after showers. Duct blockage, poor installation, or an undersized fan can require building or electrical service rather than more surface cleaning.
EPA notes that bathroom exhaust helps control moisture and indoor pollutant levels. If the bathroom consistently remains wet for hours, improving ventilation may reduce cleaning workload more than buying another mildew product.
25. Use Drying Time as a Quality-Control Test
A wet bathroom often looks cleaner than it is. Water temporarily hides streaks, mineral film, soap haze, and missed spots. After cleaning, allow major surfaces to dry and inspect again under good light.
Look for:
- chalky residue on glass or chrome;
- greasy film on tile;
- toothpaste splatter around mirrors and walls;
- hair remaining in corners;
- discoloration around silicone joints;
- water pooling where it should drain;
- streaks on the floor;
- musty odor after the room is dry.
If a surface looks cloudy only after drying, you may have cleaner residue or minerals. Rinse with clean water if the material permits and dry again before escalating to stronger chemistry.
26. Separate Staining From Active Dirt
Not every mark can be cleaned away. Rust can permanently discolor some surfaces. Mold can stain grout or silicone. Hair dye can penetrate porous materials. Acid can etch stone. Abrasive pads can dull acrylic. Metal can lose plating.
Repeated aggressive cleaning after the soil is already gone can turn a cosmetic stain into real surface damage.
How to tell: If the area feels clean, produces no residue on a white cloth, and does not change after a second appropriate cleaning cycle, consider whether you are looking at staining or damage rather than removable dirt.
27. Build a Five-Minute Daily Reset
Deep cleaning becomes easier when the bathroom does not spend a month accumulating moisture and residue.
A daily or near-daily reset can be extremely short:
- Hang towels so they dry fully.
- Remove hair from the shower or sink drain area.
- Wipe obvious toothpaste or makeup splashes.
- Squeegee shower glass or wet tile if scale and mildew are recurring problems.
- Run the exhaust fan long enough to clear excess humidity.
- Return products to organized storage so surfaces remain accessible.
This routine does not replace cleaning. It reduces the workload by preventing small problems from becoming bonded deposits.
28. Create a Weekly Cleaning Sequence That Takes Less Decision-Making
A reliable routine can follow the same order each week:
- Ventilate.
- Remove towels, mats, trash, and counter clutter.
- Dust high surfaces and remove loose hair.
- Clean mirror and upper fixtures.
- Clean sink and counter.
- Clean shower or tub.
- Clean toilet.
- Wipe high-touch points.
- Vacuum or sweep floor.
- Mop floor.
- Dry surfaces and inspect.
- Return only clean, dry items.
Using the same order means you stop deciding what comes next. The system becomes faster because tools and products can be staged in the sequence you use them.
29. Deep-Clean Monthly or Seasonally Based on Use, Not a Calendar Rule
Bathrooms do not become dirty at identical rates. A guest bathroom used twice a week does not need the same schedule as a family bathroom used by five people.
Less frequent tasks can include:
- cleaning the exhaust grille;
- washing shower-curtain liners according to their care instructions;
- descaling showerheads if required and compatible;
- cleaning behind movable storage;
- checking caulk and grout for failure;
- cleaning cabinet interiors;
- discarding expired or unused personal-care products according to appropriate guidance;
- checking for slow leaks beneath the sink and around the toilet;
- washing toothbrush cups and soap dishes;
- cleaning fan covers and accessible vents.
The best frequency is based on visible soil, moisture, number of users, and how quickly problems return.
30. Troubleshoot Soap Scum That Comes Back Immediately
If shower walls look hazy again one day after cleaning, first confirm that you are removing film rather than only spreading it.
Use a detergent-compatible cleaner and mechanical action, rinse thoroughly, and dry the surface. If haze appears only when dry, mineral deposits may also be involved. Treat soap film first and mineral scale second rather than combining chemicals.
Reducing residue after showers helps. A quick rinse followed by squeegeeing can remove product residue and water before it dries onto the wall.
31. Troubleshoot a Persistent Musty Odor
A musty smell is not solved by adding fragrance. Search for moisture.
Check:
- wet bath mats;
- towels that do not dry fully;
- the area under the sink for slow leaks;
- the seal around the tub or shower;
- the base of the toilet;
- shower-curtain folds;
- window condensation;
- poor exhaust ventilation;
- cabinet interiors against exterior walls;
- hidden water damage near plumbing penetrations.
If the odor returns quickly after surface cleaning, the source may be hidden. EPA recommends investigating moisture rather than treating mold as only a cosmetic problem.
32. Troubleshoot a Toilet Ring That Will Not Scrub Away
A persistent toilet ring may be mineral scale rather than ordinary dirt. Use a toilet-bowl product specifically labeled for the deposit and compatible with the fixture. Give it the required dwell time and use an appropriate bowl brush.
Do not reach for random abrasives or mix acidic bowl cleaner with bleach. If the ring remains after correct treatment, it may be etched mineral damage or a heavily bonded deposit that requires a manufacturer-approved specialty method.
33. Troubleshoot Orange, Pink, or Dark Discoloration
Color alone does not identify a substance. Pink or orange films in damp bathrooms can be associated with microbial growth, mineral content, iron, product residue, or combinations of factors. Dark marks can be mold, staining, degraded caulk, or dirt trapped in porous material.
Clean the area with a material-compatible method, dry it, and observe how quickly it returns. If discoloration reappears where moisture remains, improve drying and ventilation. If it follows water seepage or appears behind walls or ceilings, investigate the moisture source rather than repeatedly wiping the surface.
34. Know When Cleaning Has Become a Repair Job
Some bathroom problems cannot be cleaned away because something is physically failing.
Call for appropriate repair when you find:
- loose or cracked tiles that allow water intrusion;
- soft drywall or swollen cabinetry;
- persistent leakage below a sink;
- water around the toilet base;
- failed caulk joints that allow water behind a surface;
- mold associated with a larger hidden moisture problem;
- electrical fixtures affected by water;
- a drain or plumbing problem that routine cleaning does not solve.
Cleaning a leak stain every week does not fix the leak. The repair is part of the cleaning system because it prevents the condition from recurring.
35. Keep Children and Pets Out of the Chemical Work Zone
Cleaning products should be stored and used out of reach of children and pets. Do not leave an open toilet-bowl cleaner, bleach solution, bucket, or spray bottle unattended.
Keep products in their original labeled containers whenever possible. Transferring a cleaner into a beverage bottle or unmarked spray bottle creates an avoidable poisoning risk. If a product label tells you to dilute it, label the working solution clearly.
Do not use disinfectants on pets, and do not allow pets to walk through wet disinfectant before the product’s directions say the area is safe.
36. Store Products by Compatibility and Function
Do not store all bathroom chemicals in a jumble beneath a sink where bottles can leak onto one another.
Keep lids tightly closed. Store products upright. Separate bleach from acids and ammonia-containing products. Keep chemicals away from medications, cosmetics, towels, and personal-care supplies. Follow storage temperatures and disposal directions on the label.
If a bottle is leaking, corroded, unlabeled, or so old that you cannot identify it confidently, do not use it experimentally. Follow local household hazardous-waste guidance where applicable.
37. Clean Your Cleaning Tools
Reusable cloths, sponges, brushes, mop heads, and squeegees become dirty during the job. If you put them away wet and contaminated, the next cleaning session starts with a hygiene problem.
Launder cloths according to their care instructions. Rinse brushes and allow them to dry. Clean buckets. Hang mop heads or pads so they dry fully. Replace sponges that smell, remain stained, or are breaking down.
Do not use the same sponge for the kitchen and bathroom. Tool separation is a simple way to reduce cross-contamination.
38. A Worked Example: Deep-Cleaning a Busy Family Bathroom
Consider a bathroom used by two adults and two children. The shower glass is cloudy, grout is slightly dark in lower corners, toothpaste is splattered around the sink, the toilet has a light mineral ring, towels stay damp for hours, and the exhaust fan grille is dusty.
Step 1: Safety and ventilation. The window is opened slightly and the exhaust fan is turned on. All products are read before use. The household decides to use a mild detergent cleaner, a surface-compatible mineral remover, and a dedicated toilet-bowl cleaner. Bleach is not needed because nobody is ill and the goal is routine deep cleaning.
Step 2: Reset the room. Towels and mats go to the laundry. Shower bottles are removed. Counter items move to a tray outside the room. Trash is emptied.
Step 3: Dry cleaning. The fan grille is dusted carefully from the outside, shelves are wiped dry, and hair is vacuumed from the floor and shower corners.
Step 4: Mirror, sink, and counter. A small amount of compatible cleaner removes toothpaste and hand oils. A detail brush cleans around the faucet base. The faucet is rinsed and dried.
Step 5: Shower film. Detergent cleaner is applied to the shower walls and glass in sections. After label-approved dwell time, the surfaces are scrubbed with a non-scratch pad and rinsed.
Step 6: Mineral scale. White deposits remaining on the glass are treated with a compatible descaler. The metal trim is protected. The product is rinsed away completely. No bleach or unrelated chemical is introduced.
Step 7: Grout corners. Dark surface soil is scrubbed with detergent and a nylon brush. The area is rinsed and dried. Because the discoloration has been recurring, the family changes the ventilation routine instead of relying on stronger cleaner.
Step 8: Toilet. A separate cloth cleans the exterior. Dedicated bowl cleaner is applied and scrubbed according to the label. The toilet brush is rinsed and left to dry.
Step 9: Floor. The floor is vacuumed again and mopped with a cleaner compatible with the tile. The room is allowed to dry.
Step 10: Prevention. After future showers, the family will run the exhaust fan, hang towels spread out rather than folded, and squeegee the glass. The goal is to reduce the conditions that create next week’s work.
This example works because each problem receives the minimum chemistry it needs, and moisture control becomes part of the solution.
39. A 30-Minute Maintenance Version for Weeks When You Are Busy
You do not need a full deep-clean every time. When the room has been maintained reasonably well, use a shorter workflow:
- Minutes 0–3: Ventilate, remove towels and clutter, empty trash.
- Minutes 3–6: Dust and remove hair.
- Minutes 6–10: Clean mirror, sink, faucet, and counter.
- Minutes 10–18: Clean shower or tub with ordinary compatible cleaner.
- Minutes 18–23: Clean toilet with separate tools.
- Minutes 23–27: Wipe handles, switches, and other touch points.
- Minutes 27–30: Clean floor and set the room to dry.
If mineral deposits or mold need special treatment, schedule that as a separate targeted task. Trying to fit every restoration problem into a routine 30-minute clean encourages unsafe shortcuts and product mixing.
40. A Surface-by-Surface Decision Guide
Mirror
Use a small amount of glass-compatible cleaner and a lint-free cloth. Avoid saturating edges. If haze remains, use a clean dry cloth.
Ceramic sink
Start with mild detergent or compatible bathroom cleaner. Use a non-scratch pad. Treat mineral deposits separately if necessary.
Chrome faucet
Use a manufacturer-compatible product, rinse where required, and dry. Do not leave acids or chlorine products sitting on the finish.
Natural-stone vanity
Use a stone-safe product. Avoid assuming vinegar or acidic descaler is safe.
Acrylic tub
Use non-abrasive tools and a compatible cleaner. Avoid aggressive scouring.
Shower glass
Remove soap film, rinse, then treat mineral scale only if necessary and compatible with coatings. Squeegee after cleaning.
Tile grout
Start with detergent and a suitable brush. Avoid repeated harsh acid. Fix moisture if dark growth keeps returning.
Toilet
Use dedicated tools and products. Never layer cleaners inside the bowl.
Vinyl or tile floor
Use the floor manufacturer’s recommended chemistry and avoid flooding seams or edges.
41. Frequently Asked Questions
Do I need to disinfect the bathroom every time I clean it?
Usually not. CDC guidance says cleaning alone with soap or detergent and water removes most germs in ordinary household situations. Disinfection is more important when someone is sick, when a higher-risk person requires additional precautions, or when there is a specific contamination concern.
Can I mix bleach and bathroom cleaner?
No, not unless the labels explicitly state that the products are designed to be combined. CDC warns not to mix bleach or disinfectants with other cleaners. Bleach can react dangerously with ammonia and acids.
Can I use vinegar everywhere in the bathroom?
No. Vinegar is acidic and can damage natural stone and some finishes. It also should never be combined with chlorine bleach. Use a product compatible with the actual material.
Why does my shower look cloudy again after it dries?
Common causes are cleaner residue, soap film, or mineral deposits. Rinse and dry after cleaning. If a chalky film remains, use a compatible mineral remover rather than simply adding more general cleaner.
Should I use bleach on bathroom mold?
EPA does not recommend routine use of biocides such as chlorine bleach as the default approach for mold cleanup. The priority is to remove mold from cleanable hard surfaces with detergent and water, dry the area, and correct the moisture problem that allowed growth.
How do I stop mold from returning?
Improve drying. Use the exhaust fan, increase ventilation, repair leaks, dry wet materials, and reduce standing water. EPA specifically notes that recurring shower mold can often be reduced through increased ventilation and more frequent cleaning.
What is disinfectant contact time?
It is the time a disinfectant must remain on a surface—usually visibly wet—to achieve the germ-kill claim on its label. The required time varies by product, so follow the label rather than guessing.
Why should I clean before disinfecting?
Dirt and other impurities can reduce the disinfectant’s access to the surface. CDC recommends cleaning visibly dirty surfaces first, then disinfecting when disinfection is needed.
Is a stronger-smelling cleaner more effective?
No. Odor is not a reliable measure of cleaning or disinfecting performance. Use a product that is appropriate for the soil and surface and follow its directions.
How often should a bathroom be deep-cleaned?
There is no universal schedule. A heavily used family bathroom may need weekly cleaning plus daily moisture control, while a guest bathroom may need much less. Clean based on use, visible soil, moisture, and how quickly deposits return.
42. Final Checklist Before You Leave the Room
- All chemical products are closed and stored safely.
- No incompatible cleaners were mixed or layered.
- Mirrors, counters, sink, shower, toilet, and floor are free of visible soil.
- Products that required rinsing were rinsed.
- Disinfectants, if used, received their required contact time.
- The floor is not dangerously slippery.
- Towels and mats are clean and able to dry.
- The exhaust fan or other ventilation is still operating if the room remains humid.
- Cleaning tools are rinsed, washed, and drying.
- Leaks, failed seals, or recurring moisture problems have been noted for repair.
Conclusion: A Cleaner Bathroom Uses Less Guesswork, Not More Chemicals
The most effective bathroom-cleaning routine is controlled rather than aggressive. Remove dry debris before making it wet. Clean ordinary soil before reaching for disinfectant. Treat soap film and mineral scale as different problems. Protect sensitive materials. Keep toilet tools separate. Read contact times. Ventilate. Dry the room. And never mix bleach or disinfectants with unrelated cleaners.
The first action to take today is simple: reduce your product kit to cleaners you can identify and use correctly. The most important mistake to avoid is chemical layering—spraying one product on top of another because the first did not work fast enough. Rinse, reassess the soil, and choose the next method deliberately.
If mold, mineral scale, odors, or stains keep returning, do not automatically escalate the chemistry. Look for the system behind the problem: slow drying, hard water, poor ventilation, a leaking seal, an unsuitable surface product, or a repair that has been postponed. Once the cause is addressed, cleaning becomes faster, safer, and much more predictable.
Sources and Further Reading
- CDC — Cleaning and Disinfecting
- CDC — When and How to Clean and Disinfect Your Home
- CDC — Cleaning and Disinfecting with Bleach
- U.S. EPA — A Brief Guide to Mold, Moisture and Your Home
- U.S. EPA — Mold Cleanup in Your Home
- U.S. EPA — Safer Choice
- U.S. EPA — Safer Choice Frequently Asked Questions
- U.S. EPA — Home Ventilation and Indoor Air Quality
Image Credits
- “A clean bathroom.jpg” — DiegoKR, Wikimedia Commons, CC BY-SA 4.0.
- “Bathroom sink.jpg” — Chris McKenna (Thryduulf), Wikimedia Commons, public domain.
- “Bathroom cleaning.jpg” — Saveonclean, Wikimedia Commons, CC BY-SA 4.0.