

Quick answer: The safest way to set up a new computer is to treat the first hour as a security-and-recovery project, not an app-installing sprint. Connect to a trusted network, finish operating-system updates, confirm built-in security is active, protect your primary account with multifactor authentication, configure device encryption and save the recovery key somewhere separate from the computer, remove software you do not need, install only trusted apps, set up an independent backup, and test that you can actually recover a file before moving all of your important data. The goal is not simply to make the computer usable today; it is to make it recoverable six months from now.
 A good new-computer setup begins with a clean, documented baseline before years of apps, files, and account changes accumulate. Image: Wikimedia Commons, freely licensed under a Creative Commons share-alike license.
Buying a new computer feels like a fresh start. It is fast, empty, and uncomplicated. That is exactly why the setup period is valuable. Once work files, browser profiles, photos, messaging apps, saved passwords, cloud folders, and personal preferences accumulate, changing the underlying structure becomes harder.
Many people set up a new laptop by doing three things: signing into Wi-Fi, installing a browser, and copying old files. That works until the first account lockout, failed update, stolen device, broken drive, ransomware incident, or accidental deletion. A better setup creates several layers of protection before the computer becomes essential.
This guide covers both Windows 11 PCs and modern Macs. The exact menu names change over time, so the durable goal is more important than memorizing a path: update the operating system, protect identity, encrypt local data, build backups, document recovery, minimize unnecessary software, and verify that recovery works.
1. Before You Turn It Into “Your” Computer, Record What You Bought
Start by documenting the machine while the box, receipt, and identifying information are easy to find. This takes a few minutes and can save time if you later need warranty service, insurance documentation, a return, or technical support.
Record:
- manufacturer and exact model;
- serial number or service tag;
- purchase date;
- retailer;
- warranty period;
- processor, memory, and storage capacity;
- operating-system edition;
- any extended warranty or accidental-damage plan.
Take a photo of the serial label if it is accessible. Save the receipt in a cloud folder or household records system that does not depend on the new computer itself.
Why this matters: Support teams often ask for the serial number before troubleshooting. If the computer is lost or stolen, you may no longer have physical access to that label.
Common mistake: Saving the receipt only in the new computer’s Downloads folder. If the device dies, the proof of purchase disappears with it.
2. Inspect the Hardware Before Installing Anything
Do a basic physical check while you are still inside the return window.
Look for:
- screen defects, unusual bright or dark areas, or cracked glass;
- loose hinges;
- keyboard keys that do not register;
- a trackpad that clicks or tracks inconsistently;
- USB, HDMI, audio, and charging ports that do not work;
- unexpected fan grinding, clicking, or electrical noise;
- a charger that disconnects when the cable moves slightly;
- a battery that behaves abnormally during the first charge cycle.
Test the webcam, microphone, speakers, Wi-Fi, Bluetooth, and at least one external port if you can. This is not a stress test. It is a quick check that the device you received is the device you intended to keep.
If the computer has a touchscreen, stylus, fingerprint reader, or face-recognition camera, test those features now as well.
3. Use a Trusted Network for the Initial Setup
The first setup often involves account authentication, software downloads, security updates, and cloud synchronization. A private home or office network you trust is preferable to an unknown public hotspot.
If the only available connection is public Wi-Fi, avoid making unnecessary account changes or downloading random utilities during the initial session. Finish the minimum setup, then complete sensitive configuration on a trusted network.
If you are setting up the machine at home, this is also a good time to confirm that your router firmware and Wi-Fi security are current. The computer and the network it uses form one security system.
4. Finish Operating-System Updates Before You Judge Performance
New computers are often manufactured, imaged, boxed, shipped, warehoused, and sold over a period of weeks or months. The operating system on the device may therefore be behind the latest security and reliability updates on the day you open the box.
On Windows 11, open Settings > Windows Update and check for updates. Microsoft’s current support guidance recommends installing available Windows updates and restarting when prompted. Repeat the check after the restart because one update can make another update applicable.
On a Mac, open System Settings > General > Software Update. Apple recommends using the latest macOS that is compatible with the Mac and keeping automatic security-related updates enabled.
Do not stop after the first restart. Keep checking until the system reports that it is current or no more normal updates are offered.
Why this matters: Security fixes, driver fixes, firmware changes, and compatibility improvements can alter the behavior of a new computer. Troubleshooting a Wi-Fi or battery problem before updates finish can waste time because the update process itself may resolve it.
What success looks like: You can restart the computer, check the update page again, and see no urgent security or system updates waiting.
5. Turn On Automatic Security Updates
Manual update habits fail because people get busy. Automatic security updates reduce the time between a fix becoming available and your device receiving it.
On Windows, leave Windows Update enabled and avoid third-party tools that claim they should “disable updates for performance.” On modern Macs, verify the options for automatic macOS updates and security or system data files in Software Update settings.
Apple specifically describes keeping system data files and security updates enabled as an important part of maintaining Mac security. CISA also includes software updates among its core consumer cybersecurity actions because attackers frequently exploit known software flaws after fixes already exist.
For applications, enable automatic updates where reasonable. Browsers deserve special attention because they process untrusted content from the internet every day.
6. Create the Right Primary Account
Your operating-system account is the gatekeeper for files, settings, encryption recovery, and in many cases cloud synchronization.
On a personal Windows PC, you may use a Microsoft account or a local account depending on your needs and available options. A Microsoft account can simplify synchronization, Windows Backup, Store purchases, and BitLocker recovery-key access. On a Mac, an Apple Account connects iCloud, App Store purchases, Find My, and account recovery features.
Whatever account model you choose, use a password that is unique and not reused elsewhere.
If several people will use the machine, do not share one login. Create separate user accounts. This separates browser history, cloud files, app preferences, and personal data, and it reduces the chance that one person accidentally changes or deletes another person’s information.
7. Protect the Cloud Account With Multifactor Authentication
The account attached to your computer may be more valuable than the laptop itself. It can control email, cloud files, device recovery, purchases, saved passwords, and identity verification.
Enable multifactor authentication on the Microsoft account, Apple Account, primary email account, and any password manager you use. CISA continues to recommend MFA as one of the most effective baseline protections for consumer accounts.
Prefer stronger authentication methods when available, such as passkeys, hardware security keys, or authenticator-app approvals. SMS is still better than password-only protection in many situations, but it depends on the security of your phone number.
Also record recovery methods:
- backup email address;
- trusted phone number;
- recovery codes;
- security-key details if used;
- recovery contact, where the service supports one.
Store recovery codes somewhere you can reach even if the new computer is unavailable.
8. Set Up a Strong Local Sign-In Method
A computer password protects the device when someone has physical access to it. Make the login password unique and strong enough that it cannot be guessed from your name, birthday, phone number, or common phrases.
On Windows, Windows Hello can provide PIN, fingerprint, or facial authentication on supported devices. The Windows Hello PIN is tied to that device rather than functioning like a reusable website password.
On Macs with Touch ID, configure your fingerprint after the account password is established.
Biometric sign-in is convenient, but do not forget the underlying account password. The system will still require it in some circumstances, such as after a restart or when changing security settings.
9. Confirm Device Encryption and Save the Recovery Key Correctly
Encryption protects data at rest. If a thief removes the storage drive or bypasses the normal login path, encrypted data is far harder to read without the key.
On many Windows 11 devices, Device Encryption or BitLocker may activate automatically depending on hardware and account configuration. Open Windows Security or the device-encryption settings and verify the actual state instead of assuming it is on.
If BitLocker is active, confirm that you can access the 48-digit recovery key. Microsoft explicitly warns that its support staff cannot recreate a lost BitLocker recovery key. Save a recovery copy somewhere separate from the encrypted computer. Your Microsoft account is one common location; a securely stored printout or encrypted vault can be an additional copy.
Do not keep the only printed recovery key in the same laptop bag as the encrypted device.
On a Mac with Apple silicon or a T2 Security Chip, Apple states that data is encrypted automatically at the hardware level. Enabling FileVault adds another protection layer around access to the startup disk. If FileVault gives you a recovery key, keep the key somewhere other than the encrypted startup disk.
Success check: You can answer this question confidently: “If the computer asks for its recovery key tomorrow and will not boot normally, where exactly will I retrieve that key?”
10. Review Built-In Security Before Installing Third-Party Security Suites
Modern Windows and macOS both include substantial security protections. Before installing a paid security package, understand what is already enabled.
On Windows 11, open Windows Security. Check:
- Virus & threat protection;
- Firewall & network protection;
- App & browser control;
- Device security;
- Account protection.
Microsoft’s current Windows Security documentation describes built-in Defender Antivirus, SmartScreen protections, firewall controls, Secure Boot visibility, TPM-related security, and core-isolation features.
A green status across the main Windows Security areas is a useful baseline. Do not randomly disable protections because a forum post says they “slow down PCs.” Security features sometimes create compatibility tradeoffs, but changes should solve a specific verified problem.
On macOS, leave Gatekeeper and normal app-verification protections intact. Install software from the App Store or a developer you intentionally trust rather than bypassing macOS warnings automatically.
11. Remove Unwanted Preinstalled Software Carefully
Many Windows PCs include manufacturer utilities, trials, games, advertising shortcuts, or duplicate security products. Some are useful; some are clutter.
Do not use a bulk “debloat” script from an unknown source on day one. Those scripts can remove components you later need, change update behavior, or disable security settings without explaining the consequences.
Instead, inspect installed apps individually. Ask:
- Do I know what this app does?
- Is it required for hardware controls such as fan modes, firmware updates, special keys, or battery limits?
- Is it only a time-limited trial?
- Does Windows or macOS already provide the same function?
- Would uninstalling it make future driver or warranty support harder?
Remove obvious trials and software you do not want. Keep hardware-management tools until you understand their role.
12. Install Apps From Original or Trusted Sources
When rebuilding your software environment, the safest approach is slower than downloading everything from a search result page.
For each app, prefer:
- the official developer website;
- Microsoft Store or Mac App Store where appropriate;
- a package manager you understand and trust;
- your organization’s managed software portal for work devices.
Be cautious with “download portals” that bundle installers, browser extensions, or unwanted software. Microsoft recommends avoiding untrusted downloads and notes that Defender SmartScreen can help block potentially unwanted applications and dangerous files.
Install only the programs you actually use. Every app increases update work and creates another potential source of bugs or security vulnerabilities.
13. Build a Small “Core Apps” List
Instead of copying every program from the old computer, create a core list.
Typical categories include:
- browser;
- password manager;
- office or productivity software;
- PDF reader or editor;
- communication apps;
- cloud storage clients;
- photo or video tools;
- developer tools if relevant;
- printer or scanner software only if required.
Use the new computer for a week before installing niche utilities you barely remember. A clean machine stays easier to maintain when software is added in response to actual need.
14. Install a Password Manager Before You Start Signing Into Everything
The new-computer setup is a perfect time to stop reusing passwords.
If you already use a password manager, install it early from the official source and verify the account with MFA. If you do not use one, choose a reputable manager that supports your browsers and other devices.
Do not save your master password in a text file on the desktop. If the service provides emergency or recovery information, store that securely outside the computer.
After the password manager is ready, use it for your browser, cloud storage, email, shopping, financial services, and other important accounts rather than letting the setup process create a new layer of password reuse.
15. Decide Which Browser Will Hold Your Daily Identity
Browsers contain more than bookmarks. They can hold session cookies, saved passwords, autofill information, extensions, payment details, and synchronized history.
Choose a primary browser deliberately. Then:
- sign in only if you want synchronization;
- review what data is being synced;
- enable automatic browser updates;
- install as few extensions as necessary;
- remove old extensions you no longer trust or use;
- verify your default search and homepage settings.
Extensions have significant access inside the browser. Do not reinstall a decade of them automatically just because they existed on the old machine.
16. Configure Privacy Settings With Intent, Not Panic
Both Windows and macOS expose privacy controls for location, camera, microphone, contacts, diagnostics, and application permissions.
Review these settings after core apps are installed. If a video-conferencing app needs the microphone and camera, granting access makes sense. If a calculator requests access to contacts, ask why.
Do not turn off every privacy-related system service without understanding it. Some switches support security, crash diagnostics, location-dependent features, or device recovery.
A practical approach is:
- review camera access;
- review microphone access;
- review location access;
- review background app permissions;
- review advertising or personalization preferences;
- review browser site permissions separately.
Privacy is best managed as a permissions inventory rather than a single “maximum privacy” button.
17. Configure Find-My-Device Features Before You Need Them
If your operating system supports device location or remote account protections, enable the feature if it fits your privacy preferences and usage.
On Apple devices, Find My can help locate supported devices and is integrated with the Apple Account. Windows provides Find my device on supported personal systems when configured with the appropriate account and location settings.
Test the account portal from another device. The time to discover that you do not know the password is not after the laptop disappears.
18. Create a Backup Before the Computer Contains Anything Irreplaceable
A new computer is easiest to protect before important files accumulate.
On Windows, Windows Backup can protect certain files, settings, app information, and Wi-Fi information through the Microsoft account and OneDrive. That can simplify PC-to-PC transitions. It is useful, but do not assume cloud synchronization alone equals a complete backup strategy.
On macOS, Time Machine can automatically back up files to external or network storage. Apple currently recommends a Time Machine disk with at least about twice the storage capacity of the Mac when practical.
A robust personal setup usually includes at least two independent places where critical files exist. For example:
- working copy on the computer;
- automatic cloud copy;
- periodic external backup.
The exact combination can vary. The principle is that the failure of one device or account should not destroy every copy.
19. Understand the Difference Between Sync and Backup
Cloud-sync folders are convenient. They are not automatically a complete backup.
Synchronization means changes can propagate. If you delete a file locally, that deletion may synchronize to the cloud. If ransomware encrypts files in a synchronized folder, encrypted versions may upload as well. Many cloud providers offer version history and deleted-file recovery, but those features have limits and retention rules.
A backup should give you a separate recovery path.
For example:
- OneDrive or iCloud Drive can provide synchronization and cloud availability;
- an external backup can provide a second copy outside the same sync process;
- version history can provide another layer for accidental changes.
Do not call a file “backed up” until you know how you would restore it.
 An independent external backup gives you a recovery path that does not depend on the computer’s internal drive or a single cloud account. Image: TonyTheTiger, Wikimedia Commons, CC BY-SA 3.0.
20. Perform a Real Restore Test
This is the step most people skip.
After the backup finishes, create a test folder with several files. Let the backup run. Then delete or move one file and restore it using the actual backup interface.
Verify:
- you can find the backup;
- you can authenticate to it;
- you understand the restore interface;
- the recovered file opens correctly;
- the backup date is recent.
A backup icon that says “complete” is reassuring. A successful restore is evidence.
21. Store Recovery Information Separately
New computers create several pieces of recovery information that are easy to lose:
- BitLocker recovery key;
- FileVault recovery key if used;
- Microsoft account recovery codes;
- Apple Account recovery information;
- password-manager emergency information;
- backup encryption password;
- Wi-Fi administrator credentials;
- software license keys for products that still use them.
Do not put every recovery secret into one unencrypted file named “passwords.txt” on the new desktop.
Use a secure password-manager vault, a protected household document system, or a physically secured paper copy where appropriate. Critical recovery information should survive the loss of the computer.
22. Organize User Files Before Migration
Do not copy the entire old computer blindly if you can avoid it. Years of clutter often include:
- duplicate downloads;
- obsolete installers;
- temporary exports;
- old desktop clutter;
- abandoned project folders;
- unneeded virtual machines;
- application caches;
- random files with unclear names.
Create a simple top-level structure on the new computer. For example:
- Documents;
- Projects;
- Photos;
- Media;
- Finance or Records;
- Archive.
Use built-in standard folders when possible because backup and synchronization tools often recognize them automatically.
23. Migrate Data in Stages
A staged migration reduces confusion.
Stage 1: essential documents. Move current work, personal records, and active project files.
Stage 2: photos and media. These are often large, so verify storage capacity and backup before copying everything.
Stage 3: archives. Move older files only after you know where they belong.
Stage 4: application-specific data. Some apps store data in databases or hidden folders. Export from the old program or use the vendor’s migration tool instead of dragging random directories.
Keep the old computer intact for a transition period if possible. Do not erase it the moment the first copy completes.
24. Verify File Counts and Important Samples
Migration errors can be silent. A folder may appear present while some files failed to copy.
For important collections:
- compare folder sizes;
- compare approximate file counts;
- open sample documents from several folders;
- play sample videos;
- open several photos at full resolution;
- check large archives or ZIP files;
- verify special project files in their native applications.
For high-value archives, checksums or dedicated migration tools can provide stronger verification, but most households can catch common failures with systematic sampling.
25. Set Up Email Carefully
Email is often the recovery channel for every other account.
When adding email:
- use the provider’s official application or normal account-add workflow;
- verify MFA;
- review recovery email and phone details;
- check forwarding rules for anything unexpected;
- review connected third-party apps if the account has existed for years;
- avoid importing old browser sessions from an untrusted or compromised machine.
If the old computer had malware or unexplained account activity, do not blindly clone its entire browser profile onto the new system. Rebuild important sessions from known-good sources.
26. Connect Cloud Storage One Provider at a Time
If you use OneDrive, iCloud Drive, Google Drive, Dropbox, or another cloud service, connect them deliberately.
Before synchronizing a large library, check:
- available local storage;
- whether files are online-only or stored offline;
- which folders are included;
- how deleted files are recovered;
- whether version history is available;
- whether sensitive folders require additional protection.
A common mistake is enabling several sync clients simultaneously and then moving folders while they are all processing. Let one major migration finish before reorganizing the next.
27. Set a Sensible Screen-Lock Policy
Configure the computer to lock automatically after a reasonable idle period, especially for laptops that leave the home.
Also build the manual habit of locking the screen when you walk away. On Windows, Windows + L locks quickly. On a Mac, use the Lock Screen command or its shortcut.
Automatic locking protects against casual access when you forget. Manual locking protects during the gap before the timer activates.
28. Review Startup and Login Apps
After installing your core software, inspect what launches automatically.
Too many startup apps can:
- slow login;
- consume memory;
- create background network traffic;
- show unnecessary notifications;
- increase the number of applications running continuously.
Disable optional startup behavior rather than uninstalling useful software. Keep security, backup, cloud-sync, and hardware-control tools enabled when their background function is required.
29. Configure Notifications Before They Train You to Ignore Everything
A new computer often begins with every app competing for attention.
Review notification permissions after a few days. Keep high-value alerts such as:
- security warnings;
- backup failures;
- calendar events you actually use;
- messages from essential communication apps.
Disable promotional notifications, game suggestions, shopping alerts, and software “tips” that do not help you.
The purpose is not aesthetic minimalism. Important security alerts become easier to notice when they are not buried under noise.
30. Create a Recovery Drive or Know Your Reinstallation Path
Ask what happens if the operating system stops booting.
Windows provides multiple recovery options, including Startup Repair, System Restore, Reset this PC, and reinstalling Windows. Microsoft’s support guidance explicitly recommends backing up important files and having the BitLocker recovery key before major recovery operations.
Some users choose to create a Windows recovery drive or bootable installation media. Others rely on built-in recovery and cloud download. Whatever path you choose, document it.
On a Mac, macOS Recovery can reinstall macOS, use Disk Utility, and support other repair tasks. Apple silicon Macs and Intel Macs enter recovery differently, so know which hardware you have.
You do not need to memorize every recovery command. You do need to know where the official instructions are and whether your recovery credentials are accessible.
31. Test the Charger, Battery, and Power Settings
Battery behavior during the first day can be misleading because indexing, updates, cloud synchronization, and app installation create unusually heavy background activity.
After setup stabilizes, observe:
- whether the charger reaches and maintains a charge normally;
- whether the battery percentage falls smoothly rather than jumping dramatically;
- whether sleep works reliably;
- whether the computer becomes unusually hot while idle;
- whether battery use remains excessive after background setup completes.
Use the manufacturer’s battery-health or charging-limit features if they fit how you use the device. Do not install random “battery optimizer” utilities unless they come from the manufacturer or a source you trust.
32. Connect External Devices One at a Time
Printers, docks, drawing tablets, audio interfaces, scanners, cameras, and specialty hardware can introduce drivers and background software.
Add them one at a time. After each device:
- install official drivers only if the operating system does not handle it automatically;
- restart if required;
- test the device;
- confirm sleep, networking, and USB behavior remain normal.
If a problem appears, you will know which change likely caused it.
33. Avoid Driver-Update Utilities From Unknown Vendors
Windows users frequently encounter websites claiming that dozens of drivers are “outdated” and must be fixed with a special updater.
For most users, prefer:
- Windows Update;
- the computer manufacturer’s official support tool or website;
- the component manufacturer for specialized hardware such as graphics devices when appropriate.
Avoid tools that generate alarming scans before payment or download unsigned drivers from unclear sources.
34. Create a Clean Baseline After the Setup Is Stable
Once updates, core apps, security settings, and backup are working, create a record of the clean state.
Write down:
- operating-system version;
- major installed applications;
- backup destination;
- encryption status;
- where recovery keys are stored;
- major peripherals;
- date setup was completed.
This becomes a troubleshooting baseline. If the computer becomes unstable later, you can compare what changed.
35. Create a Separate Standard User Account if Your Risk Profile Benefits From It
Some advanced users prefer using a standard account for daily work and a separate administrator account for system changes. This can reduce the amount of routine activity performed with administrative privileges.
This approach adds friction and is not mandatory for every household computer. If you use it, make sure:
- the administrator password is unique and stored securely;
- you understand which account owns encrypted or cloud-synchronized data;
- you can still perform software updates and legitimate installations when necessary.
For shared family computers, separate standard accounts are often useful even if one adult retains administrator rights.
36. Configure Family or Child Accounts Separately
If children use the computer, create their own accounts instead of handing over the administrator login.
Family-safety tools can help with:
- age-appropriate app access;
- screen-time boundaries;
- purchase controls;
- content filtering;
- activity reporting where desired.
The exact settings depend on the family and the age of the user. Technical controls work best when paired with clear expectations rather than used as invisible surveillance.
37. Protect Webcam and Microphone Access Through Permissions
Physical webcam covers can provide visual reassurance on some laptops, but use them carefully. Thick covers can damage displays on laptops with very tight screen tolerances.
The more important control is software permission. Review which apps can access the camera and microphone.
Most modern laptops show an indicator when the camera is active, and operating systems provide privacy indicators for microphone use. Learn what those indicators look like.
38. Set Up a Practical Download Folder Habit
The Downloads folder becomes digital junk quickly.
Use a rule:
- installers are deleted after installation if they are easy to re-download;
- documents you intend to keep are moved into the proper folder;
- temporary exports are removed periodically;
- suspicious files are not opened merely because they downloaded successfully.
This reduces clutter and makes it easier to notice an unexpected file.
39. Learn the Signs of Phishing Before the New Device Creates False Confidence
A clean new computer does not make fraudulent messages safe.
CISA highlights phishing recognition as a core consumer security habit. Common warning signs include:
- unexpected urgency;
- requests for passwords or verification codes;
- attachments you were not expecting;
- links that lead to a look-alike login page;
- payment changes sent only by email;
- messages claiming you must bypass normal security procedures.
When an important message asks you to sign in, open the official site or app directly rather than using the message link.
40. Do Not Move Malware From the Old Computer to the New One
If the old machine behaved strangely—unexpected pop-ups, browser redirects, unknown extensions, disabled security tools, or account compromises—treat migration cautiously.
Transfer personal files such as documents and photos, but avoid copying:
- unknown executable files;
- old cracked software;
- random scripts;
- browser extensions from unknown sources;
- entire system folders;
- mysterious startup utilities.
Scan transferred files with the new system’s security tools. Reinstall applications from official sources rather than copying old program folders.
41. Create a “Before I Sell or Give Away This Computer” Note Now
This seems premature, but future you will benefit.
The note can say:
- verify backup;
- sign out of important accounts;
- deauthorize software that has device limits;
- remove the computer from account device lists where appropriate;
- erase the device using the operating system’s official reset or erase workflow;
- verify personal files are gone before transfer.
Microsoft’s Reset this PC documentation distinguishes between keeping files and removing everything, and it recommends the removal path when giving away or selling the PC. Macs provide Erase All Content and Settings on supported systems.
42. Troubleshoot a New Computer Systematically
The computer is slow during the first day
Wait for operating-system updates, search indexing, cloud synchronization, and app installation to finish. Restart, then evaluate again. Check Task Manager on Windows or Activity Monitor on macOS to see what is consuming resources rather than installing a “PC cleaner.”
The fan runs constantly
First check whether updates, cloud sync, photo analysis, or antivirus scanning are active. Ensure vents are not blocked. If the fan remains unusually loud at idle after setup tasks finish, check firmware updates and manufacturer diagnostics.
Battery life is poor
Allow the first setup period to finish. Review battery usage by app. Reduce unnecessary startup processes. Check display brightness and power settings. If battery drain remains abnormal on a brand-new device, use the manufacturer’s diagnostics while the return window is still open.
Wi-Fi keeps disconnecting
Install OS and manufacturer updates first. Test another network to determine whether the problem follows the computer or stays with the router. Avoid installing third-party driver tools immediately.
Cloud storage downloaded everything and filled the drive
Review Files On-Demand, optimized storage, or online-only settings depending on the provider. Do not delete folders impulsively until you understand whether deletion will synchronize to the cloud.
The computer asks for a BitLocker recovery key
Use the recovery-key backup you verified during setup. Microsoft notes that the key is often stored in the Microsoft account or a work/school directory, but support cannot recreate a missing key.
The Mac asks for a FileVault recovery method
Use the Apple Account recovery path or FileVault recovery key that was configured. Apple advises storing a standalone FileVault recovery key somewhere other than the encrypted startup disk.
An app says to disable antivirus or Gatekeeper
Stop and verify the software source. Some legitimate specialized applications need security exceptions, but a random utility that demands broad protection be disabled is a warning sign.
43. A 90-Minute New Computer Setup Workflow
If you want a practical sequence rather than 40 separate decisions, use this order.
Minutes 0–10: Document and inspect
- photograph serial number;
- save receipt externally;
- inspect screen, hinges, keyboard, ports, charger;
- test Wi-Fi, webcam, speakers, and microphone.
Minutes 10–35: Update
- connect to trusted Wi-Fi;
- install OS updates;
- restart;
- check again;
- install manufacturer firmware updates if offered by the official tool.
Minutes 35–50: Secure identity
- set unique device password;
- configure fingerprint or face login;
- enable MFA on the cloud account;
- verify recovery email and phone;
- store recovery codes safely.
Minutes 50–65: Secure the device
- verify Windows Security or macOS protection settings;
- verify encryption;
- save BitLocker or FileVault recovery information separately;
- configure automatic locking;
- enable device-location features if desired.
Minutes 65–80: Build recovery
- connect backup storage or configure cloud backup;
- start the first backup;
- record where the backup lives;
- identify the OS recovery path.
Minutes 80–90: Install only core apps
- password manager;
- primary browser;
- office/productivity tools;
- cloud storage;
- communication apps you use daily.
Data migration can happen afterward. The security-and-recovery foundation should come first.
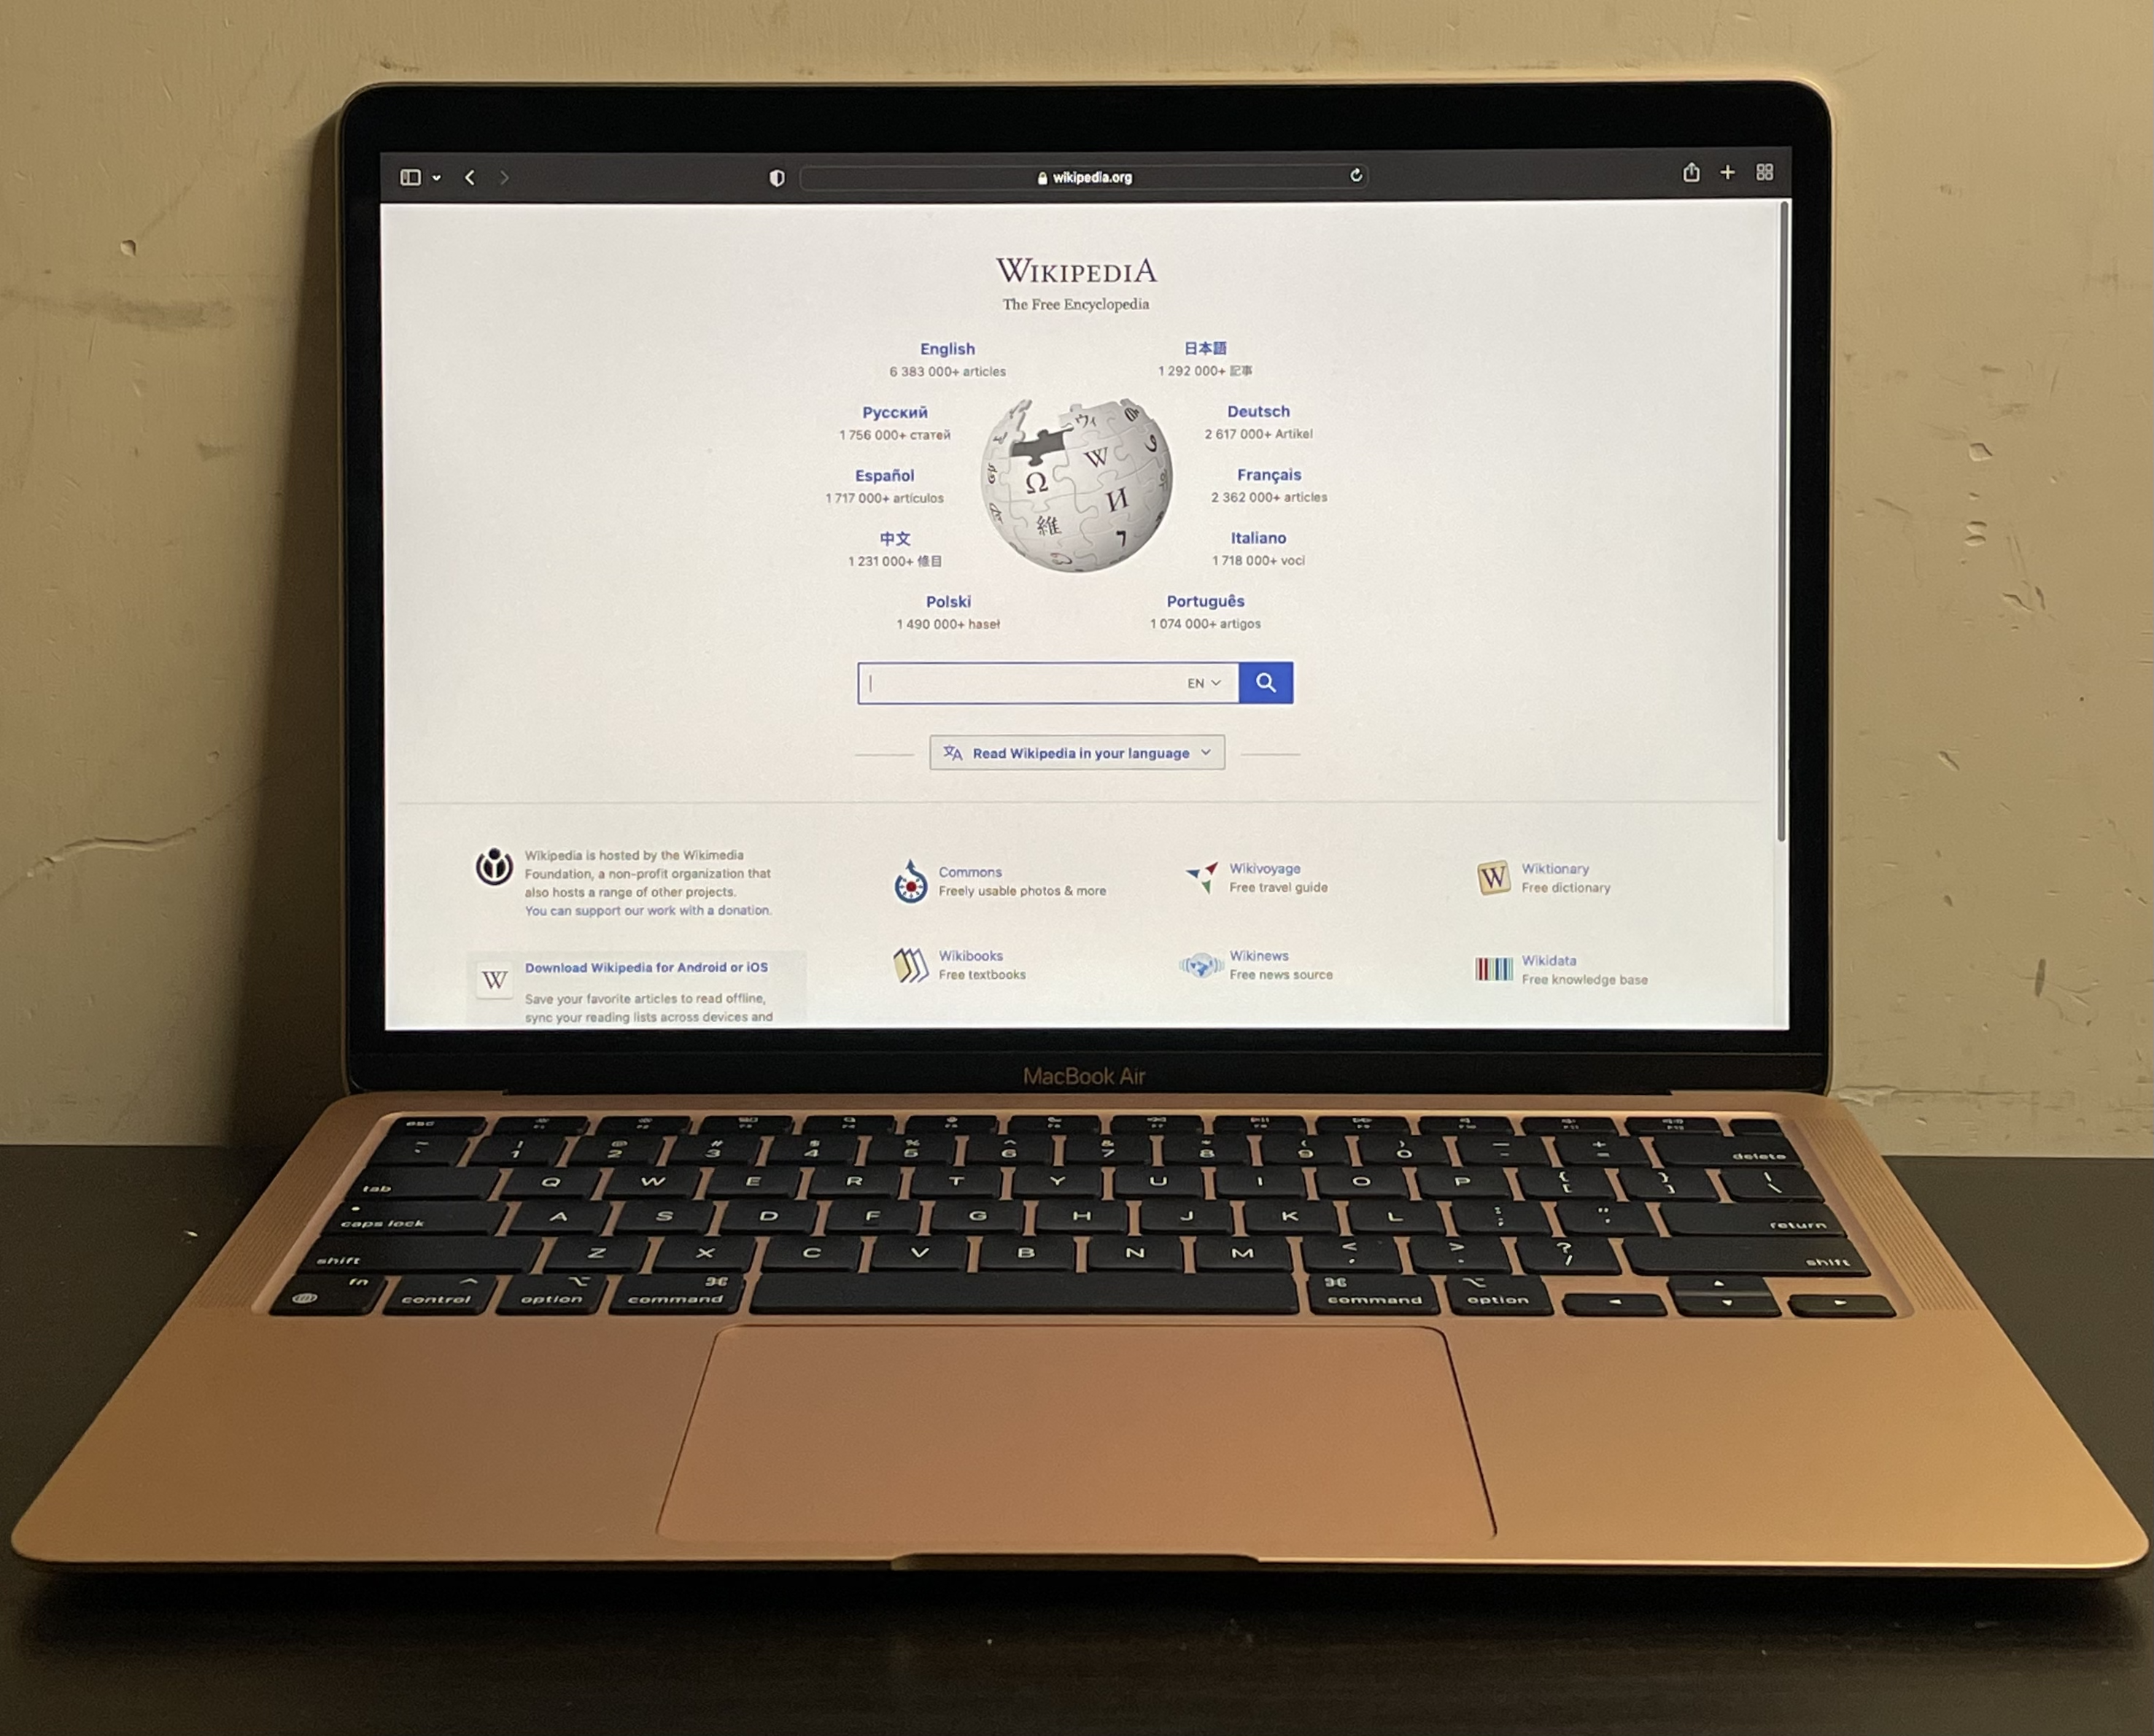 The exact menus differ between Windows and macOS, but the durable setup principles are similar: update, secure the account, encrypt, back up, and test recovery. Image: Wikimedia Commons, Creative Commons licensed.
44. Worked Example: Replacing a Five-Year-Old Laptop
Imagine Maya replaces an aging laptop used for freelance work, personal photos, and household records.
Her first instinct is to connect the old external drive and copy everything immediately. Instead, she uses a staged setup.
Step 1: She photographs the new laptop’s serial number and saves the purchase receipt in cloud storage from her phone.
Step 2: She updates Windows 11 until no additional normal updates appear and installs the laptop manufacturer’s firmware updates from the official support application.
Step 3: She signs into her Microsoft account, confirms MFA, sets up Windows Hello, and verifies that the BitLocker recovery key appears in her recovery-key library. She stores a second copy securely outside the laptop.
Step 4: She opens Windows Security and verifies that antivirus, firewall, app/browser controls, and device-security status do not show unresolved warnings.
Step 5: She removes a preinstalled trial antivirus because she intends to use the built-in Windows security stack. She keeps the manufacturer’s hardware-control utility because it manages firmware and battery settings.
Step 6: She installs her password manager, browser, office suite, cloud storage, and accounting software from official sources.
Step 7: She configures cloud synchronization for active projects but also connects an external backup drive. She performs a test restore of one sample document.
Step 8: Only then does she migrate files from the old computer. She moves current project folders first, photos second, and an older archive last. She opens samples to verify the copies.
Step 9: She leaves the old laptop untouched for two weeks. During that time she discovers one local email archive and a specialty app template she forgot to migrate. She exports them properly rather than assuming the first copy contained everything.
Step 10: After the transition, she performs one more backup and documents the clean setup.
This sequence is slower than dragging the entire old drive onto the desktop. It is also dramatically easier to recover from.
45. Build a Monthly Maintenance Routine
A good setup should not require constant attention. Once a month, spend about 10 minutes checking:
- operating-system update status;
- browser update status;
- backup recency;
- free disk space;
- security warnings;
- unnecessary startup apps;
- Downloads folder clutter.
Every few months, restore a test file from backup. Once or twice a year, review recovery contacts and codes for major accounts.
The goal is a boring computer. Boring means updates install, backups run, accounts recover, and nothing requires heroic intervention.
Frequently Asked Questions
Should I install antivirus on a new Windows 11 PC?
Windows 11 includes Microsoft Defender Antivirus, firewall controls, SmartScreen, and other Windows Security features. Many home users can rely on the built-in protections if they remain enabled and updated. Third-party security software can add features, but do not assume it is mandatory. If a computer ships with a trial product, decide whether you actually want to subscribe before keeping it.
Should I create a restore point immediately?
System Restore can be useful for some Windows configuration problems, but it is not a substitute for file backup. The more important first recovery tasks are protecting your files, saving encryption recovery information, and knowing your reinstall or reset path.
Do I need to partition a new computer?
Most home users do not need to create additional partitions. Modern backup, cloud-storage, and folder-organization tools usually provide more flexibility. Partitioning can still be useful for specialized workflows, dual booting, or certain backup designs, but it should solve a specific need.
Should I clone my old drive to the new computer?
Cloning can be efficient when hardware and operating-system conditions are compatible, but it also copies old clutter, outdated drivers, and configuration problems. A clean setup with staged data migration is often easier to troubleshoot. If you use cloning, verify the vendor’s instructions and maintain an independent backup first.
Is OneDrive or iCloud enough as a backup?
Cloud synchronization is valuable but should not automatically be treated as your only backup. Understand version history, deleted-file retention, account-recovery rules, and what happens when files are removed or encrypted. For important data, an additional independent backup provides stronger resilience.
How long should I keep the old computer before erasing it?
There is no universal number. Keep it intact until you have used the new computer long enough to discover forgotten files, verified your migrated data, confirmed important apps work, and completed at least one reliable backup of the new system. For many people, one to several weeks is more practical than erasing the old machine immediately.
Should I disable Windows telemetry or macOS system services?
Review privacy settings, but avoid scripts that disable large groups of system services without explanation. Some settings affect security, updates, search, crash reporting, device recovery, or compatibility. Change settings intentionally and document unusual changes.
What is the single most important recovery item to save?
There is no single universal item, but encryption recovery keys are critical. Microsoft specifically states that it cannot recreate a lost BitLocker recovery key. A FileVault recovery key also needs to be stored outside the encrypted Mac if you choose that recovery method. Account recovery codes and backup passwords are similarly important.
Can I use the same password on the computer and my email account?
No. Use unique passwords. If one credential is exposed, password reuse can turn a single compromise into access to multiple accounts. A password manager makes unique credentials much easier to manage.
What if I already finished setup without doing any of this?
You do not need to reset the computer. Start with the highest-value changes: install updates, enable MFA, verify encryption and recovery keys, configure backup, remove obviously unwanted software, and test file restoration. Then improve organization and privacy settings over time.
Conclusion: Set Up for the Failure You Hope Never Happens
The best new-computer setup is not the one with the prettiest desktop or the longest list of installed apps. It is the one that answers difficult questions in advance.
If the laptop is stolen, is the drive encrypted? If an update fails, do you know the recovery path? If the storage device dies, can you restore your files? If your password manager account locks you out, where are the recovery codes? If you accidentally delete a project, have you tested the backup? If the old computer disappears tomorrow, did you migrate everything that matters?
Start with updates, identity security, encryption, and backup. Then install only the software you need and migrate files in stages. The most important mistake to avoid is making the new computer the only place where important information exists.
If you do only one thing after reading this guide, verify your encryption recovery key and successfully restore one test file from backup. Those two checks turn “I think I’m protected” into evidence that recovery is possible.
Sources and Further Reading
- Microsoft Support — Back Up Your BitLocker Recovery Key
- Microsoft Support — Back Up and Restore With Windows Backup
- Microsoft Support — Install Windows Updates
- Microsoft Support — Windows Security App Overview
- Microsoft Support — Recovery Options in Windows
- Apple Support — Back Up Your Mac With Time Machine
- Apple Support — Update macOS on Mac
- Apple Support — Protect Data on Your Mac With FileVault
- CISA — Secure Our World
Image Credits
- “Dell Latitude E5570 front.jpg” — Wikimedia Commons, Creative Commons share-alike license.
- “MacBook Air M1.png” — Wikimedia Commons, Creative Commons license.
- “External hard drives.jpg” — TonyTheTiger, Wikimedia Commons, CC BY-SA 3.0.