

Learn how to diagnose a refrigerator that is not cooling properly, protect food safely, check airflow, seals, coils, settings, and know when a repair requires a technician.
A refrigerator that is running but not getting cold enough creates two problems at once: you need to find the mechanical or setup issue, and you need to protect food while you troubleshoot. The most useful approach is not to start taking panels apart. It is to work from the safest, easiest checks toward the more technical possibilities while measuring the actual temperature instead of judging only by touch.
This guide shows you how to troubleshoot a refrigerator that is not cooling properly without guessing, replacing random parts, or ignoring food-safety limits. It is written for ordinary household refrigerators, including top-freezer, bottom-freezer, side-by-side, and French-door models. Exact components, panel locations, control menus, and service procedures vary by model, so your owner’s manual always takes priority where it gives model-specific instructions.
Quick answer: start by measuring the refrigerator temperature with an appliance thermometer. Verify that the unit has power and cooling is turned on, check the temperature settings, clear blocked internal vents, make sure the doors close completely, inspect and clean the door gaskets, and check whether the condenser area is clogged with dust if your model has accessible coils that require cleaning. Give the refrigerator enough time to stabilize after changes. If the freezer is cold but the fresh-food section is warm, if fans are not running, if there is heavy frost where there should not be, if the compressor repeatedly clicks off, or if temperatures stay unsafe after the basic checks, the problem may require professional diagnosis.
 An appliance thermometer gives you a real temperature reading, which is more useful than judging cooling by touch. USDA image, public domain.
Start With Food Safety Before You Troubleshoot the Appliance
If a refrigerator is warmer than normal, your first responsibility is not the machine. It is the food. Perishable foods can become unsafe even when they still look and smell normal. The U.S. Food and Drug Administration and USDA recommend keeping a refrigerator at 40°F (4°C) or below, with the freezer at 0°F (-18°C). A built-in display can be useful, but a separate appliance thermometer is a better way to verify the actual cabinet temperature because the number on a control panel may represent a set point rather than the temperature of the food compartment at that moment.
Place an appliance thermometer near the center of the refrigerator, not pressed against the back wall, directly under an air outlet, or in the door. If you have two thermometers, place one in the refrigerator and one in the freezer. Leave the doors closed long enough for the readings to settle. If the refrigerator is at or below 40°F, you have more time to diagnose a performance problem. If it is above 40°F, minimize door opening and make a plan for perishable food.
USDA guidance says perishable refrigerated foods held above 40°F for more than two hours should not be consumed. In a power outage, FDA notes that an unopened refrigerator generally keeps food cold for about four hours, but that assumes the refrigerator began at a safe temperature and stayed closed. A mechanical cooling failure can be different because the refrigerator may have been warming gradually before you noticed it. If you do not know how long perishable food has been too warm, do not rely on smell or appearance to decide whether it is safe.
Move valuable perishables to another working refrigerator or to a cooler with enough ice or frozen gel packs to keep the food at 40°F or below. Avoid repeatedly opening the failing refrigerator to “check whether it feels colder.” Every opening admits warm room air and makes the temperature harder to interpret.
How to know this step worked
You should have an actual temperature reading and a food-safety plan before you begin. If you do not own an appliance thermometer, buy or borrow one as soon as practical. While waiting, keep the door closed and protect high-risk foods first: meat, poultry, seafood, milk, eggs, cooked leftovers, soft cheeses, and other foods that normally require refrigeration.
Step 1: Confirm That the Refrigerator Is Actually Receiving Power
A warm refrigerator can still have an interior light, which makes “it has power” less obvious than it sounds. Some models have separate circuits or control states for lighting and cooling. Start with the basics because they are quick to verify and cost nothing.
Check that the plug is fully inserted into the wall outlet. If the refrigerator has been pulled forward for cleaning, it is possible for the plug to loosen. Look at the household electrical panel for a tripped breaker. If the refrigerator is on a GFCI-protected circuit, check whether a relevant GFCI outlet has tripped. Do not repeatedly reset a breaker or GFCI that trips again; a recurring trip can indicate an electrical fault that needs qualified service.
Listen for normal operating sounds. Most refrigerators do not run the compressor continuously, so silence for a short period is not proof of failure. But if the cabinet is warm, the compressor never seems to run, fans never run, and the unit remains silent for an extended period, power, controls, or an internal component may be involved.
If you have recently experienced a power outage, surge, or appliance relocation, consult the owner’s manual before using any reset procedure. Some models intentionally delay compressor restart for several minutes after power is restored. This protects the refrigeration system and prevents immediate short cycling.
Common mistake: using an extension cord
Household refrigerators should normally be plugged into the type of outlet and circuit specified by the manufacturer. A light-duty extension cord, overloaded power strip, damaged receptacle, or improvised adapter can create a safety hazard and can also complicate troubleshooting. If your refrigerator is not connected according to its installation instructions, correct that before drawing conclusions about the appliance.
Step 2: Make Sure Cooling Was Not Accidentally Turned Off
Modern refrigerators may have modes that surprise owners: Cooling Off, Demo, Showroom, Sabbath, Vacation, Energy Saver, or a control-lock function. The names and effects vary. A showroom or demo mode can leave lights and displays working while disabling or reducing refrigeration. This can make a nearly new refrigerator appear broken.
Read the display carefully. Look for unusual words, symbols, flashing temperature values, or dashes. Then check the owner’s manual for the exact control sequence. Do not assume that unplugging and replugging the refrigerator will always exit a special mode; on some models the mode is stored and must be changed from the controls.
If the refrigerator was just installed, moved, or powered up after being unplugged, give it time. Whirlpool notes that a newly installed refrigerator can take up to about 24 hours to cool completely. Adding a large load of groceries can also raise the internal temperature for several hours. That does not mean you should ignore unsafe food temperatures, but it does mean you should not judge the machine five minutes after loading it.
Step 3: Verify the Temperature Settings Instead of Turning Everything to Maximum
A surprisingly common cause of poor cooling is an incorrect setting. The control may have been bumped while loading food, a child may have changed it, or a control reset may have returned the appliance to a different value. Some older refrigerators use numbered dials where a larger number means colder, while others use actual temperatures. Never assume what a number means without checking the manual.
For food safety, the refrigerator needs to maintain 40°F or below. Many manufacturers recommend a target around 37°F for the fresh-food compartment and 0°F for the freezer, but model recommendations differ. Set the refrigerator to the manufacturer’s normal recommended setting rather than immediately choosing the coldest possible setting.
Then wait. Refrigerators respond slowly because you are cooling air, shelves, containers, and food. Rechecking every few minutes encourages unnecessary door opening and makes the result noisy. After a setting change, manufacturers often recommend allowing many hours, sometimes up to 24 hours, before judging the final temperature.
Why the coldest setting is not a good diagnostic shortcut
If airflow is blocked, a door is leaking, a fan is failing, or the refrigeration system has a fault, turning the control to maximum may not solve the underlying problem. It can also cause food near vents or cold surfaces to freeze while other parts of the cabinet remain too warm. A controlled setting plus measured temperatures tells you much more.
Step 4: Check the Refrigerator and Freezer for Blocked Air Vents
Many household refrigerators cool the fresh-food compartment by moving cold air from the freezer or evaporator area through ducts and vents. If those vents are covered by food containers, bags, boxes, or ice, the refrigerator can be warm even though the freezer seems reasonably cold.
Find the air supply and return vents. They may be at the back, top, side, or between compartments depending on the design. Your manual may show their location. Move food several inches away from obvious vents and avoid pressing packages tightly against the rear wall if the manufacturer tells you to keep that area clear.
Do not pack the refrigerator so tightly that air has no path to circulate. At the same time, you do not need to empty the entire refrigerator. The goal is not a specific percentage full; the goal is continuous airflow around and between stored items, particularly at designed vents.
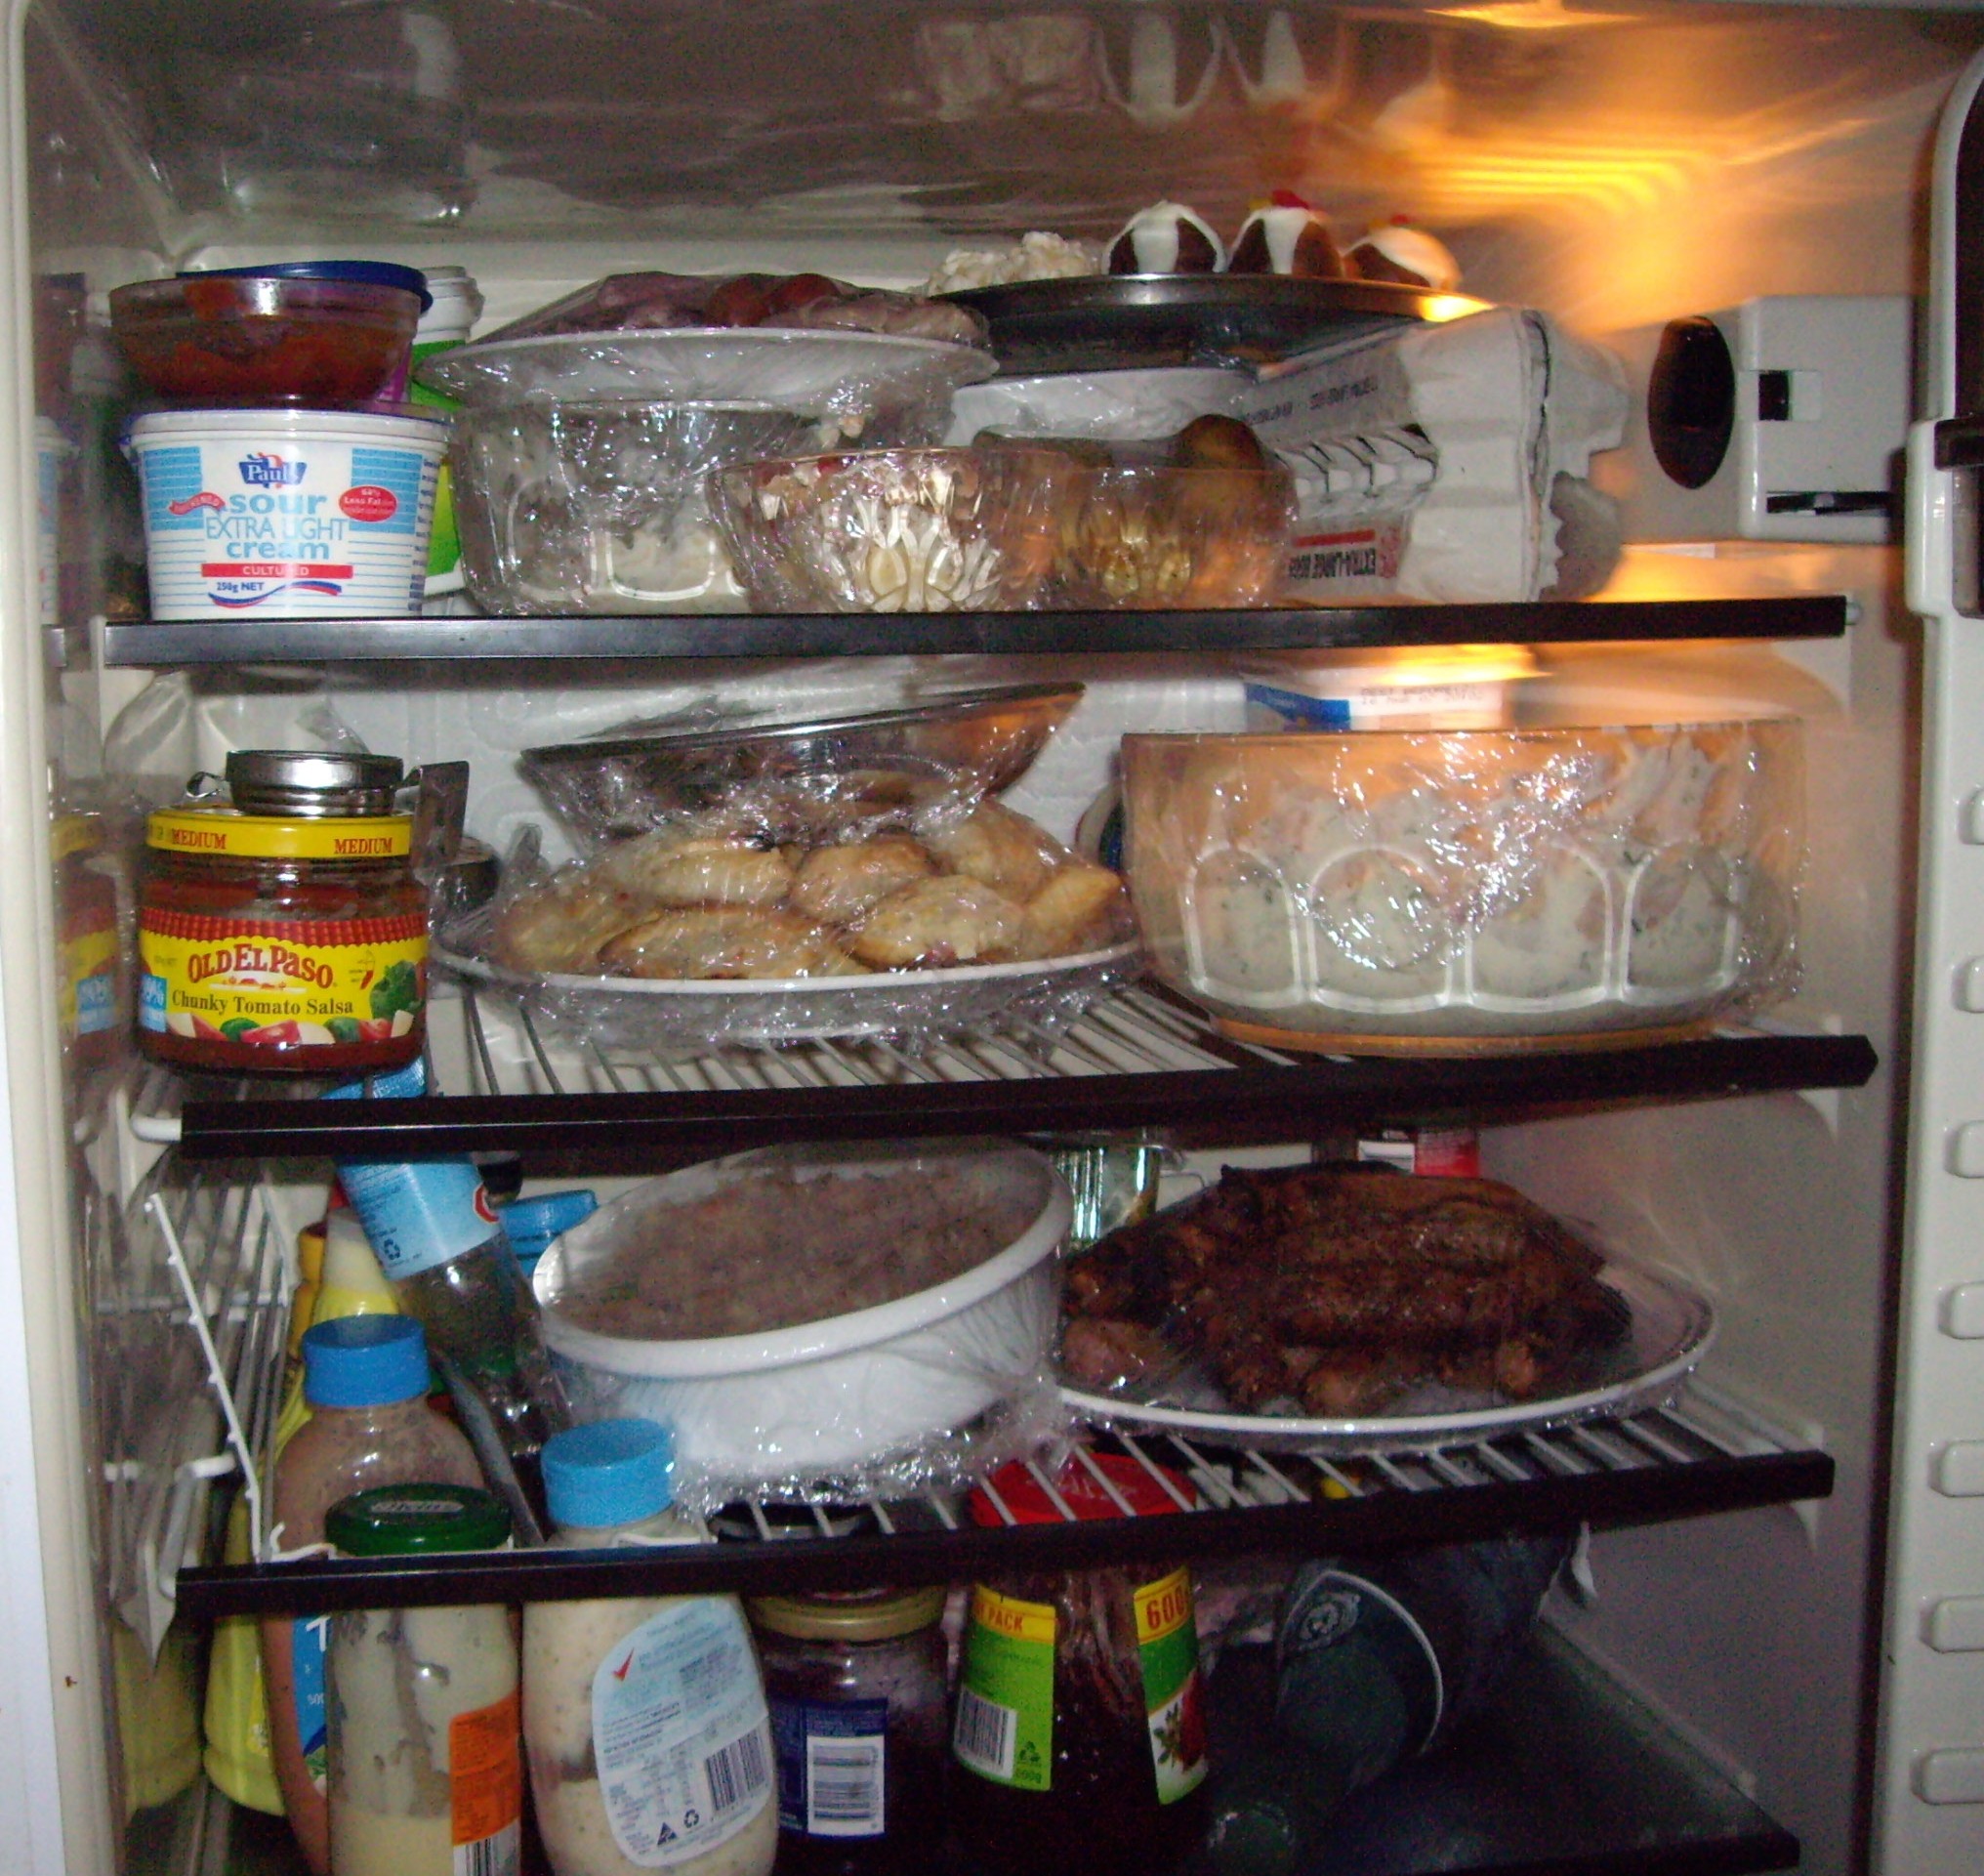 A heavily loaded refrigerator can cool normally if airflow paths remain open, but containers should not block designed supply and return vents. Public-domain image.
Practical airflow test
With the refrigerator running, open the door briefly and feel near an identified air outlet. Some models stop fans when a door opens, so you may need to hold the door switch closed if the manual makes it safe and obvious to do so. Do not insert fingers or tools into fan openings. If you cannot detect airflow, that is a clue rather than a diagnosis. A fan may be off because the compressor cycle is off, the door switch is open, the unit is defrosting, or a component has failed.
If the freezer is cold but the refrigerator is warm
This pattern strongly points your attention toward airflow between compartments. Blocked vents, a stuck damper, an evaporator fan problem, or excessive frost around the evaporator can reduce cold-air delivery to the refrigerator section. You can safely clear food away from vents and inspect for visible ice, but diagnosing hidden dampers, fans, heaters, sensors, or control boards usually requires model-specific procedures.
Step 5: Inspect the Door Gaskets and Make Sure the Doors Close Completely
The rubber or magnetic gasket around each door keeps warm, humid room air from continuously entering the refrigerator. A dirty gasket, folded corner, damaged section, warped door, misaligned hinge, or container preventing the door from closing can increase running time and raise temperatures.
Start by opening the door and inspecting the entire gasket. Look for food residue, sticky spills, crumbs, tears, hard sections, gaps, or areas that are pulling away from the door. Clean a dirty gasket with warm water and mild dish soap unless your manufacturer specifies something else. Wipe it dry afterward.
Then check the door path. A gallon container, drawer, shelf, pizza box, or oversized package can prevent the door from reaching the cabinet even though it looks almost closed from across the room. Close the door slowly and watch whether it contacts anything.
A simple paper test can reveal weak sealing areas: place a strip of paper between the gasket and cabinet, close the door, and gently pull. You should feel resistance. Repeat around several parts of the perimeter. This is not a manufacturer-calibrated test, but a place where the paper slips out with almost no resistance while neighboring areas grip it can point to a local sealing problem.
What condensation tells you
Persistent moisture, droplets, or frost near a door opening can indicate humid air entering through a poor seal or frequent door opening. It can also have other causes, so use it as evidence rather than proof. Look for a pattern: a specific wet corner plus an obvious gasket gap is more meaningful than occasional moisture on a very humid day.
When not to force a door adjustment
Door alignment procedures vary widely. Some refrigerators have adjustable rollers or feet, some use hinge adjustments, and some built-in units have installation requirements that affect door geometry. Do not loosen hinges or structural fasteners at random. If the door is visibly sagging, rubbing, or failing to align, follow the exact manual or use a service technician.
Step 6: Check Whether the Refrigerator Is Properly Leveled and Installed
A refrigerator does more than sit on the floor. Installation affects door closure, heat removal, airflow around the cabinet, and sometimes drainage. Whirlpool specifically lists installation location and leveling among possible reasons a refrigerator may not cool correctly.
Place a bubble level on a stable surface as directed by the owner’s manual. Many refrigerators are intended to be level side-to-side and slightly tilted in a specified way front-to-back so the doors behave correctly, but the requirement is model-specific. Use only the adjustable feet, rollers, or shims permitted by the manufacturer.
Also inspect clearance around the refrigerator. Cabinets need enough room to release heat. Required spacing can be different at the top, sides, and rear and can differ dramatically for freestanding, counter-depth, and built-in designs. Do not copy a clearance number from a different model. Compare your installation with your own manual.
Ambient temperature matters too. A refrigerator designed for a climate-controlled kitchen may not perform normally in a garage that becomes extremely hot or cold. Very low room temperatures can cause some single-control top-freezer models to run less often, which can affect the freezer. Very high room temperatures increase the heat the appliance must reject. If the unit is in a garage, porch, utility room, or other nonstandard location, check the allowed ambient temperature range in the manual.
Step 7: Clean the Condenser Area Only If Your Model Requires and Allows It
The refrigeration cycle removes heat from inside the cabinet and releases that heat to the room. The condenser is part of that process. On some refrigerators, condenser coils are exposed on the back. On others, they are underneath the cabinet behind a grille. Some modern designs place them in areas that are not intended for routine homeowner cleaning.
Dirty accessible condenser coils can reduce heat transfer. Whirlpool notes that dust, pet dander, grease, and debris on condenser coils can contribute to poor cooling, while also pointing out that cleaning needs vary by environment and model. This is why “clean the coils every X months” should not be treated as a universal rule.
Before touching the condenser area, read the maintenance section of your owner’s manual. If the manual instructs you to clean accessible coils, unplug the refrigerator first unless the manufacturer gives a different safe procedure. Pull the refrigerator away from the wall only if you can do so without damaging flooring, water lines, power cords, cabinetry, or anti-tip hardware.
Use a soft coil brush and vacuum to remove loose dust. Do not bend fins, puncture tubing, pry at refrigerant lines, soak electrical components, or use sharp metal tools. If a rear or lower panel is not described as a user-removable maintenance cover, leave it in place.
 A simplified vapor-compression refrigerator cycle. The condenser releases heat to the room while the evaporator absorbs heat from inside the refrigerator. CC0 image from Wikimedia Commons.
How to tell whether coil cleaning helped
Restore the refrigerator to its normal position and required ventilation clearance, reconnect power, and let it run with the doors closed. Do not expect an instant change. Record the refrigerator and freezer temperatures and compare them after several hours. A meaningful improvement is a sustained movement toward the target temperature, not simply hearing the compressor run.
Step 8: Listen and Look for Clues From Fans, Frost, and Compressor Behavior
After the simple checks, the pattern of symptoms becomes important. You are not trying to diagnose a sealed refrigeration system by ear. You are gathering evidence that can tell you whether a basic homeowner fix is likely or whether service is justified.
Clue A: the freezer is cold but the refrigerator is warm
Think airflow first. Recheck vents and packages. Look for a wall of frost or snow-like ice on the freezer’s interior rear panel. In many frost-free refrigerators, the evaporator is behind that panel. A heavy, persistent frost pattern can indicate a defrost-system problem that blocks airflow. Do not chip ice with a knife or screwdriver; puncturing a refrigerant line can ruin the appliance and release refrigerant.
Clue B: both compartments are warm, but the lights work
Check cooling mode, settings, installation, condenser condition, and whether the compressor or fans are operating. If the unit stays warm despite correct settings and clear airflow, the cause can include a failed fan, start device, sensor, control, compressor, or sealed-system problem. These are not all safe or economical DIY repairs.
Clue C: the compressor clicks repeatedly
A repeated click followed by a brief hum or silence can be associated with a start problem, overload protection, poor power conditions, or a compressor fault. Do not keep unplugging and immediately replugging the refrigerator to force repeated starts. Disconnect power and arrange qualified service if the behavior persists.
Clue D: a fan is noisy or scraping
A fan can strike ice, debris, or a damaged shroud. If the sound stops when a door is opened, the evaporator fan area may be involved on models that stop that fan with the door switch. If the sound comes from underneath or behind, a condenser fan may be involved. Avoid removing guards or reaching near moving parts. Record a short video or audio clip for a technician; it can make an intermittent problem easier to describe.
Clue E: the refrigerator is running almost constantly
Long run time can happen in hot weather, after a large grocery load, after installation, or during recovery from frequent door opening. Persistent nonstop operation combined with unsafe temperatures is more concerning. Recheck door seals, airflow, installation clearance, condenser cleanliness where applicable, and measured temperatures. If those are normal, the refrigerator may be losing cooling capacity or receiving incorrect sensor information.
Step 9: Look for Frost Patterns Without Dismantling the Refrigeration System
Frost is one of the most useful visual clues because location matters. A thin layer of frost on food packaging after a humid door opening is different from a thick sheet of white frost covering an interior freezer panel.
In a frost-free refrigerator, the appliance periodically warms the evaporator enough to melt accumulated frost. The resulting water drains away. If the heater, sensor, fuse, control logic, drain, or airflow fails, ice can build up. Eventually the evaporator fan may not move enough cold air.
You may see heavy frost through vents or on the freezer’s back wall. Photograph it before changing anything. A technician can often learn from the pattern. If you fully defrost the refrigerator and the problem disappears for several days before returning, that history also points toward a defrost or airflow problem. However, a temporary manual defrost does not identify which component failed.
If you decide to defrost a refrigerator because the manual permits it, move food to safe cold storage, unplug the appliance, protect the floor from water, leave doors open, and let ice melt naturally. Never accelerate the process with knives, screwdrivers, open flames, heat guns, boiling water poured into hidden cavities, or other methods that can damage plastic, wiring, insulation, or refrigerant tubing.
Step 10: Test the Door Switch and Interior Fan Behavior Carefully
The door switch tells the refrigerator whether a door is open. Depending on the model, it may control lights, fans, alarms, and other functions. A failed switch can sometimes affect cooling behavior or make you think a fan has failed when the fan is simply designed to stop with the door open.
Locate the switch only if it is obvious and described in the manual. Pressing a simple plunger-style switch with a finger while observing the light is generally low risk, but some modern refrigerators use magnetic or hidden sensors with no visible button. Do not pry trim apart looking for one.
If a visible switch does not turn the light off when pressed, or a door-open alarm behaves incorrectly, record the symptom. A constantly lit incandescent bulb in an older refrigerator can add some heat, but a switch fault can also affect control logic. Service may be appropriate if the switch is integrated or requires disassembly.
Step 11: Check for a Warm Refrigerator After Recent Loading or Frequent Door Opening
Not every temperature rise is a defect. A refrigerator has finite cooling capacity. Loading it with a large amount of room-temperature food, placing warm leftovers inside, hosting a party with constant door opening, or leaving a door ajar can raise cabinet temperature temporarily.
The correct response is to restore normal use, organize food so vents are clear, close the doors, and monitor with a thermometer. Do not place dangerously hot cookware where it can damage glass shelves or nearby foods, but USDA notes that hot food can be placed directly into a refrigerator or rapidly chilled first. Large quantities should be divided into shallow containers so they cool faster.
If the temperature returns to the safe range and remains stable after the load is cooled, the refrigerator may be operating normally. If the cabinet cannot recover after many hours under ordinary conditions, continue troubleshooting.
Step 12: Compare the Refrigerator and Freezer Temperatures as a Diagnostic Pair
One temperature tells you whether a compartment is safe. Two temperatures tell you more about how the system is failing. Record both at the same time.
- Refrigerator warm, freezer near 0°F: suspect airflow, damper, evaporator fan, frost blockage, or a compartment-specific control issue.
- Both refrigerator and freezer warm: suspect a whole-system problem such as incorrect mode, poor heat rejection, fan or compressor issue, sealed-system loss, or power/control failure.
- Refrigerator freezing food, freezer normal: check set point, food placement near vents, damper behavior, sensors, and airflow distribution.
- Freezer too warm but refrigerator acceptable: check settings and model design; a developing cooling-capacity problem may show first in the freezer.
These patterns narrow the possibilities but do not prove a failed part. The value is that you can tell a technician, for example, “The freezer has stayed at 2°F, but the refrigerator is 48°F and I cannot feel air at the top vent.” That is far more useful than “the fridge feels warm.”
Step 13: Check Whether an Ice Maker or Water System Is Confusing the Diagnosis
A refrigerator can have a water or ice problem while cooling normally, and the reverse is also true. Do not assume that a weak ice maker proves the compressor is failing. Ice production depends on freezer temperature, water supply, filter condition, door use, and the ice maker itself.
If the refrigerator is warm and the ice maker has slowed, measure freezer temperature. Many ice makers reduce or stop production when the freezer is too warm. That makes the ice maker a symptom, not necessarily the cause.
If you recently changed a water filter and noticed unrelated cooling problems, avoid connecting the two without evidence. A clogged water filter can reduce water flow, but it does not normally explain a warm refrigerator compartment. Separate symptoms into cooling, airflow, water, ice, noise, and leakage so you do not chase the wrong system.
Step 14: Rule Out a Drainage Problem When Water or Ice Is Present
A clogged defrost drain usually causes water under drawers, on the floor, or ice at the bottom of a freezer rather than a total loss of cooling. However, heavy ice caused by drainage or defrost issues can sometimes interfere with airflow.
Look at where the water originates. Is it under the front of the appliance, under crisper drawers, below an ice maker, or coming from the water supply line? Check for visible kinks or leaks in external water tubing without moving the refrigerator in a way that strains the line.
If water is near electrical components, unplug the refrigerator if it is safe to do so and keep people away from the wet area until the source is understood. Do not remove internal drain tubes or pour chemicals into refrigerator drains unless the manufacturer instructs you to do so.
Step 15: Know What Not to Do During Refrigerator Troubleshooting
Good troubleshooting is as much about avoiding damage as finding the fault.
- Do not chip ice with knives, screwdrivers, drills, or picks.
- Do not puncture, bend, cut, or heat refrigerant tubing.
- Do not bypass thermostats, fuses, overload protectors, door switches, or safety interlocks.
- Do not test live electrical parts unless you are trained and equipped for appliance electrical diagnosis.
- Do not repeatedly reset a breaker that trips again.
- Do not install random replacement parts based only on a generic online video.
- Do not add automotive or universal refrigerant. Household refrigerators use model-specific refrigerants and sealed-system service requires appropriate equipment and legal handling.
- Do not assume food is safe because it smells normal.
The safest homeowner tasks are observation, temperature measurement, organizing airflow, cleaning accessible surfaces and manufacturer-designated condenser areas, checking settings, cleaning gaskets, verifying installation, and documenting symptoms.
How to Build a 24-Hour Refrigerator Troubleshooting Log
Intermittent cooling problems are difficult because the refrigerator may look normal by the time someone inspects it. A simple log turns impressions into evidence.
Write down the date and time, refrigerator temperature, freezer temperature, room temperature if the appliance is in a garage or hot space, whether the compressor appears to be running, any fan noise, visible frost, door openings, recent grocery loading, and any error codes. Photograph the display and unusual frost.
Measure at consistent locations. If you move the thermometer from a door shelf to directly in front of a cold-air vent, the readings will not be comparable. Avoid opening the door only to record another reading every few minutes; that changes the system you are trying to observe.
A log can reveal cycling. For example, the refrigerator may repeatedly climb to 47°F and later return to 37°F, or it may steadily warm despite the compressor running. Those are very different patterns.
When a Refrigerator Needs Professional Repair
Stop at the boundary between maintenance and appliance repair. A technician is appropriate when basic checks do not restore safe temperatures, especially when symptoms suggest electrical, sealed-system, compressor, control-board, or internal fan problems.
Arrange service if you find any of the following:
- The refrigerator and freezer remain too warm after correct settings, clear vents, closed doors, and adequate stabilization time.
- The compressor repeatedly hums, clicks, or stops on overload.
- A fan is not running when it should, is scraping, or requires panel removal for access.
- There is a strong electrical smell, smoke, sparking, melted wiring, or recurring breaker trip.
- There is oily residue around refrigerant tubing or evidence of refrigerant-system damage.
- Heavy frost returns soon after a complete defrost.
- The control displays an error code that the manual directs to service.
- The refrigerator was damaged during moving, tipped, dropped, or has a pinched power cord or water line.
- Water is reaching electrical parts or cannot be safely contained.
Before the appointment, collect the model and serial number, proof of purchase if under warranty, temperature log, photos, error codes, and a short description of when the problem began. This can reduce diagnostic time and help the service company bring likely parts.
Repair or Replace? Make the Decision With More Than the Refrigerator’s Age
A warm refrigerator often triggers the question: is repair worth it? Age matters, but it is not the only factor. Consider the repair estimate, warranty coverage, energy use, condition of doors and cabinet, availability of parts, history of prior repairs, and the cost and dimensions of a suitable replacement.
A relatively young refrigerator with a failed fan or door gasket may be worth repairing. An older refrigerator with a sealed-system failure, damaged door, failing electronics, and repeated previous repairs may not be. Ask the technician for a written diagnosis and estimate rather than deciding from a generic “average lifespan” number.
Also account for installation costs. A replacement may require delivery, removal of the old unit, water-line work, cabinet adjustments, or disposal fees. If the appliance sits in a tight opening, measure width, height, depth, door swing, hinge clearance, and path through the home before ordering.
Prevent Future Cooling Problems With a Simple Maintenance Routine
Refrigerator maintenance does not need to become a monthly project. A few habits make problems easier to spot early.
Keep a refrigerator thermometer inside
This is the single best low-cost monitoring tool. You will know when the cabinet is drifting warm before milk spoils or food feels obviously warm.
Keep vents visible
When reorganizing groceries, avoid turning air outlets into storage backstops. Leave room for circulation around designed vents.
Wipe door gaskets
Clean sticky residue before it becomes a hardened leak path. While cleaning, look for tears or loose sections.
Clean condenser areas according to the manual
Do not invent a schedule. Some models need periodic cleaning, especially in dusty homes or homes with pets; others are designed differently. Follow the model-specific maintenance instructions.
Pay attention to new sounds
Refrigerators make normal clicks, hums, fan noise, refrigerant gurgles, and defrost sounds. The useful signal is a change: a new scrape, buzz, repeated click, or unusually long run time.
Close doors promptly
Long door openings add heat and humidity. Make a habit of deciding what you need before opening the door, especially when troubleshooting.
Troubleshooting by Symptom
The refrigerator is warm but the freezer is fine
Start with refrigerator air vents, freezer return vents, food placement, visible frost, damper openings, and evaporator fan behavior. Do not turn the freezer colder just to compensate. If airflow is absent despite clear vents, service may be needed.
The refrigerator is warm and the freezer is also warm
Verify power, cooling mode, set points, door closure, installation clearance, condenser condition where applicable, and compressor operation. If both compartments stay warm, the issue likely affects the whole cooling system rather than only fresh-food airflow.
The refrigerator cools only after unplugging and restarting it
An occasional reset after a power event can be normal if the manual recommends it. A refrigerator that repeatedly needs power cycling may have a control, sensor, fan, defrost, or electrical issue. Keep a log and arrange service rather than making resets part of normal use.
The refrigerator is too cold and freezes produce
Check the temperature setting, thermometer reading, location of the frozen items, and whether food is directly in the path of a supply vent. If the cabinet is below the intended range even at normal settings, a sensor, damper, or control issue may be involved.
The refrigerator has frost around the door
Inspect the gasket, door alignment, packages blocking closure, and frequency of door opening. Warm humid air entering through a leak condenses and can freeze on cold surfaces.
The refrigerator’s outside walls feel warm
Some warmth can be normal because refrigerators reject heat to the room and some models route condenser tubing through cabinet areas. Compare the warmth with what your manual describes. Extreme heat combined with poor cooling, burning odor, or abnormal compressor behavior deserves service.
The refrigerator makes water or gurgling sounds
Refrigerant movement and defrost drainage can create normal gurgles, trickles, and pops. A sound by itself is not a fault. Combine it with temperature performance, leaks, and other symptoms.
A Practical Decision Tree You Can Follow
If the refrigerator is above 40°F: protect perishable food first and minimize door opening.
If there is no power: check plug, breaker, and permitted GFCI reset. If protection trips again, stop and seek electrical or appliance service.
If lights work but cooling appears off: check Demo/Showroom/Cooling Off modes and temperature settings.
If the freezer is cold but refrigerator is warm: clear vents, inspect for heavy frost, and observe fan/airflow clues.
If both sections are warm: verify doors, installation, condenser maintenance requirements, and whether the compressor and fans appear to run.
If basic checks are correct but temperatures remain unsafe: stop replacing guesses with guesses. Schedule diagnosis.
Frequently Asked Questions
How long should I wait after changing the refrigerator temperature setting?
Give the refrigerator substantial time to stabilize. Many manufacturers advise waiting up to 24 hours after an adjustment before judging the final temperature. The exact recommendation depends on the model and circumstances. During that period, continue monitoring food safety; waiting for the appliance does not make food held too warm safe.
What temperature should a refrigerator be?
FDA and USDA recommend 40°F (4°C) or below for food safety. Many refrigerators are commonly set around 37°F, but use the manufacturer’s recommended setting and verify the actual cabinet temperature with an appliance thermometer.
Can a dirty condenser really make a refrigerator stop cooling?
On models with accessible condenser coils that depend on airflow, heavy dust and pet hair can reduce heat transfer and contribute to poor cooling. But not every refrigerator requires homeowner coil cleaning, so check the manual before removing covers or attempting maintenance.
Why is my freezer cold but my refrigerator warm?
The refrigerator section often depends on cold air delivered from the freezer or evaporator area. Blocked vents, heavy frost, a failed evaporator fan, a stuck damper, or a control problem can reduce airflow to the fresh-food compartment even while the freezer remains cold.
Will unplugging a refrigerator reset it?
It can reset some electronic controls, but it is not a universal repair and should not become a recurring workaround. Follow model-specific reset instructions. If the refrigerator only works after repeated power cycling, document the pattern and arrange service.
How can I tell if the compressor is bad?
A homeowner cannot reliably diagnose compressor health just by touching or listening to it. Repeated clicking, failure to start, abnormal heat, or a running compressor with no cooling can be clues, but start devices, controls, fans, power conditions, refrigerant charge, and other faults can create similar symptoms. Sealed-system diagnosis should be performed by a qualified technician.
Is food safe if the refrigerator reached 45°F?
Time matters as well as temperature. USDA guidance says perishable foods held above 40°F for more than two hours should not be consumed. In a power-outage context, FDA provides additional guidance based on outage duration and measured food temperature. When the history is uncertain, do not use smell or taste as a safety test.
Should I put hot food in the refrigerator?
USDA says hot food can be placed directly in the refrigerator. Large amounts should be divided into shallow containers so they cool more quickly. The old advice that all hot food must sit on the counter until room temperature can keep food in the bacterial growth range too long.
Can I keep using a refrigerator that is at 45°F if the food seems fine?
No. A refrigerator that cannot maintain 40°F or below is not providing the recommended storage environment for perishable food. Move perishables to safe cold storage while you troubleshoot or arrange repair.
Final Takeaway
The fastest way to troubleshoot a refrigerator that is not cooling is to stop guessing and start measuring. Protect the food, verify the actual temperature, confirm power and cooling mode, check the settings, clear vents, inspect door seals, verify installation, and perform only the condenser maintenance your model allows. Then compare refrigerator and freezer temperatures and document frost, fan, compressor, and noise patterns.
The most important mistake to avoid is treating a cooling failure as only an appliance problem. Food can become unsafe before the repair is complete, and smell is not a reliable test. Your first action should therefore be an appliance thermometer and a plan to keep perishables at 40°F or below.
If those basic checks do not restore stable, safe temperatures, the right next step is not deeper random disassembly. It is a model-specific professional diagnosis. A clear temperature log and a few photos of frost, displays, and installation conditions will make that service visit much more useful.
Sources and Further Reading
- USDA Food Safety and Inspection Service — Refrigeration & Food Safety
- U.S. FDA — Refrigerator Thermometers: Cold Facts About Food Safety
- U.S. FDA — Power Outages: Key Tips for Consumers About Food Safety
- Whirlpool — Why Is My Refrigerator Not Cooling?
- Whirlpool — Refrigerator Troubleshooting
- Wikimedia Commons — USDA refrigerator thermometer image (Public Domain)
- Wikimedia Commons — Refrigerator interior image (Public Domain)
- Wikimedia Commons — Refrigerator vapor-compression cycle diagram (CC0)