

Quick answer: A vacuum cleaner usually loses performance because airflow is restricted, the dust container or bag is full, a filter is dirty, the hose or airway is blocked, or the brush roll is wrapped with hair and debris. The safest maintenance sequence is to switch the machine off and disconnect power, empty the bin or replace the bag, inspect the airway from the floor head to the dust container, clean the brush roll, and service only the filters that the manufacturer specifically says are washable. Never reinstall a damp filter. If the machine smells hot, makes a new grinding noise, repeatedly shuts itself off, has a damaged power cord, or continues to overheat after obvious clogs are removed, stop using it until the cause is identified.
 Vacuum cleaners look simple from the outside, but airflow depends on a chain of parts that all need to stay reasonably clear. Image: Parvathisri, Wikimedia Commons, CC BY-SA 3.0.
A vacuum can appear to be working while cleaning badly. The motor runs, the lights come on, and the floor head moves, yet crumbs remain on hard flooring and pet hair stays embedded in carpet. Many people respond by buying a stronger machine or repeatedly running the same area. Often the problem is simpler: airflow has been reduced somewhere between the floor head and exhaust, or the brush system is no longer moving debris into that airflow efficiently.
Good maintenance is therefore less about “deep cleaning the vacuum” and more about preserving a clear air path and functioning agitation system. Different machines use different filters, seals, belts, cyclones, sensors, batteries, and brush designs, so the manual for your exact model remains the controlling source. This guide gives you a safe diagnostic framework that works across common upright, canister, stick, cordless, bagged, bagless, and robot vacuums without pretending that one disassembly procedure fits every model.
1. Identify Your Vacuum Type Before You Clean Anything
Start by naming the machine you actually have. The maintenance points differ.
- Upright vacuum: motor, dust system, and floor head are usually integrated into one body.
- Canister vacuum: the motor and dust container sit in a separate canister connected to a wand and hose.
- Cordless stick vacuum: compact battery-powered motor unit with removable wand and floor head.
- Robot vacuum: autonomous floor cleaner with a dust bin, filters, side brushes, main brush, sensors, wheels, and charging contacts.
- Wet/dry vacuum: designed for different debris and sometimes liquids; maintenance rules differ substantially from ordinary household dry vacuums.
Find the model number before removing covers. Manufacturers often place it on the underside, rear, battery compartment, or rating label. Search the manufacturer’s official support site for the manual and maintenance diagrams. Do not rely on a video for a model that merely looks similar. A hidden clip, filter material, belt route, or sealing gasket can differ even within one product family.
2. Understand the Four Systems That Determine Cleaning Performance
Most vacuum problems make more sense when you divide the machine into four systems.
Airflow
Air must move from the cleaning head through the wand, hose, cyclone or bag, filters, motor area, and exhaust. A restriction anywhere can reduce pickup.
Agitation
On carpet, a brush roll or powered nozzle loosens fibers and moves debris toward the suction path. Hair, thread, worn bristles, damaged bearings, or a slipping belt can reduce this effect even when suction is normal.
Filtration and separation
Bags, cyclones, screens, pre-motor filters, and exhaust or HEPA filters keep dust from reaching sensitive parts or returning to the room. When filters become overloaded, resistance increases.
Power and control
Corded machines depend on sound electrical connections, switches, motors, and sometimes powered brush heads. Cordless machines add batteries, charging electronics, temperature protection, and software. Robot vacuums add sensors, wheels, navigation hardware, and charging contacts.
A useful diagnostic question is therefore not “Why is my vacuum weak?” but “Which of these four systems is failing?”
3. Create a Safe Maintenance Area
Vacuum maintenance releases exactly the dust you were trying to contain. Work somewhere easy to clean, ideally over a hard floor or outdoors when conditions allow.
Gather:
- trash bag or bin;
- soft cloth;
- small soft brush;
- scissors or a seam ripper for hair, if the manufacturer’s design allows safe access;
- flashlight;
- the correct screwdriver only if the manual instructs you to remove a cover;
- replacement bag or filter if due.
Switch the machine off. Unplug corded vacuums. Disconnect cordless machines from the charger and, if the battery is designed to be removable, remove it when the manufacturer recommends doing so for maintenance. Never reach into a brush area that could unexpectedly start.
4. Empty the Bin Before It Looks Completely Full
Bagless vacuums often have a “max” line for a reason. Filling past it can interfere with cyclone performance, airflow, and dust separation. Empty the bin when it reaches the manufacturer’s indicated level rather than compacting debris to create more capacity.
Hold the bin low inside or above the trash container to reduce airborne dust. If the bin has a bottom-release door, open it carefully instead of shaking it aggressively at face level.
Fine dust may cling to screens or shrouds. Clean those only according to the model instructions. Some cyclone assemblies should not be washed; water can remain trapped in internal passages and later carry fine contamination toward the motor.
Common mistake: Rinsing every dusty plastic component under a faucet. “Looks washable” is not the same as “manufacturer approves washing.”
5. Replace Bags Before Airflow Collapses
Bagged vacuums depend on the bag itself as part of the airflow and filtration system. Replace it according to the manufacturer’s fullness indicator or guidance.
A bag can become restrictive before it looks physically packed solid, especially when it contains fine dust. If suction declines after vacuuming plaster dust, fireplace ash, very fine powders, or similar material, the bag may be loaded even though there appears to be empty volume.
Use the correct bag type. Poorly fitting generic bags can leak at the inlet or fail to seal correctly. If the bag compartment contains loose dust outside the bag, inspect the bag collar, seal, and installation rather than simply wiping the compartment and continuing.
6. Follow the Air Path From Floor to Exhaust
When suction is weak, trace the machine logically.
- Floor inlet or nozzle
- Brush chamber
- Neck or elbow behind the floor head
- Wand
- Hose
- Bin inlet or bag inlet
- Cyclone or separator
- Pre-motor filter
- Motor pathway
- Post-motor or exhaust filter
You may not be able to access every section, and you should not dismantle sealed motor areas. The purpose is to inspect user-serviceable sections in order rather than randomly cleaning parts.
Use a flashlight to look through removable wands and hoses. A clog often forms where airflow changes direction: elbows, hose cuffs, the neck behind the floor head, or the inlet to the dust container.
7. Remove Clogs Without Damaging the Hose
Disconnect the hose according to the manual. Look through it toward a light source if it is straight enough.
If you can see a blockage, try to remove it from the nearest opening rather than pushing it deeper. A blunt, flexible tool may be appropriate for some hoses, but avoid screwdrivers, wire hangers, sharp rods, or anything that can puncture a flexible hose or damage internal electrical conductors in powered hoses.
Do not pour water through a hose unless the manufacturer explicitly says the hose is washable. Some hoses contain electrical wiring for powered floor heads.
After clearing a clog, check both ends for damaged seals or cracks. An air leak can mimic a blockage by reducing useful suction at the floor head.
8. Clean Hair From the Brush Roll Before It Becomes a Mechanical Problem
Hair and thread wrap around brush rolls because rotating bristles act like a spool. A little wrapping may only reduce cleaning. A heavy wrap can load bearings, increase friction, interfere with a belt, and in some designs trigger protective shutdowns.
With the vacuum powered off and disconnected, rotate the brush by hand if the design permits. Cut wrapped hair in several places along a designated groove if one exists, then pull debris away from the bristles.
Avoid cutting into bristles, rubber fins, belts, sensor wiring, or soft rollers. If the brush roll is removable, follow the exact model procedure.
BISSELL’s official brush-roll maintenance instructions for several upright models specifically begin with unplugging the machine, then removing the brush cover, cleaning hair and debris, checking the belt and passageway, and confirming the brush spins properly before reassembly. That sequence illustrates the general safety principle: power off first, then inspect the mechanical system.
9. Inspect the Ends of the Brush Roll
Hair often migrates beyond the visible bristles and winds around end caps or bearings.
If your model allows removal of the brush, inspect both ends. A brush that is clean across the center can still bind because of a dense ring of hair at one bearing.
Rotate it by hand after cleaning. It should move in the manner described by the manufacturer. Grinding, stiffness, excessive side-to-side play, or a damaged end cap may indicate wear rather than dirt.
Do not lubricate bearings unless the manufacturer instructs you to. Household oils can attract dust, damage materials, or contaminate drive components.
10. Inspect the Belt Only If Your Vacuum Uses One
Many upright vacuums use a belt to drive the brush roll. Others use direct-drive motors or different mechanisms.
If the brush does not turn, inspect the belt only through the user-serviceable access specified in the manual. Signs of belt trouble can include:
- brush roll not rotating;
- burning-rubber smell;
- visible cracking or stretching;
- belt slipping off the pulley;
- new squealing noise.
Replace with the correct belt type and route it exactly as shown by the manufacturer. A belt that is too loose, too tight, or installed incorrectly can create more problems than it solves.
11. Learn Which Filters Are Washable
This is one of the most important maintenance rules: not every vacuum filter is washable.
Some foam and fabric filters are designed to be rinsed. Some pleated filters are washable. Others are disposable and can be damaged by water. The filter may also contain multiple materials with different instructions.
Check the manual or official support page before using water.
Dyson’s current support guidance for many cordless models tells users to wash designated washable filters with water, avoid detergents on those filters, and allow at least 24 hours for complete drying before reinstalling. Shark’s support guidance likewise instructs users on many upright models to rinse specified filters and let them dry completely before reinstalling. Those are model-family examples, not permission to wash an unknown filter.
12. Never Reinstall a Damp Filter
A filter can feel dry on the outside while retaining moisture deep inside foam or pleats.
Reinstalling it too soon can restrict airflow, contribute to odors, carry moisture toward electrical or motor components, and create conditions for microbial growth.
Dry washable filters in a well-ventilated area for the full period recommended by the manufacturer. Do not speed drying with an oven, microwave, clothes dryer, open flame, or high heat. Dyson explicitly warns against several of these methods in its support guidance.
If you use the vacuum frequently, consider owning a second manufacturer-approved filter set so one can dry completely while the other is in service.
13. Clean Pre-Motor and Post-Motor Filters for Different Reasons
A pre-motor filter protects the motor from dust that escaped the primary separation system. A post-motor or exhaust filter captures particles after air passes through the motor area.
A clogged pre-motor filter can reduce airflow and increase motor load. A neglected exhaust filter can increase resistance and may contribute to dusty exhaust or odor.
The cleaning or replacement interval can differ between the two. Do not assume both filters should be washed together. Some exhaust filters are long-life, some are replaceable, and some are not user-washable.
14. HEPA Is a Filter Classification, Not a Maintenance Instruction
People often assume “HEPA” means washable. It does not.
HEPA describes filtration performance under a standard or manufacturer claim; it does not tell you whether the filter should be rinsed. Some HEPA filters are washable by design. Others should be replaced.
Always follow the exact filter’s instructions. Washing a non-washable pleated filter can deform fibers, damage seals, or reduce filtration even if the filter looks clean afterward.
15. Clean Seals and Gaskets Gently
Air leaks around the dust bin, filter housing, hose connection, or bag door can reduce suction.
Inspect rubber seals for:
- dust buildup;
- hair trapped across the sealing surface;
- folding or displacement;
- cracking;
- missing gasket sections.
Wipe accessible seals with a slightly damp cloth if the manual permits, then dry them. Avoid solvents or aggressive cleaners that can swell or degrade rubber.
After reassembly, make sure bins, filter doors, and hoses click or lock fully into place.
16. Diagnose Low Suction With a Controlled Test
Do not judge suction only by whether the machine picks up one crumb from carpet.
After basic maintenance:
- Install a clean, dry filter.
- Empty the bin or install a fresh bag.
- Reconnect the hose and wand.
- Confirm all doors are closed.
- Test suction at the hose inlet if the design allows safe testing.
- Then test at the end of the wand.
- Finally test through the floor head.
If suction is strong at the hose but weak at the floor head, the restriction is likely downstream in the wand or head. If suction is weak immediately at the machine, investigate the bin, bag, filters, seals, and internal user-accessible air path.
17. Diagnose “The Vacuum Pushes Debris Instead of Picking It Up”
On hard floors, a high-speed brush can sometimes scatter cereal, litter, or crumbs instead of capturing them.
Check whether the floor head has:
- a hard-floor mode;
- brush-roll on/off control;
- height adjustment;
- blocked front intake;
- worn or jammed soft roller.
Large debris pickup varies by head design. A machine can have strong suction and still perform poorly on certain debris because of nozzle geometry.
18. Diagnose “It Cleans Hard Floor but Not Carpet”
If hard-floor suction feels fine but carpet pickup is poor, focus on agitation.
Inspect:
- brush roll rotation;
- hair wrapping;
- worn bristles;
- belt condition;
- height setting;
- floor mode;
- air path within the floor head.
Very high suction can also make some heads difficult to push on dense carpet. Use the manufacturer’s carpet setting, suction relief, or head adjustment when provided.
19. Diagnose “It Works for a Few Minutes and Shuts Off”
Repeated shutdown can be a protective response to overheating, airflow restriction, brush-roll obstruction, battery temperature, or another fault.
Turn the machine off and unplug it or disconnect it from the charger. Let it cool. Empty the bin, clean approved filters, clear blockages, and remove brush-roll debris.
Shark’s official upright-vacuum support notes that many models use a motor protective thermostat. That does not mean every shutdown is harmless. If the problem returns after normal maintenance, consult model-specific support rather than repeatedly restarting the machine.
20. Stop Immediately for Burning Smells That Are Not Clearly Dust
A new burning smell deserves attention.
Possible causes include a jammed brush, slipping belt, overheated motor, foreign object, electrical fault, or debris contacting a hot component.
Switch off and disconnect power. Do not continue running the vacuum to “see if the smell goes away.” Inspect user-serviceable areas for obvious wrapping or belt trouble. If the source is not clear, stop using the machine until it is properly assessed.
21. Distinguish Dust Odor From Electrical Odor
Vacuum exhaust can smell stale if the bin, bag, filter, or brush chamber contains organic debris, pet hair, or damp material. That is different from a sharp hot-plastic, electrical, or burning-rubber smell.
For stale odor:
- empty the bin;
- replace the bag if applicable;
- clean approved washable filters and dry fully;
- remove trapped hair and debris;
- wipe dry user-serviceable plastic areas;
- check that you did not vacuum damp material with a dry-only machine.
Do not spray fragrance or cleaning liquid into the motor intake or filter to mask odors.
22. Avoid Vacuuming Materials the Machine Was Not Designed to Handle
Ordinary household dry vacuums are generally not designed for:
- liquids;
- wet carpet debris;
- hot ash;
- large construction debris;
- fine drywall dust in large quantities;
- sharp metal fragments;
- flammable materials.
Fine construction dust can load filters rapidly and may pass through systems not designed for it. Liquids can create electrical risk and damage paper filters or motors.
Use an appropriate wet/dry or construction-rated machine when the task requires it.
23. Maintain the Cord on a Corded Vacuum
Inspect the power cord for:
- cuts;
- flattened sections;
- exposed conductors;
- loose plug pins;
- damage near strain reliefs.
Do not wrap the cord so tightly that it is sharply bent at the machine or plug. Avoid pulling the vacuum by the cord or yanking the plug from the wall by the cable.
A damaged mains cord is not a cosmetic issue. Stop using the vacuum until it is properly repaired according to manufacturer instructions.
24. Maintain a Cordless Battery Without Chasing Myths
Cordless runtime naturally changes with power mode, floor type, powered attachments, battery age, and temperature.
If runtime drops suddenly:
- clean the filter;
- remove blockages;
- inspect the floor head;
- test in the normal power mode;
- check charger connections;
- review battery status in the manufacturer app or display if available.
A clogged machine can make the motor work harder or trigger pulsing, which can look like a battery problem.
Do not use damaged, swollen, leaking, unusually hot, or recalled lithium battery packs. Follow the manufacturer’s safety guidance for replacement and disposal.
25. Keep Charging Contacts Clean
Cordless and robot vacuums may fail to charge because contacts are dusty rather than because the battery is dead.
Disconnect power to the charger where appropriate. Wipe exposed contacts with a dry soft cloth. Do not flood charging contacts with cleaner.
For robot vacuums, clean both the dock contacts and the corresponding contacts on the robot. Make sure the dock sits flat and the robot can align correctly.
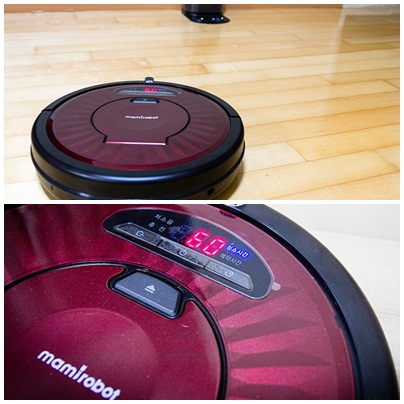 Robot vacuums add sensors, wheels, charging contacts, side brushes, and navigation components to the same basic airflow problem. Image: Mamirobothk, Wikimedia Commons, CC BY-SA 3.0.
26. Maintain a Robot Vacuum as a Sensor System
Robot vacuums do more than suction. Dirty sensors can affect navigation, cliff detection, docking, and obstacle behavior.
According to your model’s manual, regularly inspect:
- main brush;
- side brush;
- front caster;
- drive wheels;
- dust bin;
- filters;
- cliff sensors;
- camera or LiDAR window if present;
- charging contacts.
Use the recommended dry or slightly damp cleaning method for sensors. Do not polish optical windows with abrasive products.
27. Remove Hair From Robot Wheels
Long hair and thread can wind around the front caster axle or drive wheels and create navigation errors.
If the caster is designed to be removable, pop it out only using the official procedure. Remove hair from the axle and cavity, then reinstall securely.
If a drive wheel does not move freely, do not pry it apart unless the manual allows user disassembly. Internal springs, motors, and wiring may be involved.
28. Clean Robot Side Brushes Before They Deform Permanently
Side brushes sweep debris from edges toward the main cleaning path. Hair can wrap around the mounting hub and reduce rotation.
Remove the brush if the design permits, clear hair from the shaft, and inspect bristles. If they are permanently bent or worn, replace them with the correct part.
Do not install a brush that rubs the robot body or sits crooked. That can increase motor load and reduce edge cleaning.
29. Keep Dock Areas Clear
Robot vacuums need predictable access to the charging dock.
Keep loose cords, curtains, light rugs, and clutter away from the approach path. Follow the manufacturer’s clearance recommendations rather than inventing distances.
If the robot frequently fails to dock, clean contacts, verify dock power, remove nearby obstacles, and inspect whether the dock has shifted.
30. Clean Attachments Instead of Letting Them Become Secondary Clogs
Crevice tools, upholstery tools, pet-hair attachments, and miniature powered heads can accumulate debris.
Inspect openings and moving parts. Remove hair. Wash only parts specifically approved for washing.
A clogged attachment can make the vacuum seem weak even when the main machine is healthy. Test the hose without the attachment when diagnosing.
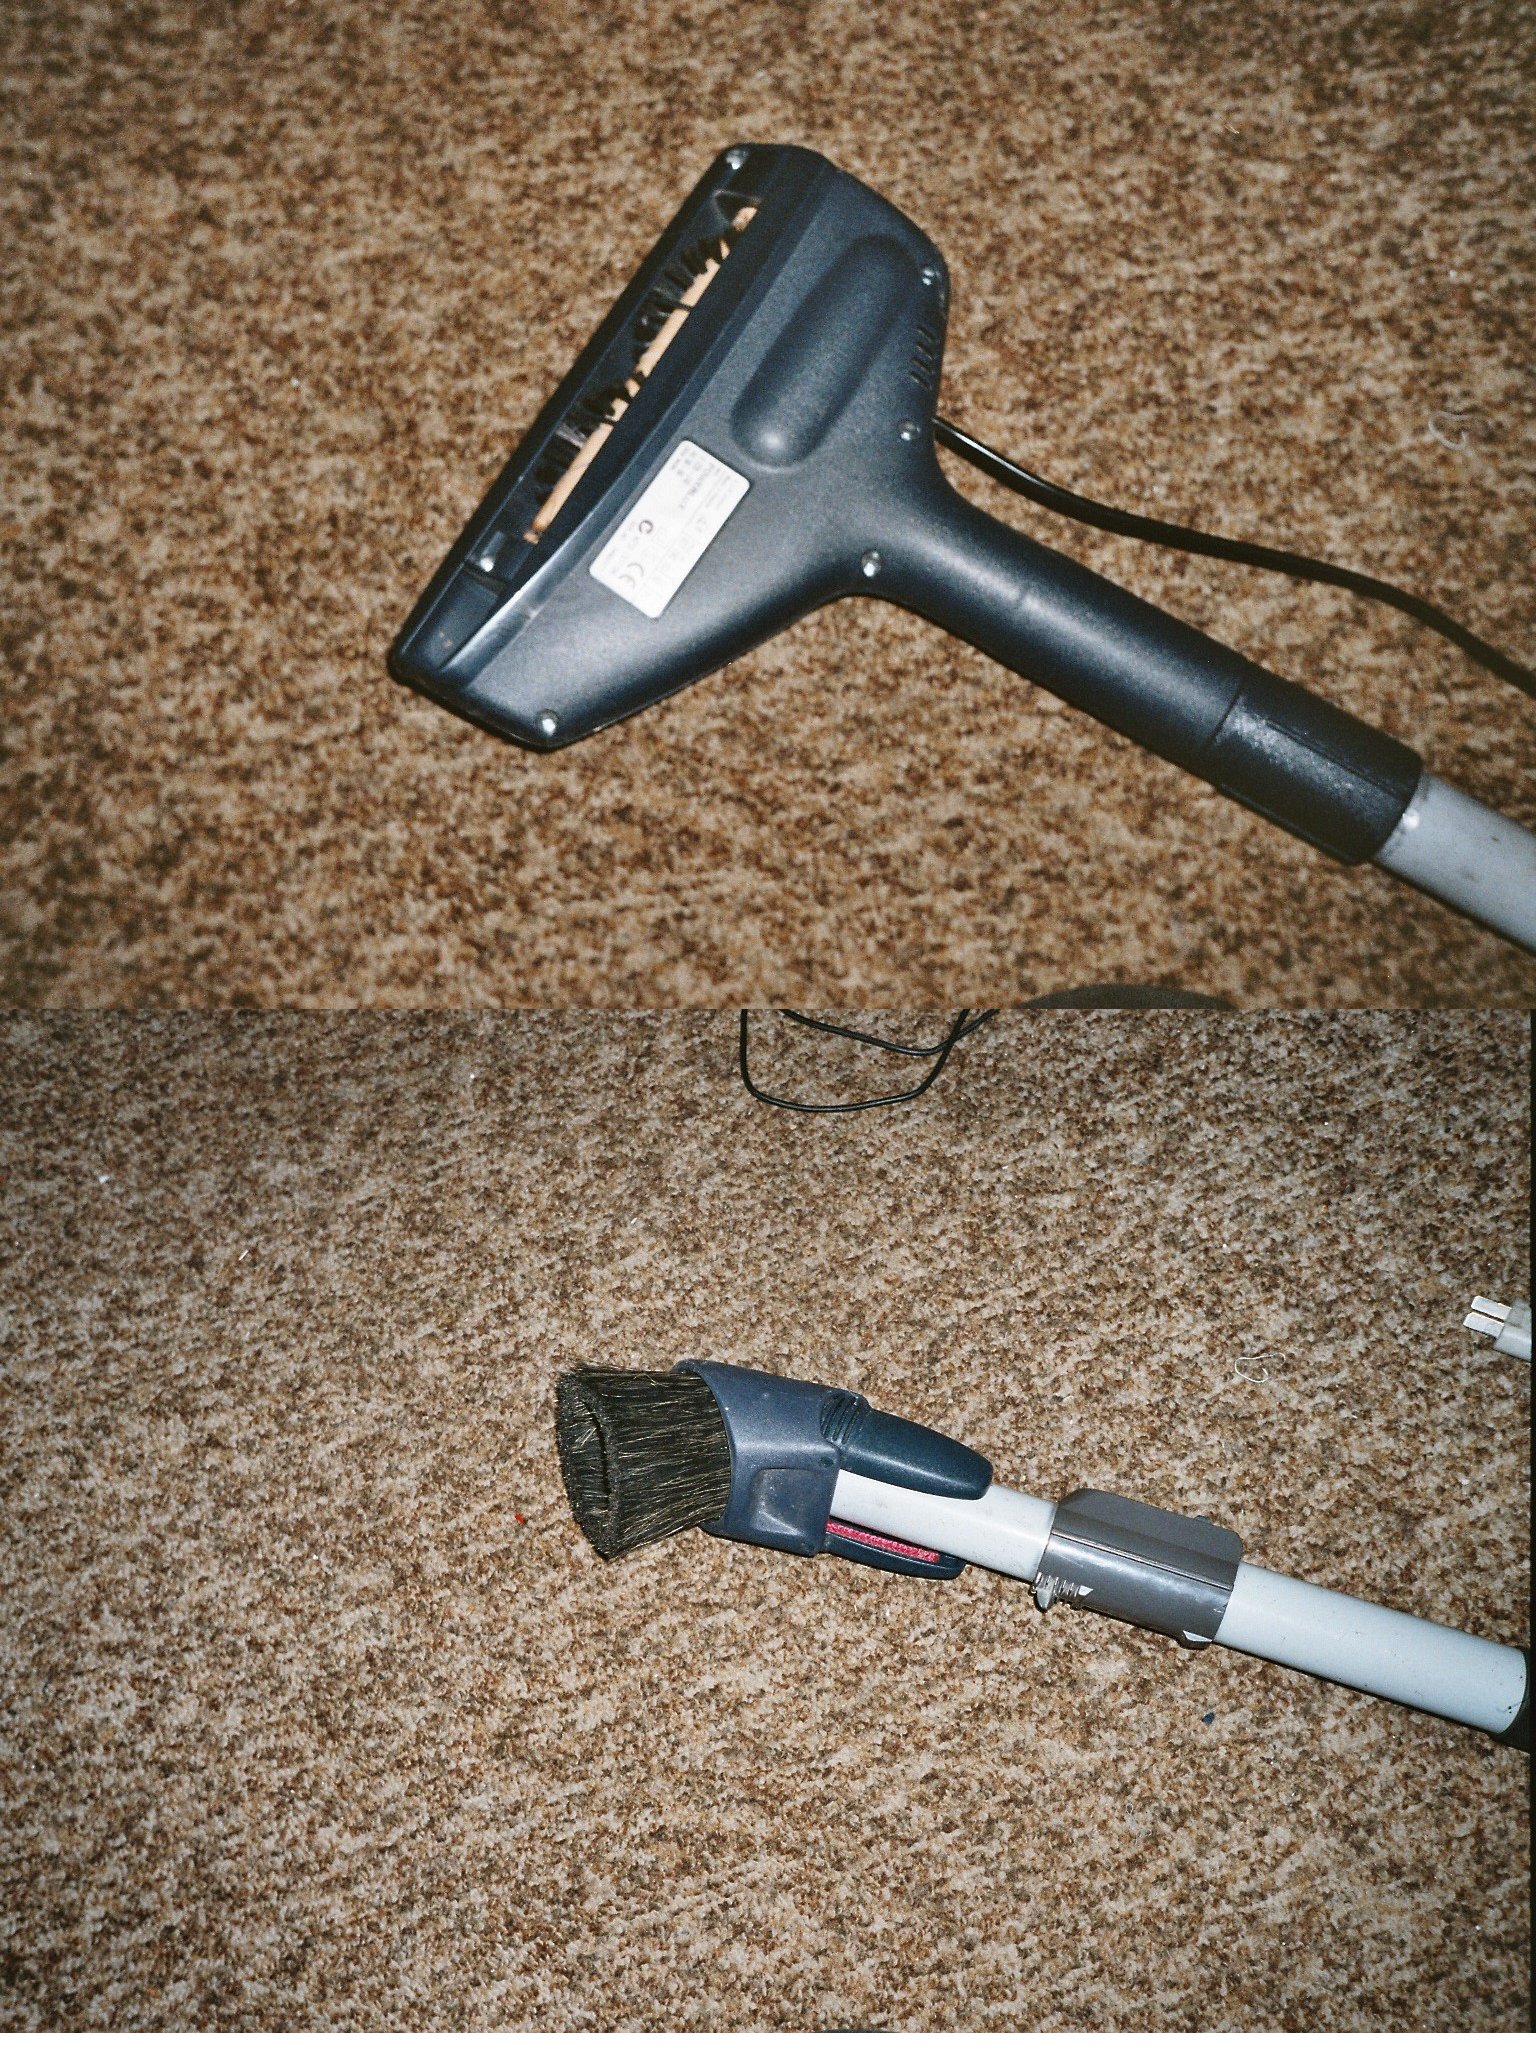 Attachments need their own airflow and blockage checks, especially narrow crevice tools and floor heads. Image: Markus Schweiss, Wikimedia Commons, CC BY-SA 3.0.
31. Inspect Wheels and Axles
Small floor-head wheels often collect hair that raises one side of the nozzle or prevents smooth movement.
Remove accessible debris from axles without forcing sealed wheel assemblies apart. If a wheel is cracked, missing, or seized, replace it if the manufacturer supplies the part.
Dragging a seized wheel across wood flooring can create scratches and make the machine harder to push.
32. Clean the Exterior Without Sending Liquid Inside
Use a soft dry or slightly damp cloth for the exterior unless the manual specifies otherwise.
Avoid spraying cleaner directly onto:
- buttons;
- motor vents;
- battery terminals;
- charging ports;
- displays;
- seams leading to electronics.
Apply a small amount of approved cleaner to the cloth instead of the machine when necessary.
33. Avoid Compressed Air in Sensitive Areas Unless Approved
Compressed air can drive fine dust deeper into motors, bearings, sensors, or sealed assemblies. It can also aerosolize dirt into the room.
Use the manufacturer’s recommended brush, cloth, tapping, or rinsing method for user-serviceable parts. “Blowing it clean” is not automatically safer.
34. Keep the Cyclone Dry Unless the Manual Says Otherwise
Cyclone assemblies in bagless vacuums often contain narrow internal channels designed to spin dirt out of airflow.
Some models permit certain cyclone components to be cleaned. Others specifically do not. Water trapped in a cyclone can take a long time to evaporate and may carry dust into sticky deposits.
If your manual says to tap or brush the cyclone rather than wash it, follow that instruction.
35. Recognize When Fine Dust Has Overloaded the System
If performance drops immediately after vacuuming very fine dust, inspect the bag or filters first.
Fine particles fill pores in filter media quickly. A bin may appear only half full while the filter is heavily loaded.
Do not keep running the motor at reduced airflow. Clean or replace filters according to the manual and use a more appropriate machine for future fine-dust cleanup.
36. Test Seals After Reassembly
A vacuum can perform worse after maintenance if a filter door is not latched, a bin is not fully seated, or a hose connection is loose.
After reassembly:
- confirm every filter is in the correct orientation;
- confirm every gasket is flat;
- click the bin into place;
- lock hose cuffs;
- close access covers;
- make sure the brush guard is fully secured.
Then test the machine briefly on a small area.
37. Build a Maintenance Schedule Based on Dirt Load, Not Calendar Alone
Homes vary enormously. A small apartment with no pets puts a different load on a vacuum than a house with two shedding dogs, carpeted stairs, and daily use.
Use a condition-based schedule:
After or before each use:
- check bin level or bag indicator;
- look for obvious brush-wrap;
- inspect the intake for large trapped objects.
Weekly or every few uses:
- clear hair from brush roll;
- wipe visible sensors on robot models;
- check wheels and attachment openings.
Monthly or as specified:
- inspect filters;
- wash only approved washable filters;
- inspect hose and wand for restrictions;
- clean charging contacts;
- check seals and belts where applicable.
Periodically:
- replace filters and bags according to condition and manufacturer guidance;
- inspect wear parts;
- review battery health;
- update robot-vacuum firmware if supported.
38. Do Not Turn Maintenance Into Unnecessary Disassembly
Many modern vacuums are not designed for the user to open the motor housing, battery pack, or sealed electronic assemblies.
Stop at the boundary defined by the manual. If a repair requires soldering, mains-voltage work, motor disassembly, battery-cell replacement, or bypassing a thermal protector, that is beyond routine cleaning.
Maintenance should reduce risk, not create it.
39. Know When a Filter Needs Replacement Rather Than Cleaning
Replace a filter if:
- the manufacturer specifies a replacement interval;
- the filter is torn;
- the frame or seal is warped;
- pleats are damaged;
- odor remains after approved cleaning and drying;
- the material stays heavily discolored and restricted;
- performance does not recover after correct cleaning.
Use genuine or manufacturer-compatible parts that match the exact model and filtration requirements.
40. Know When a Brush Roll Needs Replacement
A clean brush can still be worn out.
Replace it if bristles are permanently flattened, rubber fins are damaged, bearings bind, end caps are worn, or the roller is physically cracked.
If the vacuum relies on brush agitation for carpet cleaning, worn bristles can reduce performance even when suction remains strong.
41. Diagnose Excessive Noise
A new noise often localizes the problem.
Whistling: possible air leak, restriction, or partially blocked opening.
Rattling: object in hose or floor head, loose component, or damaged brush part.
Grinding: possible bearing, brush, motor, or debris-contact problem.
Squealing: possible belt or rotating-part issue.
Pulsing: some cordless vacuums intentionally pulse when airflow is restricted.
Stop the machine before inspecting. Never probe moving parts while power is connected.
42. Diagnose Poor Edge Cleaning
If the center of the floor head cleans well but edges do not, inspect side channels, edge bristles, side brushes on robots, and floor-head geometry.
Some machines are simply designed with weaker edge pickup and require a crevice tool. Maintenance cannot redesign the nozzle.
Knowing the limitation prevents endless cleaning of a machine that is functioning as designed.
43. Diagnose Pet Hair Problems
Pet hair creates three simultaneous loads:
- brush-wrap;
- filter loading with fine dander;
- odor from organic material.
Empty the bin more frequently, clean the brush before hair becomes tightly wound, and service washable filters according to the manufacturer’s schedule. Pet homes may need maintenance more often than generic calendar recommendations.
If hair consistently blocks one bend in the hose, inspect that area after every few uses rather than waiting for complete loss of suction.
44. Diagnose Sand and Grit
Sand is dense and abrasive. It can collect in floor heads, wheels, and brush chambers.
After heavy sand pickup, empty the bin, inspect the nozzle, and clean wheel areas. Avoid running a brush roll over delicate hard floors if trapped grit is scratching rather than being lifted.
A straight-suction hard-floor tool may be more appropriate for some surfaces.
45. Diagnose Odor After Vacuuming Something Damp
If a dry vacuum accidentally picks up damp debris, stop and empty it promptly.
Inspect the bag or bin, approved filters, hose, and floor head according to the manual. Replace disposable filters or bags that became wet.
Do not run the motor merely to “dry the inside.” Moisture in electrical or sealed areas can create hazards. If liquid may have reached the motor or electronics, stop using the machine and seek model-specific service guidance.
46. Store the Vacuum So Air Can Circulate
Do not store a machine with a damp washable filter, wet attachment, or sealed bin containing organic debris.
Choose a dry indoor location. Avoid severe heat, freezing temperatures, or moisture unless the manufacturer permits them.
For cordless vacuums, use the approved charger and storage system. For corded machines, coil the cable without sharp bends.
47. Maintain Spare Parts Without Creating Clutter
A useful spare-parts kit is small:
- one correct replacement bag pack if bagged;
- one spare filter set if filters require long drying;
- one belt if your model uses a user-replaceable belt and failures are common;
- manufacturer cleaning tool if supplied.
You do not need a drawer full of speculative parts for a machine that may never use them.
48. Worked Example: Fixing a Cordless Vacuum With Weak Suction
Imagine a cordless stick vacuum that suddenly feels weak and begins pulsing after several minutes.
Step 1: The owner switches it off and removes it from the charger.
Step 2: The bin is nearly at the max line, so it is emptied.
Step 3: A dense plug of hair is found in the bend behind the floor head and removed.
Step 4: The brush roll has several hair wraps, especially around one end cap. These are removed according to the manual.
Step 5: The manufacturer identifies the main filter as washable. It is tapped clean, rinsed using the specified method, and left to dry for the full recommended period.
Step 6: The machine is not tested with the wet filter. A dry spare filter is installed instead.
Step 7: The owner checks the wand and inlet for additional blockages, then reassembles every seal and latch.
Result: Pulsing stops and pickup returns. The battery was not replaced because the symptoms were caused by restricted airflow rather than battery failure.
Lesson: Diagnose the airflow system before buying expensive parts.
49. Worked Example: An Upright Vacuum That Smells Hot on Carpet
An upright vacuum cleans hard floors normally but smells like hot rubber on thick carpet.
The owner stops immediately and unplugs it. The brush chamber contains heavy hair wrap. The belt is visibly glazed and stretched. The brush roll does not spin freely.
After checking the official manual, the owner removes the brush cover, cleans the roller ends, and replaces the belt with the correct part. The carpet-height setting is also corrected.
The machine is tested briefly. The smell does not return.
If the smell had continued, the correct next step would not be repeated testing. It would be service diagnosis because persistent overheating can indicate a motor or electrical problem.
50. Worked Example: A Robot Vacuum That Keeps Missing the Dock
A robot vacuum completes cleaning but wanders near the dock without connecting.
The owner:
- checks that the dock is powered;
- cleans charging contacts on robot and dock;
- wipes navigation sensors according to the manual;
- removes hair from the front caster;
- moves a loose cable away from the approach path;
- confirms the dock has not shifted sideways.
The robot docks normally afterward. The battery and navigation system were not defective; mechanical dirt and environmental clutter caused the failure.
51. A 15-Minute Vacuum Maintenance Routine
When the vacuum still works but seems overdue for attention, use this sequence:
Minutes 0–2: Disconnect and empty
Turn off, unplug or disconnect from charger, then empty the bin or inspect the bag.
Minutes 2–5: Inspect the brush
Cut and remove hair and thread. Check the ends and visible belt area.
Minutes 5–8: Inspect the air path
Check floor-head neck, wand, hose, and bin inlet.
Minutes 8–11: Inspect filters
Remove loose dust. Wash only approved washable filters. If washed, do not reinstall until completely dry.
Minutes 11–13: Wipe seals and sensors
Clean accessible gasket surfaces and robot sensors with the correct method.
Minutes 13–15: Reassemble and inspect
Confirm all latches, covers, filters, and connections before testing.
52. Vacuum Maintenance Checklist
- Machine switched off and disconnected before maintenance
- Model number confirmed
- Dust bin below max line or bag not overloaded
- Brush roll free of hair
- Brush end caps inspected
- Belt inspected if applicable
- Floor-head neck checked for clogs
- Wand checked
- Hose checked
- Bin or bag inlet checked
- Only approved filters washed
- Washable filters completely dry before installation
- Seals clean and seated
- Wheels free of hair
- Robot sensors clean if applicable
- Charging contacts clean if applicable
- Power cord undamaged
- No burning smell, grinding, or repeated shutdown after maintenance
Frequently Asked Questions
How often should I clean my vacuum filter?
Follow the model manual. Some manufacturers recommend washing certain filters monthly, while other filters have different schedules or should be replaced rather than washed. Usage conditions matter: pet hair and fine dust can require more frequent service.
Can I wash a HEPA filter?
Only if the manufacturer specifically says that exact filter is washable. “HEPA” does not automatically mean washable.
Why does my vacuum have weak suction after I cleaned the filter?
The filter may still be damp, may be installed incorrectly, or another restriction may remain in the hose, wand, brush head, or inlet. Recheck seals and air pathways.
How long should a washable filter dry?
Use the manufacturer’s instruction. Dyson, for example, specifies at least 24 hours for many washable cordless-vacuum filters. Thick filters may need more time depending on the model and environment. Never reinstall while damp.
Can I dry a vacuum filter with a hair dryer?
Avoid heat unless the manufacturer explicitly approves it. Many support instructions call for air drying and warn against high-heat methods.
Why does my vacuum smell like burning rubber?
A jammed brush or slipping belt is a common possibility on belt-driven models, but other mechanical or electrical causes exist. Stop the machine, disconnect power, inspect user-serviceable brush and belt areas, and do not continue if the source is unclear.
Why does my cordless vacuum pulse?
Some cordless vacuums pulse when airflow is restricted. Check the bin, filters, wand, hose or airway, and floor head. Model-specific diagnostic indicators should take priority.
Can I vacuum baking soda or drywall dust?
Small accidental amounts are different from intentionally vacuuming large quantities. Very fine powders can load filters rapidly and may exceed what an ordinary household vacuum is designed to handle. Use equipment appropriate for fine construction dust or large powder cleanup.
Why does the brush roll stop?
Hair wrap, a jammed object, belt failure, bearing resistance, motor protection, or an incorrect floor mode can all stop a brush. Disconnect power before inspection.
Should I oil the brush-roll bearings?
Not unless the manufacturer specifically instructs you to. Many modern brush assemblies are sealed or designed for replacement rather than lubrication.
Why does my robot vacuum keep getting lost?
Dirty optical sensors, blocked LiDAR windows, hair in wheels, dock movement, changing room layout, reflective surfaces, software issues, or map corruption can all contribute. Start with physical cleaning and model-specific support.
Is it worth repairing an old vacuum?
It depends on the fault, parts availability, machine quality, age, safety condition, and repair cost. A belt, hose, filter, battery, or brush may be economical. A major motor or electronic repair on a low-cost old machine may not be.
Conclusion: Protect Airflow First
Most vacuum maintenance becomes simpler when you remember the core system: debris must reach the intake, move through a clear airway, separate into a bag or bin, pass through filters, and leave the machine without forcing the motor to fight unnecessary resistance.
Start with the easy causes. Empty the dust system. Remove hair. Check elbows and hoses. Service only the filters that are designed for cleaning. Let them dry completely. Reassemble seals carefully. Then test.
The biggest mistake to avoid is treating every dirty part as washable or every weak-vacuum symptom as a motor failure. Water in the wrong filter, a punctured hose, or a poorly reinstalled seal can create a new problem during an attempt to solve the old one.
If you take one action today, turn the machine off, inspect the brush roll and bin, then locate the official filter instructions for your exact model. Those three checks prevent a surprising share of performance problems before they become repairs.
Sources and Further Reading
- Dyson Support — model-specific vacuum filter and blockage guidance
- Shark Support — Upright Vacuum Maintenance and Common Inquiries
- BISSELL Support — Brushroll Maintenance
- BISSELL Support — CleanView Brush Roll Maintenance
Image Credits
- “A vacuum cleaner.jpg” — Parvathisri, Wikimedia Commons, CC BY-SA 3.0.
- “Robot vacuum cleaner.jpg” — Mamirobothk, Wikimedia Commons, CC BY-SA 3.0.
- “Staubsauger Zubehoer.jpg” — Markus Schweiss, Wikimedia Commons, CC BY-SA 3.0.