

Quick answer: Better handwriting usually comes from improving a small number of repeatable features rather than trying to make every letter “beautiful.” Start by collecting a normal writing sample, identify the two or three features that most reduce legibility—such as inconsistent letter size, crowded words, drifting baselines, unclear letter shapes, or rushed joins—then practice those features slowly before adding speed. Use a comfortable pen and paper, keep your grip relaxed, write from the arm and fingers together rather than squeezing the pen, and finish each practice session by writing real sentences at normal speed. Improvement becomes much easier when you measure legibility and consistency instead of copying decorative alphabets indefinitely.
 A useful handwriting routine combines deliberate form practice with ordinary sentence writing. Image: Jiafei Slay Queen, Wikimedia Commons, CC0 1.0.
Handwriting is a motor skill, a visual organization skill, and a communication tool at the same time. That combination explains why simply buying a nicer pen or copying a calligraphy alphabet rarely fixes everyday writing. Your letters may look attractive in isolation but become difficult to read when you write notes quickly, fill out a form, take an exam, label a package, or write a card.
Research on handwriting legibility repeatedly points to concrete dimensions such as letter formation, spacing, alignment, height, slant, and unnecessary or missing strokes. A systematic review of curriculum-based handwriting interventions also found moderate evidence that structured handwriting instruction can improve legibility. Although much of the intervention literature focuses on children, adult handwriting remains a fine-motor task, and recent adult research continues to find relationships between fine-motor control and handwriting performance. The practical lesson is not that every adult should return to elementary-school worksheets. It is that handwriting can be treated as a trainable system with observable parts.
This guide is designed for adults, older students, and anyone who can already write but wants their everyday handwriting to become clearer, more consistent, faster, or less tiring. It is not a calligraphy course, and it does not require you to adopt a particular cursive style. The aim is functional handwriting that another person can read reliably and that you can produce without excessive effort.
1. Decide What “Better Handwriting” Means for You
Do not begin with drills until you know what problem you are trying to solve. “My handwriting is bad” is too vague to guide practice.
Your goal might be one of the following:
- make class or meeting notes easier to reread;
- write more neatly on forms and labels;
- improve cursive fluency;
- make print handwriting more consistent;
- write faster without losing legibility;
- reduce hand fatigue during long writing sessions;
- make signatures, cards, or personal letters look more intentional;
- switch from an awkward hybrid style to a simpler personal style.
Each goal leads to different practice. If your notes are unreadable because words collapse together, spacing matters more than ornate letter shapes. If forms are difficult because your lowercase a, o, and u resemble one another, letter differentiation is the priority. If your handwriting is clear but painfully slow, you need rhythm and automation rather than more careful drawing.
Practical task: Write one sentence describing the outcome you want. For example: “I want to take one page of meeting notes at normal speed and still read every line the next day.” This becomes your quality standard.
2. Create a Baseline Sample Before You Practice
A baseline prevents you from judging progress by memory. Handwriting changes from day to day with speed, fatigue, paper, mood, and writing purpose, so use several short samples rather than one carefully staged line.
On ordinary ruled paper, collect three samples:
- Copy sample: Copy a paragraph of roughly 80–120 words at a comfortable pace.
- Natural sample: Write a short note from memory, such as what you did yesterday or a summary of something you learned.
- Fast sample: Write for two minutes as if you were taking notes during a lecture or meeting.
Do not slow down for the test. You want to capture the handwriting you actually use.
Date the page. Keep it somewhere safe. Repeat the same three-sample test every two to four weeks. Your baseline is more useful than a social-media before-and-after image because it reflects your real tasks and your real writing speed.
Common mistake: Writing a beautiful baseline because you know it will be compared later. That hides the problems you need to fix. A baseline is diagnostic, not performative.
3. Score Legibility With a Simple Checklist
You do not need handwriting-analysis software. Use a small set of observable criteria.
Read your sample after a few hours, or ask someone else to read it without context. Score each category from 1 to 5:
- Letter recognition: Can individual letters be identified?
- Word spacing: Are boundaries between words obvious?
- Letter size: Are lowercase letters roughly consistent in height?
- Baseline: Do words remain reasonably aligned with the ruled line?
- Slant: Is the direction of letters reasonably consistent?
- Shape differentiation: Can similar letters such as n/u, a/o, r/v, or m/n be distinguished?
- Speed stability: Does the writing become much worse toward the end of the sample?
Legibility research has examined many of these same dimensions, including spacing, alignment, letter height, slant, added strokes, and missing strokes. That does not mean you need laboratory scoring. It means that “good handwriting” can be broken into things you can see and change.
Circle only the two weakest categories. Those become your first training targets. Trying to fix seven variables at once usually produces tense, artificial writing.
4. Choose Print, Cursive, or a Hybrid Style Deliberately
You do not have to use traditional cursive to have excellent handwriting. Print, cursive, and hybrid handwriting can all be legible.
Print separates letters and can be especially clear on forms, labels, technical notes, and short annotations. Cursive connects many letters and can create smoother rhythm once the joins are automatic. Hybrid writing combines joined and unjoined forms and is common among adults.
If your current hybrid style is readable, you do not need to eliminate it. Simplify only the forms that create confusion.
For example, you might print uppercase letters but use mostly cursive lowercase letters. You might join common combinations such as th, ing, or er but lift the pen before letters that create awkward loops. The goal is repeatability.
Decision rule: Choose the style that lets you produce distinct letters with the least unnecessary movement. Your handwriting is a tool, not a historical reenactment.
5. Fix the Most Ambiguous Letters First
Adults often waste time practicing every letter equally. Instead, identify the letters that cause actual reading errors.
Look through your sample and mark any letter that you misread. Common trouble pairs include:
- a and o;
- u and v;
- n and r;
- m and n;
- e and c;
- t and l;
- g, q, and y in fast writing;
- uppercase I, lowercase l, and the numeral 1;
- zero and uppercase O in technical notes.
Choose one stable shape for each ambiguous letter. Practice it in three levels: isolated letter, short word, normal sentence.
For example, if your r resembles v, write:
r r r — road, river, correct — “The report arrived early.”
Do not fill five pages with isolated rs. The shape must survive inside words.
6. Standardize Letter Height Before You Chase Style
Inconsistent size is one of the fastest ways to make writing look chaotic even when every individual letter is recognizable.
Think of lowercase letters as belonging to height groups:
- x-height letters: a, c, e, i, m, n, o, r, s, u, v, w, x;
- ascenders: b, d, f, h, k, l, t;
- descenders: g, j, p, q, y.
Your exact alphabet style may differ, but the principle remains useful. Most ordinary lowercase letters should share a roughly similar body height. Ascenders should rise predictably. Descenders should fall predictably.
Use ruled paper and deliberately write words that mix groups: building, quickly, framework, tomorrow, planning. Check whether the middle bodies stay consistent.
Verification: Cover the tops of the ascenders and the bottoms of descenders. Does the middle band of the line look even, or does every letter occupy a different height? A stable middle band dramatically improves visual order.
7. Fix Word Spacing With a Physical Reference
Words that merge together are difficult to read even when the letters themselves are excellent.
A useful word gap is usually larger than the gaps between letters inside a word, but it does not have to be huge. If your spacing is inconsistent, create a temporary reference. After each word, imagine the width of a small lowercase o, a pen-tip width, or another repeatable unit before starting the next word.
Practice short phrases rather than isolated words:
- clear notes improve review;
- small changes build consistency;
- write slowly before writing quickly.
Then remove the conscious reference once the spacing becomes automatic.
Common mistake: Overcorrecting by putting giant gaps between words. The goal is visible grouping, not decorative emptiness.
8. Improve Letter Spacing Inside Words
Internal spacing is different from word spacing. Some writers crowd letters so tightly that rn looks like m. Others leave such large gaps that a word appears fragmented.
Focus on rhythm. Instead of positioning every letter separately, think of a word as a sequence of evenly timed movements.
Write a word like minimum slowly. It contains repeated vertical forms that expose spacing problems. Then try communication, remember, and organization.
If spacing collapses as speed rises, do not simply force yourself to write slowly forever. Practice at three speeds: careful, comfortable, and fast. Compare what changes. You may discover that only one letter combination causes the collapse.
9. Use the Baseline as an Anchor
If your writing drifts upward and downward, ruled paper is not a crutch. It is feedback.
Practice keeping the main bodies of letters sitting on the line. Do not press the letters mechanically into it; simply use the line as a visual boundary.
When you become more consistent, try wider-ruled paper, then narrower ruling, then blank paper with a guide sheet underneath if the paper is translucent enough.
For blank cards or envelopes, lightly place a removable guide sheet beneath the writing area or use a ruler to establish a visual boundary before writing. The objective is not perfect geometry. It is preventing the line of text from visibly climbing or falling.
10. Stabilize Slant Instead of Forcing a Particular Slant
Handwriting can slant right, remain mostly upright, or even lean slightly left. Legibility depends more on consistency than on copying one prescribed angle.
Look at five tall letters in a line—such as l, h, or t. Imagine lines running through their main stems. Do they point in roughly the same direction?
If not, draw several light parallel guide strokes in the margin and use them as a reference for a few minutes. Then return to normal writing.
Do not obsess over exact degrees. A ruler-and-protractor approach can turn handwriting into drawing. Your goal is a stable movement pattern.
11. Reduce Unnecessary Strokes
Extra loops, retracing, hooks, and corrections slow writing and can reduce clarity.
Watch yourself write several common letters. Do you repeatedly retrace the same line? Do you add a flourish that changes shape every time? Do you start letters from inconsistent points and then correct them mid-stroke?
Simplify. A practical handwriting alphabet usually uses fewer decisions, not more.
This does not mean every letter must be minimalist. It means decorative movement should not interfere with recognition or rhythm. Save ornament for signatures, cards, or calligraphy practice rather than ordinary notes.
12. Learn Letter Families Instead of 26 Separate Problems
Many letters share movement patterns. Practicing families can make training more efficient.
For print or semi-cursive Latin handwriting, possible families include:
- round forms: c, o, a, d, g, q;
- vertical forms: i, l, t, u, j;
- hump forms: n, m, h, r;
- diagonal forms: v, w, x, y, k;
- loop or descender forms: g, j, y, f depending on style.
If your round letters are inconsistent, practice the underlying oval movement first, then build several letters from it. This creates transferable control.
Why it works practically: You stop treating every character as a unique picture and start reusing stable movements.
13. Choose a Pen That Lets You Relax
The “best handwriting pen” is not universal. A pen that feels effortless to one person may feel slippery, heavy, or scratchy to another.
Test several inexpensive options before buying premium stationery:
- ballpoint;
- gel pen;
- rollerball;
- fine-liner;
- fountain pen if you already enjoy using one.
Evaluate four things: grip comfort, required pressure, line width, and how quickly the ink dries on your preferred paper.
If you press hard, a pen that writes smoothly with light pressure may help you reduce tension. If your letters fill in because the line is too thick, use a finer point. If you smear ink easily, choose a faster-drying combination of pen and paper.
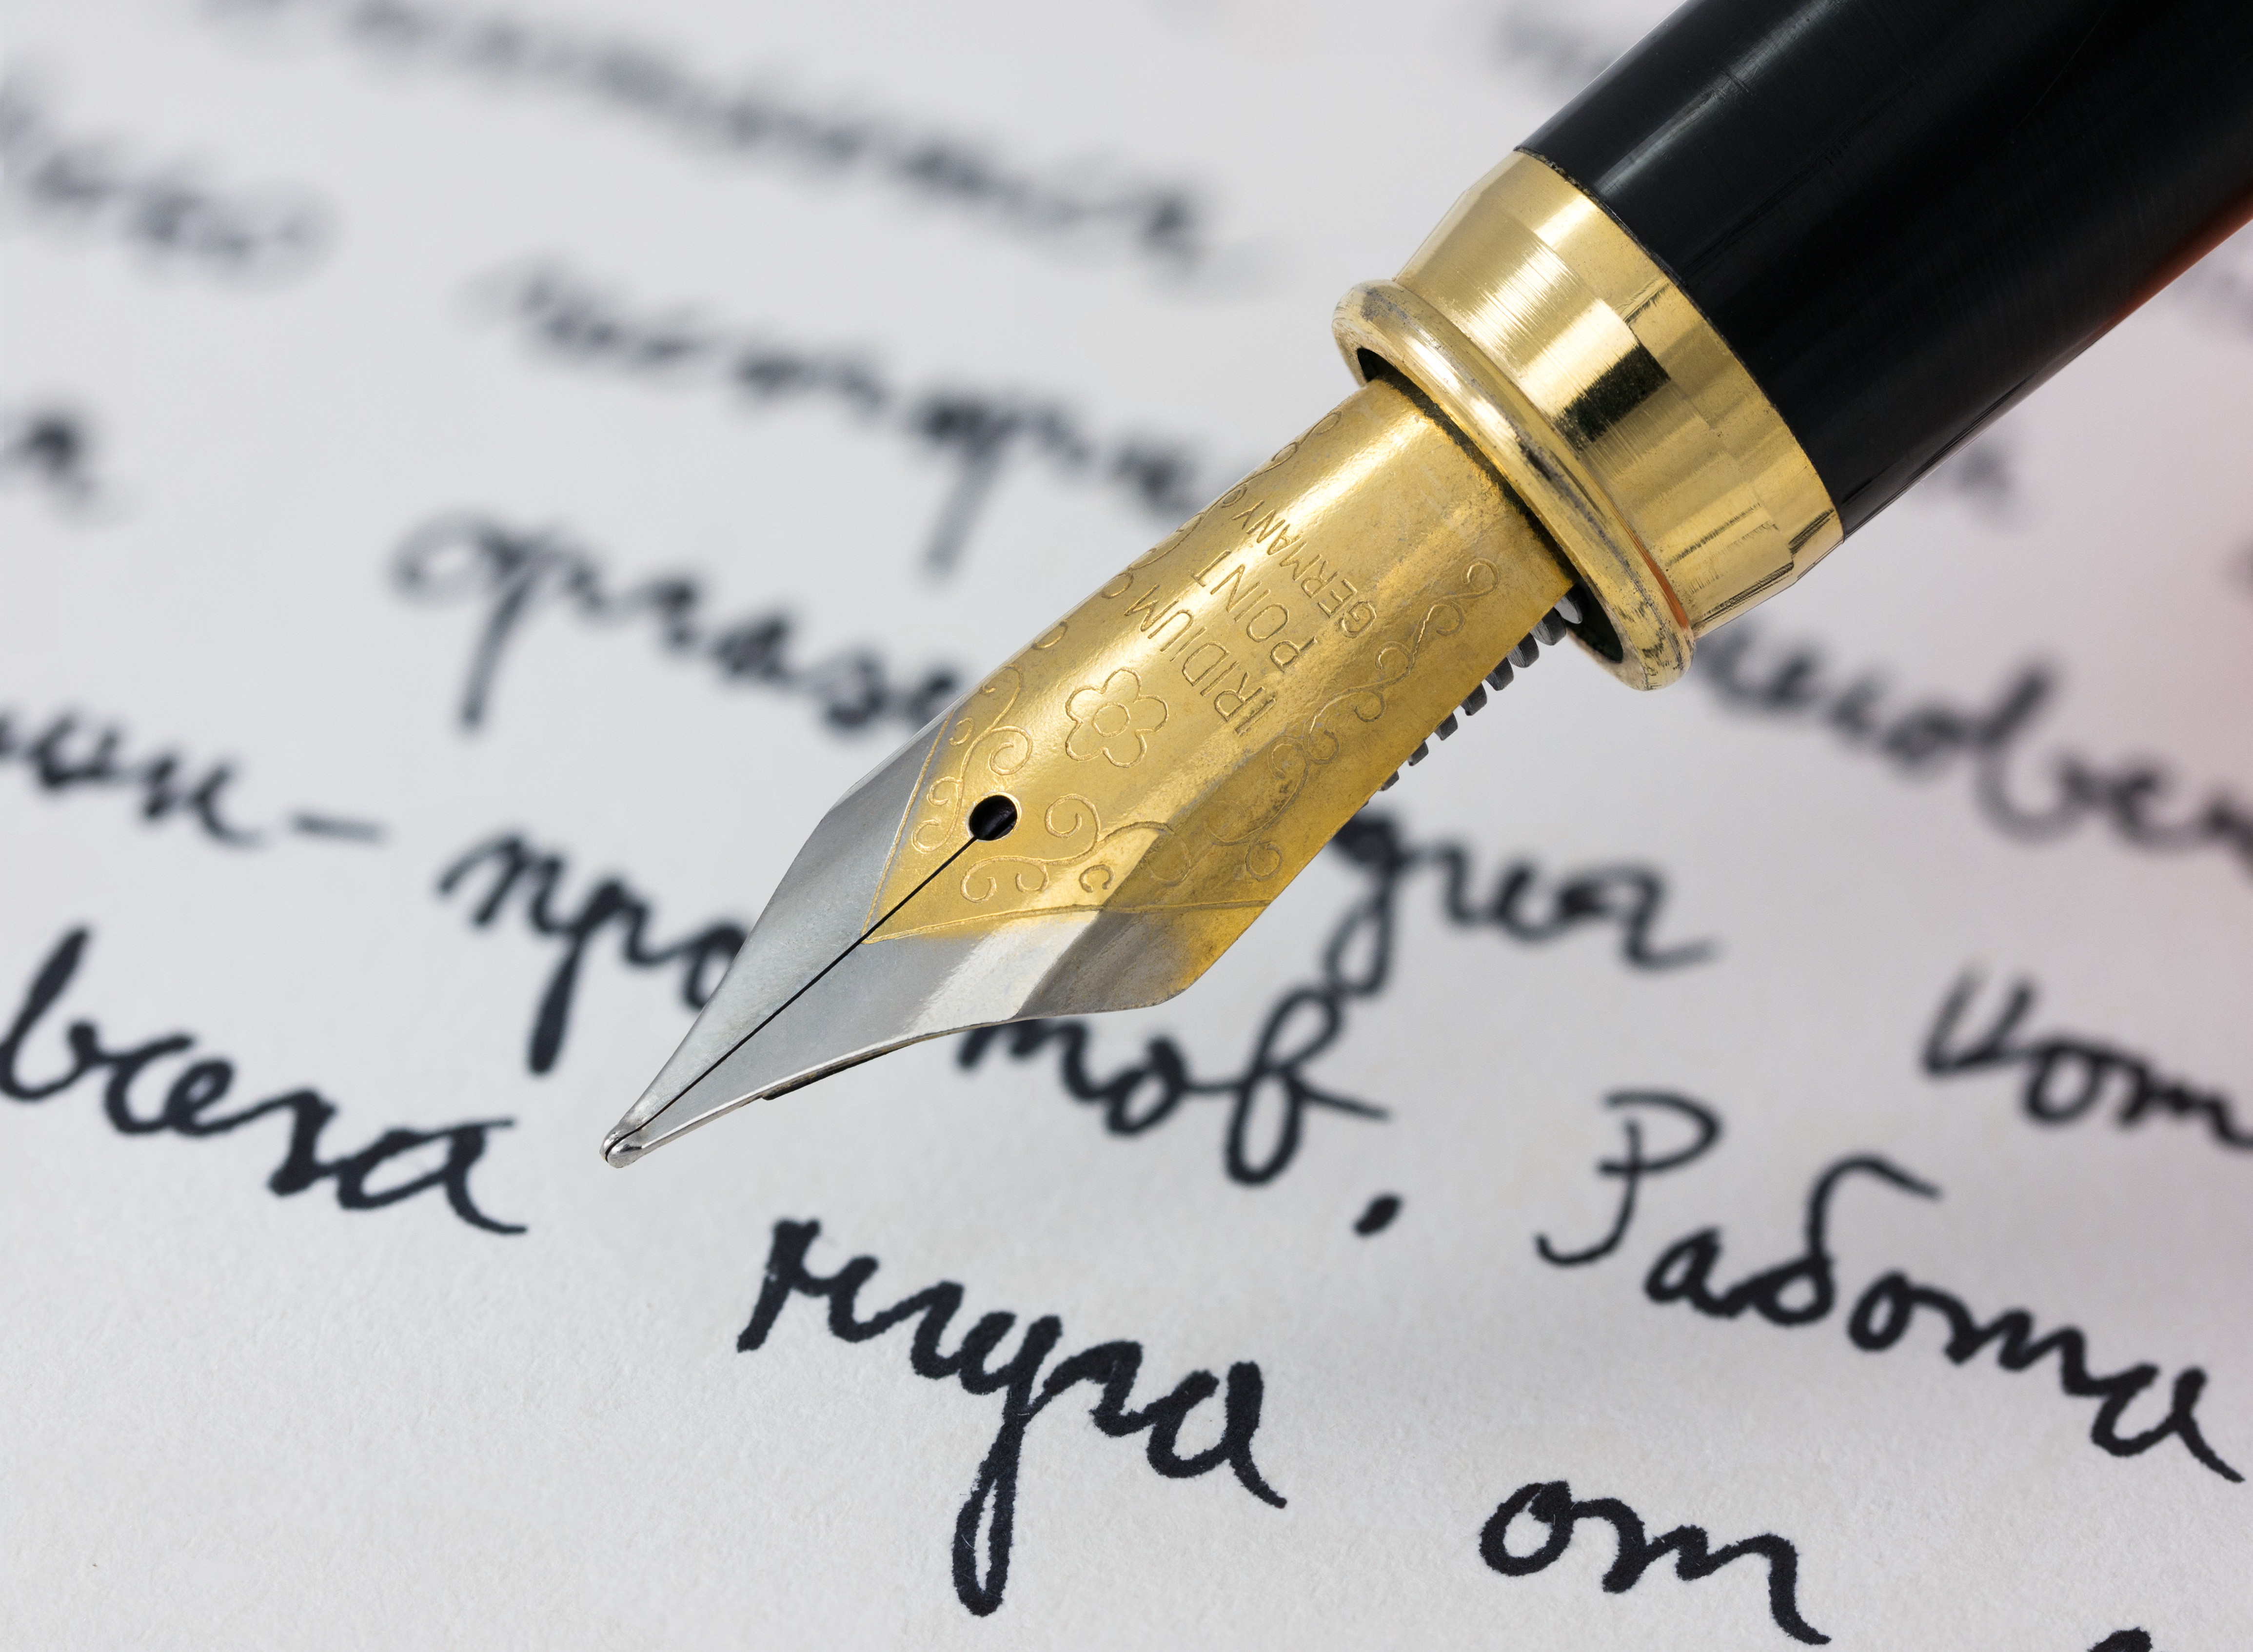 Different pens change friction, line width, pressure, and ink flow. The useful pen is the one that supports relaxed, repeatable writing. Image: Petar Milošević, Wikimedia Commons, CC BY-SA 4.0.
14. Stop Squeezing the Pen
A death grip does not make handwriting more controlled. It often makes movement smaller, more tiring, and less fluid.
Hold the pen firmly enough that it does not slide, but lightly enough that your fingertips are not whitening or aching. The pen should rest against the hand rather than being pinched continuously with maximum force.
Try this experiment:
- Write one sentence with your usual grip.
- Shake your hand loose.
- Write the same sentence while intentionally reducing grip pressure by about one-third.
- Compare control and comfort.
If the pen requires heavy downward force to produce a clear line, try a different pen. Tool friction can encourage unnecessary tension.
If you experience persistent hand pain, weakness, numbness, tremor, or a sudden unexplained change in handwriting, do not assume the solution is more practice. Those symptoms may require medical or occupational-therapy evaluation.
15. Use a Stable but Comfortable Grip
Many handwriting guides present one grip as the only correct grip. Real adults use several functional variations.
A practical grip should let the pen move while keeping the wrist and fingers comfortable. The pen is usually supported by the thumb, index finger, and middle finger in some combination, but individual variations can still work well.
Do not force your hand into an unfamiliar textbook position if your current grip is comfortable and your problem is spacing or letter shape. Change grip only when it clearly contributes to pain, excessive pressure, poor control, or blocked movement.
Test: Can you write a full paragraph without finger pain or a deep indentation from the pen? If not, tension and grip deserve attention.
16. Position the Paper So Your Hand Can Move Naturally
Paper position affects the wrist, forearm, and slant of the writing.
Instead of keeping the sheet perfectly square with the desk because it looks tidy, rotate it slightly until your forearm and writing direction feel natural. Right- and left-handed writers often prefer different angles.
Your non-writing hand should stabilize or reposition the page rather than leaving the writing hand to chase the bottom corner.
As you move down the page, slide the paper rather than curling your wrist dramatically. This small habit improves both comfort and consistency during longer sessions.
17. Sit Close Enough to the Writing Surface
Good handwriting becomes harder if the desk setup forces the shoulder upward, the torso to twist, or the wrist to hover at an awkward angle.
Use a chair and desk height that let your forearms rest comfortably. Keep the page close enough that you are not reaching. Relax the shoulder of the writing arm.
You do not need a perfectly ergonomic workstation for a five-minute note, but long journaling, exam practice, or study sessions benefit from a stable position.
If your handwriting looks neat for the first line and deteriorates after ten minutes, fatigue and posture may be part of the problem.
18. Move More Than Just the Fingertips
Very small finger-only movement can make long writing sessions tiring. At the opposite extreme, moving entirely from the shoulder can feel unnatural for ordinary handwriting.
Use a coordinated movement: fingers shape details, while the hand and forearm gradually travel across the line.
A simple drill is to write a row of smooth connected ovals while allowing your hand to travel rather than repeatedly compressing the fingers. Then write a sentence with the same feeling of continuous movement.
The objective is not to imitate a formal penmanship method. It is to avoid getting “stuck” in one tiny area of the page and stretching fingers sideways to compensate.
19. Practice Strokes for Two Minutes, Not Twenty
Basic strokes are useful, but they become low-value when they dominate the session.
Spend one or two minutes on shapes connected to your problem:
- ovals for round letters;
- vertical strokes for consistent height;
- arches for n, m, and h;
- underturns for u and related cursive forms;
- diagonal strokes for v, w, x, and y.
Then immediately transfer the stroke into letters, words, and sentences. A drill should prepare real writing, not replace it.
20. Slow Down Enough to Learn, Then Speed Up Enough to Transfer
Practice that is always slow can create beautiful handwriting that disappears the moment you take notes quickly.
Use three gears:
- Learning speed: slow enough to notice shape and spacing.
- Normal speed: the pace you use in everyday writing.
- Pressure speed: slightly faster than normal, used briefly to reveal which forms collapse.
Spend most of the session between learning and normal speed. Use pressure speed only as a diagnostic challenge.
Recent research on handwriting fluency emphasizes that writing speed and line quality interact in complex ways, while other work suggests that fluency and legibility can involve a trade-off. The practical takeaway is not to chase an arbitrary millimeters-per-second benchmark. It is to develop a speed at which your writing remains readable and repeatable.
21. Train Common Words, Not Only Alphabets
Everyday handwriting is dominated by repeated words and letter combinations. Practice them.
Choose 20 words you often write in your own context. A student might choose therefore, because, analysis, example, question, important. A project manager might choose deadline, meeting, review, approval, client, schedule.
Write each word three times, focusing on rhythm and clarity. Then put the words into sentences.
This makes training task-specific. You are building movements you will actually use rather than perfecting rare letter combinations.
22. Practice Numbers and Symbols Separately
People often improve letters while leaving numbers, dates, arrows, currency symbols, and punctuation unreadable.
If you write phone numbers, measurements, financial notes, formulas, or technical labels, create a number sheet.
Make sure these pairs are distinguishable:
- 1 and 7;
- 0 and 6;
- 0 and O;
- 5 and S;
- 2 and Z where relevant.
Decide whether to cross 7 or slash 0 only if your context benefits from it. Consistency matters more than adopting every technical convention.
23. Practice Capital Letters for Real Uses
Capital letters appear less frequently than lowercase letters, so awkward forms can persist unnoticed.
Practice names, cities, headings, days, months, and the first words of sentences. If your decorative uppercase letters slow you down, simplify them.
For forms and labels, plain printed capitals may be more useful than cursive capitals. You can maintain different functional styles for different contexts.
24. Build a Personal Model Alphabet
Once you have corrected confusing shapes, write your own reference alphabet—not someone else’s.
Create one line of lowercase letters, one line of capitals, and one line of numerals in the style you actually intend to use. Keep it inside your notebook or practice folder.
This becomes a consistency reference. If your lowercase g starts changing shape from day to day, compare it with your chosen model.
Your model can evolve. The purpose is to reduce indecision, not freeze your handwriting forever.
25. Copy Short Passages With a Specific Goal
Copywork is useful when it has a target.
Choose a paragraph of 80–150 words. Before starting, choose one focus such as:
- consistent x-height;
- clear word spacing;
- stable slant;
- lighter pressure;
- faster rhythm without crowding.
Write the paragraph once. Then review only that focus. Do not criticize every letter.
Repeat the same paragraph several days later. Because the words are familiar, you can observe whether the targeted feature improved.
26. Use Dictation to Test Real-Time Writing
Copying lets your eyes move back and forth between source and page. Real note-taking often requires listening, understanding, and writing at the same time.
Use a podcast, audiobook, lecture, or your own recorded voice. Play a short sentence, pause, and write it. Gradually reduce pauses.
This reveals which letter forms deteriorate under cognitive load. You may discover that handwriting is neat during copying but collapses when you must think about content.
Do not attempt verbatim transcription at first. Practice summarizing a spoken paragraph in one or two handwritten sentences. That trains functional note-taking rather than stenography.
27. Practice From Memory So Composition Becomes Part of the Skill
Handwriting during real life is not just motor output. You are also choosing words and organizing ideas.
At the end of each session, write 100–150 words without copying. Describe your day, summarize an article, explain a concept, or write a short plan.
Then compare this natural sample with your drills. Which improvements transferred automatically? Which disappeared?
Transfer is the true test. A perfect row of practice words does not matter if your normal writing remains unreadable.
28. Use Ruled Paper Strategically
Paper ruling can support different training goals.
Wide ruling gives beginners more space to control shapes. Narrow ruling helps refine compact everyday writing. Graph paper can expose spacing and height inconsistencies. Blank paper tests baseline control.
You do not need special handwriting notebooks. Ordinary school paper and graph paper are enough for most adults.
If you struggle with letter height, spend several sessions on wider ruling. If your real work uses small notebooks, transition gradually to the actual paper size you will use.
29. Use a Pencil When Feedback Matters More Than Appearance
Pencils provide more friction than many pens and can make pressure visible. Dark, deeply embossed lines reveal excessive force. Very faint lines can reveal inadequate control or a pencil that is too hard for you.
Pencil practice can therefore be useful for pressure awareness. But if your daily writing uses a ballpoint or gel pen, return to that tool during the same session so the skill transfers.
 Handwriting practice should eventually use the same kinds of tools and writing situations you face in everyday life. Image: Hussein Afzal, Wikimedia Commons, CC0 1.0.
30. Learn to Notice Pressure Through the Back of the Page
After writing a paragraph, turn the page over and run a fingertip gently across the back. Deep grooves suggest heavy pressure.
You do not need zero indentation. Some pens and papers naturally create texture. You are looking for excessive pressure that corresponds with hand fatigue.
Try writing the same paragraph with progressively lighter pressure while preserving a clear line. The lowest comfortable pressure that still produces reliable ink is usually preferable to pressing harder for psychological “control.”
31. Do Not Confuse Calligraphy With Everyday Handwriting
Calligraphy is a valuable art, but it optimizes different things. It may use specialized nibs, controlled stroke contrast, deliberate spacing, and slow construction.
Everyday handwriting must survive speed, ordinary pens, imperfect surfaces, and divided attention.
If you enjoy calligraphy, use it as a separate practice. Borrow principles such as spacing, rhythm, and consistent forms, but do not expect your meeting notes to look like a finished calligraphic piece.
32. Improve Your Signature Separately
A signature is not the same task as ordinary handwriting. It may be stylized, abbreviated, or intentionally difficult to read.
If you want a more consistent signature, practice the exact signature as one continuous motor pattern. Avoid constantly redesigning it.
For legal or financial use, consistency and your normal established practice matter more than decorative beauty. Do not change a signature merely because you are improving the rest of your handwriting if the change would create unnecessary confusion in your records.
33. Use Short Daily Practice Instead of Rare Marathon Sessions
Motor skills benefit from repetition, but long sessions can create fatigue and sloppy compensation.
A practical routine is 10–20 minutes, four to six days per week. That is enough time to focus without turning practice into a major project.
A 15-minute session can be structured like this:
- 2 minutes: relaxed strokes or problem letter family;
- 4 minutes: targeted words;
- 4 minutes: sentence copy at controlled speed;
- 3 minutes: natural writing from memory;
- 2 minutes: review and mark one thing to practice tomorrow.
Do not extend the session simply because a line looks bad. Stop before fatigue teaches you worse movement patterns.
34. Use a Weekly Theme
Instead of fixing everything each day, assign one main theme to a week.
Example:
- Week 1: letter size and x-height;
- Week 2: word spacing;
- Week 3: ambiguous letters;
- Week 4: speed and rhythm;
- Week 5: natural note-taking transfer.
You will still pay attention to general legibility, but one theme receives deliberate feedback. This reduces cognitive overload.
35. Increase Speed With Timed Paragraphs
Once your normal writing is legible, introduce time gently.
Choose a paragraph of about 100 words. Time how long it takes at a comfortable pace. Do not race.
Repeat the paragraph on another day and aim to write slightly faster while preserving readability. If speed improves but two or three letters collapse, isolate those forms and practice them.
Measure success as legible output per unit of time, not raw speed. A faster page that nobody can read is not progress.
36. Use the “One Pass Later” Test
One of the best legibility tests is delayed self-reading.
Write a page of notes, close the notebook, and return a day later. Read every line without reconstructing from memory.
Circle any word you cannot identify immediately. Then identify the exact cause: unclear letter, crowded word, missing crossbar, drifting line, abbreviation you forgot, or punctuation problem.
This converts vague frustration into targeted practice.
37. Ask Another Person to Read a Sample
Your brain is good at recognizing your own writing because you remember what you intended to write. Another reader provides a stricter test.
Give someone a short paragraph without telling them the content. Ask them to underline anything they cannot read confidently.
Do not ask, “Is my handwriting nice?” That invites a social answer. Ask, “Which words were difficult to read?” That creates usable data.
38. Use Photos to Compare Progress
Take a clear photo of your baseline page and later samples in similar lighting. Put them side by side.
Look at overall texture before individual letters. Is the page more even? Are word boundaries clearer? Does the line of text look stable? Are letters closer to a consistent size?
This visual comparison often reveals progress that is hard to notice day by day.
39. Practice Under the Conditions That Matter
If you are improving handwriting for exams, practice timed answers on exam-style paper. If you are improving meeting notes, write while listening. If you need clear labels, practice larger print with a marker. If you want personal letters, practice on the stationery you will actually use.
Skill becomes durable when the practice context resembles the target context.
A person who practices only slow cursive in a premium notebook may still struggle with a cheap ballpoint on a clipboard. Include realistic conditions before declaring the problem solved.
40. Build a Better Note-Taking Handwriting Style
Notes require a compromise between speed and readability. Do not write every word as carefully as a greeting card.
Create a simplified note-taking style:
- use clear headings;
- leave more space between topics;
- use consistent bullet symbols;
- create a small set of abbreviations you will remember;
- underline or box only genuinely important terms;
- print unfamiliar names, numbers, and technical terms clearly.
Layout can compensate for imperfect penmanship. A moderately neat page with good structure is easier to review than beautiful letters packed into an unstructured block.
41. Improve Exam Handwriting Without Sacrificing Time
If you write timed exams, the goal is not visual elegance. It is readable answers produced within the time limit.
Practice full paragraphs under a realistic time constraint. Keep letters large enough to distinguish. Leave clear spaces between words. Make punctuation visible. Avoid elaborate capitals.
At the end of each practice answer, review only the words most likely to confuse a grader. Those forms deserve targeted work.
If your hand becomes painful or severely fatigued during normal exam-length writing, discuss accommodations or professional evaluation with the appropriate school or healthcare professional rather than trying to train through significant pain.
42. Write More Clearly on Forms
Forms usually favor simple print.
When filling a form:
- slow down slightly;
- use block capitals if requested;
- keep letters inside boxes;
- distinguish 1, I, and l;
- distinguish 0 and O where ambiguity matters;
- avoid decorative joins;
- check names, addresses, dates, and account numbers separately.
A person can use flowing cursive in a journal and plain print on a form. Functional handwriting changes with context.
43. Make Envelopes and Labels Easier to Read
For addresses, packages, storage labels, or medication organization, clarity matters more than personal style.
Use larger letters, strong contrast, generous word spacing, and simple numerals. Avoid writing over folds or textured surfaces. Use a pen that will not smear easily on the material.
If the label may be read by scanning equipment or delivery workers, plain print is usually safer than highly connected cursive.
44. Adapt Practice for Left-Handed Writing
Left-handed writers may encounter different smearing, wrist-position, and page-angle problems depending on the direction of the writing system and the ink used.
Experiment with rotating the page and positioning it so your hand does not have to hook sharply over the writing line. Faster-drying ink can reduce smearing. Keep the writing hand relaxed and move the page when necessary.
Do not force a right-handed model of paper angle or hand position. The goal is a neutral, controllable movement path.
45. Adapt Practice if You Write in More Than One Script
If you write Latin plus Arabic, Devanagari, Chinese characters, Cyrillic, or another script, treat each writing system as its own motor vocabulary.
The general principles—spacing, scale, alignment, rhythm, pressure, and repeated form—still matter, but letter families, joining rules, stroke order, direction, and page use differ.
Do not assume that an exercise designed for English cursive automatically improves another script. Use script-specific models and educational resources.
46. Know When “Bad Handwriting” Is Really a Vision or Motor Problem
Sometimes legibility problems are not primarily about practice habits. Vision changes, hand injury, arthritis, tremor, nerve problems, medication effects, or other conditions can affect writing.
If your handwriting has always been messy but stable, skill practice may help. If your handwriting changes suddenly, becomes much smaller or shakier without explanation, or is accompanied by pain, weakness, numbness, or loss of coordination, seek appropriate medical evaluation instead of self-diagnosing through handwriting analysis.
Handwriting itself cannot diagnose a neurological condition. Online “personality” or disease claims based on a writing sample are not a substitute for medical assessment.
47. Avoid Graphology Claims While You Improve Penmanship
Handwriting practice should focus on observable motor and visual features. Claims that slant, loops, pressure, or letter shape reliably reveal personality are different from practical handwriting instruction.
You can analyze your spacing, alignment, size, and formation because those affect legibility. That does not mean those features prove character traits, honesty, confidence, or intelligence.
Keep the goal grounded: clearer communication, smoother movement, appropriate speed, and comfort.
48. Do Not Buy a Large Collection of Practice Books Too Early
A worksheet can provide useful models, but the main constraint is usually not a lack of materials.
Before buying anything, practice for two weeks with ordinary ruled paper and one reference alphabet. If you discover that you specifically need structured cursive joins, italic handwriting, Spencerian penmanship, or another formal style, then buy a resource designed for that goal.
Buying ten books at the start can create the illusion of progress while delaying the actual motor practice.
49. Troubleshoot Common Handwriting Problems
“My handwriting is neat only when I write extremely slowly.”
You have trained appearance at learning speed but not transfer. Add normal-speed sentences every session. Identify the exact letters or spacing patterns that collapse under speed and practice those transitions.
“My writing starts neat and becomes messy halfway down the page.”
Check fatigue, grip pressure, posture, and attention. Shorten practice sessions. Move the page instead of stretching the wrist. Take brief pauses during long writing tasks.
“All my letters are different sizes.”
Use ruled or graph paper and practice one stable x-height. Group letters by body height and ascenders/descenders. Do not focus on decoration until size is stable.
“My words run together.”
Use a temporary spacing reference after each word. Practice phrases, not isolated words. Increase the visual gap without exaggerating it.
“My cursive is difficult for other people to read.”
Unjoin the combinations that cause ambiguity. Simplify loops. Print proper nouns, numbers, and technical terms if necessary. Hybrid handwriting is acceptable if it improves communication.
“I press so hard that my hand hurts.”
Try a smoother pen, deliberately reduce grip and downward pressure, and shorten sessions. Persistent pain deserves professional assessment rather than more forceful practice.
“My hand shakes when I try to write neatly.”
Some people become tense when they over-control movement. Try larger writing, lighter pressure, and more rhythmic practice. If shaking is new, significant, or occurs outside deliberate penmanship practice, seek medical guidance.
“My handwriting is readable but ugly.”
Decide whether appearance actually interferes with your goal. If not, you may already have functional handwriting. If aesthetics matter, work on consistent slant, size, spacing, and simplified forms before decorative style.
“I keep changing letter styles.”
Create a personal model alphabet and choose one default form for each problem letter. Use alternatives only when they serve a specific context.
“My writing looks cramped.”
Increase word spacing, slightly enlarge x-height, loosen grip, and check whether the paper ruling is too narrow for your natural movement.
50. Use a Four-Week Improvement Plan
Week 1: Diagnose and stabilize
- Create baseline samples.
- Score letter recognition, spacing, size, baseline, and slant.
- Choose two problem categories.
- Practice 10–15 minutes on four or five days.
- Use ruled paper and a comfortable pen.
Do not chase speed yet. Your goal is to create repeatable forms.
Week 2: Build word rhythm
- Practice problem letter families.
- Write common words from your real life.
- Use a consistent word-space reference.
- End each session with a natural paragraph.
Compare practice words with the same forms inside normal sentences.
Week 3: Transfer to realistic writing
- Copy one paragraph at normal pace.
- Use short dictation exercises.
- Take notes from a short video or podcast.
- Practice numbers, dates, and headings.
At this stage, legibility should survive cognitive load.
Week 4: Add speed and review
- Time one familiar paragraph.
- Write one slightly faster sample.
- Retest your original three baseline tasks.
- Ask another person to read a short sample.
- Choose the next two weak categories.
Do not judge the month by whether your handwriting became “beautiful.” Judge whether it became easier to read, more stable, or easier to produce.
51. Worked Example: Fixing Fast, Crowded Meeting Notes
Imagine Daniel, who takes project notes by hand. His writing is readable when he journals slowly, but his meeting notes become a dense line of joined letters that he cannot read the next day.
Baseline: Daniel writes a copied paragraph, a natural paragraph, and two minutes of fast notes. His slow writing scores well for letter recognition and baseline. The fast sample scores poorly for word spacing and differentiation between m, n, and r.
Diagnosis: His problem is not general handwriting quality. It is speed-related crowding.
Week 1: Daniel practices hump-family letters—n, m, h, r—then writes phrases containing them. He uses slightly larger spacing between words.
Week 2: He listens to a five-minute podcast and pauses after each sentence to summarize in writing. He prints technical terms and names instead of forcing them into fast cursive.
Week 3: He introduces abbreviations for recurring meeting words such as “project,” “deadline,” and “review,” but limits himself to abbreviations he can remember without a legend.
Week 4: He retakes the fast sample. The letters are not dramatically prettier, but another person can now identify nearly every word. Daniel can reread the page the next day without reconstructing it from memory.
That is a successful outcome: functional legibility under the condition that mattered.
52. A 12-Minute Practice Routine You Can Start Today
- Minute 1: Shake out the hand and write a normal sentence.
- Minutes 2–3: Practice one letter family connected to your problem.
- Minutes 4–6: Write ten common words containing those forms.
- Minutes 7–9: Copy a short paragraph with one focus such as spacing or x-height.
- Minutes 10–11: Write two or three sentences from memory at normal speed.
- Minute 12: Circle one improvement and one problem to revisit tomorrow.
Do this consistently before adding more drills. Twelve focused minutes repeated across weeks are more useful than an occasional hour spent drawing perfect letters.
Frequently Asked Questions
Can adults really improve their handwriting?
Yes. Handwriting is a practiced motor skill, and structured practice can improve specific dimensions such as letter formation, spacing, consistency, and legibility. Adult improvement usually works best when it targets a real problem rather than repeating elementary-school drills without diagnosis.
How long does it take to improve handwriting?
There is no universal timeline. A narrow problem such as word spacing may improve within days of deliberate practice, while changing deeply automated letter forms can take weeks or months. Measure progress with repeated samples rather than a promised number of days.
Should I use cursive or print?
Use the style that best serves your task. Print can be extremely clear. Cursive can become fast and fluid. A hybrid can combine advantages of both. Legibility and repeatability matter more than conformity to one style.
What pen is best for improving handwriting?
No single pen is best. Choose a pen that writes reliably with light pressure, feels stable in your hand, suits your paper, and produces a line width that keeps your letter shapes open. Test inexpensive options before buying premium pens.
Does a fountain pen improve handwriting?
It can encourage lighter pressure because many fountain pens write with little downward force, but it does not automatically fix spacing, letter shapes, rhythm, or alignment. Use one if you enjoy it and it suits your writing conditions.
Should I practice the alphabet every day?
A short alphabet check can be useful, but real words and sentences should make up most of your practice. Handwriting must work inside language, not only in isolated character rows.
How do I write faster without becoming messy?
Stabilize the most important letter forms first, then practice the same material at careful, normal, and slightly faster speeds. Identify the specific forms that collapse under speed and simplify them. Do not simply push the pen faster.
Why does my handwriting change from day to day?
Speed, fatigue, attention, writing surface, pen friction, paper, posture, and emotional state can all affect handwriting. Look for trends across multiple samples rather than judging one page.
Should handwriting hurt?
Ordinary writing should not require significant pain. If you experience persistent pain, numbness, weakness, severe fatigue, tremor, or a sudden change in handwriting, seek appropriate medical or occupational-therapy advice rather than training through symptoms.
Is beautiful handwriting the same as legible handwriting?
No. Decorative writing can be attractive but difficult to read, while plain writing can be extremely legible. For everyday communication, legibility usually deserves priority.
Conclusion: Improve the System, Not Every Letter at Once
The fastest route to better handwriting is usually not a new pen, a perfect alphabet, or a promise to “write more neatly.” It is diagnosis.
Collect a real sample. Find the two or three features that reduce legibility most. Stabilize letter size, word spacing, baseline, and ambiguous forms before worrying about style. Relax your grip. Use tools that do not force excessive pressure. Practice slowly enough to learn, then at normal speed so the improvement survives real life.
The biggest mistake to avoid is producing beautiful drills that never transfer into notes, forms, exams, labels, and everyday sentences. Every practice session should end with real writing.
If you want one action today, write a 100-word paragraph at your normal pace, circle every word you cannot read immediately, and classify each problem as shape, size, spacing, alignment, or speed. That single page will tell you what to practice next.
Sources and Further Reading
- National Library of Medicine / PMC — Curriculum-Based Handwriting Programs: A Systematic Review With Effect Sizes
- PubMed — Dimensions of good and poor handwriting legibility
- Arizona State University — Handwriting legibility dimensions research record
- PubMed — The influence of fine motor skills and executive functions on automatized handwriting
- PubMed — How fast is fluent handwriting? (2026)
- Frontiers in Psychology — Motor and cognitive determinants of handwriting fluency and legibility (2026)
Image Credits
- “Person writing in cursive.jpg” — Jiafei Slay Queen, Wikimedia Commons, CC0 1.0.
- “Fountain pen writing (literacy).jpg” — Petar Milošević, Wikimedia Commons, CC BY-SA 4.0.
- “Pen-writing.jpg” — Hussein Afzal, Wikimedia Commons, CC0 1.0.