

A home rarely fails all at once. More often, it gives small warnings first: a stain under a sink, a gutter that overflows only in heavy rain, an HVAC filter that has not been checked in months, a dryer that takes longer to finish a load, a hairline crack that changes shape, or a smoke alarm that nobody remembers testing. The problem is not that homeowners do not care. It is that a house contains dozens of systems with different maintenance intervals, and most people try to remember them mentally until something breaks.
A better approach is to build a home maintenance schedule that works like a lightweight operating system for the property. Instead of keeping one enormous checklist, you divide tasks by risk and frequency, attach each task to a repeatable trigger, record what you find, and escalate unusual conditions before they turn into emergencies. This guide shows how to build that system from scratch without turning homeownership into a second job.
 A useful maintenance schedule begins with observation: know what is normal in your home so changes are easier to spot. Image: David E. Lucas / Columbus Metropolitan Library via Wikimedia Commons, public domain in the United States.
Start With the Right Goal: Reliability, Not Perfection
The purpose of preventive maintenance is not to keep every surface looking new or to replace parts before they have delivered their useful life. The goal is to preserve safety, function, efficiency, and the building envelope while catching deterioration early enough that you still have choices. A loose downspout bracket is inexpensive to correct. Water repeatedly spilling against siding or a foundation can become a larger moisture problem. A dirty HVAC filter is simple. Restricted airflow ignored for a long period can reduce comfort and make equipment work harder. A small plumbing drip may be an easy seal or connection problem; undetected moisture inside cabinetry or flooring can be far more disruptive.
Think of every maintenance task as answering one of four questions: Is this condition safe? Is water staying where it belongs? Is the system operating normally? Is the exterior keeping weather out? Those four questions cover a surprisingly large share of practical home maintenance.
Do not confuse preventive maintenance with amateur repair. Inspection is often a homeowner task; diagnosis and repair may not be. If you find signs of electrical overheating, gas leakage, structural movement, active roof leakage, combustion problems, persistent sewer odors, significant mold growth, or any condition you cannot evaluate safely, stop and use a qualified professional. The schedule should help you discover problems, not pressure you into taking risks.
Step 1: Build a One-Page Home Profile
Before scheduling recurring tasks, create a one-page profile of the home. This prevents a common failure: people build a generic checklist that has nothing to do with the systems they actually own. Your profile can be a spreadsheet, note, printed page, or document stored with household records.
Record the approximate age of the roof, HVAC equipment, water heater, major appliances, windows, exterior finishes, and any sump pump, well, septic system, irrigation system, fireplace, chimney, solar system, pool, or water treatment equipment. Add model and serial numbers where they are easy to obtain. Record filter sizes, unusual maintenance supplies, warranty periods, and the location of shutoffs.
Most importantly, identify the main water shutoff, electrical service panel, gas shutoff if applicable, and any local emergency disconnects you may need to reach quickly. Do not wait for a leak or outage to discover that a shutoff is hidden behind stored boxes or that nobody in the household knows where it is.
Add a section called “professional-only.” Put tasks there that you should not attempt yourself because of height, electrical exposure, gas or combustion equipment, confined spaces, local licensing requirements, or manufacturer instructions. This is a practical boundary, not a sign that your maintenance plan is incomplete.
How to know this step is complete: another adult in the household should be able to look at your profile and understand what major systems the home has, where critical controls are located, and where to find manuals and service history.
Step 2: Organize Tasks by Risk Before You Organize Them by Month
Many online home checklists are sorted by season. That is useful, but risk is a better first layer. If a task protects life safety or prevents water damage, it deserves a more reliable reminder than a cosmetic task.
Use four priority bands:
- Priority A — life safety: smoke alarms, carbon monoxide alarms where required or appropriate, fire extinguishers according to manufacturer instructions, dryer vent condition, safe egress, visible electrical hazards, combustion appliance concerns.
- Priority B — water and weather: plumbing leaks, roof and flashing observations, gutters and downspouts, grading and drainage, caulk and exterior penetrations, sump pumps, washing-machine hoses, water heater leakage, irrigation leaks.
- Priority C — equipment reliability and efficiency: HVAC filters and professional service, refrigerator coils if the manufacturer calls for cleaning, condensate drains, dishwasher or washer maintenance, garage-door hardware where applicable, water treatment systems.
- Priority D — preservation and appearance: paint touchups, deck finishes, screen repair, minor trim, cosmetic caulk, cabinetry adjustment, landscape pruning away from structures.
This hierarchy helps when life becomes busy. If you can complete only a few tasks this month, do the safety and water tasks first. The point of a maintenance system is not to make you feel behind; it is to help you make good decisions when time and money are limited.
Step 3: Create Four Maintenance Frequencies Instead of One Giant Checklist
Now create four buckets: monthly, quarterly, seasonal, and annual or long-interval. Avoid putting dozens of tasks on the first day of every month. A system that looks impressive but is routinely skipped is weaker than a smaller schedule that you actually use.
Monthly: quick observations that catch fast-changing problems
A monthly round should usually take 20 to 40 minutes for an average home. Walk the same route each time. Check around plumbing fixtures for moisture, look under sinks, listen for running toilets, scan ceilings for new stains, inspect the visible area around the water heater, look at the HVAC filter, test smoke alarms according to official guidance and manufacturer instructions, and glance at exterior drainage after a rain when possible.
The U.S. Fire Administration advises testing smoke alarms monthly. It also says smoke alarms generally need replacement 10 years from the manufacture date, with battery practices depending on alarm type and manufacturer instructions. That makes alarm testing a good anchor for the entire monthly routine: when you test alarms, do the short house walk at the same time.
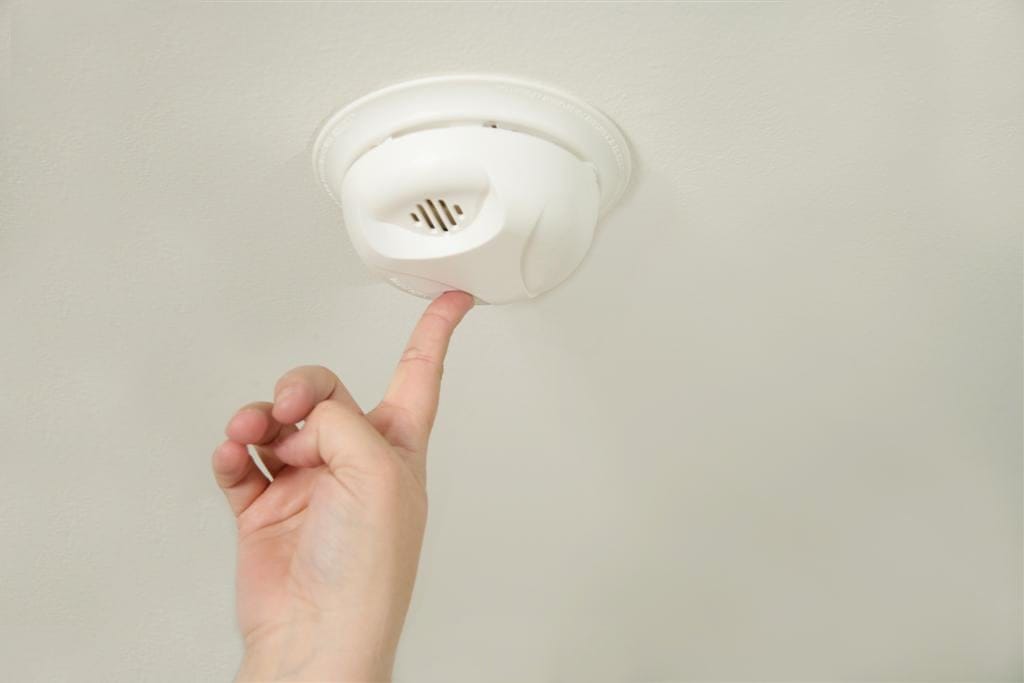 Testing smoke alarms is a high-priority recurring task. Image: U.S. Fire Administration, free high-resolution outreach image.
Quarterly: systems that need a deeper look but not constant attention
Every three months, choose a weekend for tasks such as checking caulk and grout in wet areas, cleaning accessible exhaust grilles, inspecting appliance supply hoses that are visible, checking exterior doors and weather seals, vacuuming accessible dust around mechanical equipment without opening protected electrical compartments, and reviewing the maintenance log for unresolved issues.
ENERGY STAR recommends checking HVAC filters every month, especially during heavy-use seasons, and changing a dirty filter; its general guidance says at minimum to replace filters every three months, while actual timing must still follow the system and filter manufacturer. That is why filter inspection belongs monthly but a quarterly reminder is useful as a backstop.
Seasonal: tasks triggered by weather, not by arbitrary dates
Seasonal maintenance should follow your climate. “Spring” in a cold snowy region is not the same maintenance event as spring in a hot dry region, a hurricane-prone coast, or a humid subtropical area. Build triggers around conditions: before the cooling season, before the heating season, before freezing weather, after the main leaf drop, before a rainy season, or before leaving a seasonal property vacant.
Annual and long-interval: the tasks most likely to disappear from memory
Annual reminders are ideal for professional HVAC service when appropriate, plumbing leak tests, water heater service according to the manufacturer, roof and exterior review, dryer vent inspection and cleaning as needed, chimney or fireplace service where applicable, pest inspection in areas where it is useful, and a review of warranties and service records. Long-interval tasks include replacing devices or components based on age, manufacturer instructions, wear, or local rules.
Step 4: Make Water the Center of Your Preventive Maintenance Strategy
If you want a maintenance schedule to prevent expensive disruption, water deserves disproportionate attention. Water can arrive from plumbing, roofing, exterior drainage, condensation, appliances, irrigation, groundwater, or humidity. It can also travel: the stain you see may not be directly below the source.
The EPA WaterSense home-maintenance guidance recommends regularly checking for leaks and gives several practical detection methods. One is to compare water use with the same period in a previous year. Another is to read the water meter when no water is being used and check it again later; an unexplained change can point to leakage. WaterSense also recommends looking at fixtures, connections, appliances, and irrigation and considering leak detection or flow-monitoring devices where appropriate.
Run a five-zone leak inspection
Instead of randomly looking for drips, divide the house into five zones. Zone one is bathrooms: toilets, valves, supply lines, faucets, shower connections, tub surrounds, and the flooring around fixtures. Zone two is kitchen and laundry: sink connections, dishwasher area, refrigerator water line if present, washer hoses and valves. Zone three is mechanical: water heater, HVAC condensate path, boiler or hydronic components if present, water softener or treatment equipment. Zone four is basement, crawlspace, or slab perimeter where accessible. Zone five is outdoors: hose bibbs, irrigation, exterior penetrations, gutters, downspouts, and grading.
For toilets, WaterSense describes a simple dye test: add a small amount of food coloring or a dye tablet to the tank, wait without flushing, and check whether color appears in the bowl. If it does, the flapper or flush-valve seal may be leaking. Flush after the test so dye does not stain the fixture.
Common mistake: treating the absence of a visible puddle as proof that there is no leak. Slow leaks may show up first as swelling cabinetry, staining, soft materials, peeling paint, musty odor, corrosion, or abnormal water use.
If something looks wrong: photograph it, note the date, determine whether active water is present, and decide whether the source can be isolated safely. If water is near electrical equipment or the source is unclear and active, prioritize safety and professional help.
Step 5: Inspect the Building Envelope From the Ground Up
The “building envelope” is the collection of components that separate indoors from outdoors: roof, walls, windows, doors, foundation, flashing, sealants, and penetrations. Your maintenance schedule should not ask you to climb onto a roof. A safer method is to inspect what you can from the ground, from windows, from an attic access when safe, or with binoculars or a zoom camera, and hire a qualified professional when access or diagnosis requires it.
Start at the ground. After rain, look for persistent pooling next to the foundation. Check whether downspouts discharge where intended and whether extensions have moved. Look for soil erosion, disconnected joints, or water marks that suggest overflow. Then move upward: inspect siding or exterior finishes for openings, peeling areas, impact damage, loose trim, or penetrations where sealant has failed.
At windows and doors, look for deterioration rather than chasing tiny cosmetic gaps. Pay attention to water staining, softened wood, failed exterior sealant, damaged flashing, or recurring indoor moisture. On the roof, note obviously missing or displaced materials, damaged flashing that is visible from the ground, vegetation or debris accumulation, and gutters that sag or overflow.
Do not automatically seal every crack. Some joints are designed to drain or move, and incorrect caulking can trap moisture. If you do not understand how a component sheds water, consult the manufacturer or a building professional before sealing it.
 Exterior inspections are most useful when they focus on changes: drainage, damaged finishes, openings, loose components, and signs of repeated moisture. Image: David E. Lucas / Columbus Metropolitan Library via Wikimedia Commons, public domain in the United States.
Step 6: Give Gutters and Drainage Their Own Weather Trigger
Gutter maintenance is a good example of why a calendar date alone is weak. A home under mature deciduous trees may need attention after major leaf drop and after storms. A home with few nearby trees may need far less frequent cleaning. The correct frequency depends on debris load, roof design, local climate, and whether gutter guards are installed.
Use the first heavy rain of the season as a functional test. From the ground, watch whether water reaches downspouts, whether gutters overflow at specific points, and whether downspout discharge is directed away from vulnerable areas. Do not climb a ladder during rain. If a gutter is high, access is awkward, the ground is uneven, or you are not trained and equipped for ladder work, use a professional.
Also inspect drainage after landscaping work. Mulch, soil, edging, patios, and planting beds can change water movement over time. A maintenance schedule should include a simple question: “Where does rainwater go now?” That question can reveal problems that a static checklist misses.
Step 7: Make HVAC Maintenance Simple Enough to Follow
Heating and cooling systems are expensive, technically complex, and easy to neglect because they often keep running while efficiency or airflow gradually deteriorates. Your schedule needs only a few homeowner-level tasks plus a reliable service plan.
ENERGY STAR recommends checking filters monthly, particularly during heavy heating and cooling seasons. If a filter looks dirty, replace or clean it as required. Use the exact type, size, and orientation recommended by the equipment or filter manufacturer. Do not assume that the thickest or highest-rated filter is automatically better for every system; excessive airflow resistance can be a problem in systems not designed for it.
Keep indoor supply and return openings unobstructed. Keep the outdoor unit clear of leaves, snow, vegetation, and debris while respecting manufacturer clearance requirements. Notice new noises, short cycling, unusual odors, weak airflow, water where it should not be, or a sudden change in comfort.
ENERGY STAR also recommends annual pre-season checkups by a contractor, commonly cooling service before the cooling season and heating service before the heating season. A professional maintenance check may include electrical connections, controls, condensate drainage, coils, airflow, refrigerant-related checks where appropriate, and combustion components for fuel-burning systems.
How to verify success: the system should start, run, and stop normally; rooms should receive expected airflow; filters should fit correctly; condensate should drain as designed; and there should be no unexplained water, burning odors, repeated breaker trips, or new mechanical sounds.
Step 8: Treat Dryer Maintenance as Fire Prevention, Not Housekeeping
Laundry maintenance is often reduced to cleaning the lint screen, but the vent path matters too. The U.S. Fire Administration warns that the risk of a clothes-dryer fire is higher when lint filters and dryer vents are not cleaned. Its guidance recommends cleaning the lint filter before and after each cycle, checking the area behind the dryer where lint can accumulate, ensuring the venting system is not damaged, crushed, or restricted, and confirming that the exterior vent opens when the dryer operates.
Add a quick lint-screen action to every load and a periodic visual vent check to your maintenance calendar. If drying times noticeably increase, the dryer feels unusually hot, the vent flap does not open normally, or airflow seems weak, stop treating that as a minor inconvenience and investigate safely.
Do not push a dryer tightly against a wall if doing so crushes the exhaust duct. Do not improvise a vent material that violates the appliance instructions or local requirements. If the exhaust route is long, hidden, inaccessible, or difficult to clean, professional service may be the safer option.
Step 9: Build a Kitchen and Appliance Round That Takes 15 Minutes
Appliance maintenance becomes manageable when you inspect by room rather than by brand. Once a quarter, perform a kitchen round. Check the sink cabinet for moisture and corrosion. Inspect visible dishwasher supply and drain areas. Check the refrigerator water connection if accessible. Clean door seals as the manufacturer recommends and verify that doors close normally. Review the range hood or exhaust filter and clean or replace it according to the product instructions.
For dishwashers, washers, refrigerators, disposals, and other equipment, the manufacturer manual should outrank generic internet advice. Some parts are designed to be cleaned by the homeowner; others should not be opened. Save PDF manuals in one folder and add a link or file name to the home profile.
If an appliance suddenly begins consuming more time, water, or energy, treat the change as diagnostic information. A dishwasher that no longer drains fully, a refrigerator that runs almost continuously, or a washer that moves violently may be signaling a maintenance, installation, loading, or mechanical problem.
Step 10: Give the Water Heater a Safe Inspection Routine
Water heaters combine water, heat, pressure, and sometimes combustion or high-voltage electricity, so the maintenance schedule should distinguish visual homeowner checks from service work.
WaterSense recommends regularly inspecting water heaters for leaks, aged gaskets, loose connections, and corrosion, and notes that professional service at least annually may be appropriate to ensure all aspects are checked. It also advises following the manufacturer manual for do-it-yourself maintenance. Specific procedures such as flushing a tank or checking a temperature-and-pressure relief valve can involve hot water and safety hazards, so do not copy a generic procedure if it conflicts with the appliance instructions or your ability to perform it safely.
For the monthly house walk, simply look for new moisture, rust trails, corrosion, staining, or changes around connections. For annual maintenance, open the manual, review required service, record what was performed, and keep invoices or notes. If a fuel-burning water heater shows combustion concerns, unusual soot, venting problems, or gas odor, stop and seek qualified help.
Step 11: Create a Safety Round That Is Separate From Repair Work
Safety items deserve a checklist that cannot be postponed because another maintenance project took longer than expected. Once a month, test smoke alarms using the test button. Check that exits are not blocked. Make sure address numbers are visible if that matters for emergency response in your area. Confirm that fire extinguishers or other safety devices are present and maintained according to their manufacturer instructions and applicable local guidance.
For smoke alarms, U.S. Fire Administration guidance calls for alarms inside every bedroom, outside each separate sleeping area, and on every level of the home, including the basement. It recommends monthly testing and replacement of smoke alarms after 10 years, with battery maintenance depending on alarm type. Local codes can be more specific, and carbon monoxide alarm requirements vary by jurisdiction and fuel-burning equipment, so use local rules in addition to national guidance.
Do not use a monthly test as the only form of fire preparedness. A working alarm is valuable because it gives warning; the household also needs to know how to get outside. Review and practice a home escape plan appropriate to the people who live there.
Step 12: Add a “Change Detection” Photo Log
A maintenance log becomes much more powerful when it contains photographs. You do not need to document the entire house. Photograph conditions that are hard to remember: a foundation crack with a ruler or reference point, a recurring ceiling stain after it has dried, corrosion on a valve, roof damage visible from the ground, an exterior gap, or a patch of efflorescence.
Name photos with a date and location, such as 2026-08-07-basement-north-wall-crack.jpg. On the next inspection, photograph the same area from roughly the same distance and angle. This turns “I think it got bigger” into an evidence-based comparison.
Do not rely on photographs to diagnose structural or electrical problems. Their role is to document change and help a professional understand timing and progression.
Step 13: Use a Simple Red-Yellow-Green Triage System
Every finding should produce a decision. Without triage, maintenance lists become collections of unresolved observations.
- Red — act now: active uncontrolled water, gas odor, electrical overheating or arcing, blocked safe exit, failed life-safety device, dangerous structural condition, severe roof leak, sewage backup, or another immediate hazard. Isolate the hazard if you can do so safely and contact the appropriate emergency or qualified service.
- Yellow — schedule: slow leak, deteriorated sealant, abnormal appliance behavior, minor roof or siding damage, loose hardware, recurring drainage issue, noisy mechanical equipment, or a condition that is not immediately dangerous but could worsen.
- Green — monitor: stable cosmetic crack, minor wear, noncritical paint deterioration, or a condition documented for comparison that is not currently affecting safety or function.
Assign every yellow item a next action and date. “Watch it” is not a plan unless you also decide when you will look again and what change would trigger escalation.
Step 14: Build a Maintenance Calendar You Can Actually Live With
Use recurring calendar events rather than relying on memory. Keep the names short: “Monthly 30-minute house walk,” “HVAC filter check,” “Quarterly wet-area inspection,” “Before heating season service,” “After leaf drop: drainage and gutters,” and “Annual home records review.”
Do not schedule all annual work in January merely because it feels organized. Match work to the best practical time. Cooling equipment service makes more sense before the hottest period. Heating service is more useful before sustained cold. Exterior sealant and paint may require suitable temperature and dry weather. Gutters are best checked after predictable debris periods. Irrigation systems need attention around start-up and shutdown in climates where they are seasonal.
If your household travels often, add “before leaving for more than a week” and “after returning” routines. Before travel, look for leaks, dispose of perishables, follow safe thermostat and water-system practices suitable for your climate and property, and arrange monitoring if needed. Do not shut down heating, cooling, water, or other systems in a way that creates freeze, humidity, fire, or equipment risk.
Step 15: Budget for Maintenance Without Pretending Every House Costs the Same
Maintenance budgeting is often reduced to a percentage of home value. That can be a rough planning shortcut, but it should not be treated as a universal prediction. Two homes with the same market value can have very different maintenance needs because of age, climate, roof complexity, equipment type, labor costs, previous renovations, landscaping, and deferred repairs.
The Consumer Financial Protection Bureau advises buyers to budget for home maintenance, repairs, and utilities and notes that these costs can be significant and vary with climate, building characteristics, rates, and other factors. Use that principle instead of chasing one magic number.
Create two pools: predictable maintenance and repair reserve. Predictable maintenance includes filters, service visits, cleaning, small sealants, routine inspections, and manufacturer-specified consumables. The repair reserve is for failures and larger corrections. Look at your own service history after one year and revise the budget based on real costs.
If the home has aging major systems, build a replacement timeline separately. A maintenance reserve should not be the only plan for a roof, HVAC system, or water heater that is already near the end of its expected service period.
Step 16: Know Which Jobs Should Not Be DIY
A preventive-maintenance article can become dangerous if it encourages readers to perform tasks beyond their training. Use three filters before doing a job yourself.
Access risk: does the task require roof access, a tall ladder, confined space, attic movement near unsafe footing, or work near overhead power? If yes, the inspection may need a professional.
Energy risk: does it expose you to mains electricity, gas, combustion equipment, pressurized systems, very hot water, refrigerant circuits, or stored mechanical energy? If yes, follow licensing rules and manufacturer guidance.
Diagnostic uncertainty: could the visible symptom have multiple serious causes? Foundation movement, repeated breaker trips, combustion odors, recurring water intrusion, and major mold or rot are examples where diagnosis matters more than a quick cosmetic fix.
The most effective homeowner is not the person who does every job. It is the person who recognizes problems early, documents them well, performs appropriate routine care, and gets qualified help before a small issue becomes a crisis.
A Practical 12-Month Home Maintenance Framework
The following framework is intentionally flexible. Shift seasonal tasks to your climate and equipment.
Every month
- Test smoke alarms and other alarms according to applicable guidance and manufacturer instructions.
- Walk bathrooms, kitchen, laundry, and mechanical areas for leaks, stains, corrosion, and unusual odors.
- Check the HVAC filter and replace or clean it when required.
- Look at the water heater and exposed plumbing connections for moisture.
- Check dryer operation and exterior vent airflow where visible.
- Record unresolved yellow or red findings.
Every three months
- Inspect wet-area sealants and visible supply hoses.
- Review range hood and exhaust filters.
- Check exterior doors, weather seals, and visible penetrations.
- Review the appliance and maintenance log.
- Inspect accessible drains and condensate paths for signs of blockage or leakage.
- Confirm emergency shutoffs remain accessible.
Before the cooling season
- Schedule HVAC service if appropriate.
- Clear debris around outdoor equipment while observing manufacturer clearances.
- Inspect condensate drainage and note any previous moisture problems.
- Check window screens and weather seals.
- Inspect irrigation startup and outdoor plumbing for freeze-related damage in cold climates.
Before the heating season
- Schedule heating-system service when appropriate.
- Inspect safe clearances around heating equipment.
- Review smoke and carbon monoxide alarm requirements for the home.
- Inspect weather stripping and obvious air leaks.
- Prepare outdoor plumbing for freezing conditions where necessary.
After major leaf drop or before the rainy season
- Observe gutters and downspouts from the ground and arrange cleaning if needed.
- Check where downspouts discharge.
- Inspect exterior drainage and soil erosion.
- Look for roof debris or visible storm damage from a safe location.
Once a year
- Perform a whole-home leak check, including the water-meter method when appropriate.
- Use a toilet dye test to detect silent leaks.
- Review the water heater manual and complete required professional or owner maintenance safely.
- Inspect dryer venting and arrange cleaning as needed.
- Review roof, exterior finishes, caulk, grading, and drainage.
- Review appliance manuals for annual maintenance requirements.
- Update the home profile, service records, warranties, and replacement timeline.
- Review maintenance spending and adjust the next year’s reserve.
How to Troubleshoot a Maintenance Schedule That Keeps Failing
Problem: the checklist is too long
Cut it. Move low-risk cosmetic tasks to a separate project list. The recurring schedule should protect safety, water control, weather resistance, and major equipment first. A 30-minute routine completed every month is more valuable than a six-hour checklist abandoned after February.
Problem: nobody knows whether a task was completed
Add a “last done” field and one sentence of notes. For filters, record the date and product. For inspections, record “no change” when nothing is wrong. Silence in a maintenance log is ambiguous; a dated normal observation is useful history.
Problem: recurring reminders become invisible
Change the reminder from a task name to a trigger with an outcome: “30-minute house walk — close all red/yellow findings.” Pair it with an existing routine, such as the first Saturday morning of the month.
Problem: you keep finding issues but never fixing them
Create a repair queue separate from the inspection list. Every yellow finding needs an owner, a target date, and an estimated next step: DIY after checking the manual, request a quote, monitor for 30 days, or schedule a professional.
Problem: maintenance advice conflicts
Use a source hierarchy. First: manufacturer instructions for the exact product. Second: local codes and utility or fire-safety requirements. Third: authoritative agencies and professional standards. Generic checklists should fill gaps, not override specific instructions.
Step 17: Build a Small Maintenance Kit and Records System
A maintenance schedule works better when common tools and records are easy to reach. This does not mean buying a workshop full of equipment. The objective is to remove friction from safe observation and simple routine care. A basic kit might include a flashlight or headlamp, disposable gloves, a few cleaning cloths, a small mirror, a tape measure, painter’s tape for marking observations, a permanent marker, replacement batteries only for devices that use replaceable batteries, the correct HVAC filters, food coloring for a toilet leak test, and a phone or camera for documentation. Add tools only when a specific task and manufacturer instruction justify them.
Keep maintenance supplies in one clearly labeled location rather than scattering them through garages and cabinets. If the HVAC filter is a special size, write that size on the home profile and keep one replacement on hand when practical. If a smoke alarm uses a replaceable battery, record the battery type. If an appliance requires a specific cleaning tablet, lubricant, or filter, store the exact product name or manual reference instead of relying on memory.
Separate tools for observation from tools for repair. A flashlight, moisture indicator, tape measure, and camera help you document a condition without taking anything apart. That distinction matters. Many maintenance mistakes happen when a homeowner discovers something unusual and immediately starts disassembling equipment without a diagnosis, manual, shutoff procedure, or plan for reassembly.
Create a service-history folder
Make one digital folder for invoices, inspection reports, warranties, permits, manuals, model numbers, and before-and-after photographs. Use consistent file names such as 2026-04-HVAC-spring-service.pdf or 2026-09-roof-repair-north-valley.pdf. When you sell the property, troubleshoot a recurring issue, compare contractor recommendations, or make a warranty claim, this history can be much more useful than a memory of “someone looked at it a few years ago.”
For each major system, keep a short timeline rather than a pile of documents. Example: “Water heater installed 2022; anode inspected 2025 per manufacturer schedule; supply valve replaced 2026.” The goal is not obsessive recordkeeping. It is to make age, recurring problems, and previous work visible at a glance.
Track normal conditions, not just failures
A strong maintenance record includes normal observations. If the basement wall is dry every monthly inspection for a year and then develops a damp patch after a storm, that change is meaningful. If an HVAC system normally cools a room quietly and then begins cycling frequently, you have a baseline for comparison. If your water bill has been stable and then rises without a lifestyle change, the historical pattern may prompt a leak check.
Write brief notes: “No leaks under kitchen sink,” “filter clean,” “downspouts flowing normally in rain,” or “crack unchanged from previous photo.” These notes take seconds but create a pattern that makes abnormal conditions easier to recognize.
Use maintenance records to evaluate contractors
When you call a professional, provide concise evidence: when the symptom began, whether it is constant or intermittent, what changed recently, photographs, equipment model information, and previous repairs. Avoid diagnosing the problem for the contractor unless you have relevant expertise. “Water appears below the air handler only after long cooling cycles” is more useful than “the drain pan is definitely broken.” Good observations improve communication without locking everyone into an unverified theory.
When work is completed, ask what was found, what was corrected, whether another component should be monitored, and what maintenance interval the manufacturer or contractor recommends. Add the answer to your schedule. In this way, the maintenance calendar becomes specific to your actual home instead of remaining a generic list copied from the internet.
Review the system once a year
At the end of each year, spend 30 minutes reviewing the log. Which tasks repeatedly found nothing and may reasonably be performed less often? Which systems generated multiple yellow findings and deserve closer monitoring? Which consumables ran out? Which service visits should be booked earlier next year? Which major component is aging into a period where replacement planning makes sense?
This review is how the schedule improves. A new homeowner may begin with a broad checklist. After a year or two, the plan should reflect the property’s real behavior: the side of the house where gutters clog first, the bathroom where caulk deteriorates faster, the filter interval that matches actual dust loading, the season when drainage problems appear, and the equipment that needs professional attention before peak demand.
Frequently Asked Questions
How often should I inspect my house?
A short visual inspection every month is practical for leaks, alarms, filters, and obvious changes. Deeper inspections can be quarterly, seasonal, or annual depending on the system, climate, age of the home, and manufacturer guidance. The important point is to separate quick high-risk checks from larger maintenance projects.
Do I really need a home maintenance spreadsheet?
No. A calendar plus a one-page log is enough for many homes. Use the simplest system that lets you answer three questions: what is due, what did I find, and what happens next?
What should a new homeowner do first?
Locate shutoffs and the electrical panel, build the home profile, test life-safety alarms, check for visible plumbing leaks, inspect drainage, identify HVAC filter requirements, collect appliance manuals, and create the monthly 30-minute walk. Do not begin by buying dozens of tools.
How can I tell whether a crack is serious?
Cracks have many causes, and appearance alone is not always enough to diagnose them. Document the location, width, pattern, and any change over time. Seek professional evaluation when cracking is new and progressive, accompanied by displacement, water intrusion, sticking doors or windows, sagging, or other structural symptoms.
Should I clean gutters myself?
Only if access is safe and you are comfortable with the required equipment and ladder practices. Many gutter systems are high, steep, or awkward enough that professional cleaning is the safer choice. You can still inspect performance from the ground during rain.
How often should HVAC filters be replaced?
Check the filter monthly, especially during heavy-use seasons. Replace or clean it when dirty and follow the equipment and filter manufacturer. ENERGY STAR gives a general minimum of every three months for replacement filters, but actual intervals vary with filter type, system design, pets, dust, occupancy, and operating hours.
What is the most important maintenance task for preventing water damage?
There is no single task because water can enter from many systems. The highest-value approach is a recurring leak and drainage inspection: plumbing connections, appliances, water heater, toilets, roof drainage, gutters, downspouts, grading, and any basement or crawlspace. Catching a small change early is the objective.
Sources and Further Reading
- U.S. EPA WaterSense — Home Maintenance
- U.S. EPA WaterSense — Leak Detection and Flow Monitoring Devices
- U.S. Fire Administration — Smoke Alarms
- U.S. Fire Administration — Clothes Dryer Fire Safety
- ENERGY STAR — Heating and Cooling Maintenance Checklist
- Consumer Financial Protection Bureau — Budgeting for Homeownership Costs
Build the Habit Before You Build the Perfect Checklist
A good home maintenance schedule is not a document you admire. It is a routine that repeatedly turns small observations into timely decisions. Start with the monthly safety-and-water walk, then add quarterly and seasonal tasks only after the first routine is working. The first action is simple: create the one-page home profile, find your shutoffs, set a monthly reminder, and make your first inspection pass.
The biggest mistake to avoid is postponing a strange condition because it is not yet disruptive. New moisture, recurring overflow, unusual heat, persistent odor, changing cracks, or equipment that suddenly behaves differently deserves attention. You do not need to diagnose everything yourself. You need to notice change, document it, and act at the right level before the house makes the decision for you.