

Quick answer: The easiest way to pack for a move is to work backward from moving day. First reduce what you are taking, then create a simple inventory and room-labeling system. Pack rarely used items first, one room and one category at a time. Use small boxes for dense items, medium boxes for mixed household goods, and larger boxes only for lightweight bulky items. Protect fragile items with padding and empty-space fill, label every box on at least two sides with destination room and contents, and keep documents, medicine, chargers, valuables, keys, basic tools, toiletries, bedding, and a change of clothes in an essentials kit that travels with you. If you hire movers, verify the company, understand the estimate and liability terms, and supervise loading and delivery.
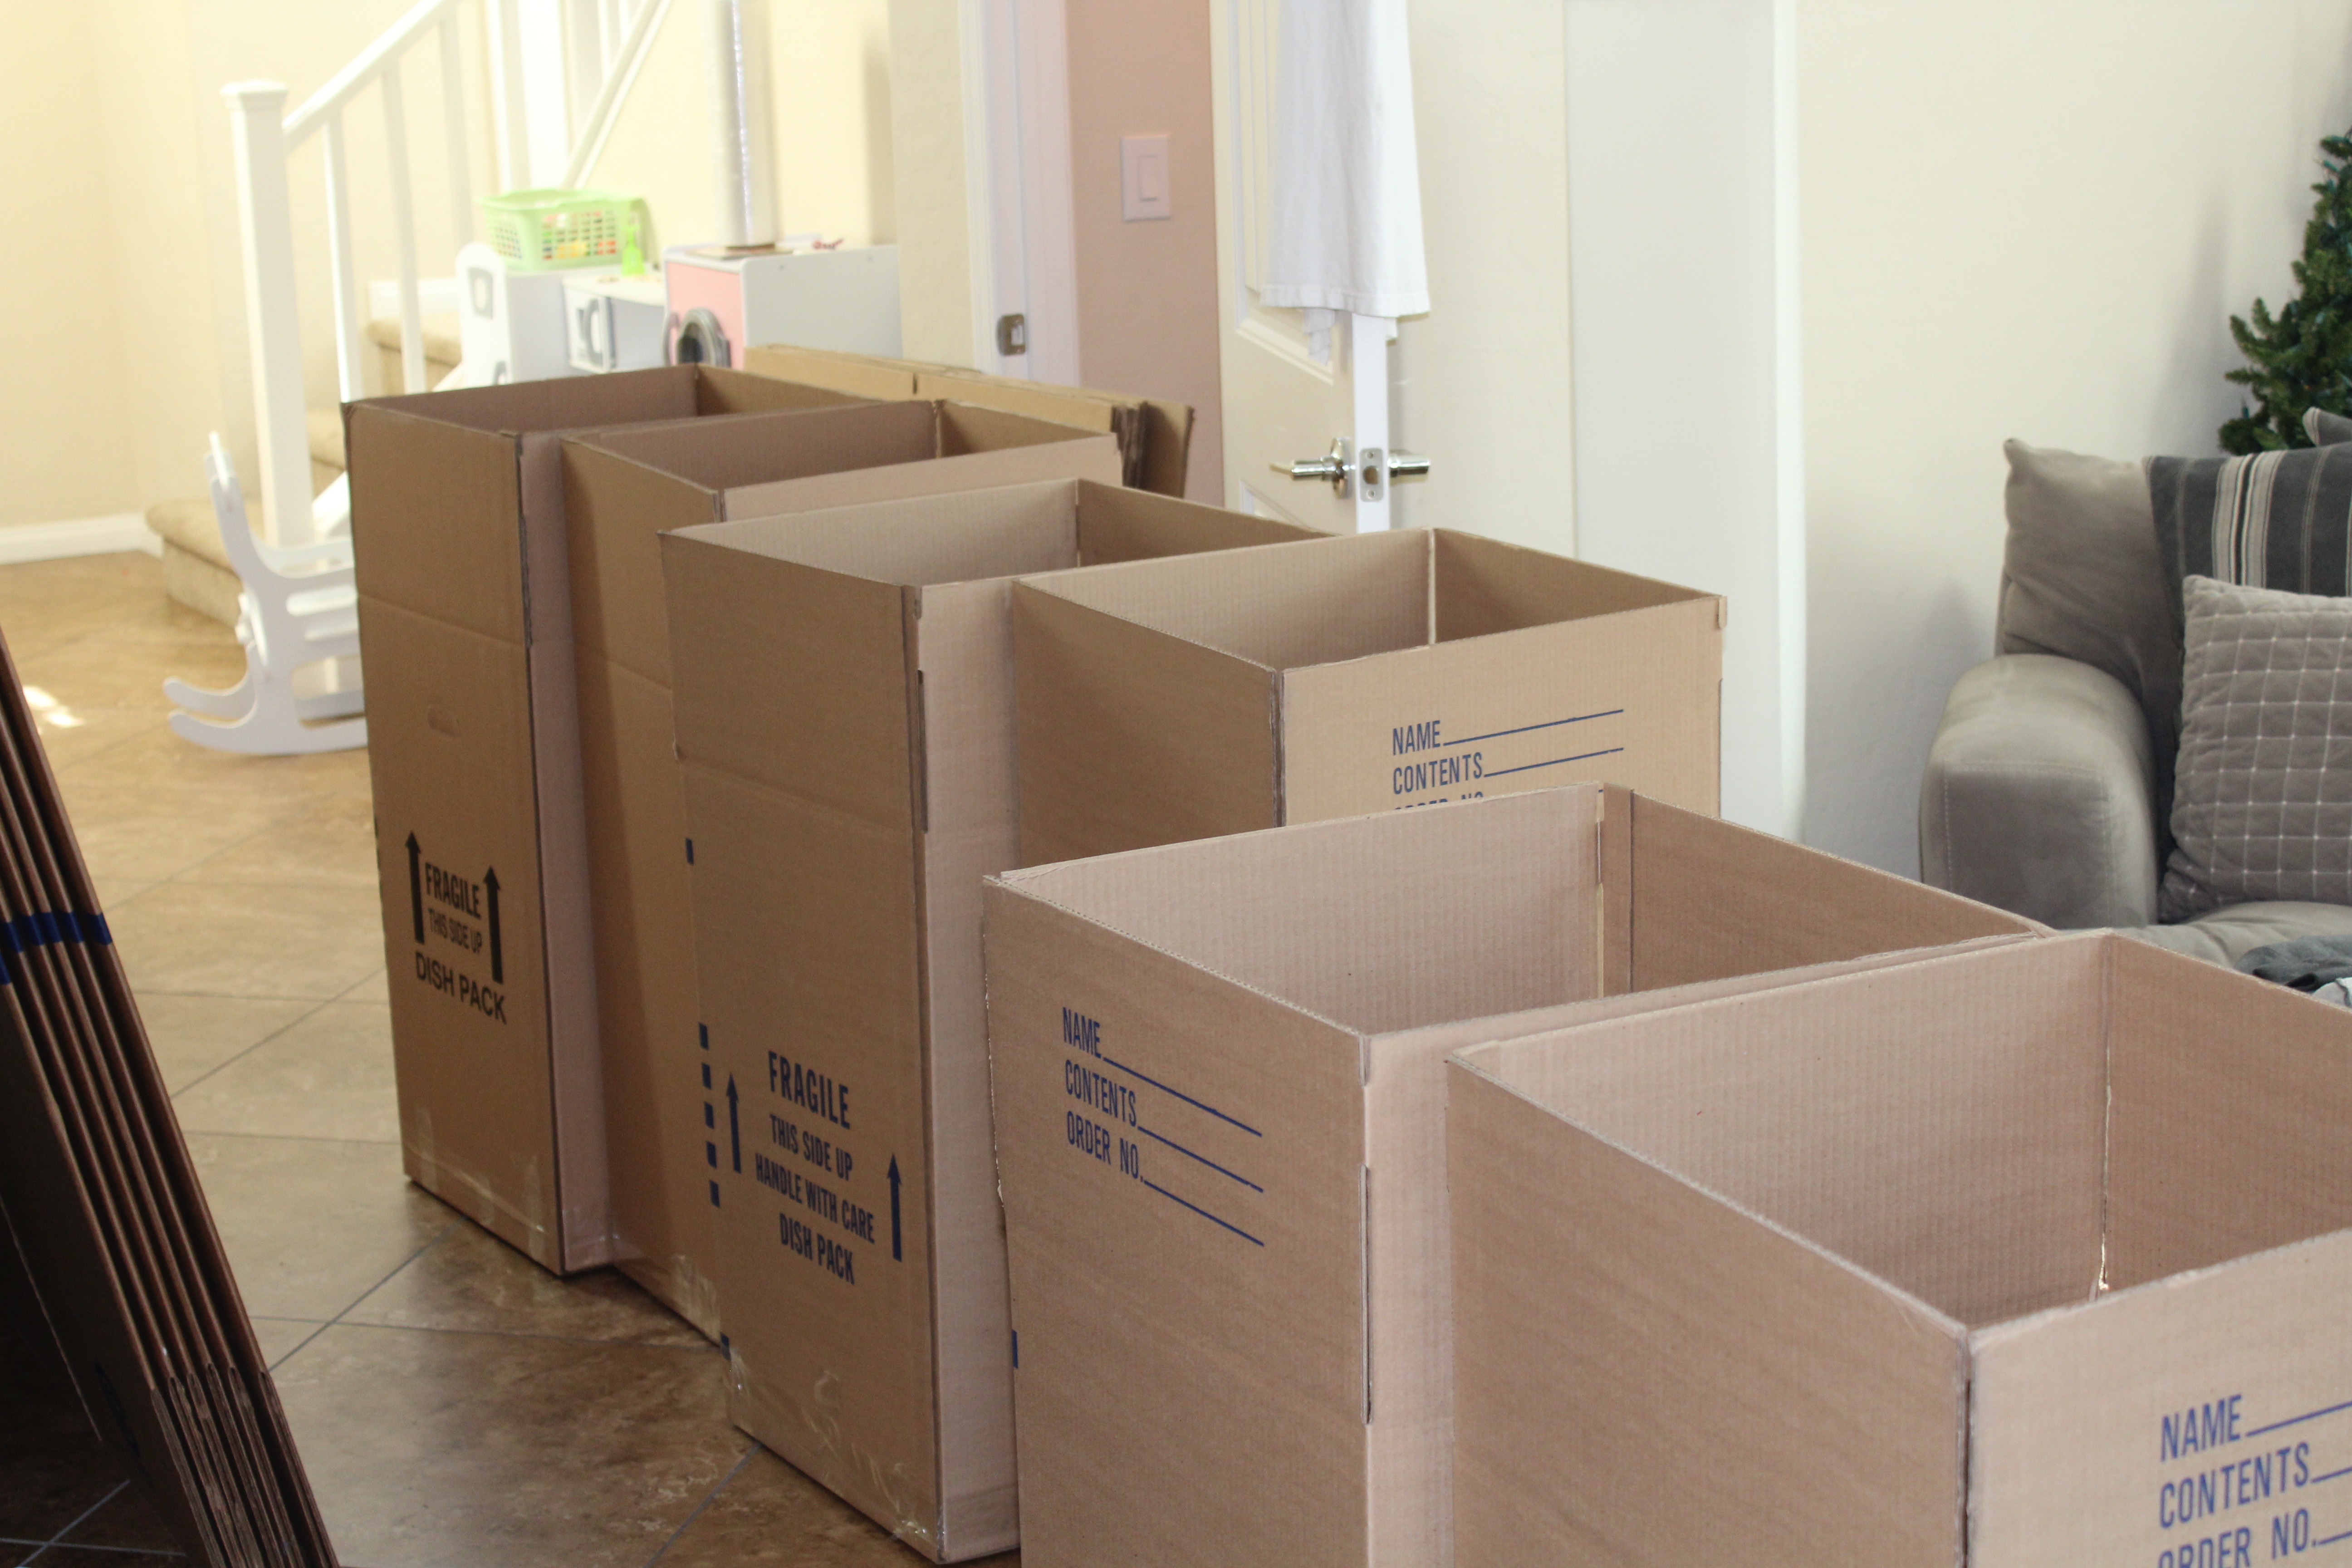 Good moving systems begin before boxes are filled: choose a labeling method, destination rooms, and packing order first. Image: MoveON moving, Wikimedia Commons, CC BY-SA 4.0.
Moving is one of those projects that looks simple from a distance and becomes complicated only when every cupboard, drawer, cable, book, pan, picture frame, bottle, towel, tool, toy, plant, and document suddenly needs a destination. The difficulty is not putting objects into boxes. The difficulty is preserving enough order that you can find, protect, move, unload, and rebuild your household without turning the process into weeks of confusion.
A strong moving plan treats packing as a logistics problem. You have limited time, limited lifting capacity, limited vehicle space, different levels of fragility, and a new home that may have a different layout. Some items should travel in a moving truck, some should stay with you, some should be disposed of before the move, and some should never have been kept in the first place.
This guide is designed for renters and homeowners doing local or long-distance household moves, whether you are using friends, a rental truck, a full-service mover, or a hybrid approach. It focuses on practical systems rather than decorative organization: what to pack first, how to choose boxes, how to protect fragile and expensive items, how to handle documents and valuables, how to reduce moving costs, how to avoid common mover problems, and how to make the first night in the new home livable.
1. Start With the Move Date and Work Backward
Write the moving date at the top of a simple plan and divide the remaining time into phases. The exact schedule depends on household size, but the order matters more than the number of weeks.
- Early phase: declutter, measure furniture, collect supplies, compare movers, and pack seasonal or rarely used items.
- Middle phase: pack books, decor, spare linens, hobby supplies, archives, extra cookware, and nonessential clothing.
- Final week: pack most daily-use possessions, prepare appliances, confirm access and parking, and create essentials kits.
- Final 24 hours: pack bedding, daily toiletries, refrigerated-food decisions, chargers, basic tools, and cleaning supplies.
- Moving day: protect floors and doors, supervise loading, photograph condition, verify inventory, and keep critical items with you.
The biggest planning error is delaying every category because “we still use some of it.” Instead, separate each category into daily-use and non-daily-use groups. You can pack 80% of a kitchen while keeping one saucepan, one frying pan, two plates, two mugs, and a few utensils available.
2. Decide What Is Not Moving Before You Buy Boxes
Every object you remove before the move saves packing time, box space, lifting effort, vehicle volume, and unpacking work.
Work room by room and create five destinations:
- Move
- Donate
- Sell
- Recycle
- Dispose correctly
Avoid a giant “maybe” category. If you have not used an ordinary item for years and it has low replacement value, ask whether paying to transport and store it again makes sense.
Large furniture deserves special attention. Measure the new home’s doorways, stair turns, elevators, and intended rooms before moving a wardrobe or sectional sofa. A piece that cannot fit through the new entrance is expensive cargo with no useful destination.
3. Create a One-Page Moving Inventory
You do not need a museum-grade catalog for every spoon. You do need enough information to know what left the old home and what arrived at the new one.
Use a spreadsheet or note with these columns:
| Box/Item ID | Destination | Contents | Priority | Notes |
|---|---|---|---|---|
| K-01 | Kitchen | Baking dishes | Low | Fragile |
| BR-03 | Main bedroom | Daily clothing | High | Open first |
| OFF-02 | Office | Monitor + cables | High | Screen protected |
For expensive electronics, artwork, jewelry, tools, and collectibles, take photos before packing. If you are using a professional mover, keep your own record in addition to any mover-created inventory.
4. Build a Labeling System Before the First Box Is Packed
A box labeled “stuff” is almost useless. A box labeled “Kitchen — coffee, mugs, kettle — OPEN FIRST” saves time immediately.
Use three pieces of information:
- destination room;
- short content description;
- priority or handling instruction.
Write the label on at least two sides, not only on top. Boxes are often stacked with the top hidden.
If you use color coding, pair color with text. For example, blue tape can mean bedroom, but also write “MAIN BEDROOM.” Color alone can be hard to interpret and tape colors can look similar under poor lighting.
5. Number Boxes Instead of Writing Every Valuable Item Outside
Detailed external labels can advertise contents. A box labeled “camera lenses, tablet, hard drives” is unnecessarily specific.
For sensitive contents, write “Office equipment — OFF-04” and keep the detailed list in your private inventory.
Numbering also makes missing boxes easier to detect. If the kitchen series runs K-01 through K-14 and K-09 is absent after unloading, you know exactly what to look for.
6. Choose Box Size Based on Weight, Not Object Size
Dense items belong in smaller boxes because a large box full of books can become dangerously heavy.
A practical pattern is:
- Small boxes: books, canned food, tools, small appliances, dense decor.
- Medium boxes: cookware, shoes, toys, desk supplies, folded clothing.
- Large boxes: pillows, lampshades, bedding, towels, lightweight baskets.
- Wardrobe boxes: hanging clothes when speed matters.
- Specialty cartons: mirrors, pictures, dishes, televisions, or mattresses when suitable.
The goal is for an ordinary adult to lift each packed box safely using normal technique. If a box requires two people, mark it clearly or split the contents.
7. Use Strong Boxes for Heavy or Fragile Loads
Reused boxes can save money, but inspect them carefully. Avoid boxes with water damage, crushed corners, torn hand holes, weakened bottoms, or strong odors.
For heavy items, use intact corrugated boxes and tape the bottom securely. Do not trust an old strip of tape that has already survived one shipping cycle.
Fragile loads benefit from boxes that hold their shape. A soft box allows the stack above it to compress the contents.
8. Buy Supplies Based on the Work, Not a Generic Kit
Useful packing supplies include:
- multiple box sizes;
- packing tape and dispenser;
- permanent markers;
- packing paper;
- bubble cushioning for delicate items;
- stretch wrap when appropriate;
- furniture blankets;
- zip bags for hardware;
- labels or colored tape;
- mattress bags;
- corner protectors;
- small tool kit;
- scissors and utility knife.
Do not buy huge quantities of one box size simply because the per-box price is lower. A good mix reduces wasted volume and unsafe loads.
9. Pack by Room and Category at the Same Time
“Pack one room at a time” is useful, but many rooms contain categories that belong elsewhere. For example, books may be scattered across bedrooms, living room, and office.
A better method is a hybrid:
Work primarily by room, but consolidate obvious categories before packing. Gather books, cables, framed art, important papers, and tools into their logical systems first.
This prevents discovering ten miscellaneous cable boxes in the new home.
10. Pack Rarely Used Items First
Start with:
- seasonal decorations;
- off-season clothing;
- guest-room items;
- archived papers;
- books;
- display decor;
- specialty kitchen tools;
- hobby supplies not needed before the move.
Leave daily medication, work equipment, a small kitchen kit, essential clothing, bedding, and toiletries for the final days.
11. Create a “Do Not Pack” Zone
Choose a closet, locked room, bathroom, or clearly marked corner for items that must travel with you rather than in the truck.
Examples:
- passports and identification;
- lease or closing documents;
- medication;
- jewelry and small valuables;
- cash;
- keys;
- phones and laptops;
- chargers;
- hard drives with important data;
- children’s critical comfort items;
- pet carriers and veterinary documents.
Tell movers and helpers not to touch this zone.
12. Build a First-Night Essentials Kit
The first night is easier when you do not have to open twenty boxes to find soap and sheets.
Pack one suitcase or clearly marked bin per household with:
- one or two changes of clothing;
- toiletries;
- toilet paper;
- towels;
- basic medication;
- phone chargers;
- sleepwear;
- bedding;
- basic eating utensils;
- coffee or breakfast essentials if important;
- pet food;
- children’s bedtime items;
- trash bags;
- paper towels;
- basic cleaning supplies.
Move this kit in your own vehicle or load it last so it comes off first.
13. Make a Moving-Day Tool Kit
A small tool box should stay accessible until the end. Include:
- screwdrivers;
- hex keys;
- adjustable wrench;
- pliers;
- tape measure;
- utility knife;
- scissors;
- flashlight;
- spare tape;
- markers;
- zip bags;
- basic picture-hanging tools for later.
Do not bury the tools required to reassemble beds inside a box at the front of the truck.
14. Photograph Furniture Before Disassembly
Take photos of:
- bed frames;
- desk cable routes;
- television connections;
- shelving hardware;
- complex tables;
- adjustable furniture;
- wall-mounted systems.
Photos turn reassembly into a reference task instead of a memory test.
15. Keep Hardware With the Furniture
Put screws, bolts, washers, shelf pins, and small brackets in a zip bag. Label the bag and attach it securely to a non-damaging part of the furniture, or place all hardware bags in one dedicated, well-labeled hardware box that travels with the tool kit.
Do not tape adhesive directly to delicate finishes without checking whether it can cause damage.
16. Protect Furniture Edges Before the Truck Arrives
Damage often occurs during doorways, stair turns, and loading—not during the drive.
Remove loose shelves, drawers, and glass components when practical. Wrap vulnerable edges. Use moving blankets for finished wood and large furniture. Protect floors and door frames where traffic will be heavy.
 Loading is easier when boxes are sealed, stable, clearly labeled, and sized for safe handling. Image: Bellhopsmarketing, Wikimedia Commons, CC BY-SA 4.0.
17. Pack Books Flat or Spine-Down, Not With Pages Bearing Weight
Books are heavy, so use small cartons.
Pack them flat or with the spine down depending on size and binding. Avoid packing books with the page edges supporting the weight because bindings can deform.
Fill small gaps with paper so books do not shift, but do not overload the box.
18. Pack Dishes Vertically When Appropriate
For plates, wrap each item and place plates on edge like records rather than stacking a tall horizontal column. Use padding under, around, and above the group.
Cups and bowls need interior protection and spacing so hard edges do not strike each other.
Do not leave empty volume at the top of a fragile box. Fill the space so the contents cannot bounce when the box is moved.
19. Separate Heavy Kitchen Items From Fragile Glass
Do not mix cast-iron pans and wine glasses simply because they belong in the same room.
Use separate boxes:
- heavy cookware;
- glassware;
- plates and bowls;
- pantry goods;
- small appliances.
The destination room can still be “Kitchen,” but the handling needs differ.
20. Reduce Open Food Before Moving Week
Use frozen and refrigerated food gradually before the move. Avoid doing a large grocery shop immediately before relocation unless your move is short and refrigeration is guaranteed.
Discard leaking, expired, or questionable food. Seal dry goods in containers or bags so grains and flour do not spill inside boxes.
If a moving company will transport your goods, ask what food items they prohibit.
21. Do Not Pack Household Hazardous Waste Like Ordinary Boxes
Paints, solvents, pesticides, oils, batteries, strong cleaners, and compressed-gas products can create transport and disposal hazards.
EPA’s current household hazardous waste guidance advises keeping hazardous products in original containers, retaining labels, following product storage and disposal directions, and never mixing leftovers. Local disposal programs vary.
Before moving, contact your local solid-waste or hazardous-waste program for unwanted products. Do not pour chemicals down drains, on the ground, or into storm sewers.
22. Ask Movers What They Will Not Transport
Professional movers commonly restrict hazardous or dangerous materials, and individual company policies vary.
Ask for the prohibited-items list before packing. Commonly restricted categories can include:
- flammable liquids;
- propane cylinders;
- some chemicals;
- explosives or ammunition;
- perishable food;
- certain plants;
- high-value personal documents or jewelry.
Never assume an item is accepted simply because it fits inside a box.
23. Pack Clothing by How You Will Need It
Divide clothing into:
- first-week clothing;
- work clothing;
- off-season clothing;
- formal or delicate clothing;
- donation items.
Wardrobe cartons are fast for hanging clothes but occupy more volume. Suitcases are excellent for dense folded clothing because they have handles and wheels. Lightweight clothes can fill medium boxes.
24. Use Towels and Linens as Padding Selectively
Clean towels and blankets can cushion durable items and fill gaps, reducing the amount of disposable packing material.
Do not use your only clean bedding to wrap dirty garage equipment. Keep first-night bedding separate and clearly accessible.
25. Pack Shoes So They Do Not Crush Clothing
Clean shoes before packing. Pair them and protect delicate surfaces. Fill soft boots lightly so they keep their shape.
Shoes can be surprisingly heavy, so do not place a large collection in one oversized carton.
26. Back Up Computers Before Moving Them
A physical move is a good time to create a fresh backup.
Before disconnecting a computer:
- complete a backup to an external drive or cloud system;
- verify important files can be restored;
- shut down normally;
- disconnect cables;
- photograph cable arrangement;
- label cables if needed;
- pack storage devices carefully.
Keep irreplaceable backups with you rather than putting every copy in the same truck.
27. Pack Monitors and Televisions Upright
Use original packaging when available. Otherwise, protect screens with soft non-scratching material and rigid support appropriate to the device.
Do not lay heavy objects on top of a flat-screen television or monitor. Keep the device upright during handling when the manufacturer recommends it.
28. Photograph Cable Connections Before Disconnecting Electronics
A clear photo of the television, router, desktop computer, game console, and audio setup can save significant time later.
Put cables for each device in a labeled bag instead of combining every cable in one box.
29. Move Important Data and Password Access Safely
Confirm that you know passwords for:
- internet provider;
- router administration;
- smart-home accounts;
- utilities;
- security systems;
- cloud storage;
- email.
Use a password manager rather than writing sensitive passwords on moving labels.
30. Pack Artwork Based on Surface and Frame Type
Framed art with glass needs corner protection and separation between glass surfaces. Unframed canvases need clean protective material that will not stick to paint.
Do not use newspaper directly against artwork because ink can transfer. For valuable or fragile art, professional packing may be appropriate.
31. Protect Mirrors and Large Frames From Flexing
Use appropriately sized mirror or picture cartons when possible. Add rigid corner protection and avoid leaving large unsupported voids.
Do not use the mirror carton as a place to insert random heavy household items.
32. Create a Fragile-Box Standard
Every fragile box should have:
- padding on the bottom;
- individually protected vulnerable items;
- minimal movement inside;
- no heavy object resting on delicate items;
- top padding;
- clear FRAGILE and orientation markings when meaningful;
- a strong sealed carton.
Then tell loaders which boxes are fragile. A label alone cannot compensate for careless stacking.
33. Pack Bathroom Items Late, but Declutter Early
Bathrooms often contain many nearly empty products. Before the final week, discard expired products and consolidate duplicates where safe.
Pack spare towels, extra toiletries, backup cleaning supplies, hair tools, and unopened products early. Keep one daily kit in use until the last morning.
34. Prevent Liquid Leaks
For ordinary nonhazardous toiletries and household liquids that are allowed in your move, tighten caps and transport upright. Place vulnerable containers in sealed secondary bags or bins.
Do not assume a pump dispenser is leak-proof when laid sideways for hours.
35. Keep Medicine With You
Prescription medicine, emergency medication, and temperature-sensitive medication should not disappear into a moving truck.
Keep medicine in original labeled containers when practical and follow storage requirements. For refrigerated medicine, follow manufacturer or pharmacist guidance for transport temperature.
36. Pack Children’s Rooms With Continuity in Mind
Let children choose a small personal bag that stays with them. Include:
- favorite toy;
- comfort item;
- snack;
- change of clothes;
- bedtime book;
- headphones or simple entertainment.
Pack toys in categories rather than one mixed giant box. “Building toys,” “books,” and “art supplies” are easier to restore than “kids stuff.”
37. Move Pet Essentials Separately
Keep with you:
- pet food;
- water;
- bowls;
- medication;
- leash or harness;
- carrier;
- litter supplies;
- veterinary records;
- familiar blanket or toy.
On moving day, pets are often safer in a closed quiet room, boarding arrangement, or secure carrier away from repeatedly opening exterior doors.
38. Pack Houseplants Last
Plants are vulnerable to temperature, wind, and crushing. Water them appropriately before the move but avoid transporting waterlogged soil.
Check rules if moving plants across state or national borders because agricultural restrictions may apply.
Professional movers may restrict plants, especially on long-distance moves, so confirm policy.
39. Organize the Garage Before Packing It
Garage boxes become dangerous when heavy tools, chemicals, sharp hardware, and random equipment are mixed together.
Create groups:
- hand tools;
- power tools;
- garden tools;
- automotive equipment;
- sports equipment;
- hardware;
- hazardous products.
Remove fuel from equipment when manufacturer and mover instructions require it. Dispose of unwanted chemicals correctly before moving day.
40. Secure Sharp Tools
Cover blades, drill bits, saw teeth, pruning tools, and other sharp edges. Lock folding mechanisms where possible.
Do not place an uncovered saw blade into a box of loose hand tools where someone may reach in blindly.
41. Prepare Appliances According to Their Manuals
Large appliances may require:
- defrosting;
- draining;
- shipping bolts;
- hose removal;
- door securing;
- special upright transport;
- professional disconnection.
Use the manufacturer’s instructions. For example, washing-machine drums often require transport hardware, while refrigerators may have model-specific guidance about waiting before reconnecting after certain transport positions.
42. Empty and Dry Refrigerators Before Transport
Remove food, shelves that can move, and loose drawers. Defrost when needed and dry interior surfaces to reduce odor and moisture.
Keep doors slightly open after cleaning if the appliance will sit unplugged before transport, but secure the doors properly during the actual move according to mover/manufacturer guidance.
43. Confirm Utility Timing
A perfectly packed move can still become miserable if the new home has no electricity, water, or internet.
Schedule:
- electricity;
- gas where applicable;
- water;
- internet;
- waste collection;
- security monitoring;
- building access.
Do not shut off old utilities before final cleaning and walkthrough if you still need lights, water, heating, or cooling.
44. Change Your Address Through Official Channels
In the United States, USAGov directs movers to the official USPS change-of-address process and notes that third-party sites may charge unnecessary fees. USPS also advises notifying senders directly in addition to forwarding mail.
Update important organizations separately, including banks, employers, insurance providers, tax authorities, driver’s-license agencies, vehicle registration, schools, subscriptions, and healthcare providers as applicable.
Address-change procedures differ by country, so use your national postal service and relevant government agencies when moving elsewhere.
45. Photograph the Old Home After It Is Empty
Before leaving, photograph:
- each room;
- floors;
- walls;
- appliances included with the property;
- meter readings where relevant;
- keys being returned;
- any pre-existing damage.
For renters, this can help document move-out condition. Follow local tenancy rules for required inspections and key return.
46. If Hiring Movers, Verify the Company Before Paying a Deposit
For U.S. interstate moves, FMCSA requires household-goods movers and brokers to be registered. FMCSA’s Protect Your Move resources allow consumers to search registered movers and complaint history.
FMCSA advises getting written estimates and verifying that the company is authorized and insured for interstate household-goods transport. Requirements for moves entirely within one state vary, so check state or local regulators.
Do not rely only on a polished website, online ad, or low quote.
47. Know Whether You Are Dealing With a Mover or a Broker
A mover physically transports goods. A broker arranges transport with a mover.
FMCSA warns consumers to understand the difference because a broker may not own trucks or employ the crew that appears on moving day.
Ask directly:
- Are you the carrier or a broker?
- What is your U.S. DOT number if this is a U.S. interstate move?
- Who will physically transport my goods?
- Who handles claims?
- What documents will I receive?
48. Get a Written Estimate
FMCSA states that interstate movers must provide written estimates, and its consumer guidance advises comparing multiple estimates.
Understand whether the estimate is binding or non-binding and what can legitimately change the final price. Additional services, added items, difficult access, stairs, long carries, or parking restrictions can affect cost depending on contract terms.
Do not sign a blank estimate or other blank document.
49. Understand the Bill of Lading
For a professional interstate move in the U.S., the bill of lading is a core contract and receipt document. Review:
- pickup and delivery information;
- service terms;
- charges;
- valuation/liability selection;
- contact information;
- inventory references.
Keep your copy with you, not packed inside the truck.
50. Understand Valuation Before You Assume You Have “Insurance”
FMCSA distinguishes mover liability/valuation options from ordinary insurance language. Interstate movers must offer specific liability choices, including Full Value Protection and Released Value.
Do not choose a liability option without understanding what it would actually pay if a heavy but expensive item were damaged.
Check whether your homeowners or renters insurance provides any moving coverage, and ask questions before moving day rather than after a claim.
51. Supervise Loading
FMCSA recommends supervising loading and unloading or appointing someone you trust.
During loading:
- keep the do-not-pack area closed;
- watch fragile and high-value items;
- confirm box counts;
- review furniture condition notes;
- keep children and pets away from the loading path;
- keep documents with you.
52. Do Not Sign an Inventory You Have Not Reviewed
Professional movers may record pre-existing damage on the inventory. Walk through those notes before signing.
If an item is described as badly damaged and you disagree, raise the issue before the truck leaves.
53. Load Heavy Items Low and Stable
If you are loading your own rental truck, dense items and stable furniture generally belong low, with weight distributed safely according to the truck rental company’s instructions.
Avoid putting heavy boxes on top of fragile cartons. Use tie-down points and straps where appropriate so the load cannot shift dramatically during braking or turns.
Follow the rental company’s load and vehicle instructions; do not guess at payload limits.
54. Fill Empty Spaces Without Creating Crushing Pressure
Movement causes damage. Fill gaps with appropriate lightweight items or padding, but do not wedge fragile furniture so tightly that pressure itself causes cracking.
A load should be stable, not compressed like a trash compactor.
55. Keep Access to the First-Unload Items
Useful first-unload items include:
- cleaning supplies;
- tool kit;
- bed hardware;
- toilet paper;
- basic kitchen box;
- pet supplies;
- children’s essentials.
If using your own truck, load these late. If using movers, move them separately when possible.
 Moving day is easier when access, parking, paperwork, unloading rooms, and first-night supplies are planned before the vehicle arrives. Image: JonBalzer, Wikimedia Commons, CC BY-SA 4.0.
56. Plan Parking and Building Access
Confirm:
- where the truck can legally park;
- whether a permit is required;
- elevator reservation;
- loading-dock schedule;
- building move-in hours;
- door or gate access codes;
- distance from truck to door;
- stair access;
- weather protection.
A ten-minute parking problem can become an expensive delay when a paid crew is waiting.
57. Protect the New Home Before Unloading
Before boxes enter, put floor protection in high-traffic areas if needed. Hold doors open safely. Clear tripping hazards. Confirm that stairs and hallways are lit.
Do not cover floors with loose material that itself becomes a slip hazard.
58. Put Boxes Directly Into Destination Rooms
A single giant pile in the living room creates a second move inside the house.
Use room labels and tell helpers to carry each box to its final room.
Place “open first” cartons where they are visible rather than burying them under low-priority boxes.
59. Assemble Beds Before Unpacking Decor
A functional first night matters more than a finished-looking home.
Prioritize:
- toilet and handwashing;
- beds;
- medicine;
- pet care;
- basic food and water;
- phone charging;
- shower supplies;
- work essentials.
Decor, books, and archived possessions can wait.
60. Check for Damage While the Context Is Fresh
As furniture and boxes arrive, look for visible damage. Photograph problems before discarding packaging or rearranging the item.
If a professional mover was used, follow the claim procedures and deadlines in your contract and applicable rules. Do not rely on a verbal promise that “we’ll handle it later.”
61. Create an Unpacking Order
A practical order is:
- bathroom;
- bedroom;
- basic kitchen;
- work or school setup;
- children’s and pet spaces;
- daily clothing;
- living areas;
- storage and decor.
Finish one zone before opening every box in the house.
62. Break Down Empty Boxes Immediately
Empty cartons create visual chaos and reduce walking space.
As soon as a box is completely unpacked, flatten it or place it in a defined reuse/recycling area. Keep a small number assembled until you are sure no items need to be repacked for storage or return.
63. Use the Move to Improve Storage, Not Recreate Old Clutter
Do not automatically reproduce the old home’s storage system. The new home has different shelves, closets, traffic patterns, and room sizes.
Before filling a cabinet, decide what should logically live there.
Moving is one of the few moments when every possession passes through your hands. Use that opportunity.
64. Worked Example: One-Bedroom Apartment Move
A renter is moving ten miles across town and using a rental van with two friends.
Week 2: donate unused kitchen items, sell an extra chair, pack books and decor, reserve building elevator.
Week 1: pack most clothes, dishes, desk supplies, and small appliances. Number boxes by room.
Day before: pack daily kitchen items, disassemble bed, create essentials suitcase, move laptop and documents into car.
Moving day: load heavy boxes first, furniture next, fragile items protected, essentials last. At the new building, boxes go directly to labeled rooms.
Result: The bed is assembled by evening and only low-priority decor remains packed.
65. Worked Example: Family Move With Professional Movers
A family of four is moving interstate.
They obtain three written estimates, verify the selected mover in FMCSA’s database, review valuation options, and confirm prohibited items.
Three weeks before the move, they begin with seasonal equipment, books, and guest-room items. Children each keep a personal travel bag. Medication, laptops, passports, jewelry, chargers, and one change of clothes travel in the family’s vehicle.
On moving day, one adult supervises the truck while another keeps children and pets away from the loading route. They review the mover’s inventory before signing.
At delivery, they direct boxes to destination rooms and photograph any visible damage immediately.
66. Worked Example: Downsizing From a House to an Apartment
The main problem is not packing—it is volume.
Before buying boxes, the household measures the new rooms and compares furniture dimensions. A second dining table, large shelving unit, duplicate guest bed, and several garage items are sold or donated.
Only then do they pack.
This reduces mover volume and prevents arriving with furniture that has nowhere to go.
67. Worked Example: Three-Day Emergency Move
Sometimes there is no six-week plan.
Use triage:
Hour 1: secure documents, medication, valuables, electronics, and legal paperwork.
Hours 2–4: arrange transportation and gather boxes, tape, markers, and bags.
Day 1: pack bedroom and personal items.
Day 2: pack kitchen, living space, office, and bathroom; dispose of hazardous materials through approved channels if time allows.
Day 3: furniture disassembly, final essentials, cleaning, and loading.
In a compressed move, perfect sorting is unrealistic. Protect critical items first and use accurate room labels so organization can happen during unpacking.
68. Troubleshooting: “We Have Too Many Boxes”
Stop packing and declutter the next category before continuing. More boxes are not always the answer.
Review large low-value items, duplicates, expired products, old paperwork, unused clothing, and broken household goods.
69. Troubleshooting: “Every Box Is Too Heavy”
You are probably using boxes that are too large for dense categories.
Split books, tools, canned goods, and small appliances into smaller cartons. Use towels or lightweight items to fill remaining space rather than adding more heavy objects.
70. Troubleshooting: “We Can’t Find Anything After the Move”
Pause random unpacking. Create a central list of box numbers and destination rooms. Move boxes to the correct rooms before opening more.
Then unpack one functional zone at a time.
71. Troubleshooting: “The Mover’s Price Changed”
Read the estimate type, bill of lading, added-service documentation, and applicable rules.
For U.S. interstate moves, FMCSA publishes specific consumer protections for binding and non-binding estimates, including the 110% rule for payment at delivery under qualifying non-binding-estimate circumstances. Use official FMCSA guidance rather than social-media advice, because details depend on the actual contract and services.
72. Troubleshooting: “The Truck Is Late”
Keep essential medication, clothing, food needs, work equipment, and documents with you so a delayed truck is inconvenient rather than catastrophic.
Contact the mover through documented channels and record names, times, and promised updates.
73. Troubleshooting: “It Is Raining on Moving Day”
Protect walking routes from slipping, use waterproof covers where appropriate, reduce the time boxes sit outside, and dry wet cartons quickly.
Do not wrap damp furniture tightly in plastic for long storage without drying it first; trapped moisture can cause damage.
74. Troubleshooting: “The New Home Is Smaller Than Expected”
Do not unpack every storage box immediately. Designate one temporary holding area and build core rooms first.
Measure available storage and decide what truly belongs before filling closets.
75. A Seven-Day Packing Sprint
Day 7: declutter, buy supplies, create inventory and labels.
Day 6: pack books, decor, archives, hobby items.
Day 5: pack off-season clothing, spare linens, guest room.
Day 4: pack most kitchen items, pantry, dining room.
Day 3: pack living room, office, electronics not in daily use.
Day 2: pack garage, bathroom extras, most clothing; disassemble unused furniture.
Day 1: prepare essentials, tools, medicine, documents, bedding, final kitchen kit, refrigerator, and cleaning supplies.
76. Moving-Day Checklist
- Phones charged.
- Keys accounted for.
- Documents and valuables with you.
- Medication with you.
- Essentials kit separate.
- Tool kit accessible.
- Children and pets in safe arrangements.
- Old home photographed.
- Utilities still available as needed.
- Mover paperwork reviewed.
- Box count or inventory available.
- Truck parking confirmed.
- New-home access confirmed.
- First-night supplies identified.
- Final walkthrough completed.
77. Delivery-Day Checklist
- Protect floors and doors.
- Direct boxes to destination rooms.
- Compare box count with inventory.
- Check furniture for visible damage.
- Photograph issues before discarding packaging.
- Assemble beds.
- Set up bathroom basics.
- Connect only appliances that are ready according to manufacturer instructions.
- Keep mover paperwork and receipts.
- Do not rush signatures without reviewing the documents.
78. A Simple Packing Priority Matrix
| Use frequency | Fragility | Packing timing | Example |
|---|---|---|---|
| Low | Low | Early | Seasonal linens |
| Low | High | Early with careful protection | Decorative glass |
| High | Low | Late | Daily clothing |
| High | High/critical | Keep with you | Laptop, medicine, documents |
Frequently Asked Questions
How far in advance should I start packing?
Start decluttering and packing rarely used items several weeks ahead when possible. The exact timing depends on household size, work schedule, children, and how much you own. The most important rule is to avoid leaving every category for the final week.
What should I pack first?
Start with seasonal items, books, decor, guest-room items, archives, hobby supplies, spare linens, and off-season clothing. Keep daily-use kitchen items, toiletries, work equipment, medication, and bedding until late.
What should not go in the moving truck?
Keep identification, important documents, medication, jewelry, cash, keys, phones, laptops, irreplaceable backups, chargers, and first-night essentials with you. Movers may also prohibit hazardous materials, perishables, plants, or other items; obtain the company’s written prohibited-items policy.
How should I label moving boxes?
Write destination room, short content description, and handling priority on at least two sides. Number boxes and keep a private inventory for more detailed contents.
How do I pack fragile dishes?
Use a strong carton, bottom padding, individually wrapped pieces, minimal empty space, and top padding. Plates are often safer packed vertically on edge than in a tall flat stack. Avoid mixing heavy cookware with delicate glassware.
Is it cheaper to use larger boxes?
Not necessarily. Large boxes become unsafe when filled with dense items and can waste truck space if they collapse. Use size according to weight and shape.
How can I reduce moving costs?
Reduce the volume before obtaining final estimates, compare written quotes, understand access charges, pack efficiently if your service level allows it, and avoid paying to move low-value items you no longer want.
How do I verify an interstate mover in the United States?
Use the Federal Motor Carrier Safety Administration’s Protect Your Move resources to verify registration, U.S. DOT information, and complaint history. Intrastate moves are regulated differently, so check your state or local authority.
Can I move paint and cleaning chemicals?
Do not assume a mover or rental vehicle allows them. Follow product labels, mover restrictions, local hazardous-material rules, and EPA/local disposal guidance. Keep hazardous products in original labeled containers and never mix leftovers.
What should I unpack first?
Set up bathroom basics, beds, medicine, food and water, phone charging, pet or child essentials, basic kitchen functions, and work or school needs before decor and archives.
Conclusion: Make the Move a System, Not a Pile of Boxes
The fastest moves are not always the ones packed in the fewest hours. They are the ones that preserve order from the old home to the new one.
Start by reducing what you own. Build a simple inventory and labeling system. Use box size according to weight. Separate dense, fragile, hazardous, high-value, and daily-use items. Keep critical documents and medicine with you. Prepare the first night before you seal the last box. If you hire movers, verify the company, understand the estimate and liability documents, and supervise the transfer.
The biggest mistake is packing without thinking about unloading. Every box should already know where it is going before the tape closes. Your first practical step is to choose your destination-room labels today and begin with the least-used category in the least-used room. One completed, labeled box is more useful than a house full of empty moving supplies.
Sources and Further Reading
- Federal Motor Carrier Safety Administration — Protect Your Move
- FMCSA — Steps to Select a Mover
- FMCSA — Tips for a Successful Move
- FMCSA — Household Goods Moving FAQs
- USAGov — How to Change Your Address
- USPS — Change of Address Basics
- U.S. EPA — Household Hazardous Waste
Image Credits
- “Moving-boxes.jpg” — MoveON moving, Wikimedia Commons, CC BY-SA 4.0.
- “BellhopsWorking.jpg” — Bellhopsmarketing, Wikimedia Commons, CC BY-SA 4.0.
- “Picture of moving truck.jpg” — JonBalzer, Wikimedia Commons, CC BY-SA 4.0.