

Quick answer: A dishwasher works best when water can circulate freely, the filter is clear, the spray arms can spin without obstruction, the detergent matches the machine and water conditions, and the interior stays free of trapped food and mineral buildup. Start by identifying your model and reading its manual. Then inspect and clean the removable filter, check spray-arm holes, wipe the door seals and lower door edge, confirm the detergent dispenser opens freely, use automatic-dishwasher detergent only, and load dishes so nothing blocks the spray arms. If cleaning performance falls, troubleshoot in a logical order: loading, filter, spray arms, detergent, rinse aid, water temperature, water hardness, drainage, and finally service-level faults. Never reach into a pump area without following the manufacturer’s instructions, and disconnect power before any procedure that requires access beyond normal user-maintenance parts.
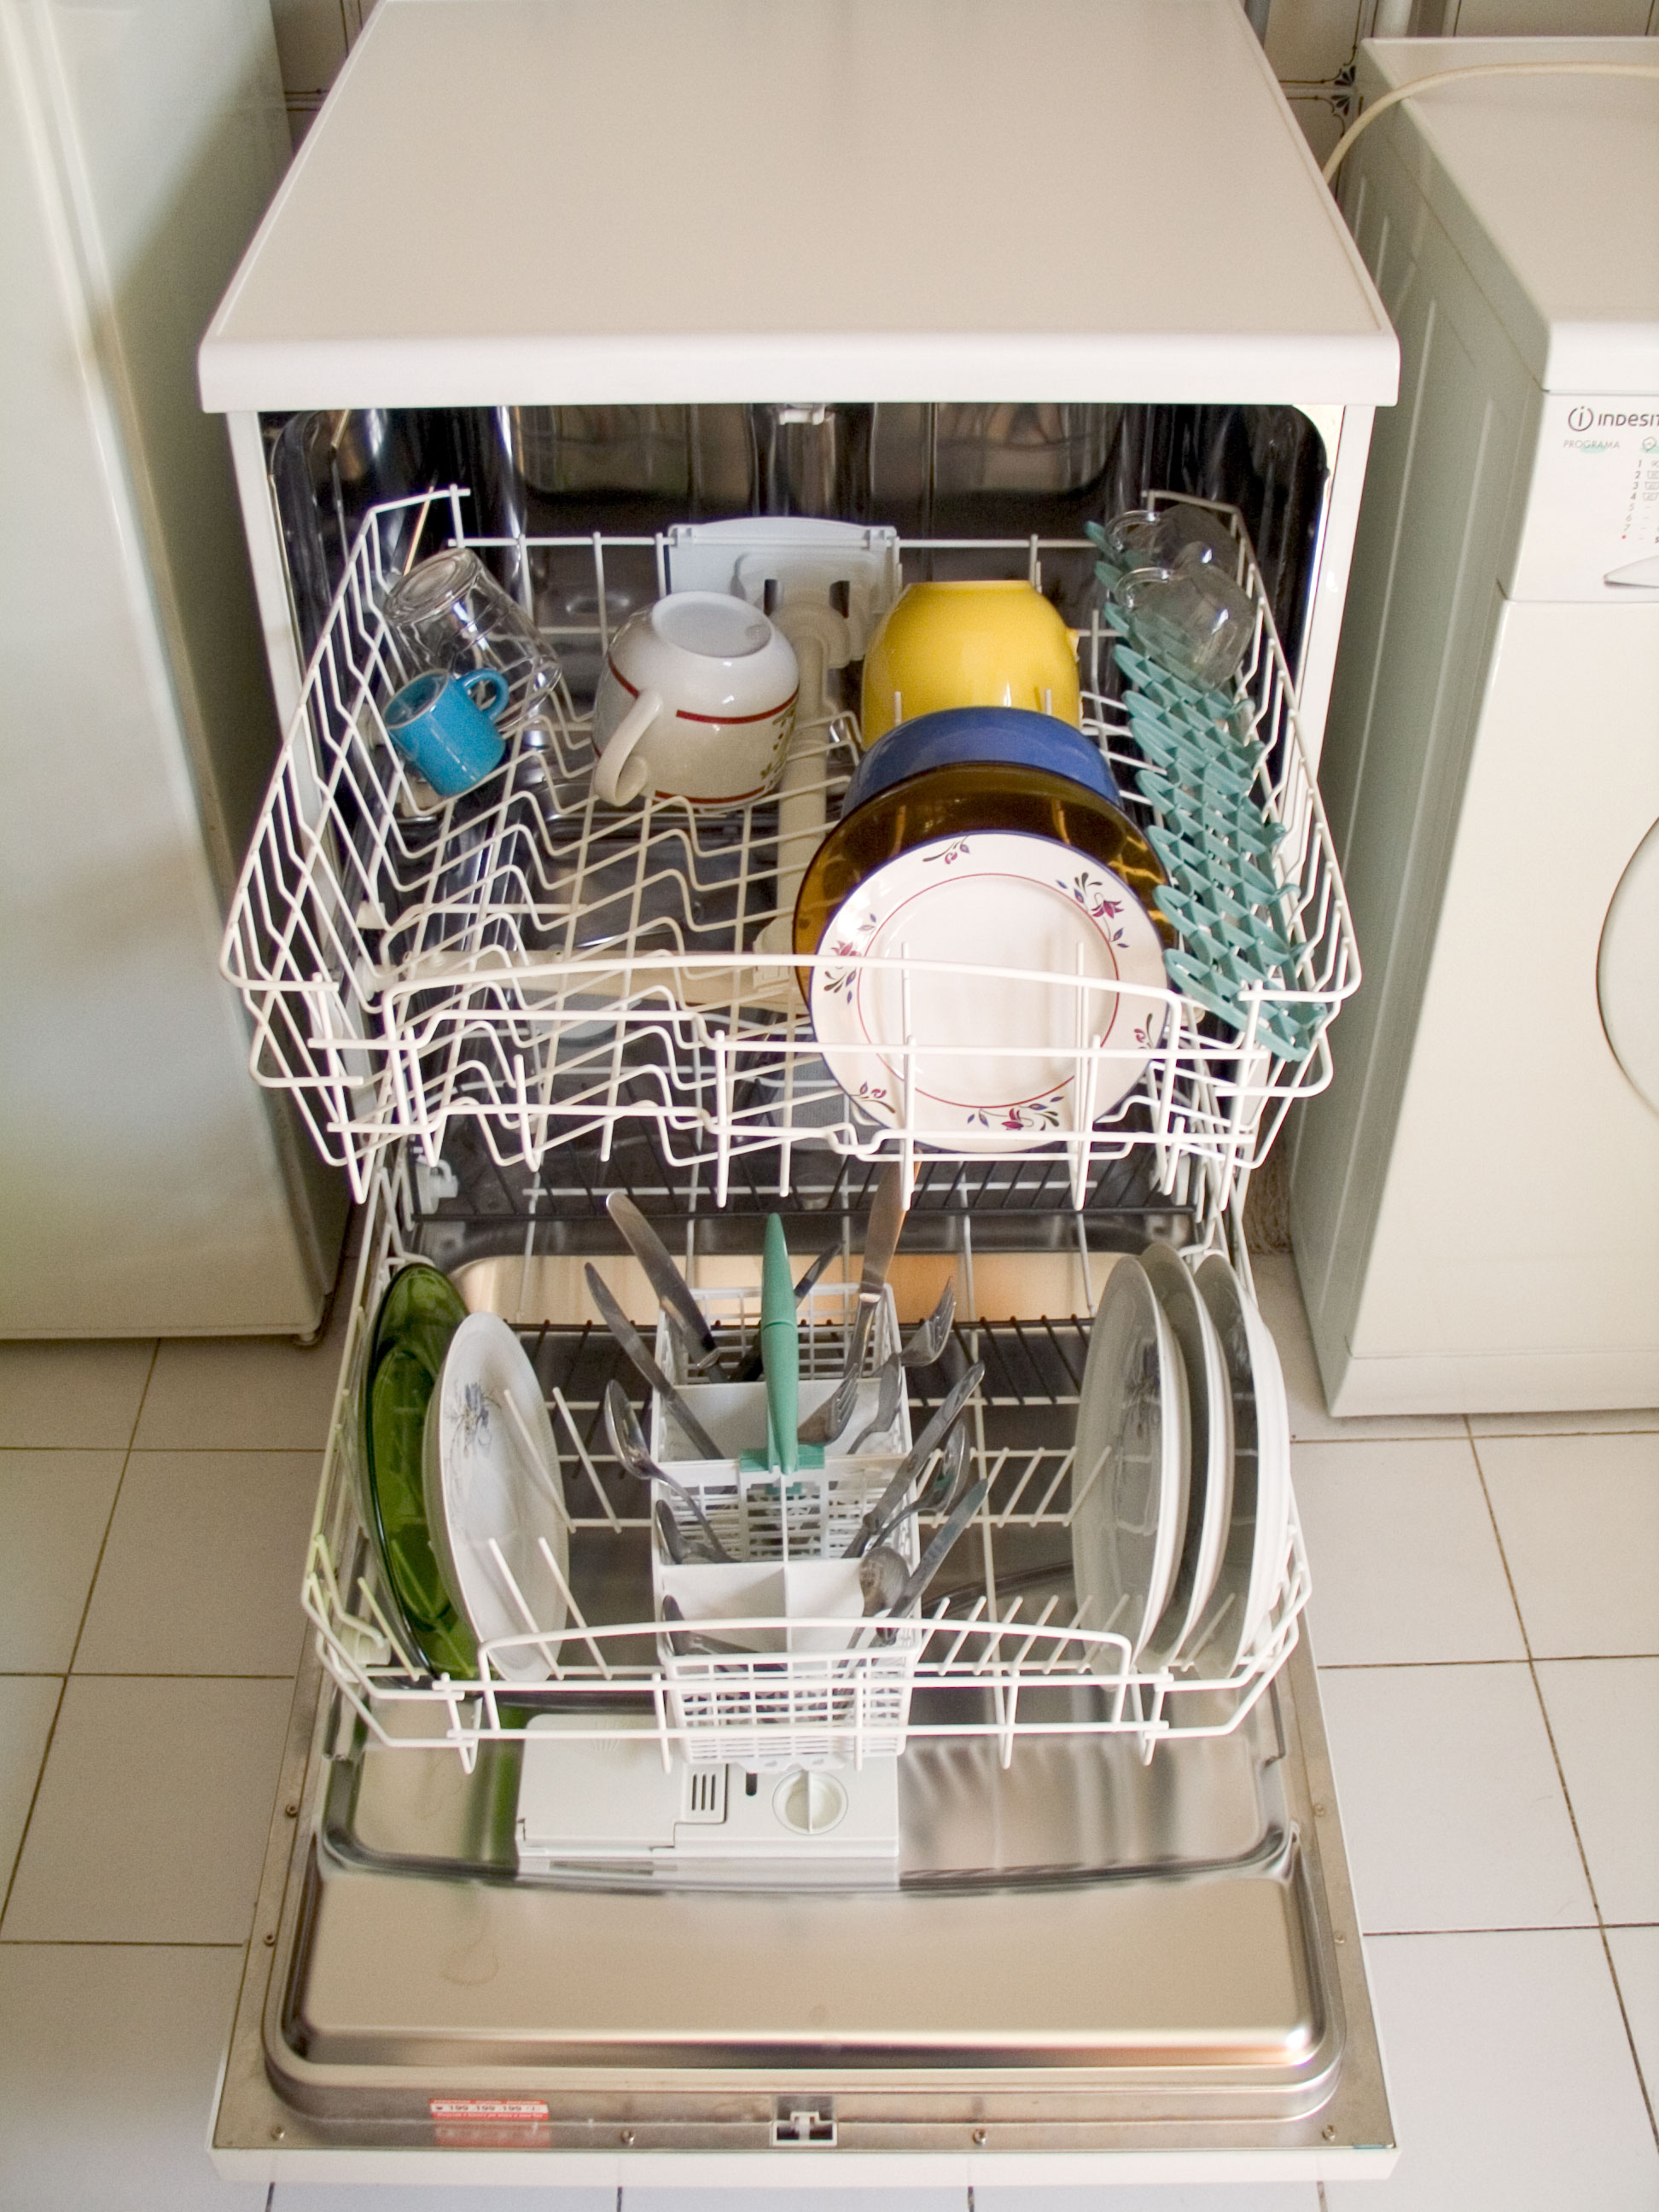 An efficiently loaded dishwasher leaves room for spray water to reach surfaces and allows the spray arms to rotate freely. Image: Carlos Paes, Wikimedia Commons, free-use permission confirmed through Wikimedia VRT.
A dishwasher can look clean while gradually losing performance. Food particles collect in the filter. A glass shard or seed blocks a spray hole. A pan handle stops the lower arm from rotating. Mineral deposits form in hard-water areas. Detergent absorbs moisture in storage and no longer dissolves properly. A door edge that never sees the main wash collects residue and begins to smell. Because the decline is slow, people often compensate by pre-rinsing more aggressively, using more detergent, choosing longer cycles, or re-running loads instead of fixing the actual cause.
That approach wastes time, water, energy, and detergent. It can also make certain problems worse. Excess detergent can contribute to filming or etching in some water conditions. Heavy pre-rinsing increases water use and may not improve cleaning. Running a machine with a clogged filter or obstructed spray arm can leave gritty residue and create the false impression that the appliance itself is failing.
This guide treats dishwasher care as a system rather than a single cleaning trick. You will learn what the major user-serviceable parts do, how to clean them safely, how to interpret common symptoms, how water hardness affects results, why loading matters, when rinse aid helps, what not to put in the machine, how to prevent odors, and when a problem has moved beyond normal maintenance into professional repair.
1. Find the Exact Model Before Following Any Maintenance Advice
Dishwashers are not all built the same. Some use removable cylindrical filters. Others use self-cleaning or maintenance-free filter systems. Some spray arms twist off; others clip in place. Some manufacturers allow a user to remove a pump cover; others do not. Some models include built-in water softeners. Some require special salt. Some use heated drying; others rely heavily on condensation drying and rinse aid.
Find the model number on the door edge, frame, kickplate area, or identification label specified by the manufacturer. Download the official manual and save it on your phone. Search within the manual for “filter,” “spray arm,” “cleaning,” “rinse aid,” “hard water,” “drain,” and “maintenance.”
Why this matters: Generic advice should never overrule the model-specific manual. Bosch, Whirlpool, GE, KitchenAid, Miele, Samsung, LG, Beko, and other brands may use different removal procedures and cleaning schedules even when the components look similar.
2. Understand the Four Systems That Determine Cleaning Quality
Most dishwasher performance problems can be traced to one or more of four systems:
- Water circulation: water must reach the dishes through unobstructed spray arms.
- Filtration and drainage: food debris must be captured and wastewater removed.
- Chemistry: detergent, rinse aid, water hardness, temperature, and soil must be compatible.
- Loading and program selection: dishes must be positioned so the machine’s hydraulic pattern can reach them.
This framework is useful because it stops random troubleshooting. If the top rack is dirty but the bottom rack is clean, focus on water distribution to the top rack. If all dishes have a white film, investigate detergent, rinse aid, hard-water minerals, and possible glass etching. If dishes are clean but smell bad, inspect trapped debris, seals, the filter, standing water, and drain behavior.
3. Learn What the Dishwasher Filter Actually Does
A removable dishwasher filter protects the pump and keeps food particles from being recirculated onto clean dishes. Bosch currently describes three core functions: protecting the pump from debris, helping clear the wash water, and preventing trapped food from redepositing on plates and glassware.
When the filter becomes overloaded, you may notice:
- gritty particles on dishes;
- unpleasant odors;
- visible debris in the tub;
- poor cleaning performance;
- slow or incomplete drainage in some cases;
- food collecting around the filter screen.
Do not assume every dishwasher filter needs the same cleaning frequency. Whirlpool notes that some models have removable filters requiring routine cleaning while others have different filter designs. Check your own manual first.
4. Remove a Removable Filter Without Forcing It
For many modern machines, filter access begins by pulling out the lower rack. The filter is usually near the center or rear of the tub floor, close to the lower spray arm.
Typical removable-filter procedures involve rotating a cylindrical upper filter counterclockwise and lifting it out, sometimes followed by removing a lower flat filter. But the exact geometry varies.
Do this:
- Turn the dishwasher off and make sure it is not running.
- Remove or pull out the lower rack.
- Check the manual for the filter release direction.
- Grip the filter housing, not fragile mesh.
- Unlock it gently.
- Lift it straight out and note how the parts fit together.
- Take a photo before separating multiple pieces if reassembly is not obvious.
Common mistake: Twisting harder when the filter does not release. A locked tab, spray arm, retaining clip, or different model design may be preventing removal. Forcing plastic parts can turn a simple cleaning task into a replacement-parts problem.
5. Clean the Filter With Water, Mild Soap, and a Soft Brush
Bosch and Whirlpool both recommend rinsing removable filters under running water and using a soft brush for stubborn debris. Whirlpool specifically warns against wire brushes and abrasive scouring pads because they can damage the filter.
Use:
- warm running water;
- a small amount of mild dish soap when the manufacturer allows it;
- a soft toothbrush or nylon brush;
- a soft cloth for the surrounding area.
Clean food from the mesh and crevices. Inspect for cracks, warped plastic, torn mesh, or a damaged locking mechanism.
Verification: Hold the filter under running water. Water should pass through the mesh easily without obvious blocked areas.
6. Reinstall the Filter Correctly Before Running the Machine
A clean filter installed incorrectly can create more problems than a dirty filter.
Whirlpool warns not to operate applicable models without the filters correctly installed and locked. Reinstall the lower filter in its locating tabs, align the upper assembly, rotate it into the locked position, and confirm it does not turn freely when it should be locked.
After reassembly, spin the lower spray arm by hand to confirm the filter or surrounding components are not interfering with its movement.
Success check: Nothing should feel loose, tilted, or improperly seated.
7. Set a Filter-Cleaning Schedule Based on Real Use
Manufacturer schedules vary. Whirlpool currently gives a general recommendation of about monthly cleaning for removable filters, with more frequent cleaning for heavy-use households. Bosch publishes more aggressive guidance for some models and regions. The right interval is therefore the one in your manual, adjusted for what you observe.
Check the filter more often if:
- the dishwasher runs daily or multiple times per day;
- plates often contain seeds, rice, labels, bones, or fibrous debris;
- you notice odors;
- dishes feel gritty;
- you wash many pots and food-preparation items;
- the household does not scrape large food scraps consistently.
If the filter is nearly clean every time, you can follow the longer manufacturer interval. If it is heavily loaded each week, your household needs a shorter schedule.
8. Check the Spray Arms Whenever Cleaning Becomes Uneven
Spray arms distribute wash water through multiple small holes. If one arm cannot rotate or several holes are blocked, cleaning can become patchy.
Bosch recommends checking that spray arms are clean and removing debris from blocked nozzles with a toothpick. GE similarly notes that blocked wash-arm jets can reduce wash performance.
With the machine off:
- Remove the lower rack.
- Spin the lower spray arm by hand.
- Check whether it hits a tall utensil, pan, board, or rack component.
- Inspect visible spray holes.
- Follow the manual if the arm is removable.
- Rinse the arm under water.
- Clear blocked holes with the manufacturer-approved method.
- Reinstall securely.
 Dishwasher interiors vary substantially by model, so spray-arm removal and filter access should follow the manufacturer’s instructions. Image: Ryan from Louisville, Wikimedia Commons, CC BY-SA 2.0.
9. Never “Improve” Spray Holes by Drilling or Enlarging Them
A blocked nozzle should be cleaned, not redesigned. Spray-hole size and direction are part of the hydraulic system. Enlarging a hole can alter pressure distribution and reduce cleaning elsewhere.
If mineral deposits or debris cannot be removed safely, replace the damaged spray arm with the correct part rather than modifying it.
10. Check for Spray-Arm Obstruction After Loading
One of the simplest tests takes five seconds: after loading, manually rotate the visible spray arms.
Look for:
- long utensil handles dropping through the rack;
- large pans leaning inward;
- cutting boards extending below the rack;
- tall bottles or trays blocking the upper arm;
- loose lightweight plastic pieces that can flip during washing.
If the arm hits something before the cycle starts, water distribution will be compromised.
11. Scrape Food—Do Not Automatically Pre-Rinse Everything
ENERGY STAR currently recommends scraping dishes instead of rinsing them before loading. Modern dishwashers and detergents are designed to handle normal food soil, and pre-rinsing increases total water and energy use.
Scrape off:
- bones;
- fruit pits;
- large vegetable pieces;
- heavy rice piles;
- thick sauces;
- paper labels;
- toothpicks;
- broken glass;
- other objects that could block a filter or pump.
You do not need to turn every plate into a visually clean plate before loading.
12. Use a Rinse or Hold Cycle When Dirty Dishes Must Sit
If a partial load will sit for a long period, some dishwashers offer a rinse-only or rinse-and-hold program. Whirlpool notes that this can help keep residue from drying and odors from developing while you wait for a full load.
Use the feature only if your model includes it. Do not add detergent to a rinse-only program unless the manual specifically says to do so.
13. Load for Water Access, Not Maximum Piece Count
A full dishwasher is efficient; an overloaded dishwasher is not.
ENERGY STAR encourages full loads because dishwashers use roughly similar energy and water for a cycle regardless of whether the machine contains only a few items. But “full” still means water can circulate.
Leave enough spacing so:
- dirty surfaces face water spray;
- bowls do not nest tightly;
- spoons do not stack together;
- large items do not shield small items;
- spray arms rotate freely;
- the detergent dispenser can open.
14. Face the Dirtiest Surfaces Toward the Wash Zone
Dishwasher racks are engineered around spray patterns. Deep bowls usually clean better when angled downward and inward. Pots belong where strong lower spray can reach them. Cups should be angled so they drain rather than trap a puddle.
The manual often includes loading diagrams for your exact rack geometry. Use them as a starting point, then adapt to your dishes.
15. Do Not Let Dishes Block the Detergent Dispenser
Whirlpool notes that lower-rack items can physically block the dispenser door from opening. A large baking sheet, pan, or cutting board placed directly in front of the dispenser may keep detergent trapped for part or all of the cycle.
After loading, open and close the dispenser manually. Make sure it has space to move.
16. Use Automatic Dishwasher Detergent Only
Hand dishwashing liquid is not interchangeable with automatic-dishwasher detergent. Whirlpool warns that ordinary dish soap creates excessive suds, which can cause leaks and poor cleaning.
If hand dish soap is accidentally added, stop the machine and follow the manufacturer’s suds-removal procedure. Do not keep restarting full wash cycles while foam is overflowing.
17. Store Dishwasher Detergent in a Cool, Dry Place
Detergent exposed to humidity can clump, cake, or lose performance. Keep the package sealed and dry. Do not store powdered detergent where steam from the dishwasher or sink repeatedly enters the container.
If a tablet or pod is swollen, stuck together, or visibly degraded, replace it.
18. Do Not Assume More Detergent Means Cleaner Dishes
Detergent amount must match the product, machine, soil, and water conditions. Excess detergent can contribute to residue or glassware problems, especially in softer water.
Follow detergent packaging and dishwasher instructions rather than doubling the dose after one bad load. First check the filter, spray arms, loading, water supply, and dispenser operation.
19. Understand What Rinse Aid Does
Rinse aid is not another detergent. Whirlpool explains that it reduces water surface tension, allowing droplets to sheet off dishes more easily. This can improve drying and reduce water spots, streaks, and mineral residue.
It is especially useful for:
- hard-water spotting;
- plastic items that remain wet;
- condensation-dry dishwashers;
- glassware with frequent water marks.
Use a dishwasher-specific rinse aid and set the dispenser according to the manual.
20. Do Not Replace Rinse Aid With Random Household Acids
Internet advice often recommends filling the rinse-aid dispenser with vinegar. Whirlpool specifically advises against using vinegar as a rinse-aid replacement because strong acidity can damage hoses, gaskets, and other internal components.
If a manufacturer provides a separate approved vinegar-cleaning procedure, that is different from continuously filling a rinse-aid dispenser with vinegar. Follow the machine’s own instructions.
21. Diagnose White Film Before Trying to Remove It
White haze on glassware can have several causes:
- hard-water mineral deposits;
- detergent residue;
- insufficient rinse aid;
- too much detergent in soft water;
- glass etching;
- silica-related film;
- poor rinsing due to restricted water circulation.
A deposit that dissolves with an approved descaling treatment is different from permanent glass etching. Do not keep increasing acid cleaning if the glass itself has been chemically etched.
22. Learn Your Water Hardness
Hard water contains higher levels of dissolved minerals, particularly calcium and magnesium. Those minerals can leave scale in the machine and white deposits on dishes.
You can obtain hardness information from:
- your municipal water-quality report;
- a water utility;
- a home test kit;
- a water-treatment provider;
- built-in hardness testing or setup procedures on some dishwashers.
If the dishwasher has a built-in softener, enter the correct hardness setting and refill dishwasher salt only as the manual directs.
23. Distinguish Hard Water From Too-Soft Water
Water that is extremely soft can also create problems if detergent dosage remains too high. Whirlpool notes that detergent chemistry designed to bind hardness minerals can interact differently when very little hardness is present, which may contribute to film or damage on some materials.
This is why detergent amount and hardness should be considered together.
24. Descale Only With a Manufacturer-Approved Method
Mineral scale can accumulate on heaters, spray arms, the tub, and internal hydraulic paths. Use a dishwasher descaler or cleaning procedure approved for the appliance.
Do not mix cleaners. Never combine chlorine bleach with acids or ammonia-containing products. If your manual specifies a commercial cleaner, use it exactly as labeled.
25. Clean the Door Seals and Lower Door Edge
The main wash does not always reach the entire door perimeter. Food splashes and detergent residue can collect around gaskets, the lower door lip, and hinge areas.
Bosch recommends cleaning seals and the door area with a damp cloth and soapy water when needed.
Use a soft cloth. Do not pull, stretch, or scrub gaskets aggressively.
26. Wipe the Detergent and Rinse-Aid Area
Sticky detergent, grease, or hard-water deposits can interfere with dispenser operation.
With the dishwasher off, wipe around the dispenser lid and hinge. Make sure the lid closes and opens freely. Do not pry apart the internal dispenser mechanism.
27. Check the Racks for Damaged Coating
Dishwasher rack tines are often steel under a protective coating. When the coating chips, exposed metal can rust.
Inspect:
- tine tips;
- weld joints;
- rack wheels;
- fold-down hinges;
- slides and stops.
Use manufacturer-approved rack repair products or replacement parts before corrosion spreads.
28. Do Not Wash Items the Manufacturer Says Are Unsafe
Common dishwasher-risk items can include:
- certain wood cutting boards and utensils;
- some cast iron;
- hand-painted ceramics;
- antique china;
- crystal not labeled dishwasher-safe;
- insulated items with sealed cavities;
- some sharp knives;
- aluminum or copper items depending on finish;
- adhesive-labeled jars.
Follow the cookware or utensil manufacturer’s instructions. Dishwasher safety is a property of the item as well as the machine.
29. Secure Lightweight Plastic Items
Light plastic lids, measuring cups, and containers can flip, fill with dirty water, or fall onto a heating element in models that have exposed heating components.
Use the upper or third rack when appropriate and secure small pieces using clips or designated rack sections.
30. Improve Drying Before Assuming the Heater Is Broken
Poor drying can result from:
- no rinse aid;
- low rinse-aid setting;
- plastic-heavy loads;
- water pooling in concave bottoms;
- choosing an energy-saving or no-heat drying option;
- opening the door too early or too late depending on model;
- a malfunctioning heater or fan.
Plastics naturally retain less heat than glass or ceramic and often emerge wetter. Start with loading and rinse-aid guidance before assuming a component failure.
31. Diagnose Odors by Finding the Source
A deodorizing product can mask a smell without fixing its cause.
Common odor sources include:
- food trapped in the filter;
- food under a seal or door edge;
- standing water;
- drain-hose installation problems;
- a dirty garbage disposal connection;
- a clogged air gap where used;
- loads sitting for several days;
- foreign objects near the pump;
- biofilm or grease buildup.
Clean the user-serviceable components first. If standing water or sewer-like odor persists, inspect the drain system according to the manual and local plumbing design.
32. Know What Standing Water Is Normal
Some dishwashers intentionally retain a small amount of water in a sump below the filter to keep seals moist. A shallow amount hidden below the filter can be normal; a tub floor covered with dirty water after the cycle is not.
Compare what you see with the manual rather than assuming every drop means the drain is blocked.
33. Troubleshoot a Dishwasher That Does Not Drain
Start with simple user-maintenance checks:
- Cancel or drain the cycle correctly.
- Clean the filter.
- Inspect visible debris around the filter area.
- Check the sink or garbage disposal for a blockage if the dishwasher drains into it.
- Check the air gap where local plumbing uses one.
- Inspect the visible drain hose for kinks.
- Follow manufacturer instructions for any user-accessible pump cover.
Bosch identifies a blocked filter, pump, or drain hose among common causes of incomplete drainage. However, pump access involves sharp debris such as broken glass. Use gloves and follow the specific manual.
34. Never Reach Blindly Into a Pump Area
A dishwasher pump can contain:
- broken glass;
- bone fragments;
- metal pieces;
- sharp plastic;
- ceramic chips.
If your manufacturer allows user pump cleaning, disconnect power as instructed, wear protective gloves, remove standing water safely, and follow the documented access procedure. If the model does not describe user pump access, call for service.
35. Diagnose Rattling and Knocking Before Calling It Mechanical Failure
Some noises are caused by the load rather than the appliance.
Check for:
- spray arm hitting a pan or utensil;
- light plastic items moving;
- cutlery touching;
- a loose rack component;
- a tall dish contacting an upper spray arm.
Whirlpool notes that wash, drain, and pump phases have characteristic sounds, while loose items can create clatter. Learn the normal sound pattern of your machine.
36. Treat a New Grinding Noise Differently From Normal Pump Noise
A dishwasher can produce a normal hum or grinding-like sound during drainage, but a sudden loud mechanical noise deserves investigation.
Stop the cycle if you suspect a foreign object, damaged spray arm, pump obstruction, or broken glass. Inspect user-accessible areas. If the noise remains after clearing obvious obstructions, arrange service.
37. Troubleshoot Detergent That Remains in the Cup
Common causes include:
- the dispenser was blocked by a dish;
- the tablet became stuck in a damp dispenser;
- water did not reach the dispenser effectively;
- a spray arm was blocked;
- water temperature or fill was inadequate;
- the dispenser mechanism malfunctioned.
Whirlpool and Bosch both connect blocked spray arms and loading problems with detergent dissolution issues. Dry the dispenser before adding certain tablets if the product instructions require it.
 Use detergent designed for automatic dishwashers and keep the dispenser unobstructed so it can open during the correct part of the cycle. Image: SelenaJKruse, Wikimedia Commons, CC BY-SA 4.0.
38. Check Water Supply When the Entire Load Is Dirty
If every rack suddenly cleans poorly, confirm that the dishwasher is actually filling and circulating water.
Possible causes include:
- water-supply valve not fully open;
- inlet hose kink;
- low household water pressure;
- inlet-valve fault;
- float or level-sensor issue;
- circulation-pump problem.
User checks should stop where the manual stops. Electrical and internal hydraulic diagnosis belongs to a qualified technician.
39. Check Water Temperature Only According to the Manual
Dishwashers heat water internally to varying degrees, but many still depend on sufficiently warm incoming water. Required inlet temperature varies by model.
Do not raise the household water heater blindly. Excessively hot water increases scald risk and may violate local safety recommendations. Compare your actual inlet temperature with the dishwasher manual.
40. Choose the Right Cycle for the Soil
Eco, auto, normal, heavy, quick, sanitize, glass, and machine-clean programs have different priorities.
A quick cycle may not handle baked-on casserole residue as well as a heavy program. A normal or eco cycle may take surprisingly long because modern machines reduce energy by using lower-power heating and longer soak periods.
Use the cycle descriptions in the manual instead of interpreting “shorter” as automatically “more efficient.”
41. Do Not Interrupt Long Modern Cycles Without a Reason
Modern dishwashers can run for several hours. Long runtime alone is not proof of malfunction.
Frequent interruption can leave detergent partially used, prevent final rinsing, or reset sensor logic. Let a selected program finish unless you need to stop because of a leak, unusual noise, wrong item, or another real concern.
42. Inspect for Leaks From the Outside In
If water appears on the floor:
- Stop the machine and turn off power if safe.
- Identify whether the water is coming from the door, hose area, sink plumbing, or below the unit.
- Check for excessive suds from wrong detergent.
- Check whether a large item is interfering with the door seal.
- Inspect accessible supply and drain hose connections.
- Arrange service for internal leaks.
Do not continue running test cycles on a machine that is actively leaking onto flooring or electrical components.
43. Inspect the Door Seal Without Replacing It Prematurely
Food or mineral residue on the gasket can cause a poor seal. Clean it gently first.
Look for:
- tears;
- permanent deformation;
- missing sections;
- hardening;
- items trapped against it.
If the gasket is physically damaged, use the correct replacement procedure or professional service.
44. Watch for Labels, Glass, and Seeds
Small foreign objects cause outsized problems.
Paper labels from jars can loosen and clog a filter. Glass can break and enter the sump. Citrus seeds and popcorn kernels can block spray holes. Toothpicks can lodge in filters or pumps.
Remove loose labels and scrape large debris before loading.
45. Create a Monthly Maintenance Routine
A practical monthly routine for a removable-filter dishwasher is:
- Clean the filter.
- Inspect spray-arm holes.
- Spin spray arms.
- Wipe the door edge and gasket.
- Check rinse-aid level.
- Inspect detergent dispenser.
- Check rack coating and wheels.
- Look for mineral deposits.
- Inspect visible hoses under the sink.
- Run an approved machine-cleaning program if due.
Adjust the frequency to the manual and household use.
46. Add a Quarterly Hard-Water Review
Every few months, look for:
- white crust on spray holes;
- scale on stainless surfaces;
- persistent cloudy glassware;
- rinse-aid setting changes;
- water-softener salt level where applicable;
- hardness changes from the local water supply.
Scale is easier to control before it becomes heavy.
47. Add an Annual Connection Inspection
Once a year, inspect the areas you can see safely:
- water-supply connection;
- drain hose;
- sink connection;
- air gap if present;
- cabinet floor for moisture;
- mounting brackets;
- door alignment.
If the appliance is hard-wired or connections are concealed, do not disassemble electrical parts unless qualified.
48. Worked Example: Dishes Are Gritty After Every Cycle
A family notices fine food particles on glasses and bowls.
Step 1: Remove and inspect the filter. It is packed with food.
Step 2: Clean the filter with running water and a soft brush.
Step 3: Inspect spray arms. Several nozzles contain rice grains.
Step 4: Clear the holes and verify rotation.
Step 5: Change the loading habit from leaving large food piles to scraping plates.
Success check: Run a normal load. If grit disappears, the problem was filtration and circulation rather than a failed pump.
49. Worked Example: Glasses Have White Spots but Plates Are Clean
The dishwasher cleans food well, but glassware emerges with visible spots.
Investigation:
- Check rinse-aid level.
- Confirm water hardness.
- Inspect for mineral scale.
- Review detergent dosage.
- Test whether the film is removable or permanent etching.
Likely response: Adjust rinse aid and detergent according to the water conditions and use the manufacturer-approved descaling procedure if mineral buildup is present.
50. Worked Example: Dishwasher Smells Bad Between Loads
The machine cleans dishes, but a sour odor appears after two days.
Investigation: The filter contains food, and the lower door edge has residue.
Fix: Clean the filter and door area, scrape large food waste before loading, and use the rinse-only feature if a partial load will sit for an extended period.
If odor persists despite a clean machine, inspect drainage and plumbing rather than masking it with fragrance.
51. Worked Example: Detergent Tablet Is Still in the Dispenser
The machine finishes with the tablet partly intact.
Investigation: A large baking tray in the lower rack rests against the dispenser door.
Fix: Reposition the tray, verify spray-arm movement, and run another correctly loaded cycle.
If the dispenser still fails with nothing blocking it, the latch or actuator may need service.
52. Worked Example: Top Rack Is Dirty but Bottom Rack Is Clean
This symptom suggests a distribution problem rather than a total machine failure.
Check:
- upper spray-arm holes;
- upper arm attachment;
- rack docking connection on models that feed water through the rack;
- tall items blocking rotation;
- incorrect upper-rack height position;
- circulation performance.
If all user-serviceable parts are clear and correctly installed, professional diagnosis may be needed.
53. Troubleshooting: The Machine Suddenly Became Much Louder
Unload and inspect before assuming a motor failure.
Look for:
- utensil through rack;
- spray arm hitting cookware;
- broken glass;
- loose filter;
- foreign object in user-accessible pump area;
- rack component rattling.
A persistent grinding or mechanical sound after these checks deserves service.
54. Troubleshooting: The Dishwasher Is Clean but Still Performs Poorly
If filter, spray arms, loading, detergent, rinse aid, and water conditions are all correct, look beyond routine maintenance.
Possible faults include:
- circulation pump weakness;
- water inlet valve problem;
- heater fault;
- temperature sensor issue;
- diverter malfunction;
- control fault;
- drain problem;
- failed dispenser.
These problems require measurement, model-specific diagnostics, and often electrical access. Call a qualified appliance technician.
55. Troubleshooting: The Filter Becomes Dirty Extremely Fast
A removable filter that clogs after every load may be receiving too much large debris.
Review:
- scraping habits;
- food labels;
- broken dishware;
- filter installation;
- possible damage to filter mesh;
- whether you are cleaning the correct filter component.
If the filter is correctly installed but food bypasses it, inspect for damage.
56. Troubleshooting: The Dishwasher Has a Sewer Smell
A sewer-like odor may come from plumbing rather than the wash tub.
Check whether the drain hose is installed with the required high loop or air gap for your local plumbing code and dishwasher instructions. Inspect the garbage disposal connection if applicable. A recently installed disposal may still have an inlet knockout plug blocking dishwasher drainage.
Plumbing configuration varies by country and installation. If unsure, call a plumber or appliance installer.
57. Troubleshooting: Water Remains in Cups and Plastics
This is often a loading and drying issue, not a failure.
Angle cup bottoms so water drains. Keep lightweight plastics in the rack recommended by the manufacturer. Use rinse aid if supported. Choose the appropriate dry option.
Remember that plastic does not retain heat as well as ceramic or glass, so it often dries more slowly.
58. Troubleshooting: Dishes Smell Like Detergent
Check:
- detergent dosage;
- correct detergent type;
- proper cycle;
- water fill;
- spray-arm blockage;
- drain function;
- rinse performance.
Do not simply add an extra rinse forever. Identify why detergent is not being rinsed away properly.
59. Troubleshooting: Glassware Looks Permanently Cloudy
If the haze does not respond to an approved mineral-removal treatment, the glass may be etched. Etching is physical/chemical surface damage and is generally not reversible.
Prevent future damage by checking water hardness, detergent amount, cycle temperature, and whether delicate glassware is dishwasher-safe.
60. Know When to Stop DIY Troubleshooting
Call for service when:
- the machine trips a breaker repeatedly;
- you smell electrical burning;
- water leaks from internal areas;
- the circulation pump does not run;
- the unit will not fill despite a confirmed water supply;
- the heater fails;
- the control panel is malfunctioning;
- internal wiring must be accessed;
- a safety switch or latch must be bypassed to test;
- the manufacturer’s troubleshooting ends with service.
Do not bypass door switches or operate the machine with protective panels removed.
61. A 15-Minute Dishwasher Reset
If performance is declining but the machine still runs, use this quick routine:
Minutes 0–3: Remove lower rack and clean the filter.
Minutes 3–6: Inspect and spin the spray arms.
Minutes 6–9: Wipe door edge, gasket, and dispenser.
Minutes 9–12: Check rinse aid, detergent condition, and water-hardness setting.
Minutes 12–15: Reload one test load correctly and run the recommended normal or sensor cycle.
If cleaning remains poor, move into symptom-based troubleshooting rather than repeating the same cleaning routine.
62. Dishwasher Maintenance Checklist
- Identify the exact model and keep the manual.
- Clean a removable filter on the manufacturer’s schedule.
- Use only soft brushes on filter mesh.
- Lock the filter correctly after cleaning.
- Inspect spray-arm holes.
- Confirm spray arms rotate freely after loading.
- Scrape large food waste instead of automatically pre-rinsing.
- Run full loads without overloading.
- Keep the detergent dispenser unobstructed.
- Use automatic-dishwasher detergent only.
- Keep detergent dry and fresh.
- Use rinse aid when recommended.
- Match detergent and rinse-aid settings to water hardness.
- Use manufacturer-approved descaling products or procedures.
- Wipe door seals and lower door edge.
- Inspect racks for rust or chipped coating.
- Secure lightweight plastic items.
- Investigate persistent standing water.
- Check visible drain-hose kinks.
- Do not reach blindly into pump areas.
- Stop and seek service for electrical smells, repeated breaker trips, or internal leaks.
Frequently Asked Questions
How often should I clean my dishwasher filter?
It depends on the model and household use. Whirlpool gives a general monthly recommendation for many removable filters and suggests more frequent cleaning for heavy use, while other manufacturers publish different schedules. Follow your manual and shorten the interval if the filter becomes heavily soiled.
Should I rinse dishes before putting them in the dishwasher?
Usually no. ENERGY STAR recommends scraping food off rather than pre-rinsing because pre-rinsing increases water and energy use. Remove large scraps, bones, labels, seeds, and other debris that could block the machine.
Why does my dishwasher smell even though the dishes look clean?
Check the removable filter, lower door edge, gaskets, standing water, and drainage. Odors often come from trapped food or stagnant water rather than the visible tub walls.
Can I use regular dish soap in a dishwasher?
No. Hand dishwashing liquid creates excessive suds and can cause leaks and poor performance. Use detergent labeled for automatic dishwashers.
Should I use vinegar as rinse aid?
Not unless your dishwasher manufacturer explicitly allows that use. Whirlpool advises against filling the rinse-aid dispenser with vinegar because acidity can damage hoses and gaskets. Use dishwasher-specific rinse aid.
Why are my glasses cloudy?
Possible causes include mineral deposits, detergent residue, incorrect detergent dosage, low rinse aid, or permanent glass etching. Determine whether the haze is removable before repeatedly descaling.
Why is the top rack dirty while the bottom rack is clean?
Check the upper spray arm, rack water connection, blocked nozzles, tall items that prevent rotation, and upper-rack position. If those are correct, circulation or diverter problems may need professional diagnosis.
Why is my detergent tablet still in the dispenser?
A dish may be blocking the dispenser door, the spray arm may be obstructed, the dispenser may be wet, water circulation may be inadequate, or the dispenser mechanism may be faulty.
Is a little water under the filter normal?
On many models, a small amount in the sump can be normal. A large pool of dirty water covering the tub floor is different. Consult the manual for your model.
When should I call an appliance technician?
Call for service when user-maintenance checks do not solve the problem or when the issue involves internal wiring, heaters, pumps, repeated breaker trips, significant leaks, burning smells, or safety switches.
Conclusion: Maintain Water Flow, Filtration, and Chemistry
A dishwasher rarely needs complicated attention when its basic systems stay healthy. Keep the filter clear, let spray arms rotate, remove large food debris, load for water access, use the correct detergent, and match rinse aid and descaling to your water conditions. Those habits prevent a large share of gritty dishes, odors, spotting, poor drying, and detergent problems.
The most important mistake to avoid is compensating for a maintenance problem with more detergent or more pre-rinsing. If performance changes, inspect the system in order: loading, filter, spray arms, dispenser, detergent, rinse aid, hardness, water supply, drainage, then service-level components.
Your first practical step is simple: find your dishwasher’s model number and open the official cleaning section of its manual. If it has a removable filter, inspect that filter today. That one five-minute check often reveals more about dishwasher performance than a shelf full of cleaning products.
Sources and Further Reading
- Bosch — How to Properly Clean Your Dishwasher Filter
- Bosch — Dishwasher Cleaning and Maintenance
- Bosch — Dishwasher Not Cleaning Dishes
- Whirlpool — How to Clean the Dishwasher Filters
- Whirlpool — What Is Rinse Aid and How to Use It
- ENERGY STAR — Dishwashers: Best Practices
- GE Appliances — Dishwasher Poor Wash Performance
Image Credits
- “Dishwasher open for loading.jpg” — Carlos Paes, Wikimedia Commons, free-use permission confirmed through Wikimedia VRT.
- “View of dishwasher inside.jpg” — Ryan from Louisville, Wikimedia Commons, CC BY-SA 2.0.
- “Loading Dishwasher with Detergent.jpg” — SelenaJKruse, Wikimedia Commons, CC BY-SA 4.0.