

 Dishwasher interior and rack layout. Photo: Ryan (BoneDaddy.P7), Wikimedia Commons, CC BY-SA 2.0.
Quick answer: When a dishwasher stops cleaning well, start with the filter, spray arms, loading pattern, detergent dispenser, water temperature, and cycle choice before assuming a pump or control has failed. Those checks address the most common causes while keeping troubleshooting within normal user maintenance.
A dishwasher can complete a full cycle, sound normal, and still leave food, grease, grit, or cloudy film behind. The useful question is not simply whether the dishes are dirty. It is what kind of residue remains, where it appears, and which part of the wash process could create that pattern. This guide turns those clues into a safe, step-by-step diagnostic process for a typical residential dishwasher.
The instructions are intentionally model-aware. Dishwasher designs differ, so your owner’s manual and the manufacturer’s official support information take priority when removal procedures, temperatures, chemicals, or service boundaries differ. Do not bypass door switches, open electrical compartments, or reach into hidden pump areas with bare hands.
Start by identifying the cleaning failure, not just the symptom
A dishwasher that “doesn’t clean” can fail in several different ways, and the fastest repair path depends on which failure you actually have. Food particles left on plates point toward blocked water flow, poor loading, a dirty filter, weak circulation, or an unsuitable cycle. A chalky white film may be mineral scale or detergent residue. Greasy dishes can indicate low wash temperature, too little effective detergent, an overloaded rack, or a cycle that is too light for the soil. Grit redeposited on otherwise clean dishes often points toward a filter that is not being cleaned or seated correctly. A single dirty rack suggests a blocked spray arm or loading problem near that rack rather than a whole-machine failure.
Before changing anything, run one normal load and inspect the results in good light. Note whether the problem affects the top rack, bottom rack, glasses, pans, or everything. Also note whether the detergent dispenser opened, whether the tablet or powder fully dissolved, whether the tub is draining, and whether the dishes are hot at the end of the wash. These observations turn a vague complaint into a useful diagnostic pattern.
- Food still attached: prioritize loading, filter, spray arms, cycle choice, and water temperature.
- White or cloudy film: investigate detergent dose, rinse aid, and water hardness.
- Grit or particles: inspect the filter, drain area, and spray-arm jets.
- One rack dirty: check that rack’s water path and spray-arm movement.
- Everything dirty and cool: check incoming hot water, cycle selection, and whether the machine is filling and circulating.
Read the owner’s manual before removing parts
Dishwasher filters, spray arms, drain covers, and racks often look similar across brands, but the way they are removed can differ. Some filters twist out by hand; others have a retaining mechanism. Some spray arms pull upward, some unscrew, and some are not intended for routine removal. The owner’s manual is therefore the safest starting point before you pry, force, or disassemble anything.
Find the model number, usually on the door edge, tub frame, or identification label. Search the manufacturer’s official support site for the manual and parts diagram. The diagram is especially useful because it shows the intended order of filters, screens, spray arms, seals, and covers. If the manual says a component is non-serviceable by the user, leave it in place. Home troubleshooting should focus on cleaning, loading, settings, and other maintenance tasks that do not require bypassing electrical safety devices or opening sealed components.
Unplug the dishwasher or switch off its circuit breaker before any task that involves reaching near pumps, wiring, or a removable drain cover. For routine filter cleaning where the manufacturer instructs otherwise, follow the manual. Never reach into an unseen sump with bare fingers; broken glass can hide below the filter.
Empty the dishwasher and create a clean baseline
Remove all dishes, cutlery, racks that are designed to lift out easily, and loose food debris. A crowded machine makes troubleshooting harder because you cannot see whether a spray arm is obstructed or whether debris is sitting around the filter. Wipe up obvious scraps with a paper towel or soft cloth rather than pushing them deeper into the drain area.
Do not begin by pouring random household chemicals into the tub. Strong acids, chlorine products, drain cleaners, hand dish soap, and combinations of cleaners can damage seals, create excessive foam, corrode components, or produce hazardous fumes. Use only products allowed by the dishwasher manufacturer, and never mix cleaning chemicals. Your goal at this stage is simply to expose the mechanical cleaning system so you can inspect it logically.
A successful baseline means the tub is empty, the lower area is visible, the spray arms can be turned by hand where the design allows it, and you can identify the filter assembly described in the manual.
Check the filter first because it affects the whole wash system
The filter is one of the highest-value checks when a dishwasher leaves particles or grease behind. Its job is to capture food debris while allowing wash water to circulate. Bosch explains that a maintained filter helps protect the pump, keep particles from returning to dishes, and support cleaning performance. When the filter is coated with grease, seeds, labels, fragments, or compacted food, water flow can deteriorate and debris can be redeposited on plates.
Remove the lower rack. Follow your manual’s directions to unlock the filter, then lift it out slowly. Inspect the coarse screen and fine mesh. If the mesh is coated, rinse it under running water and use mild soap with a soft brush if the manufacturer permits. Avoid wire brushes, knives, or aggressive scraping that can damage fine mesh. Wash both sides because grease can form a nearly transparent film that is easy to miss.
Before reinstalling the filter, wipe the surrounding sump area without pushing debris into openings. Refit every part in its original orientation and lock the filter fully. A loose filter can be almost as troublesome as a dirty one because particles may bypass it during circulation.
- Success check: the filter mesh is visibly open and water passes through it easily.
- Common mistake: cleaning only the removable cylinder while ignoring the flat screen or companion filter.
- If the filter will not seat: stop and compare the part orientation with the manual rather than forcing it.
- If the filter is cracked or warped: replace it with the correct part instead of trying to glue or modify it.
Inspect the spray arms for blocked jets
Dishwashers clean mainly by directing pressurized water through rotating spray arms. If several jets are blocked, the arm may rotate poorly and some dishes may never receive enough water. Bosch specifically recommends checking spray arms and clearing blocked outlet holes. Mineral scale, paper labels, seeds, glass fragments, and food particles can become lodged in the openings.
Rotate each arm by hand to make sure it is not striking the racks or tub. If your manual allows removal, take the arm out and rinse it under water. Hold it so water enters the central connection and watch whether water exits the jet holes. Clear visible debris gently with a toothpick or other non-damaging tool approved by the manufacturer. Do not enlarge the holes; changing jet size can alter spray pressure and rotation.
After reinstalling, spin the arm again. It should move freely without hitting a pan handle, cutting board, utensil, or tall plate. If it binds even when the dishwasher is empty, inspect the hub or mounting point for damage and consult service information rather than lubricating it with household oil.
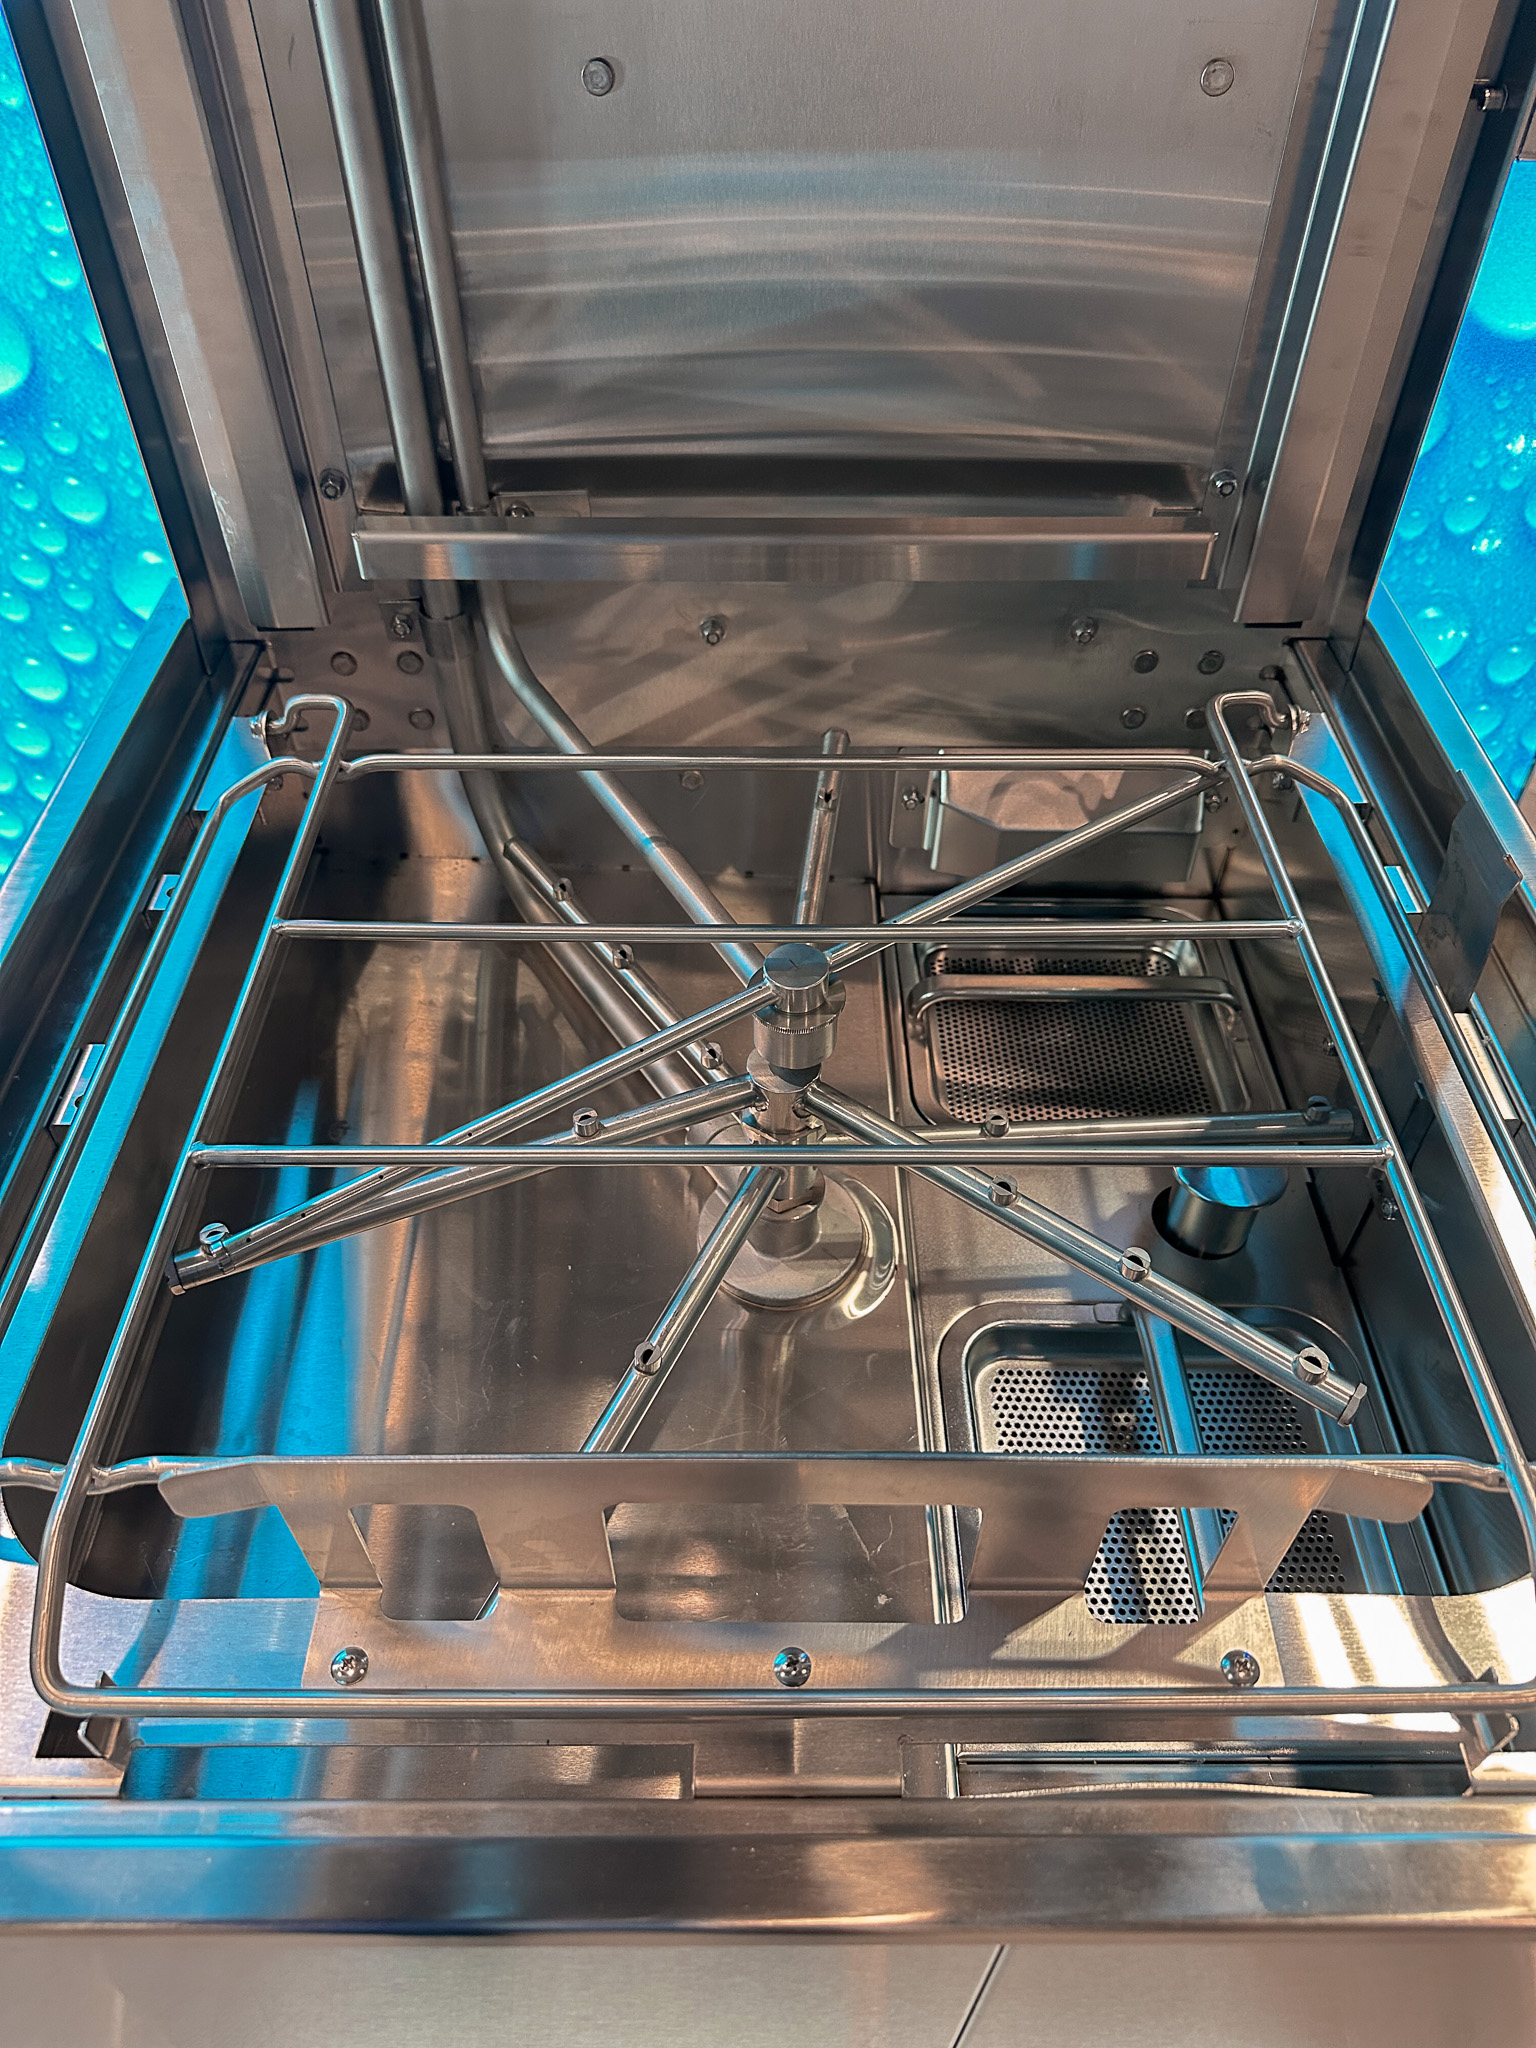 Wash arms distribute pressurized water through multiple jets. Photo: Danny.w.macklin, Wikimedia Commons, CC BY-SA 4.0.
Use rack position to diagnose a blocked water path
When the bottom rack is dirty but the top is clean, the lower spray arm or its water feed deserves close attention. When the top rack is dirty but the bottom is clean, focus on the upper spray system, rack water connection, and tall items that may block rotation. If the machine has a third rack, examine how its spray system is supplied and whether your selected cycle actually activates every zone.
This rack-by-rack method prevents unnecessary detergent experiments. A detergent problem generally affects the whole load. A mechanical obstruction can create a very specific dead zone. Place a few similarly soiled test items in different rack positions during your next diagnostic cycle. If only one region remains dirty, compare that location with the nearest spray arm and look for obstructions.
Some machines have selectable wash zones or a “top rack only” option. Whirlpool notes that when a top-rack-only feature is selected, lower spray arms may not engage as expected. Check the control panel before assuming the lower wash system has failed.
Reload the machine so water can actually reach the soil
Even a perfectly functioning dishwasher cannot clean a surface that is shielded by another dish. Place plates and bowls so their dirty surfaces face inward and downward toward the spray pattern. Leave enough separation for water to travel between items. Nesting two bowls together, stacking spoons tightly, or overlapping plates creates dry shadows where detergent solution cannot circulate.
Whirlpool and Bosch both identify loading as a common cause of poor cleaning. The most useful habit is the “spray path check”: after loading, crouch slightly and imagine water traveling upward and inward from the spray arms. If a cutting board blocks an entire side, a frying-pan handle stops arm movement, or a deep bowl acts as a roof over smaller items, rearrange the load.
Large flat items are usually better near the sides or back rather than across the front where they can block the detergent dispenser or restrict water. Dishwasher-safe plastics often belong on the upper rack, away from intense heating areas. Follow your model’s loading diagram because tine spacing and rack geometry are engineered for a particular spray pattern.
- Do not let utensils fall through the basket and stop a spray arm.
- Do not place tall boards directly in front of the detergent dispenser.
- Angle cups and concave items so water can drain instead of pooling.
- Mix spoons and forks loosely so they do not nest into a solid bundle.
- Leave the dispenser door unobstructed so detergent can release at the correct time.
Scrape food, but do not automatically pre-rinse everything
Modern dishwashers are generally designed to handle scraped dishes without extensive hand rinsing. ENERGY STAR recommends “scrape, don’t rinse,” because pre-rinsing adds water and energy use. Bosch similarly advises removing coarse food while avoiding routine pre-rinsing. This does not mean loading bones, large peels, piles of rice, or thick sauce into the machine. Remove large solids that could overload the filter, then let the wash system handle normal residues.
There are exceptions. If your dishes will sit for several days, your machine has a specific rinse function, or your manual gives different directions, follow the model guidance. Baked-on starches may benefit from the heavy cycle or a soak rather than running a short cycle after aggressive hand rinsing.
A useful test is to scrape one typical load normally, clean the filter first, and use the correct full cycle. If cleaning improves, your old habit may have been masking a filter, detergent, or cycle issue rather than solving it.
Verify that the detergent dispenser is opening
After a poor cycle, look at the dispenser. If the detergent tablet is still sitting intact in the cup, powder is caked behind the lid, or the door appears not to have opened, the wash cannot perform normally. First check for a simple loading obstruction. A cutting board, pan, or utensil can physically prevent the dispenser door from opening.
Wipe the dispenser dry before adding detergent if your manufacturer recommends a dry cup. Inspect the latch for food or detergent buildup, and make sure nothing is wedged around the lid. Then load the machine without anything near the dispenser and run a normal cycle. If the door consistently fails to release even when unobstructed, the dispenser mechanism, control, or electrical actuation may require professional diagnosis.
Do not tape the dispenser open or throw detergent into random areas of the tub as a permanent workaround. Detergent is released at a specific point in the cycle for a reason. Use the manufacturer’s prescribed location and formulation.
 Automatic dishwasher detergent belongs in the designated dispenser. Photo: SelenaJKruse, Wikimedia Commons, CC BY-SA 4.0.
Choose automatic-dishwasher detergent, not hand dish soap
Hand dishwashing liquid is formulated to produce abundant suds; automatic dishwasher detergent is designed for a low-foam machine environment. Substituting hand soap can create a mass of foam that interferes with circulation, leaks from the machine, and makes a simple cleaning problem much worse. Use only detergent labeled for automatic dishwashers.
Powders, gels, and tablets can all work when they are compatible with the machine and local water conditions, but age and storage matter. Detergent stored open in a humid cabinet can clump or lose performance. Tablets that have absorbed moisture may not dissolve normally. If performance changed soon after opening an old or damp package, test a fresh detergent before concluding that the dishwasher itself has failed.
Use the dose recommended by the detergent maker and appliance manufacturer. More is not automatically cleaner. Too much detergent can contribute to residue or film, especially in softer water; too little may struggle with heavy soil or hard water. Treat dose as an adjustable variable, not a measure of effort.
Match detergent amount to water hardness
Water hardness changes how detergent behaves. Hard water contains minerals that can leave scale or spots and may require different detergent, salt, rinse-aid, or softener settings depending on the dishwasher. Soft water often needs less detergent than very hard water. Some European-style machines include an internal water-softening system that must be configured to local hardness and supplied with dishwasher salt; other machines do not.
Find your local water utility’s hardness information or use a reliable test strip. Then follow the dishwasher manual’s hardness table rather than guessing. If your machine has a water-softener setting, an incorrect value can cause poor results in either direction. Very hard water may also build mineral deposits in spray-arm jets and on internal surfaces.
If you see a chalky film that wipes away with an acid-based descaling product approved for your dishwasher, mineral scale is more likely than food soil. If glass has permanent cloudy etching that does not wipe away, the damage may not be reversible. Avoid repeatedly increasing detergent without identifying which type of film you have.
Use rinse aid for drying and spotting problems
Rinse aid is not the main cleaning detergent, but it can improve water sheeting and drying, reducing droplets that dry into spots. Bosch specifically recommends rinse aid as part of troubleshooting cleaning and drying complaints. If your glasses emerge spotted, wet, or streaky, check the rinse-aid reservoir and its setting.
Fill only with a product intended for automatic dishwashers. Wipe spills because concentrated rinse aid can cause excessive foaming in some machines. Start with the manufacturer’s default setting, then adjust gradually if the manual allows it. If you use all-in-one tablets, do not assume the rinse-aid function is always unnecessary; some water conditions and drying systems still benefit from a separate reservoir.
If the issue is actual food stuck to dishes, rinse aid is not the primary fix. Return to spray coverage, filter condition, cycle choice, and detergent. Use rinse aid to solve the problem it is designed to solve rather than treating it as a universal cleaner.
Make sure the incoming water is hot enough
Detergent chemistry and greasy-soil removal both depend on temperature. GE Appliances advises checking incoming water temperature and notes that many residential dishwashers perform best when supplied with hot water around 120°F (about 49°C), while the appliance may use internal heating to raise temperature during selected stages. Your model’s manual is the authority, because requirements differ.
Run the kitchen faucet until hot water arrives before starting the dishwasher if your manufacturer recommends this practice. This is especially useful where the dishwasher is far from the water heater and the pipe contains a large slug of cooled water. Measure faucet temperature carefully with a thermometer if you suspect a problem. Avoid setting a household water heater unnecessarily high because scalding risk increases with temperature.
If the faucet never becomes adequately hot, the root cause may be a water-heater setting, mixing valve, plumbing issue, or distance problem rather than the dishwasher. If the faucet is hot but the dishwasher remains cold through a full wash, internal heating or control problems may need service.
Confirm that the dishwasher is actually filling with enough water
A dishwasher can sound as if it is running while receiving too little water. Low fill can reduce spray pressure, prevent detergent from dissolving, and leave both racks dirty. Possible causes include a partially closed supply valve, a kinked supply hose, inlet-screen restriction, low household pressure, or a failing inlet valve.
Start with external checks only. Confirm the shutoff valve serving the dishwasher is fully open if it is designed to remain open. Look for a pinched hose where accessible without pulling or dismantling the appliance unsafely. Listen early in the cycle: you should normally hear a fill period followed by stronger circulation. Some modern machines use surprisingly little visible water, so do not judge fill level by old dishwasher expectations.
Do not defeat the door latch to watch the machine operate. If your manual describes a safe fill-level check, follow it. If repeated loads show poor circulation and you suspect an inlet valve, pressure sensor, or electronic control, stop at the user-maintenance boundary and schedule service.
Select a cycle that matches the soil
A quick cycle is useful when the load is lightly soiled and time matters. It is not a fair test for dried oatmeal, baked cheese, heavy grease, or casserole residue. GE Appliances and Whirlpool both note that a light or short cycle may underperform on heavily soiled loads. For diagnosis, use the normal or heavy program recommended for the test soil, with heat options where appropriate.
Do not compare cleaning solely by cycle length. Modern efficient dishwashers may use long cycles because they trade time for lower water and energy use. A three-hour normal cycle is not automatically malfunctioning. Sensors can also alter duration according to soil, temperature, and selected options.
To verify cycle selection, reset unusual options such as eco-only, rinse-only, half-load, top-rack-only, or no-heat settings unless you intentionally need them. If cleaning improves immediately, you have found an operating mismatch rather than a broken pump.
Test whether the spray arms are rotating during the cycle
A spray arm can spin freely by hand yet fail to rotate under water pressure. You can perform a simple non-invasive position test. With the dishwasher off, place the spray arms in a memorable orientation, close the door, start a wash, and let it circulate for a few minutes. Stop or pause the cycle using the manufacturer’s normal control procedure, wait for spray to stop, then open the door. If the arms have moved, water pressure is at least rotating them.
Repeat only if your manual permits normal mid-cycle opening; most machines pause automatically, but designs vary. Never defeat switches or place hands inside while the pump is running.
If one arm repeatedly stays in exactly the same position while another moves, recheck blockages and the water connection feeding that arm. If all arms fail to move despite adequate fill and clean filters, circulation-pump performance may require service.
Look for labels, seeds, glass, and other hidden jet blockers
The debris that blocks dishwasher jets is often not ordinary food. Adhesive labels from jars can soften, detach, and travel through the wash system. Lemon seeds, popcorn kernels, fragments of bone, small pieces of plastic, and broken glass can also reach filters or jets. These materials do not dissolve simply because you run another hot cycle.
Inspect the lower tub with a flashlight after removing the filter according to the manual. If you see glass, use protective gloves and tools rather than fingers. Check spray-arm openings from both sides when removable. A piece of debris may rattle inside an arm and move between holes, creating intermittent cleaning problems.
Prevent recurrence by removing paper labels before dishwashing reusable jars, scraping large solids into the trash or compost, and checking chipped glassware before loading it. Small preventive habits reduce the amount of debris the filter must manage.
Check whether the detergent is dissolving at the right time
An undissolved tablet is a strong clue. Besides a blocked dispenser, it can indicate poor water spray near the dispenser, water that is too cool, a tablet stuck because the cup was wet, or an unsuitable cycle. Bosch includes tablet dissolution among its primary troubleshooting checks.
Run a controlled test with the dispenser unobstructed and the correct normal cycle. Use fresh detergent. If a powder dose dissolves but a particular tablet does not, formulation or storage may be involved. If neither dissolves and spray pressure seems weak, return to fill, filter, and circulation checks.
Do not place a tablet in the cutlery basket unless your appliance manufacturer specifically instructs you to. Premature dissolution can change when detergent is available during the wash. The dispenser is part of the cycle design, not just a convenient container.
Clean mineral scale only with an approved method
Hard-water scale can narrow spray jets, coat heating surfaces, leave white film, and reduce performance gradually. If you know your water is hard and internal stainless surfaces show mineral haze, use the descaling procedure and product recommended by the dishwasher manufacturer. Bosch, for example, publishes specific cleaning and descaling guidance for its machines.
Avoid improvising with concentrated acids or combining vinegar with other cleaners. Vinegar is commonly suggested online, but not every manufacturer recommends pouring it directly into every machine, and acids can affect certain rubber or metal components when misused. Follow the appliance-specific directions instead of assuming a kitchen ingredient is universally safe.
After descaling, clean the filter and inspect the spray arms again. Mineral fragments can loosen during treatment. Then run a normal test load with correctly dosed detergent and the proper hardness setting.
Inspect the lower sump for standing debris, not just standing water
A small amount of clean water may remain below the filter in some dishwasher designs, so the presence of water alone does not prove a drain failure. The concern is dirty water that remains high in the tub, returns after draining, or carries food particles back onto dishes. If the machine ends with obvious pooled water above the normal sump area, drainage deserves attention.
Check the filter first, because debris there can affect both wash and drain performance. If the manufacturer permits access to a pump cover, follow the exact manual procedure and disconnect power first. Remove visible debris carefully. Do not insert tools into impellers or force pump components.
If the dishwasher fails to drain, repeatedly reports a drain error, or water backs up from the sink, inspect the household drain connection and garbage disposal setup where applicable. A newly installed disposal may still have its dishwasher inlet plug in place. Plumbing work beyond a simple accessible obstruction is a good point to involve a qualified professional.
Make sure the drain hose is not causing dirty-water return
A drain hose that is installed incorrectly can allow wastewater to return to the dishwasher. Requirements vary by jurisdiction and model, but many installations use a high loop or air gap to reduce backflow risk. The hose must also avoid kinks and inappropriate height. GE Appliances specifically notes that installation and drain-hose configuration can affect wash performance.
If the dishwasher has always cleaned poorly since installation, do not overlook this. Compare the current hose routing with the official installation guide for your exact model and your local plumbing requirements. If the sink or disposal also drains slowly, fix that drainage problem before blaming wash chemistry.
Do not create a makeshift hose configuration from generic internet diagrams. Air-gap and high-loop requirements differ by local code and appliance design. When uncertain, use the manufacturer’s installation manual or a licensed plumber.
Check that the dishwasher is level
Leveling is easy to dismiss because the machine still turns on, but an improperly leveled dishwasher can affect drainage, rack movement, door operation, and water distribution. GE Appliances includes leveling among its installation checks for poor wash performance.
Place a level along the rack rails or frame as directed by the installation manual. If the machine rocks, the door will not remain positioned normally, or the rack rolls strongly by itself, installation may need adjustment. Adjust only the leveling feet using the prescribed method, and secure the appliance to cabinetry according to its installation instructions.
If the dishwasher is integrated under a stone countertop or difficult to access, do not loosen mounting hardware casually. A heavy or poorly supported appliance can shift. Installation correction is a different task from routine cleaning and may be better handled by an installer.
Use a controlled test load after each major change
Changing five things at once makes it impossible to know what solved the problem. After cleaning the filter and spray arms, run a controlled load. If the result improves, you have evidence that water circulation was involved. If not, move next to detergent, temperature, cycle, or fill checks.
Choose ordinary washable items with similar soil, not heirloom glass, delicate cookware, or anything the manufacturer excludes from dishwashing. Photograph the load before the cycle if necessary. Use the same detergent and cycle while testing one variable. This simple troubleshooting discipline prevents you from endlessly adjusting settings based on memory.
Record the result in a note: date, cycle, detergent, water temperature if measured, rinse-aid setting, and what remained dirty. Three short test notes can reveal patterns that are invisible when each load is treated as a one-off disappointment.
Diagnose greasy dishes separately from gritty dishes
Grease and grit usually tell different stories. Greasy film often means wash temperature, detergent chemistry, cycle intensity, or spray coverage was insufficient to emulsify and remove fats. Grit suggests food particles were trapped, recirculated, or unable to drain. A filter problem can contribute to both, but the dominant residue helps prioritize your next check.
For grease, verify hot water, fresh automatic detergent, and a suitable cycle. Avoid overloading pans that shield plates below. For grit, clean the filter, inspect the sump, check spray jets, scrape large food particles, and verify drainage. If grit appears only inside cups on the top rack, their angle may also be catching debris-laden water.
Do not compensate for grit by adding more detergent. Detergent cannot solve a physical recirculation problem, and excess detergent may add its own residue.
Diagnose cloudy glassware before assuming it is dirty
Cloudy glasses can result from removable mineral film, detergent residue, or permanent glass etching. The fix depends on which one you have. Mineral film is more likely in hard water and may respond to manufacturer-approved descaling plus corrected hardness settings. Detergent residue may improve with proper dosing and rinse aid. Etching is actual surface damage and cannot be cleaned away.
Test a single glass rather than treating the whole machine with chemicals. If a manufacturer-approved method removes the cloudiness, it was a deposit. If the haze remains unchanged after appropriate cleaning, consider etching, especially if the water is soft and detergent use has been high.
Reduce future risk by following detergent-dose guidance for your water conditions, using the correct cycle, and not treating every white mark as evidence that you need stronger chemistry.
Diagnose white powder or detergent residue
Powdery residue can come from too much detergent, detergent that did not dissolve, overloaded racks that prevent rinsing, low water temperature, or water chemistry. Start by confirming the dispenser opens and the wash arms can rotate. Then reduce detergent only if the manual and water-hardness guidance support it.
Check whether the residue appears everywhere or only where dishes touch. Residue at contact points may be a loading problem. Residue inside the detergent cup points more directly to dispenser or dissolution issues. If your machine has a water-softening system, verify that salt and hardness settings are correct.
A second rinse may temporarily improve appearance, but using extra rinses indefinitely wastes water and hides the underlying cause. Identify the dosing or circulation issue instead.
Diagnose food left mainly on the upper rack
When the upper rack is consistently dirty, inspect its water-feed connection. Many dishwashers route pressurized water through a docking port at the back of the rack. If the rack is not fully seated, is adjusted to an incompatible height, or the port seal is damaged, the upper spray arm may receive less water.
Pull the rack out and push it back fully. Check whether adjustable-rack positions align with the supply port as designed. Spin the upper arm and clear jets. Make sure tall stemware or utensils are not physically stopping movement.
Run the spray-arm position test. If the upper arm does not move while the lower arm does, and loading is correct, the feed path or circulation diverter may be involved. Mechanical diverters and internal pumps are generally service tasks rather than cleaning tasks.
Diagnose food left mainly on the bottom rack
For bottom-rack failures, first check that the lower spray arm is not obstructed by a pan, platter, cutlery handle, or item protruding through the rack. Remove the arm if the manual allows, flush it, and inspect every jet. Lower arms often handle larger food particles because they sit close to the filter and sump.
Also verify that a selectable top-rack-only or half-load mode is not active. Whirlpool notes that rack-specific wash settings can intentionally leave other spray zones inactive. Reset the controls and choose a normal full-machine cycle.
If the lower arm receives little or no pressure even with a clean filter and adequate water fill, internal circulation or diverter problems may require service. Do not attempt to increase pressure by drilling jets or modifying the arm.
Check door seals only if leaks or steam loss accompany poor cleaning
A worn door gasket is not the most common cause of dirty dishes, but leaks can interrupt cycles, trigger error behavior, or indicate installation problems. Inspect the gasket for food debris, folds, cuts, and obvious hardening. Clean it gently with a damp cloth and the method allowed by the manufacturer.
Do not apply petroleum jelly, grease, or random seal conditioners unless specified. Door seals are made from materials that may react with unsuitable products. If water escapes during the wash, stop using the dishwasher until the leak is identified. Persistent leaks can damage floors and cabinetry and may involve hoses, pumps, valves, or tub seals rather than the door gasket itself.
A leak combined with poor cleaning moves the problem beyond simple optimization. Treat water containment as the priority.
Listen for changes in circulation sound
You know the normal rhythm of your appliance better than you may realize. A healthy cycle typically alternates filling, active spraying, pauses, draining, and later rinse stages. If the machine suddenly becomes much quieter during what should be the wash phase, repeatedly hums without strong spray noise, or produces grinding, circulation may be impaired.
A rattling sound can come from a spray arm striking an item, which is easy to fix by reloading. Grinding can also indicate debris near a pump. Stop the cycle, disconnect power as required, and inspect only user-serviceable areas. Do not continue running a machine that sounds mechanically damaged in the hope that debris will “work itself out.”
Record unusual sounds on your phone from outside the closed appliance. A short recording can help a service technician understand an intermittent problem without requiring you to open the machine during operation.
Do not ignore error codes
Modern dishwashers monitor water level, drainage, heating, door status, and other conditions. An error code can narrow the diagnosis far more accurately than generic troubleshooting. Write down the exact code and consult the official manual or manufacturer support page for your model.
Avoid using a code description from an unrelated brand or model. The same letters and numbers can mean different things across manufacturers. If the official guidance says to reset power once, do so. If the code returns, treat it as evidence rather than repeatedly clearing it.
Codes involving leaks, heating circuits, electrical faults, or internal pumps are usually signs to move from user maintenance to professional service. A cleaning guide is not a substitute for electrical diagnosis inside a wet appliance.
Know when hard-water scale is a system problem
If scale returns quickly after descaling, the issue may be broader than the dishwasher. Extremely hard supply water can affect faucets, water heaters, coffee machines, and dishwashers. If your appliance has an internal softener, verify salt use and hardness calibration. If it does not, whole-house treatment may be worth discussing with a qualified water professional when hardness is severe.
Do not install a softener simply because glasses have spots. First obtain a hardness measurement and rule out rinse-aid and detergent issues. Water treatment changes household plumbing chemistry and may require maintenance, drainage, and sodium considerations.
The dishwasher should be configured to the water you actually have, not to generic advice from a different region.
Avoid the most common troubleshooting mistakes
Poor-cleaning problems often persist because users repeat the same low-value fixes. Running empty hot cycles without cleaning a physically blocked filter will not remove a seed stuck in a spray jet. Adding extra detergent cannot restore water flow. Pre-rinsing every plate may hide the problem while wasting water. And forcing parts off without the manual can turn a maintenance issue into a repair.
- Do not use hand dish soap in an automatic dishwasher.
- Do not mix bleach, acids, vinegar, ammonia, or commercial cleaners.
- Do not drill or enlarge spray-arm holes.
- Do not bypass the door interlock to watch the machine spray.
- Do not reach into the sump blindly; hidden glass is common.
- Do not keep resetting an error code without finding the cause.
- Do not assume a long efficient cycle means the dishwasher is broken.
- Do not run repeated extra rinses as a permanent substitute for correct detergent and loading.
Build a simple monthly maintenance routine
Preventive maintenance is easier than diagnosing a heavily fouled machine. Once a month, inspect the filter and clean it if needed, check the spray arms for free movement, wipe the door edges and gasket, inspect the detergent dispenser, and look for mineral buildup. The exact cleaning frequency depends on how often you run the machine and how much food enters it; households that wash heavily soiled dishes daily may need more frequent filter attention.
Every few months, inspect spray-arm jets closely and use any dishwasher-cleaning or descaling product only according to the manufacturer’s directions. Refill rinse aid as required. If your machine has a softener, maintain dishwasher salt and hardness settings.
Add one habit at loading time: spin the lower arm after the racks are full. It takes two seconds and catches many obstructions before a three-hour cycle is wasted.
Use a 20-minute troubleshooting sequence
If you want the fastest practical workflow, use a fixed order. First, empty the machine and clean the filter. Second, inspect and flush the spray arms. Third, reload a modest test load with correct spacing and unobstructed dispenser access. Fourth, use fresh automatic dishwasher detergent at the recommended dose. Fifth, run hot water at the sink if your manufacturer recommends it, then choose a normal or heavy cycle appropriate to the soil. Sixth, note whether the dispenser opened and whether the dishes are hot and clean at the end.
If the result is good, restore normal loading gradually and keep the maintenance routine. If the result remains poor, separate the problem into water fill, circulation, heating, drainage, or chemistry. That sequence eliminates the common maintenance causes before you pay for service.
The key is order. Cleaning a filter and correcting a blocked spray arm costs little and solves common problems. Replacing parts before completing those checks is usually inefficient.
When a professional repair is the better next step
Stop DIY troubleshooting when the problem moves inside sealed electrical or hydraulic systems. Professional service is appropriate when the dishwasher does not fill despite an open supply, the circulation pump does not produce spray pressure, the heater appears not to operate, the machine leaks, a drain pump remains jammed after user-serviceable debris is removed, the control displays a persistent fault code, or wiring smells hot or shows damage.
Also call for service when a user-removable filter, spray arm, rack, or dispenser is physically broken and you are unsure about the correct replacement. Use the model and serial number to obtain exact parts. Appliance designs change even within the same product family.
Before the appointment, provide the technician with your test notes: which rack is dirty, whether water gets hot, whether the dispenser opens, whether the arms move, what error codes appear, and what maintenance you already completed. Good observations shorten diagnostic time.
A practical example: food particles after every normal cycle
Suppose plates come out mostly clean but with small grains and vegetable fragments stuck to bowls. Start by removing the filter and finding a heavy layer of debris. Clean it, inspect the sump, and flush the spray arms. On reloading, scrape large scraps but do not pre-rinse. Space bowls so their interiors face the spray rather than one another. Use the normal cycle and fresh detergent.
If the next load is clean, the likely chain was simple: debris reduced filtration and circulation, then particles were redeposited. If grit remains only in top-rack cups, change their angle so water drains and inspect the upper spray arm. If grit remains everywhere and dirty water is standing after the cycle, investigate drainage next.
This example shows why residue type and location matter more than the sentence “my dishwasher is dirty.”
A practical example: greasy pans and dull plates
Imagine the filter is clean and the spray arms move, but oily residue remains on pans and plates. Measure the kitchen hot-water temperature carefully and discover that it barely becomes warm. Run the faucet until hot water arrives before the cycle if the manufacturer recommends it, verify the water-heater setting with appropriate safety guidance, choose the heavy cycle for the pans, and use fresh automatic detergent.
If cleaning improves, the dishwasher may have been receiving water too cool for the load and chemistry. If the sink supply is adequately hot but the machine still finishes with cool dishes and grease, internal heating may need diagnosis. If only pans remain greasy while ordinary plates clean well, load orientation and cycle intensity may be the main issues.
Do not solve every greasy load by doubling detergent. Temperature, spray coverage, and soil load work together.
A practical example: top rack fails after rack height was changed
An adjustable upper rack can sometimes be raised or lowered to accommodate tall items. After an adjustment, a user may notice that glasses stop cleaning even though the lower rack is fine. The first check is the rack’s rear water-feed docking point. Pull the rack out, inspect how its inlet aligns with the tub supply, then reinstall it fully in one of the supported positions.
Spin the upper spray arm, clear jets, and ensure stemware is not blocking it. Run the position test. If the arm now rotates and glasses clean, the issue was a water connection or obstruction introduced during adjustment.
This kind of failure is valuable diagnostically because the timing matters: when performance changes immediately after a physical adjustment, inspect the affected mechanism before changing detergent brands or water chemistry.
How to verify that your dishwasher is genuinely fixed
One clean load is encouraging; three representative loads are better evidence. Test a normal mixed load, a heavier cooking load, and a load containing the glassware or rack position that previously failed. Use normal loading habits rather than an unrealistically empty machine. The filter should remain seated, spray arms should rotate, detergent should dissolve, and there should be no abnormal standing water or error code at the end.
Record which settings worked. If a normal mixed load requires the heaviest possible cycle and repeated extra rinses every time, something may still be wrong or your loading and detergent setup may need refinement.
A repaired or properly maintained dishwasher should be boring again: load, dose, select, unload. You should not need to prewash every plate, add mystery chemicals, or manually rearrange the machine halfway through each cycle.
Frequently asked questions
The questions below address common situations that do not require repeating the entire troubleshooting process.
Why are my dishes still dirty after I cleaned the filter?
Check spray-arm jets, loading, detergent dissolution, incoming hot water, cycle choice, and whether the machine is filling and circulating normally. A clean filter removes one bottleneck; it does not rule out blocked spray, insufficient heat, or a mechanical fault.
Should I rinse dishes before putting them in the dishwasher?
ENERGY STAR recommends scraping rather than routine pre-rinsing for modern dishwashers. Remove large scraps that can clog the filter, but do not waste water washing the dishes before the dishwasher unless your appliance instructions or a specific situation call for it.
How often should I clean the dishwasher filter?
There is no universal interval for every model and household. Inspect it regularly and follow the manufacturer’s schedule. Frequent users and households that load heavily soiled dishes may need more frequent cleaning than light users.
Can I use vinegar to clean my dishwasher?
Use only a method approved for your exact model. Acidic cleaners can interact with seals, metals, or other chemicals. Never mix vinegar or other acids with chlorine bleach or unknown cleaners.
Why is only the top rack dirty?
The upper spray arm may be blocked, unable to rotate, or not receiving water through its rack connection. Also check tall items, adjustable-rack alignment, and the selected wash-zone setting.
Why is only the bottom rack dirty?
Check the lower spray arm for blocked jets or physical obstruction and make sure a top-rack-only or partial-load mode is not active.
Why is my detergent tablet still there after the cycle?
Make sure the dispenser was not blocked by dishes, the cup was used correctly, water is reaching the dispenser, the water is hot enough, and the detergent is fresh and stored dry. Repeated dispenser failure may require service.
Does a long cycle mean something is wrong?
Not necessarily. Modern efficient dishwashers often use longer cycles to reduce water and energy use. Judge performance by the manual, error codes, wash results, and whether the machine completes its cycle normally.
When should I stop troubleshooting and call for repair?
Call for service when there are leaks, electrical smells, persistent error codes, no fill, no circulation, repeated drain failure, suspected heater or pump faults, or broken internal components outside the manufacturer’s user-maintenance procedures.
Conclusion: fix the water path before chasing exotic causes
Most dishwasher cleaning complaints become easier when you think of the appliance as a controlled water path. Water must enter at the right temperature and quantity, mix with the right detergent, move through clean filters and open spray jets, reach surfaces that are not blocked by bad loading, then drain away with the soil. A failure anywhere in that path changes the result.
Begin with the highest-value maintenance steps: clean and correctly seat the filter, inspect spray arms, reload for clear spray paths, confirm fresh automatic detergent and the correct cycle, and verify the hot-water supply. Then use the residue pattern and rack location to decide whether you need to investigate fill, heating, drainage, or water hardness.
The biggest mistake is replacing parts or adding stronger chemicals before establishing which part of the process is actually failing. A methodical test costs less, protects the appliance, and gives you useful evidence if professional service becomes necessary.
Sources and further reading
- Bosch: Dishwasher Not Cleaning Dishes
- Bosch: How to Properly Clean Your Dishwasher Filter
- Bosch: How to Clean Dishwasher Spray Arms
- Whirlpool: Why Is My Dishwasher Not Cleaning Dishes Properly?
- GE Appliances: Dishwasher Poor Wash Performance
- ENERGY STAR: Dishwashers and Best Practices
- US EPA WaterSense: Home Maintenance and Dishwashers
Image licenses: Featured image by Ryan/BoneDaddy.P7, CC BY-SA 2.0; wash-arm image by Danny.w.macklin, CC BY-SA 4.0; detergent image by SelenaJKruse, CC BY-SA 4.0. All via Wikimedia Commons.