

A window air conditioner can lose a surprising amount of performance without ever producing an obvious error message. Cooling becomes slower. The fan sounds louder. The room feels humid even though the unit runs for hours. Water appears where it did not before. A musty smell returns every time the compressor starts. Many people respond by lowering the thermostat, running the unit longer, or assuming the appliance is simply old. Often, the real problem is much more basic: restricted airflow, a dirty reusable filter, debris on accessible surfaces, blocked intake or exhaust space, poor drainage, or a maintenance routine that never progressed beyond wiping the front grille.
This guide shows you how to clean and maintain a window air conditioner as a system rather than as a single filter. The goal is not to turn a homeowner into an HVAC technician. It is to help you do the low-risk, high-value work that manufacturers routinely expect owners to perform, identify the signs that separate normal operation from a real fault, and avoid common “fixes” that can damage the appliance or create an electrical, mold, or water problem.
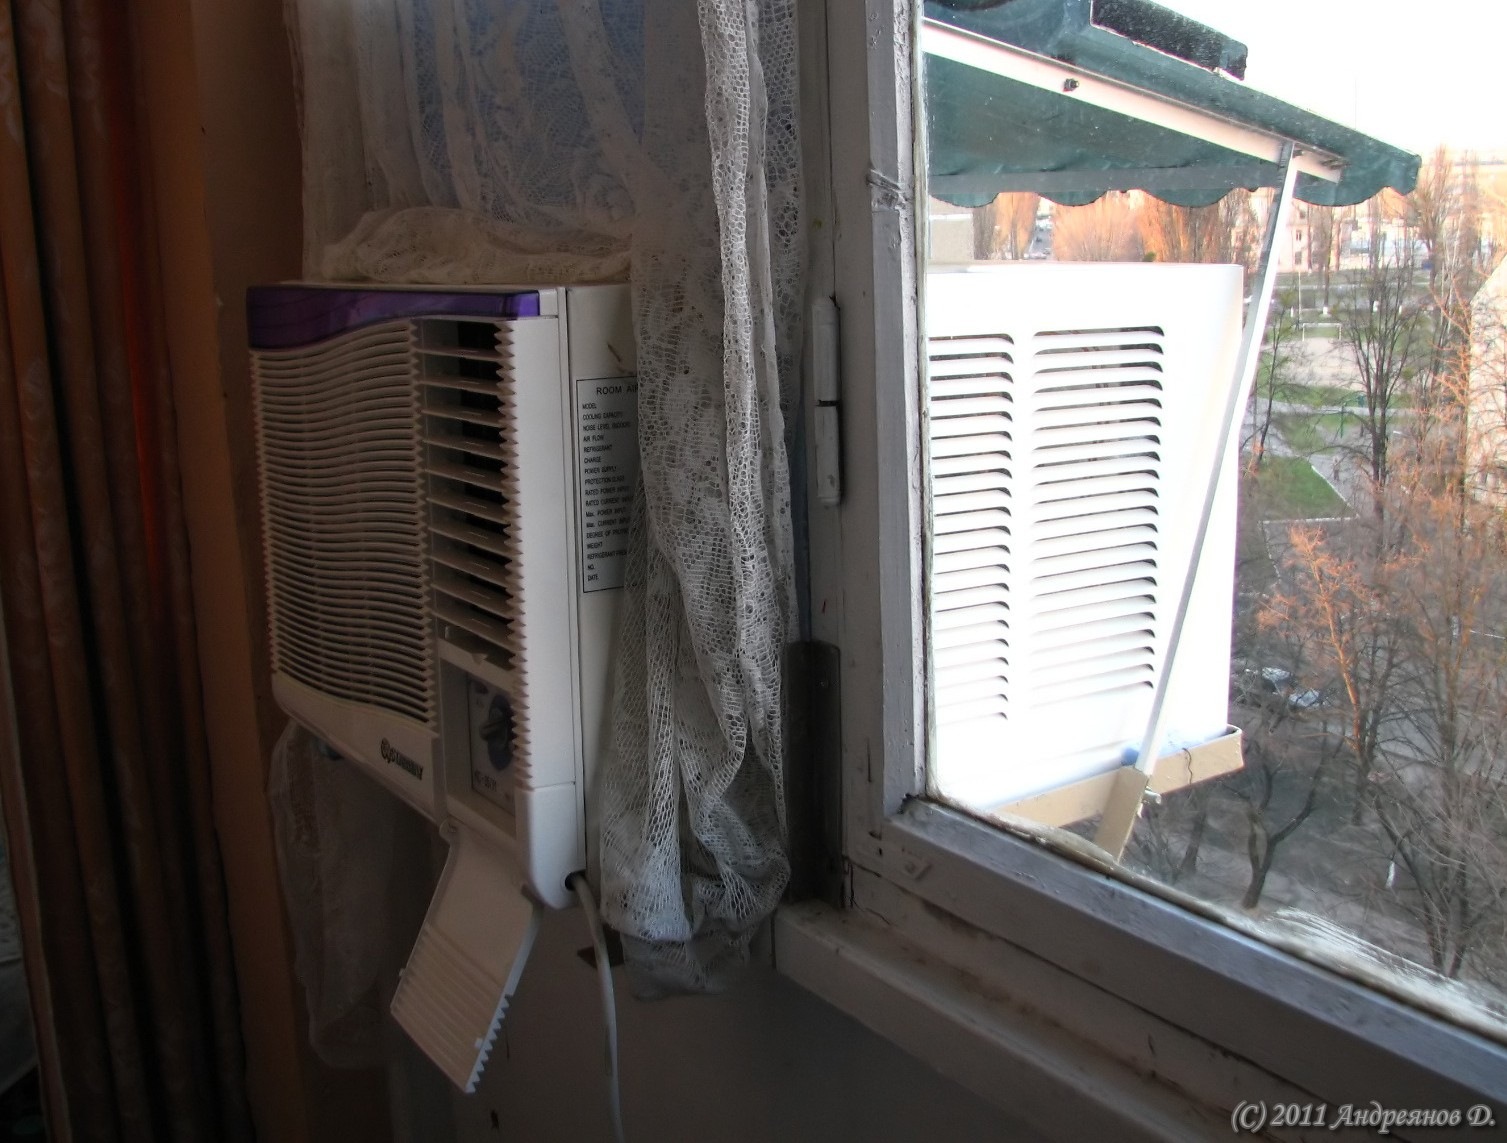 Window air conditioners move heat from the room to the outdoors, so both the indoor and outdoor sides need unobstructed airflow. Photo: Andreyanov D, Wikimedia Commons, CC BY 3.0.
Start With the Right Goal: Restore Airflow, Heat Transfer, and Moisture Control
A room air conditioner performs three related jobs. It pulls warm room air across a cold evaporator coil, removes heat from that air, and sends the heat outdoors through a condenser coil. At the same time, moisture in the indoor air can condense on the cold coil. Fans keep air moving across both sides of the system, while the base pan and drainage design handle the water that collects during cooling.
That means maintenance is not just cosmetic. Dust on a filter reduces the amount of room air reaching the cold coil. A blocked grille reduces airflow even when the filter is clean. Dirt or leaves around the outdoor side make it harder for the unit to reject heat. Water that does not move as the design expects can contribute to odors, corrosion, or leakage. A unit installed too tightly against curtains, furniture, security screens, plants, or an exterior wall can behave like a dirty unit even when every visible surface looks clean.
Your maintenance objective is therefore simple: keep the intended air paths open, keep removable filters clean, keep accessible non-electrical surfaces reasonably clean and dry, preserve the unit’s designed drainage path, and recognize symptoms that should not be “cleaned around.”
1. Identify Your Exact Unit Before You Touch Anything
Before cleaning, find the model number and the manufacturer’s use-and-care manual. This step feels unnecessary until you discover that two visually similar window units can have different filters, drainage designs, front-panel release points, seasonal storage instructions, or warnings about coil cleaning.
Look for a label on the side, behind the front grille, near the control panel, or on the chassis. Photograph the model and serial information with your phone. Search the manufacturer’s support site for that exact model, not merely the product family. Save the PDF manual in a household appliance folder so you do not have to repeat the search next season.
Pay special attention to four items in the manual: how the filter is removed, whether the front grille is designed to come off, whether the base pan has a plug or drain feature, and what the manufacturer allows the owner to clean. GE, for example, notes that many window air conditioners intentionally retain some water in the base pan so a slinger ring on the fan can throw water against the condenser coil. Removing a plug simply because you see water may reduce efficiency on some designs. That is exactly why generic advice to “drill a drain hole” or “remove every drain plug” is unsafe and often wrong.
Success check: You should be able to name your model, locate the filter instructions, and know whether any visible drain plug is intended to remain installed during normal operation.
Common mistake: Treating every window AC as mechanically identical. The outside shape is standardized enough to look familiar, but the water-management and filter details are not.
2. Shut the Unit Down Safely and Create a Clean Work Area
Turn the air conditioner off with its controls, then unplug it from the receptacle before routine cleaning. Do not rely on the thermostat being satisfied or the fan being stopped. You will be working near a fan, electrical controls, and surfaces that may retain moisture.
Place towels or an absorbent mat under the indoor side if you plan to remove and wash a filter. Keep a small container nearby for screws only if your manual specifically instructs you to remove a panel. If the unit is high, awkwardly installed, or heavy enough that reaching the exterior side would require leaning out of a window, do not improvise. Clean only the safe, accessible areas and arrange service for anything that requires unsafe access.
Use modest tools: a vacuum with a soft brush attachment, microfiber cloths, a soft cleaning brush, warm water, and mild detergent where the manual permits it. Avoid aerosol sprays around electrical components, bleach, strong solvents, high-pressure water, stiff wire brushes, and compressed-air cans aimed into the unit. GE’s current cleaning guidance for portable units explicitly warns against spray or liquid cleaners, chlorine, bleach, concentrated detergents, solvents, and abrasive pads. The exact restrictions vary by product, so the manual remains the controlling source.
3. Clean the Reusable Air Filter Properly
The filter is the highest-value maintenance point because it protects the indoor coil from a steady stream of household dust, lint, pet hair, and airborne debris. A filter that looks only “slightly gray” can already restrict airflow enough to change how the unit behaves.
Open the front grille according to the manual and slide or lift the filter out without bending its frame. Vacuum loose dust first if the filter is heavily loaded. This prevents a mat of wet dust from being pushed deeper into the mesh. Then wash a reusable filter with warm, soapy water if the manufacturer permits washing. Rinse it thoroughly and allow it to air-dry completely before reinstalling.
Frigidaire’s current support guidance for room air conditioners recommends warm, soapy water for the reusable filter and complete drying before reinstallation, with a vacuum brush attachment as an alternative for dust removal. GE advises checking the filter approximately every 30 days and cleaning it if necessary. Some models use a reminder light based on operating hours; Frigidaire, for example, describes filter reminders on certain units after 250 hours. These are reminders, not substitutes for inspection. A home with pets, construction dust, cooking aerosols, open windows, or heavy summer usage may require more frequent cleaning.
Do not operate a unit without its designed filter. Removing a dirty filter and running the AC “temporarily” can move the same debris onto the evaporator coil, where it is harder to clean and can combine with condensation.
How to verify success: Hold the dry filter toward a bright window. Air should be able to pass through the mesh without large areas being visibly blocked by lint or residue. The filter should sit flat in its guides after reinstallation.
If the filter still feels greasy: In a kitchen-adjacent room, airborne cooking oils can create a sticky film that plain vacuuming does not remove. If the filter is washable, repeat the warm-water cleaning with a small amount of mild detergent and rinse thoroughly. If the material remains deformed, brittle, torn, or permanently clogged, replace it with the manufacturer-specified filter rather than cutting generic material to fit.
 The indoor side contains the intake, filter area, supply louvers, controls, and the cold side of the cooling system. Photo: FanFan61618, Wikimedia Commons, CC BY-SA 2.0.
4. Vacuum the Intake Grille and Accessible Dust Before Wiping
With the filter removed and the unit unplugged, use a soft brush attachment to lift dry dust from the front grille, filter track, louvers, and other surfaces the manual identifies as owner-accessible. Vacuuming before wiping matters because a wet cloth can turn dry lint into paste and push it into seams.
Support delicate plastic louvers with one hand instead of forcing the vacuum brush between them. Older plastic becomes brittle after years of heat and ultraviolet exposure. If a vane does not move normally, do not pry it.
After loose dust is removed, wipe the grille and case with a lightly damp microfiber cloth and mild detergent if permitted. The cloth should be damp, not dripping. Never pour or spray cleaner directly into the air outlet, control panel, or coil area.
This is also a good moment to inspect rather than merely clean. Look for cracked plastic, a loose control panel, dark staining caused by a chronic leak from somewhere above the unit, insect nesting, damaged power cord insulation, or scorch marks around the plug and receptacle. Stop using the appliance if you find evidence of overheating at the cord or outlet.
5. Inspect the Indoor Coil Without Turning It Into a DIY Chemical-Cleaning Project
Behind the filter you may be able to see the evaporator coil: closely spaced metal fins with tubing running through them. The coil should not be packed with a felt-like layer of dust. A thin amount of settled dust is different from a mat that visibly blocks the fin passages.
If the manual permits gentle owner cleaning, remove loose surface dust with a soft brush or low-suction vacuum while taking care not to bend fins. Do not scrape the coil with a screwdriver, stiff brush, or improvised metal tool. Bent fins reduce airflow. Do not flood the coil with water while the unit remains installed unless the manufacturer explicitly provides a procedure for doing so. Electrical components, insulation, fan motors, and controls may be nearby.
If the evaporator coil is heavily impacted with greasy dirt, biological growth, or debris beyond what gentle dry cleaning can remove, professional disassembly and cleaning is often the safer choice. The same applies if you can see contamination deeper inside the blower wheel or insulated sections that cannot be accessed without removing the chassis.
EPA guidance on moisture and mold is useful here: the core solution to mold is moisture control. Cleaning visible material without correcting a drainage, humidity, leak, or persistent dampness problem invites recurrence. EPA also advises against operating a heating or cooling system that is known or suspected to be contaminated with mold because it can distribute contamination through the space.
6. Check the Outdoor Side for Airflow Restrictions
The exterior section must reject the heat removed from your room, which means its airflow matters just as much as the indoor side. From a safe location, inspect the outdoor grille and visible condenser area. Look for leaves, cottonwood fluff, dust mats, bird nesting material, plastic bags, vines, fabric covers left partially in place, or anything else blocking the inlet or outlet.
Do not reach through the exterior grille while the unit is connected to power. Do not clean the condenser with a pressure washer. High-pressure water can bend fins, drive water into electrical areas, and damage components. GE advises that if outdoor coils appear clogged with dirt, professional cleaning may be appropriate.
Also check the installation environment. Some window ACs are mounted beneath deep awnings or within sleeves that restrict hot exhaust air. Others have shrubs or exterior screens pressed close to the condenser. If the unit repeatedly cycles on thermal protection, struggles only on hot afternoons, or performs much better after sunset, poor outdoor heat rejection should be considered alongside sizing and mechanical faults.
Success check: The exterior air path should be visibly open. Nothing should be pressed against the rear grille or side vents that the manual says must remain clear.
 The exterior side must release heat outdoors. Keep the manufacturer’s required clearances and do not block the condenser airflow. Photo: FanFan61618, Wikimedia Commons, CC BY-SA 2.0.
7. Understand Condensate Before You Try to “Fix” the Water
Water behavior causes more unnecessary modifications to window air conditioners than almost any other maintenance issue. During cooling, the indoor coil removes moisture from the air. That water has to go somewhere. On many traditional window units, some water intentionally remains in the outdoor base pan. A fan-mounted slinger ring can lift the water and throw it against the warm condenser coil, helping evaporation and heat transfer.
GE specifically explains that many window room air conditioners are not designed around a simple continuously open drain hole. Water collecting in the base pan, and even dripping outdoors in humid or rainy weather, can be normal. Some models have plugs intended mainly for seasonal storage or service. Other models provide an operating option that changes water level but can affect efficiency.
Therefore, do not drill holes in the base pan. Do not enlarge a factory opening. Do not remove a rubber plug because a social-media video says “window ACs should never hold water.” Follow the model-specific drainage design.
What is not normal is water leaking into the room, soaking the wall, collecting under the indoor grille, or repeatedly spilling from a location not described by the manufacturer. Indoor leakage can come from an installation angle problem, blocked drainage path, ice melting from the evaporator, a cracked or displaced pan, a clogged internal channel, or water entering from exterior rain.
8. Check the Installation Angle and Window Seal
A window unit must be installed exactly as its instructions specify. Many traditional units are designed so condensate remains toward the outdoor portion of the base pan. The required pitch is often created by the mounting hardware or case geometry, so deliberately tilting the appliance far downward is not a substitute for following the installation instructions.
Inspect the unit from indoors and outdoors. Is it securely supported? Is the sash or bracket still holding it as designed? Has foam compressed over time? Are side panels torn or pulled away? Has the building settled or the sill softened from an old leak? Does rainwater have a path into gaps around the chassis?
Do not place books, wood scraps, or random shims beneath the appliance to create a steeper angle unless the installation manual tells you to use a specific support. A poorly supported unit can shift, damage the window, leak, or fall.
Sealing gaps around the unit can improve comfort because hot outdoor air should not bypass the appliance through cracks. However, never seal over vents on the case. Window-unit side and rear openings may be essential to condenser airflow.
9. Use Symptoms to Diagnose Airflow Problems Before Assuming Refrigerant Failure
A window air conditioner that “is not cooling” can mean several different things. Start by describing the symptom precisely.
The fan runs, but airflow from the front is weak
Check the filter, indoor grille, louvers, and any curtain or furniture blocking the intake or outlet. Confirm the fan-speed setting. If the filter is clean and the air path is open but airflow remains abnormally weak, the blower may be dirty, damaged, or mechanically failing.
Airflow is strong, but the air is barely cooler than the room
Confirm the unit is in cooling mode rather than fan mode, the set temperature is below room temperature, doors and windows are closed, and the outdoor side has adequate airflow. Give the compressor normal time to start if the control system uses a delay. Persistent poor temperature drop can indicate a mechanical or refrigeration problem that routine cleaning will not fix.
The unit cools well at night but struggles in afternoon heat
Check direct sun exposure, room heat gain, exterior airflow, unit sizing, and whether other heat-producing appliances are running. A clean but undersized unit cannot overcome unlimited heat load. Likewise, a correctly sized unit can perform poorly if its condenser is recirculating hot exhaust air.
The unit starts and stops frequently
Short cycling can be caused by several things, including a unit that is oversized for the room, a thermostat sensing unusual local temperatures, restricted airflow, icing, or a fault. Do not assume that more frequent cycling proves the unit is saving energy.
10. Respond to Ice by Restoring Airflow and Letting the Unit Thaw
Ice on the indoor coil is a sign that the coil surface is dropping below freezing while moisture is present. A dirty filter or blocked airflow can contribute because too little warm room air passes across the coil. Frigidaire’s support guidance for room AC icing specifically tells owners to check the filter and make sure curtains, drapes, furniture, and other objects are not blocking airflow. It also notes that cooling operation in low outdoor temperatures can contribute to icing on some units.
If you see ice, stop cooling operation. Use fan-only mode if the manufacturer recommends it and the fan can operate safely, or turn the unit off and allow all ice to melt. Put towels in place if necessary to protect the interior. Never chip ice from the coil with a knife or screwdriver. The thin refrigerant tubing and aluminum fins can be damaged easily.
After the unit is fully thawed, clean the filter, restore clear airflow, and restart under normal conditions. If icing returns despite a clean filter and unobstructed airflow, arrange service. Low refrigerant from a leak, fan problems, sensor faults, or other mechanical conditions are not solved by repeated thawing.
11. Treat Musty Odors as a Moisture Investigation, Not a Fragrance Problem
A musty smell from an air conditioner should lead you to inspect moisture and cleanliness rather than masking the odor with fragrance sprays. Start with the filter, accessible grille surfaces, condensate behavior, visible coil area, and any wet material around the installation.
EPA’s mold guidance emphasizes that moisture control is the key to mold control. Indoor relative humidity should generally remain below 60 percent and ideally around 30 to 50 percent where practical. Air conditioners can help remove humidity, but persistent dampness around the appliance, standing water in inappropriate locations, leaks, or water-damaged porous materials can support microbial growth.
If you see substantial suspected mold inside inaccessible components, if insulated material inside the appliance is wet or contaminated, or if odors return immediately after ordinary cleaning, do not keep spraying disinfectants into the air path. The unit may need professional cleaning, repair, or replacement. If contaminated water such as sewage is involved, EPA recommends professional assistance.
Remember that not every dark mark is mold and not every odor originates inside the unit. A damp window frame, wall cavity, curtain, exterior sill, or wood trim can create an odor that appears only when the fan begins moving room air.
12. Clean the Exterior Case Without Damaging the Controls
For routine case cleaning, use a soft cloth lightly dampened with water and mild detergent if your manual permits it. Wipe the control panel rather than spraying it. Clean fingerprints and accumulated dust from the louvers and front panel. Dry the surfaces before reconnecting power.
If the plastic has yellowed with age, accept the cosmetic change rather than experimenting with strong oxidizers or solvents on an installed electrical appliance. Cosmetic restoration is not worth damaging brittle plastic, labels, buttons, or electrical insulation.
13. Build a Maintenance Schedule Based on Usage, Not the Calendar Alone
A good schedule is simple enough to follow. Use the manufacturer’s interval as your baseline and adjust based on conditions.
Every two to four weeks during heavy cooling
- Inspect the reusable filter and clean it when dirty.
- Check that curtains, furniture, and objects have not drifted into the intake or outlet.
- Look for unusual indoor water, ice, or odor.
- Listen for new rattling, scraping, buzzing, or fan imbalance.
Monthly during the cooling season
- Vacuum the grille and accessible filter compartment.
- Inspect the exterior air path from a safe location.
- Check window seals, side panels, and mounting stability.
- Inspect the plug and receptacle for heat discoloration or looseness.
At the beginning of the cooling season
- Find the model manual and review any updated service notices or recalls.
- Perform a deeper filter and case cleaning.
- Inspect coils visually.
- Confirm drainage behavior matches the manual.
- Test all operating modes and fan speeds.
At the end of the season
- Clean and completely dry the filter.
- Follow the manufacturer’s procedure for draining any water intended to be removed for storage.
- Clean and dry the case.
- Store the unit upright if the manual requires it.
- Protect the appliance from pests and dust without trapping moisture inside.
14. Reduce the Cooling Load Before Blaming the Appliance
Maintenance cannot compensate for an impossible heat load. A room with strong afternoon sun, unsealed window gaps, multiple computers, cooking equipment, or frequent door opening may require much more cooling than its floor area suggests.
Close blinds or curtains that block solar heat without blocking the air conditioner’s intake or outlet. Seal air leaks around the window using the installation kit or suitable weatherstripping while keeping all appliance vents clear. Avoid placing heat-producing lamps or electronics near the thermostat sensor. When outdoor conditions permit, reduce unnecessary internal heat sources.
If the unit has always struggled from the day it was installed, sizing may be the issue. An undersized unit can run nearly continuously and still fail to reach setpoint. An oversized unit can cool the air rapidly but cycle off before removing enough moisture, leaving the room cool and clammy. Sizing is about both sensible cooling and humidity control.
15. Know Which Noises Are Normal and Which Deserve Attention
Window air conditioners are not silent machines. Compressor hum, fan airflow, relay clicks, and water splashing against the condenser may be normal. GE notes that water droplets thrown against the outside coils can create a pinging sound because of the slinger-ring design.
New mechanical sounds are different. A scraping noise that changes with fan speed can suggest something contacting the fan. A repetitive metallic rattle may be a loose panel or fastener. A loud electrical buzz followed by failure to start can indicate a component problem. A high-pitched squeal, burning smell, visible smoke, or repeated breaker trip is a stop-use condition.
Do not defeat a rattle by wedging objects into the chassis or placing weight on top of the unit. Find whether an external grille, front cover, side panel, window sash, or installation bracket is vibrating. If the sound originates inside the sealed chassis and requires disassembly to reach, service is the safer route.
16. Do Not Use an Extension Cord as a Permanent Installation Fix
Room air conditioners draw substantial electrical current, especially when the compressor starts. Use the electrical connection specified by the manufacturer. Do not make a habit of plugging the appliance into an undersized extension cord or a crowded power strip because the receptacle is inconveniently located.
Inspect the plug occasionally. It should not be scorched, melted, cracked, or unusually hot. If the receptacle feels loose, if the plug will not remain secure, or if you see heat damage, stop using that outlet and have the electrical problem corrected. Replacing the air conditioner’s plug while ignoring a damaged receptacle is not a complete repair.
17. Use a Simple Performance Test After Maintenance
You do not need laboratory instruments to decide whether cleaning helped. Run a before-and-after test under similar conditions.
Before cleaning, note the room temperature, outdoor conditions, fan speed, setpoint, and how the airflow feels at a fixed distance from the outlet. If you have a reliable thermometer, measure the room air away from the direct supply stream. Record how long the unit runs and whether it cycles normally.
After cleaning and complete reassembly, run the unit on the same fan and cooling settings. Confirm that airflow is stronger or at least unobstructed, the unit does not ice, no water enters the room, and the room temperature moves steadily toward setpoint.
Avoid judging performance by placing a thermometer directly against the cold coil or by expecting one universal vent temperature. Room air conditions, humidity, fan speed, model design, and sensor behavior differ. The practical question is whether the appliance now moves air properly and controls the room better without abnormal symptoms.
18. Troubleshoot Common Problems in a Logical Order
Problem: The unit smells dusty for a few minutes after startup
Check and clean the filter and grille first. Dust that settled during storage can create a temporary odor. If the smell fades quickly and there is no moisture or visible contamination, continue monitoring. Persistent musty odor requires a moisture investigation.
Problem: Water drips outdoors
Outdoor dripping can be normal, especially in humid conditions. Compare the behavior with the manual before changing anything.
Problem: Water drips indoors
Turn the unit off if water threatens electrical components or the building interior. Check for ice, installation movement, window gaps, and the model’s drainage guidance. Persistent indoor leakage warrants service.
Problem: Filter becomes dirty extremely quickly
Look for indoor sources: pet shedding, renovation dust, smoke, candles, cooking aerosols, open windows facing traffic or construction, and fabric lint. Cleaning more often may be necessary, but reducing the source can help.
Problem: Unit runs continuously
Confirm the filter is clean, airflow is clear, doors and windows are closed, and the setpoint is realistic. Consider extreme outdoor heat, room heat gain, and sizing. If it never reaches temperature under conditions it previously handled, mechanical service may be needed.
Problem: Cooling is good but the room feels humid
Make sure the unit is not greatly oversized and short-cycling. Check that fan mode and energy-saving settings are appropriate for your model. Persistent high humidity may also originate from air leaks, moisture sources, or building conditions beyond the AC itself.
19. Know When DIY Maintenance Ends
Routine owner maintenance should stay on the safe side of the appliance’s designed service boundary. Stop and seek qualified service when you encounter any of the following:
- Repeated breaker trips or a hot, scorched, or damaged plug.
- A compressor that repeatedly fails to start or makes abnormal electrical noises.
- Recurring evaporator icing after the filter and airflow problems are corrected.
- Persistent indoor water leakage with correct installation.
- Heavy contamination that requires deep chassis disassembly.
- Suspected refrigerant leakage or damaged refrigerant tubing.
- Fan blades that scrape, wobble, or do not rotate correctly.
- A damaged power cord or built-in leakage-current protection plug.
- Substantial suspected mold in inaccessible or porous internal materials.
- A unit that has been dropped, flooded, or exposed to contaminated water.
Refrigerant work is not normal homeowner maintenance. The cooling circuit is sealed and subject to technical and environmental requirements. If a leak exists, adding refrigerant without repairing the leak is not a meaningful long-term fix.
20. A 30-Minute Routine for a Typical Window AC
If your unit is basically healthy and only needs routine care, use this sequence:
- Minute 0–3: Turn the unit off, unplug it, clear the surrounding work area, and inspect the cord and receptacle.
- Minute 3–8: Remove the filter, vacuum loose dust, and wash it if allowed.
- Minute 8–14: While the filter dries, vacuum the front grille, louvers, and accessible filter compartment.
- Minute 14–18: Inspect the visible indoor coil for heavy buildup, ice evidence, corrosion, or contamination.
- Minute 18–22: Inspect the outdoor airflow path from a safe location and remove loose external debris you can reach without disassembly.
- Minute 22–25: Check the window seal, support, side panels, and signs of indoor leakage.
- Minute 25–30: Reinstall the completely dry filter, reconnect power, and test cooling and fan operation.
If the filter is still wet at minute 25, stop the clock. Complete drying matters more than finishing within 30 minutes.
Worked Example: A Bedroom AC That Became Noisy and Slow to Cool
Imagine a six-year-old window unit in a bedroom. It used to cool the room in less than an hour, but this summer it runs for long periods, airflow feels weak, and a faint rattling appears at high fan speed. There is no error code.
The owner first checks the exact manual rather than opening the chassis. The filter, which had not been cleaned for two months, is covered with pet hair and fine dust. After unplugging the unit, the owner vacuums and washes the filter and leaves it to dry.
With the filter removed, the front intake is found to have a visible line of lint. The grille and filter track are vacuumed. The evaporator surface is visible and not heavily impacted, so no chemical coil cleaner is used. A curtain that had been moved for summer is discovered hanging partly across the left side of the intake.
Outside, a lightweight decorative screen installed near the window is restricting part of the rear airflow. It is repositioned to restore the clearance required by the AC manual. The installation itself is secure, and the water seen in the rear pan is confirmed to be normal for this model.
After the filter dries and is reinstalled, the unit is tested. Airflow is noticeably stronger. The rattle is gone because the curtain is no longer being pulled toward the grille. The room reaches temperature normally. No refrigerant was added, no drain hole was drilled, and no internal parts were disassembled. The problem was a combination of filter restriction and blocked air paths.
This example shows why a diagnostic sequence matters. Starting with the refrigerant or compressor would have skipped the most likely and lowest-risk causes.
Maintenance Mistakes That Can Turn a Small Problem Into a Large One
Running without the filter
This moves debris from an easy-to-clean component to a harder-to-clean coil and blower.
Drilling a drain hole
Many window units intentionally manage water in the base pan. An improvised hole can damage the pan, reduce designed water-slinging efficiency, create corrosion points, or strike hidden components.
Using a pressure washer
Pressure can bend coil fins and force water where it does not belong.
Spraying bleach or disinfectant into the intake
This can damage materials, expose occupants to chemical mist, and fails to correct the moisture source responsible for recurring biological growth.
Chipping ice from the evaporator
The fins and tubing are delicate. Let ice melt naturally after correcting airflow.
Assuming a musty smell means “dirty filter only”
The filter is the first check, not the final diagnosis. Look for moisture, water-damaged materials, and deeper contamination.
Blocking the outdoor side with a winter cover during use
Never operate the appliance with airflow covers, storage wrap, or protective panels still blocking vents.
Buying generic replacement foam without checking specifications
The wrong material can create excessive resistance or bypass gaps. Use the specified filter type.
Frequently Asked Questions
How often should I clean a window air conditioner filter?
Follow the manual first. A monthly inspection is a practical baseline for many units, and GE currently advises checking the filter about every 30 days. Heavy use, pets, dust, smoke, or cooking residue may justify more frequent cleaning.
Can I run the AC while the filter is drying?
No. Reinstall the clean filter only after it has dried fully, and do not operate the unit without the designed filter in place.
Should there be water in the bottom of my window AC?
Possibly. Many units intentionally retain some condensate in the outdoor base pan so the fan can splash it over the condenser. Check your exact manual before removing plugs or changing drainage.
Why does my AC freeze even though the room is hot?
Restricted airflow from a dirty filter or blocked intake can allow the evaporator to become too cold. Clean the filter, clear obstructions, let all ice thaw, and test again. Recurring icing after airflow is restored needs service.
Can I use vinegar to clean the inside of the unit?
Do not assume a household chemical is safe for every internal component. Use only cleaning products and procedures allowed by the manufacturer. Mild detergent and water are commonly approved for removable filters and cases, but internal coil and electrical-area cleaning varies by design.
Why does the AC smell musty only when it starts?
The first places to inspect are the filter, accessible coil area, drain or base pan behavior, and wet materials around the installation. Persistent mustiness is a moisture issue to investigate, not merely an odor to mask.
Is a portable air conditioner maintained the same way?
No. Portable units have different filters, condensate tanks or pumps, hoses, and cleaning restrictions. Use a portable-AC procedure and its specific manual rather than applying window-unit drainage assumptions.
When is an old window AC worth replacing instead of repairing?
Replacement becomes more attractive when the chassis is badly corroded, the electrical cord or case has multiple age-related failures, sealed-system repair is expensive relative to a new unit, the appliance is badly oversized or undersized, or it repeatedly fails despite proper maintenance. Compare repair cost, efficiency, noise, sizing, installation condition, and expected remaining life rather than using age alone.
Conclusion: Maintain the Air Path Before You Chase Complicated Fixes
The most useful window-air-conditioner maintenance is not dramatic. It is a repeatable process of inspecting the filter, protecting airflow on both sides of the appliance, keeping accessible surfaces clean, understanding how the model handles condensate, watching for ice and leakage, and verifying that the installation remains secure.
Your first action today should be to find the model number and clean the filter according to the manufacturer’s instructions. The most important mistake to avoid is modifying drainage or applying aggressive chemicals because a generic online tip says every room AC should behave the same way.
A healthy window unit should not require constant improvisation. When ordinary maintenance restores airflow and cooling, keep the routine simple and repeat it. When the same symptom returns despite a clean, unobstructed, correctly installed appliance, stop treating it as a cleaning problem and move to qualified diagnosis.
Sources
- Frigidaire: How to clean a room air conditioner’s air filter
- GE Appliances: Cleaning room air conditioners and filters
- GE Appliances: Window air conditioner drain plug and slinger-ring operation
- Frigidaire: Room air conditioner icing guidance
- U.S. EPA: A Brief Guide to Mold, Moisture and Your Home
- U.S. EPA: Care for Your Air — indoor humidity and air-quality guidance
Image Credits
- Window air conditioner — Andreyanov D, Wikimedia Commons, CC BY 3.0.
- Frigidaire Window Air Conditioner — interior — FanFan61618, Wikimedia Commons, CC BY-SA 2.0.
- Frigidaire Window Air Conditioner — exterior — FanFan61618, Wikimedia Commons, CC BY-SA 2.0.