

Learn how to clean, descale, troubleshoot, and maintain a drip coffee maker or home espresso machine without damaging it, using a practical schedule and model-specific checks.
Quick answer: keeping a coffee maker clean requires two different jobs: removing coffee residue from the parts that touch grounds and brewed coffee, and removing mineral scale from the water path. Wash removable food-contact parts regularly, let wet parts dry between uses, wipe the machine rather than immersing it, and descale only with the method approved for your model. Do not assume that vinegar, baking soda, or a generic cleaning tablet is safe for every machine. Manufacturers often specify different products, concentrations, filters to remove, and rinse cycles.
A coffee maker can look clean on the counter while slowly becoming harder to use. Coffee oils coat baskets and carafes, damp reservoirs can develop odor or microbial growth, and minerals in water accumulate inside heaters and narrow passages. The symptoms often arrive gradually: the brew takes longer, the machine sounds louder, the coffee tastes flatter or more bitter, the carafe develops a brown film, or a “clean” light appears.
The most reliable way to maintain a brewer is not to wait for one dramatic failure. Instead, separate the machine into systems, clean each system with the right method, and use performance changes as clues. This guide shows you how to do that for common drip coffee makers, pod brewers, and home espresso machines while respecting the important differences between them.
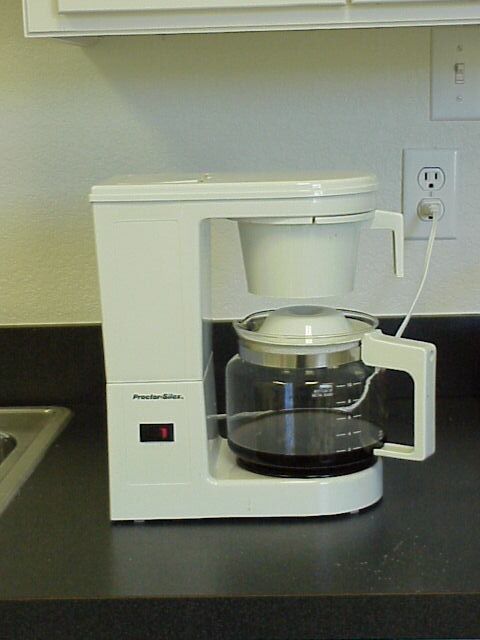
 A coffee maker can look clean externally even when coffee residue or mineral scale is accumulating inside. Photo: Roderick Suñaz Sumalinog, Wikimedia Commons, CC0 1.0.
1. Start by Identifying What Kind of Cleaning Your Machine Actually Needs
Before reaching for a cleaner, decide whether you are dealing with coffee residue, mineral scale, ordinary surface dirt, or a mechanical problem. These problems overlap in appearance, but the correct treatments are different.
Coffee residue is the oily brown film left by brewed coffee and grounds. It usually appears in the filter basket, reusable mesh filter, carafe, lid, showerhead area, portafilter, brew group, or coffee spout. It can cause stale or bitter flavors even when the water system itself is clean. Warm water and an appropriate detergent are generally more relevant here than a descaler.
Mineral scale forms when dissolved minerals in water remain behind as water is heated or evaporates. It may be visible as pale crust around a reservoir, hot-water outlet, kettle-like heating surface, or steam wand, but much of it can be hidden inside the machine. Scale can reduce flow, slow heating, increase noise, and eventually interfere with sensors or valves. Descaling targets minerals; it is not the same as washing off coffee oil.
Microbial or musty contamination is more likely where water sits for long periods. NSF notes that coffee-maker reservoirs can develop yeast and mold when they are not cleaned regularly. That does not mean every reservoir is contaminated, and it is not a reason to panic. It is a reason to stop treating the reservoir as a permanently clean water bottle. Emptying, washing when the design allows it, and drying removable components are practical controls.
Mechanical problems can mimic dirt. A cracked valve, failing pump, damaged gasket, blocked needle, loose shower screen, defective thermostat, or worn burr grinder will not be fixed by running repeated cleaning chemicals through the machine. If a cleaning cycle does not produce a meaningful change, do not keep escalating the chemistry. Reassess the diagnosis.
A useful first test is to write down three observations before cleaning: how long a normal brew takes, whether the flow is even, and whether the coffee tastes or smells unusual. After maintenance, repeat the same brew with the same amount of water. That gives you a concrete way to know whether the intervention worked.
2. Find the Model Number and Read the Cleaning Section of the Manual
This step prevents more damage than any “universal” cleaning recipe. Coffee makers differ in tubing materials, boiler metals, valves, filters, sensors, descaling programs, and instructions for removable parts. A method that is acceptable in one drip brewer may be discouraged in an automatic espresso machine.
Look for the model number on the underside, rear label, inside the water-reservoir area, or near the power rating label. Search the manufacturer’s support site rather than relying only on a retailer listing. Save the manual as a PDF or bookmark the maintenance page.
Pay particular attention to four instructions: what descaler is permitted, which filters must be removed before descaling, whether the cleaning cycle can be interrupted, and how many rinse cycles are required. For example, Philips instructs owners of several espresso-machine families to use its specified descaler and explicitly warns against acids such as vinegar for some models. Braun, by contrast, publishes a descaling process for its drip coffee makers that uses an approved descaling agent and includes defined rinse cycles. Cuisinart publishes vinegar-based cleaning guidance for many of its drip brewers. These are not contradictions; they show why model-specific guidance matters.
If the manual says a component is dishwasher-safe, note whether that applies to the upper rack only. If it says “wipe clean,” do not interpret that as permission to soak the component. If a removable reservoir includes electrical contacts, valves, or seals, confirm that it can be immersed before washing it in a sink.
Also check the warranty terms. Using an unapproved chemical can matter if the manufacturer links damage or warranty coverage to maintenance instructions. A cheaper cleaning shortcut is not a bargain if it attacks a gasket, aluminum component, sensor, or coating.
3. Unplug, Cool, Empty, and Disassemble the Brewer Safely
Cleaning becomes easier when the machine is cool and empty. Turn it off, unplug it, and allow hot plates, boilers, steam wands, and metal brewing parts to cool. Remove spent grounds and pods. Empty the carafe, drip tray, capsule bin, and water tank if the design permits.
Next, remove only the parts the manufacturer intends you to remove. On a basic drip brewer, that often means the filter basket, reusable filter, carafe, carafe lid, and perhaps the reservoir lid. On a pod machine, the pod holder or needle assembly may be removable. On an espresso machine, the portafilter, filter basket, drip tray, grounds bin, water tank, milk container, and sometimes the brew group may come out. Do not force a brew group out if the machine is in the wrong position or the manual says it is not user-removable.
Create a simple “clean side” on the counter by placing a dry towel next to the sink. As parts are washed and rinsed, put them on the towel instead of mixing them with dirty pieces. This reduces the chance that a clean filter basket goes back into a dirty carafe lid or that a tiny gasket disappears into dishwater.
Inspect as you disassemble. Look for warped plastic, cracked seals, chipped glass, damaged mesh, sticky valves, hardened coffee residue, or scale. Take a photo before removing unusually shaped gaskets or small pieces so you know how they fit during reassembly.
A common mistake is to start a cleaning cycle while coffee grounds remain in the basket or while a charcoal/water filter that should have been removed is still installed. Those errors can spread residue or expose a filter to cleaning chemicals. Preparation is part of cleaning, not wasted time.
4. Wash the Carafe, Basket, Reusable Filter, and Removable Parts
For routine cleaning, removable food-contact parts deserve more attention than the exterior. Coffee oils cling to plastic, glass, stainless steel, and fine mesh. Rinsing with water can remove visible grounds while leaving a thin flavor-altering film.
Use warm water and a small amount of dishwashing liquid on parts that the manual allows you to hand-wash. Use a non-abrasive sponge or soft bottle brush. Work the brush into the carafe shoulder, lid channels, basket ribs, and around the mesh of a reusable filter. Rinse until there are no suds or detergent odor.
For a thermal carafe, avoid assuming you can reach inside with any tool. Narrow-neck thermal carafes can be damaged by hard metal brushes, and some manufacturers prohibit immersion because water can enter a vacuum-insulated structure or handle assembly. Follow the specific carafe instructions.
If the carafe has a persistent brown stain, start with the least aggressive approach: warm soapy water and soaking if permitted. A manufacturer may recommend baking soda or a dedicated coffee-equipment cleaner for stubborn residue. Do not mix cleaners. In particular, never combine chlorine bleach with acids such as vinegar; dangerous chlorine gas can be released.
Reusable mesh filters need a different check. Hold the clean filter toward a bright light. If many holes are still blocked, soak or clean it with the method approved by the manufacturer and brush gently. A permanently clogged or damaged mesh filter may be easier to replace than to rescue.
After rinsing, allow parts to drain and dry. Drying matters because a lid snapped onto a wet carafe and a reservoir closed while damp create a stagnant environment. If you use the machine again immediately, complete drying is less important than if the brewer will sit unused for several days.
5. Clean the Water Reservoir Without Treating It Like a Permanent Storage Tank
The water reservoir is easy to ignore because it only holds water. But “only water” does not mean “nothing can grow or accumulate there.” Dust, handling, biofilm, and mineral deposits can enter over time, especially if water remains warm or stagnant.
If the reservoir is removable and the manufacturer allows normal washing, empty it, wash it with mild dish soap and warm water, rinse thoroughly, and let it dry. Use a soft brush for corners that a sponge cannot reach. Avoid abrasive pads that scratch clear plastic; scratches can make future cleaning harder.
If the reservoir is fixed in the machine, do not pour soapy water into internal plumbing unless the manual explicitly instructs you to do so. Instead, follow the manufacturer’s reservoir-cleaning method. You may be able to wipe reachable surfaces with a clean damp cloth and then use a manufacturer-approved internal cleaning or rinse cycle.
Do not continually top up old water. A better routine is to add approximately what you expect to use and periodically empty and refresh the reservoir. If the machine will not be used for an extended period, follow storage instructions; many manufacturers recommend emptying water systems or preparing them in a specific way.
Look closely at reservoir valves and seals. A slow leak under a machine may come from a dirty or damaged tank valve rather than a plumbing failure. Clean around the valve only as directed, and never pry at a spring-loaded mechanism with a sharp tool.
If you see colored growth, persistent slime, or an odor that returns immediately after proper cleaning, stop using the machine until you can inspect all user-cleanable water-contact components. If the contamination is in inaccessible tubing and the manufacturer does not provide a sanitation procedure, contact the manufacturer or service provider rather than improvising a harsh chemical flush.
6. Clean the Brew Head, Shower Area, Pod Holder, or Coffee Outlet
The point where hot water meets coffee is a high-residue zone. On a drip brewer, inspect the showerhead or spray outlet above the basket. On a pod brewer, inspect the pod holder and puncture area. On an espresso machine, the group head, shower screen, portafilter, and coffee outlet collect fine particles and oils.
Start by checking the manual for removable pieces. A removable drip showerhead can often be rinsed and brushed. A fixed shower area should usually be wiped with the machine unplugged and cool. Do not poke metal wires into internal outlets unless the manufacturer specifically supplies a cleaning tool and tells you where to use it.
Pod machines require extra care because piercing needles can be sharp. Some brands provide a needle-cleaning tool or documented procedure. Use that procedure rather than a sewing needle or random wire, which may enlarge an opening or cause injury.
For espresso machines, knock out spent grounds promptly. Rinse the portafilter and basket and wipe the group area after brewing. If the manufacturer supports backflushing, follow the specified blank basket, detergent, dose, and cycle. Not every espresso machine is designed for detergent backflushing, so do not infer that a three-way valve exists merely because the machine has a portafilter.
Once clean, check water distribution. A drip brewer should wet grounds reasonably evenly for its design. An espresso shower screen should not have obvious blocked jets. A pod brewer should deliver a normal stream without unusual sputtering. Uneven flow after surface cleaning can point toward scale or an internal blockage.
 Removable baskets, carafes, and lids are common places for coffee oils to accumulate. Photo: Teepetersen, Wikimedia Commons, CC BY-SA 4.0.
7. Understand Descaling Before You Pour Anything Into the Water Tank
Descaling is a chemical process for dissolving mineral deposits. It is not a general-purpose wash. This distinction is important because a machine can need one process, both processes, or neither.
Scale is influenced by water mineral content and how much water passes through the brewer. A heavily used machine in a hard-water area can need descaling much sooner than a lightly used machine supplied with softer water. Some machines estimate this based on usage and a hardness setting; others simply illuminate a clean light after a fixed pattern.
Do not treat the clean light as a perfect laboratory measurement. It is a maintenance prompt. If your model allows a water-hardness setting, configure it accurately because that may affect the reminder interval.
The most important rule is: use the descaling substance and concentration approved for the exact model. Keurig explains that descaling removes calcium and scale that can hinder brewer performance. Braun recommends an approved commercial descaler for its drip machines and links frequency to water hardness and use. Philips specifies its descaler for many automatic espresso models and warns against vinegar in certain machine families. Cuisinart, meanwhile, provides vinegar-based procedures for many of its drip brewers.
This is why the internet claim “vinegar is always safe” is too broad. Vinegar can be appropriate where the manufacturer says it is, but not where the manufacturer prohibits it. The same applies to citric acid, sulfamic acid, tablets, powders, and branded solutions.
Before descaling, remove filters the instructions say to remove. Empty coffee grounds and milk systems as required. Place a container large enough to catch the output. Make sure you have enough time to complete the process; some automatic cycles should not be interrupted once started.
8. Run the Correct Descaling Cycle and Rinse Completely
Once you have the correct product and instructions, measure rather than guess. Over-concentrating a descaler does not necessarily clean better, and under-concentrating it may leave scale behind. Add the prescribed amount of water and solution in the correct order if the manufacturer specifies one.
For a machine with an automatic “clean” or “descale” program, use that program. Automatic sequences often alternate flow and soaking periods so the solution contacts internal scale without requiring you to manually stop the machine. Do not defeat the sequence by switching the machine off halfway through unless the support documentation tells you how to recover from an accidental interruption.
For a basic drip brewer without a special program, the manufacturer may instruct you to run a normal brew cycle with a cleaning mixture, sometimes with a pause. Use only the exact procedure for that product family.
When the descaling phase is finished, discard the solution safely and rinse the carafe or catch container. Then perform the specified fresh-water rinse cycles. Rinsing is not an optional cosmetic step. It removes residual acid or cleaning product from the water path. Braun, for example, instructs users of some drip models to run fresh-water cycles after descaling; Philips programs include a defined rinsing phase.
After the final rinse, smell the water and inspect it. There should not be a strong cleaner odor, visible particles, or abnormal color. If the manufacturer calls for additional rinsing, continue until that process is complete. Replace or reinstall water filters only when the instructions say to do so.
Finally, perform a plain-water performance test. Measure the time it takes to move a known quantity of water through the brewer. If a machine that was painfully slow returns to a normal pace, scale was probably an important part of the problem. If nothing changes, investigate other causes rather than immediately repeating an aggressive descaling cycle.
9. Clean Milk Frothers and Steam Systems as Their Own Hygiene Zone
Milk systems need faster cleaning than water-only components because milk proteins, sugars, and fats leave residue that can spoil and block narrow passages. If your coffee maker includes a milk carafe, automatic frother, cappuccino tube, or steam wand, treat that system separately from the coffee and water circuits.
After milk use, follow the machine’s immediate-rinse procedure. For a steam wand, this often includes wiping the exterior promptly and briefly purging steam according to the manual. For an automatic milk circuit, the machine may provide a rinse program and require periodic disassembly of tubes or connectors.
Do not leave a milk carafe attached at room temperature for long periods simply because it is connected to the machine. Refrigerate milk according to food-safety guidance and clean the container as its instructions require. Some milk systems can go in a dishwasher; others have small seals that need hand washing.
When a frother produces large weak bubbles instead of its normal texture, first look for dried milk at the air inlet, tube, or nozzle. A partially blocked air path can change froth quality dramatically. Clean only the holes identified by the manufacturer and use the supplied pin or tool if one is specified.
If milk has dried deeply inside an inaccessible hose and ordinary cleaning cannot remove the odor, replacement of the hose may be more reliable than repeated soaking. Many automatic machines treat milk tubes as replaceable maintenance parts.
Never combine milk-cleaning chemical and descaling chemical unless a manufacturer has designed a cycle that does so. They solve different deposits, and combining chemicals can create unexpected reactions or damage.
10. Clean Grinders Carefully Without Introducing Water Where It Does Not Belong
Built-in grinders and standalone burr grinders accumulate coffee dust and oil. They are part of coffee-machine maintenance, but they should not be cleaned like a wet filter basket.
Unplug a standalone grinder before disassembly. Empty beans and remove only burrs or hoppers the manufacturer describes as user-removable. Brush dry grounds away with a grinder brush or soft dry brush. Vacuuming may be allowed for some products, but check instructions before placing a vacuum nozzle near delicate components.
Many burrs and grinder mechanisms should not be washed with water because moisture can cause corrosion, swelling of retained grounds, or electrical damage. A removable plastic hopper may be washable while the burr carrier is not. Dry a washed hopper completely before reinstalling it; even a few droplets can make coffee powder stick inside the grind path.
If you change from very dark oily beans to lighter beans, old oil can transfer stale flavors for several doses. More frequent brushing may help. Grinder-cleaning pellets are available, but use them only if the grinder manufacturer permits them.
Do not use uncooked rice as a universal grinder cleaner. Some grinder manufacturers warn against it because hard grains can stress burrs or motors, and starch can leave residue. Again, model-specific support wins over folklore.
A grinder problem can masquerade as a brewing problem. If an espresso machine suddenly runs too fast after cleaning, the issue may be a grind setting that changed during maintenance rather than a water-flow fault. Re-establish the grinder setting before diagnosing the brewer.
11. Build a Maintenance Schedule Based on Use, Not a Random Calendar
A practical schedule has three layers: tasks after use, periodic washing, and condition-based descaling. The exact interval depends on your machine and usage, but the structure is broadly useful.
After each brewing session: discard grounds or pods, rinse the basket or portafilter as appropriate, empty standing coffee from the carafe, wipe splashes, and clean milk-contact parts promptly. If your espresso machine specifies a steam-wand purge, do it immediately after steaming.
Every few days or weekly for frequent users: wash removable baskets, lids, trays, and carafes thoroughly. Empty and wash the removable reservoir if the manual permits. Wipe the shower area and check drain holes or tray channels.
Monthly or as needed: inspect seals, reusable filters, grinder buildup, water filters, pod needles, milk tubes, and hidden corners. Look for a trend in brew time. Check whether the manual calls for filter replacement by time or number of uses.
Descaling: follow the machine’s indicator, water-hardness setting, support guidance, or performance symptoms. Do not copy a universal “once a month” rule if the manufacturer says otherwise. Cuisinart notes that hard water can require more frequent descaling, while Braun similarly ties frequency to hardness and usage. Some automatic espresso systems calculate reminders internally.
Put recurring tasks in a phone reminder, but record the last actual descale date on a note or maintenance log. This is especially useful in an office or shared home where nobody remembers who cleaned the brewer. A small label inside a cabinet reading “Descaled: 10 Aug 2026” can prevent both neglect and unnecessary duplicate treatment.
12. Diagnose Slow Brewing, Noise, Weak Coffee, and Other Symptoms
Cleaning becomes more effective when you connect symptoms to likely causes rather than treating every issue with descaler.
Brewing is much slower than before
Compare the same volume of plain water. If flow is slow and the machine has not been descaled according to its schedule, scale is a strong possibility. Also inspect the basket, reusable filter, shower openings, pod needles, and water filter for blockage. If a freshly descaled machine remains slow, the pump, heater, valve, or sensor may require service.
The machine is louder
Rattling or pumping noises can increase when water flow is restricted or a reservoir is nearly empty. Confirm that the tank is seated properly and filled, check for scale, and remove air according to the manufacturer’s priming procedure. Grinding noises from a grinder require a different inspection.
Coffee tastes bitter or stale
Clean the basket, carafe, reusable filter, grinder, and coffee outlet first. Old coffee oil is a common flavor problem. Then examine bean freshness, grind size, dose, water, and brew ratio. Descaling is not a cure for every unpleasant flavor.
Coffee tastes weak
Confirm the amount of coffee, grind, filter fit, and brew size before blaming cleanliness. A partially blocked shower can create uneven extraction, but weak coffee can also come from too little coffee or too coarse a grind.
The clean light returns quickly
Some machines require the official cleaning mode to reset the indicator. Simply running a brew cycle with cleaner may not reset it. Other machines will illuminate the light again if the initial cycle did not complete. Follow the model-specific reset/descale steps rather than repeatedly adding acid.
Water leaks under the machine
Stop and identify whether the leak comes from an overfilled reservoir, poorly seated tank, carafe lid, drip tray, or internal base. An internal electrical appliance leak is not a situation for repeated test brews. Unplug the machine and use manufacturer service guidance if water is entering the electrical base.
13. Know When Cleaning Should Stop and Repair Should Start
A maintenance guide should include limits. Cleaning is appropriate for residue and scale; it is not a substitute for electrical or mechanical repair.
Stop using the coffee maker if you smell burning plastic or insulation, see smoke or sparks, find a damaged power cord, discover water entering the electrical base, or hear abnormal electrical arcing. Unplug it if it is safe to do so. Do not open an appliance housing merely because an online video shows how; internal capacitors, mains wiring, hot components, and pressure systems can create hazards.
For espresso machines, persistent pressure problems, steam leaks from internal joints, boiler errors, repeated over-temperature warnings, or pump failures may require qualified service. On inexpensive drip brewers, replacement can sometimes be more economical than internal repair, but that is a product decision rather than a cleaning task.
Also stop escalating chemicals. If one correct descaling cycle and the required rinse do not restore flow, repeating stronger concentrations can damage seals or metals without solving a failed pump. The next diagnostic step should be mechanical, not chemical.
If a machine is under warranty, document the symptoms, model number, serial number, maintenance performed, and error codes. A short video showing the abnormal flow or sound can make support easier.
14. Use Water Choices to Reduce Scale Without Creating New Problems
Water affects both coffee flavor and equipment maintenance. Hard water contains more calcium and magnesium ions that can contribute to scale. Reducing hardness can reduce scale formation, but using water that is too low in minerals can change extraction and may not be appropriate for every machine.
If your coffee maker includes a replaceable water filter, use the correct filter and replace it at the interval specified by the manufacturer. A filter is not permanent simply because water still passes through it.
Do not assume all bottled water is “soft.” Mineral content varies widely. Likewise, ordinary refrigerator filters may reduce chlorine taste but may not significantly soften water. If scale is severe, a simple water-hardness test can tell you more than guessing based on taste.
Some espresso manufacturers set explicit water requirements because scale and corrosion both matter. If the manual specifies a hardness range or warns against distilled water, follow it. The goal is not to produce chemically pure water at any cost; the goal is water compatible with the equipment and good brewing.
Specialty Coffee Association resources emphasize that water chemistry influences extraction, flavor, and equipment performance. For a typical household, you do not need a laboratory. You do need to recognize that water treatment is part of the system. A sensible hardness setting, compatible filter, and timely descaling can reduce maintenance surprises.
 Espresso machines combine water, coffee, pressure, and often milk systems, so maintenance must follow the machine’s specific design. Photo: Sander van der Wel, Wikimedia Commons, CC BY-SA 2.0.
15. A Practical 30-Minute Cleaning Routine for a Typical Drip Coffee Maker
If you own a conventional drip machine and its manual allows normal washing of removable parts, this routine provides a simple structure. Adapt it to the actual instructions for your brewer.
Minutes 0–5: shut down and clear the machine. Unplug it, allow the warming plate to cool, discard grounds, and separate the basket, filter, carafe, and lid. Empty old reservoir water if it is safe and intended to be emptied.
Minutes 5–15: wash food-contact parts. Use warm soapy water on permitted removable parts. Brush the basket and lid channels. Wash the carafe and inspect for stains. Rinse thoroughly.
Minutes 15–20: inspect the machine. Wipe the showerhead area, warming plate when cool, and exterior. Check the reservoir for film or scale. Inspect the power cord, basket fit, and carafe lid.
Minutes 20–25: dry and reassemble. Allow washed pieces to drain. Wipe external surfaces dry. Reinstall components only when you are confident they are seated correctly.
Minutes 25–30: run a test if needed. If you performed only ordinary washing, a full plain-water brew can confirm water flow and remove any unnoticed soap residue from components that contact brew water. If the machine also needs descaling, do not improvise it inside this 30-minute routine. Schedule enough time for the model’s full descale and rinse sequence.
This separation is useful because routine washing is fast, while descaling can take 30–45 minutes or more on some machines. Treating every weekly clean as a descale wastes chemicals and can subject the equipment to unnecessary acid exposure.
16. A Deeper Maintenance Routine for Automatic Espresso Machines
Automatic bean-to-cup machines have more systems, so maintenance is best divided into modules. Follow the menu prompts and manual first; the sequence below is a planning framework, not a replacement for your model’s instructions.
Daily: empty the drip tray and coffee-grounds container as needed, rinse milk components after use, clean the coffee spouts externally, and refresh water. Many machines perform automatic rinse cycles; let them complete and keep a container or tray properly positioned.
Weekly: wash removable milk parts, clean the drip tray thoroughly, inspect the water tank, and remove/rinse the brew group if your model explicitly allows the user to do so. Let a removable brew group air-dry according to the manufacturer’s instructions before reinstalling it.
Periodic lubrication: some removable brew groups require food-safe lubricant on rails or specified points. Use only the lubricant and interval recommended for that system. Do not grease random seals.
Coffee-oil cleaning: some machines request a cleaning tablet at a defined interval. A coffee-oil tablet is not the same as descaler. Put it only in the location and cycle the manual identifies.
Descaling: use the machine’s water-hardness setting and indicator. Remove water filters and milk attachments when instructed. Philips documentation for multiple automatic espresso lines illustrates how specific the sequence can be: the machine may tell the user to remove an AquaClean filter, add a measured descaling solution, place a large container under outlets, run a programmed cycle, and then rinse.
The value of this modular approach is that you can diagnose the machine. If espresso tastes stale, coffee-oil cleaning may matter. If the milk foam is poor, the milk circuit matters. If flow is slow, scale or water delivery matters. One “clean machine” button does not necessarily perform every kind of maintenance.
17. Common Coffee-Maker Cleaning Mistakes to Avoid
- Using vinegar automatically: vinegar is accepted by some manufacturers and prohibited by others. Check the manual first.
- Confusing descaler with detergent: mineral scale and coffee oil are different deposits.
- Leaving water in the reservoir indefinitely: refresh water and clean accessible reservoirs regularly.
- Running soap through internal tubing: unless a manufacturer explicitly directs this, keep dish soap to washable removable components.
- Skipping rinse cycles: a completed acid cycle is not a completed maintenance process if the instructions require fresh-water flushing.
- Cleaning a hot machine: let warming plates, boilers, steam wands, and metal brew parts cool.
- Using abrasive scrubbers: they can scratch plastic, stainless finishes, carafes, and coatings.
- Poking needles and nozzles with random metal objects: use the supplied tool or documented method.
- Ignoring the grinder: stale grounds and oils can ruin flavor even after the water system is spotless.
- Assuming every removable part is dishwasher-safe: heat can warp some plastics and damage seals.
- Closing wet parts for storage: trapped moisture encourages odor and microbial growth.
- Repeating descaling when symptoms do not improve: a failed pump, valve, heater, or sensor needs a different diagnosis.
18. How to Tell Whether the Cleaning Worked
A clean machine should produce observable improvements. Do not judge success only by whether the exterior shines.
First, compare brew time. Use the same volume of water you measured before maintenance. A substantial improvement after descaling suggests mineral restriction was affecting flow. Second, inspect distribution: water should emerge from the appropriate outlet without new sputtering or obvious blockage.
Third, smell a plain-water cycle. There should be no strong detergent, vinegar, descaler, moldy, or stale-coffee smell. Fourth, taste coffee made with the same beans and recipe. Cleaner equipment should remove stale residue as a variable, although it cannot fix old beans or an unsuitable grind.
Fifth, look for leaks. Reassembly can expose an incorrectly seated reservoir, gasket, basket, or carafe lid. Run the first cycle while you are present rather than setting a timer and walking away.
Finally, record the date. If the same symptoms return unusually quickly, you now have useful diagnostic evidence. Rapid scale recurrence can indicate very hard water or an incorrect hardness setting. Rapid coffee-oil buildup may reflect heavy use or dark oily coffee. A recurring leak after cleaning points more toward a part failure than dirt.
Frequently Asked Questions
How often should I clean a coffee maker?
Wash removable coffee-contact parts frequently—often after each use or every few uses depending on the part and manufacturer. Deep cleaning and descaling should follow the manufacturer’s schedule, the machine’s clean indicator, water hardness, and usage. There is no single safe interval for every brewer.
Is white vinegar safe for all coffee makers?
No. Some manufacturers publish vinegar-based cleaning procedures for certain drip machines, while others specifically advise against vinegar for some espresso machines. Follow the instructions for your exact model.
What is the difference between cleaning and descaling?
Cleaning generally removes coffee oils, grounds, milk residue, and ordinary dirt. Descaling dissolves mineral deposits in the water path. Automatic machines may use separate programs and separate chemicals for these jobs.
Why does my coffee maker still smell after cleaning?
Check the carafe lid, reusable filter, basket, reservoir, drip tray, milk tubing, and grinder. Odor can hide in components that were only rinsed. If odor appears to come from inaccessible internal water lines after you have followed the manufacturer’s process, seek model-specific support rather than adding stronger chemicals.
Can I use baking soda in the water tank?
Only if the manufacturer explicitly recommends it for that model and procedure. Baking soda can be useful for scrubbing some removable surfaces or carafes, but sending it through internal tubing without approval can create residue or clogging.
Why is my machine slow even after descaling?
Possible causes include a clogged filter or outlet, trapped air, a failing pump, valve restriction, heater problem, or sensor issue. Confirm that the descaling cycle completed correctly, then move to the manufacturer’s troubleshooting process rather than simply increasing acid concentration.
Should I leave the reservoir full overnight?
For occasional overnight use, follow your machine’s normal operating guidance, but avoid treating the reservoir as long-term water storage. Refresh water regularly and clean the reservoir as the design allows. If the machine will sit unused for days or weeks, follow its storage instructions.
Conclusion: Keep the Routine Simple and the Chemistry Specific
The most effective coffee-maker maintenance plan is not aggressive. It is consistent. Wash the parts that collect coffee and milk, keep standing-water areas clean, remove scale at the interval your water and machine require, and use only the chemicals the manufacturer approves.
If you want one place to start today, remove the basket, carafe, lid, and drip tray and inspect them under good light. Clean those parts properly, find your model number, and save the manufacturer’s maintenance page. That small step replaces guesswork with a repeatable routine.
The most important mistake to avoid is treating every coffee maker as chemically identical. A vinegar cycle copied from another brand may be harmless in one brewer and expressly discouraged in another. Model-specific instructions are part of the maintenance procedure.
Sources
- NSF — Consumer Product Testing and Certification FAQs. Includes discussion of coffee-maker cleanability and reservoir yeast/mold findings.
- Keurig Support — How to Descale Your Keurig Coffee Maker. Explains scale buildup and its effect on brewer performance.
- Cuisinart — How to Clean Your Coffee Maker. Manufacturer cleaning and descaling guidance for Cuisinart and drip coffee makers.
- Braun — Coffee Maker Descaling Instructions. Descaling, water-hardness, filter removal, and rinsing guidance.
- Philips Support — How to Descale My Philips Espresso Machine. Model-family descaling procedures and chemical cautions.
- Specialty Coffee Association — Certified Home Brewer Program. Equipment performance context for home brewing.
- Wikimedia Commons — Coffee maker 2024.jpg, CC0 1.0.
- Wikimedia Commons — Coffee maker.jpg, CC BY-SA 4.0.
- Wikimedia Commons — Espresso machine photo, CC BY-SA 2.0.