

Quick answer: A useful home tool kit is not the biggest case you can buy. It is a small, deliberate set of tools that lets you measure, fasten, grip, cut, level, inspect, and drill safely. Start with a tape measure, two or three screwdrivers or a quality multi-bit driver, a claw hammer, adjustable wrench, slip-joint and needle-nose pliers, locking pliers, utility knife, level, flashlight, hex keys, a compact socket set, a small putty knife, safety glasses, work gloves, and a simple organizer. Add a cordless drill/driver only after you understand bits, clutch settings, anchors, and what may be hidden behind the surface you are drilling.
The best starter kit is built around jobs you will actually do: tightening a loose cabinet handle, hanging a picture, assembling furniture, replacing a showerhead, opening a stuck access panel, measuring a room, adjusting a hinge, securing a shelf, removing a stripped fastener, or making a small patch. You do not need to buy specialized plumbing, electrical, automotive, woodworking, or masonry tools until a real project justifies them.
This guide shows you how to build that kit from the ground up, how to judge tool quality without paying for features you do not need, how to match a tool to a task, and how to recognize the point where a “simple DIY job” should stop because the risk or required skill has changed.
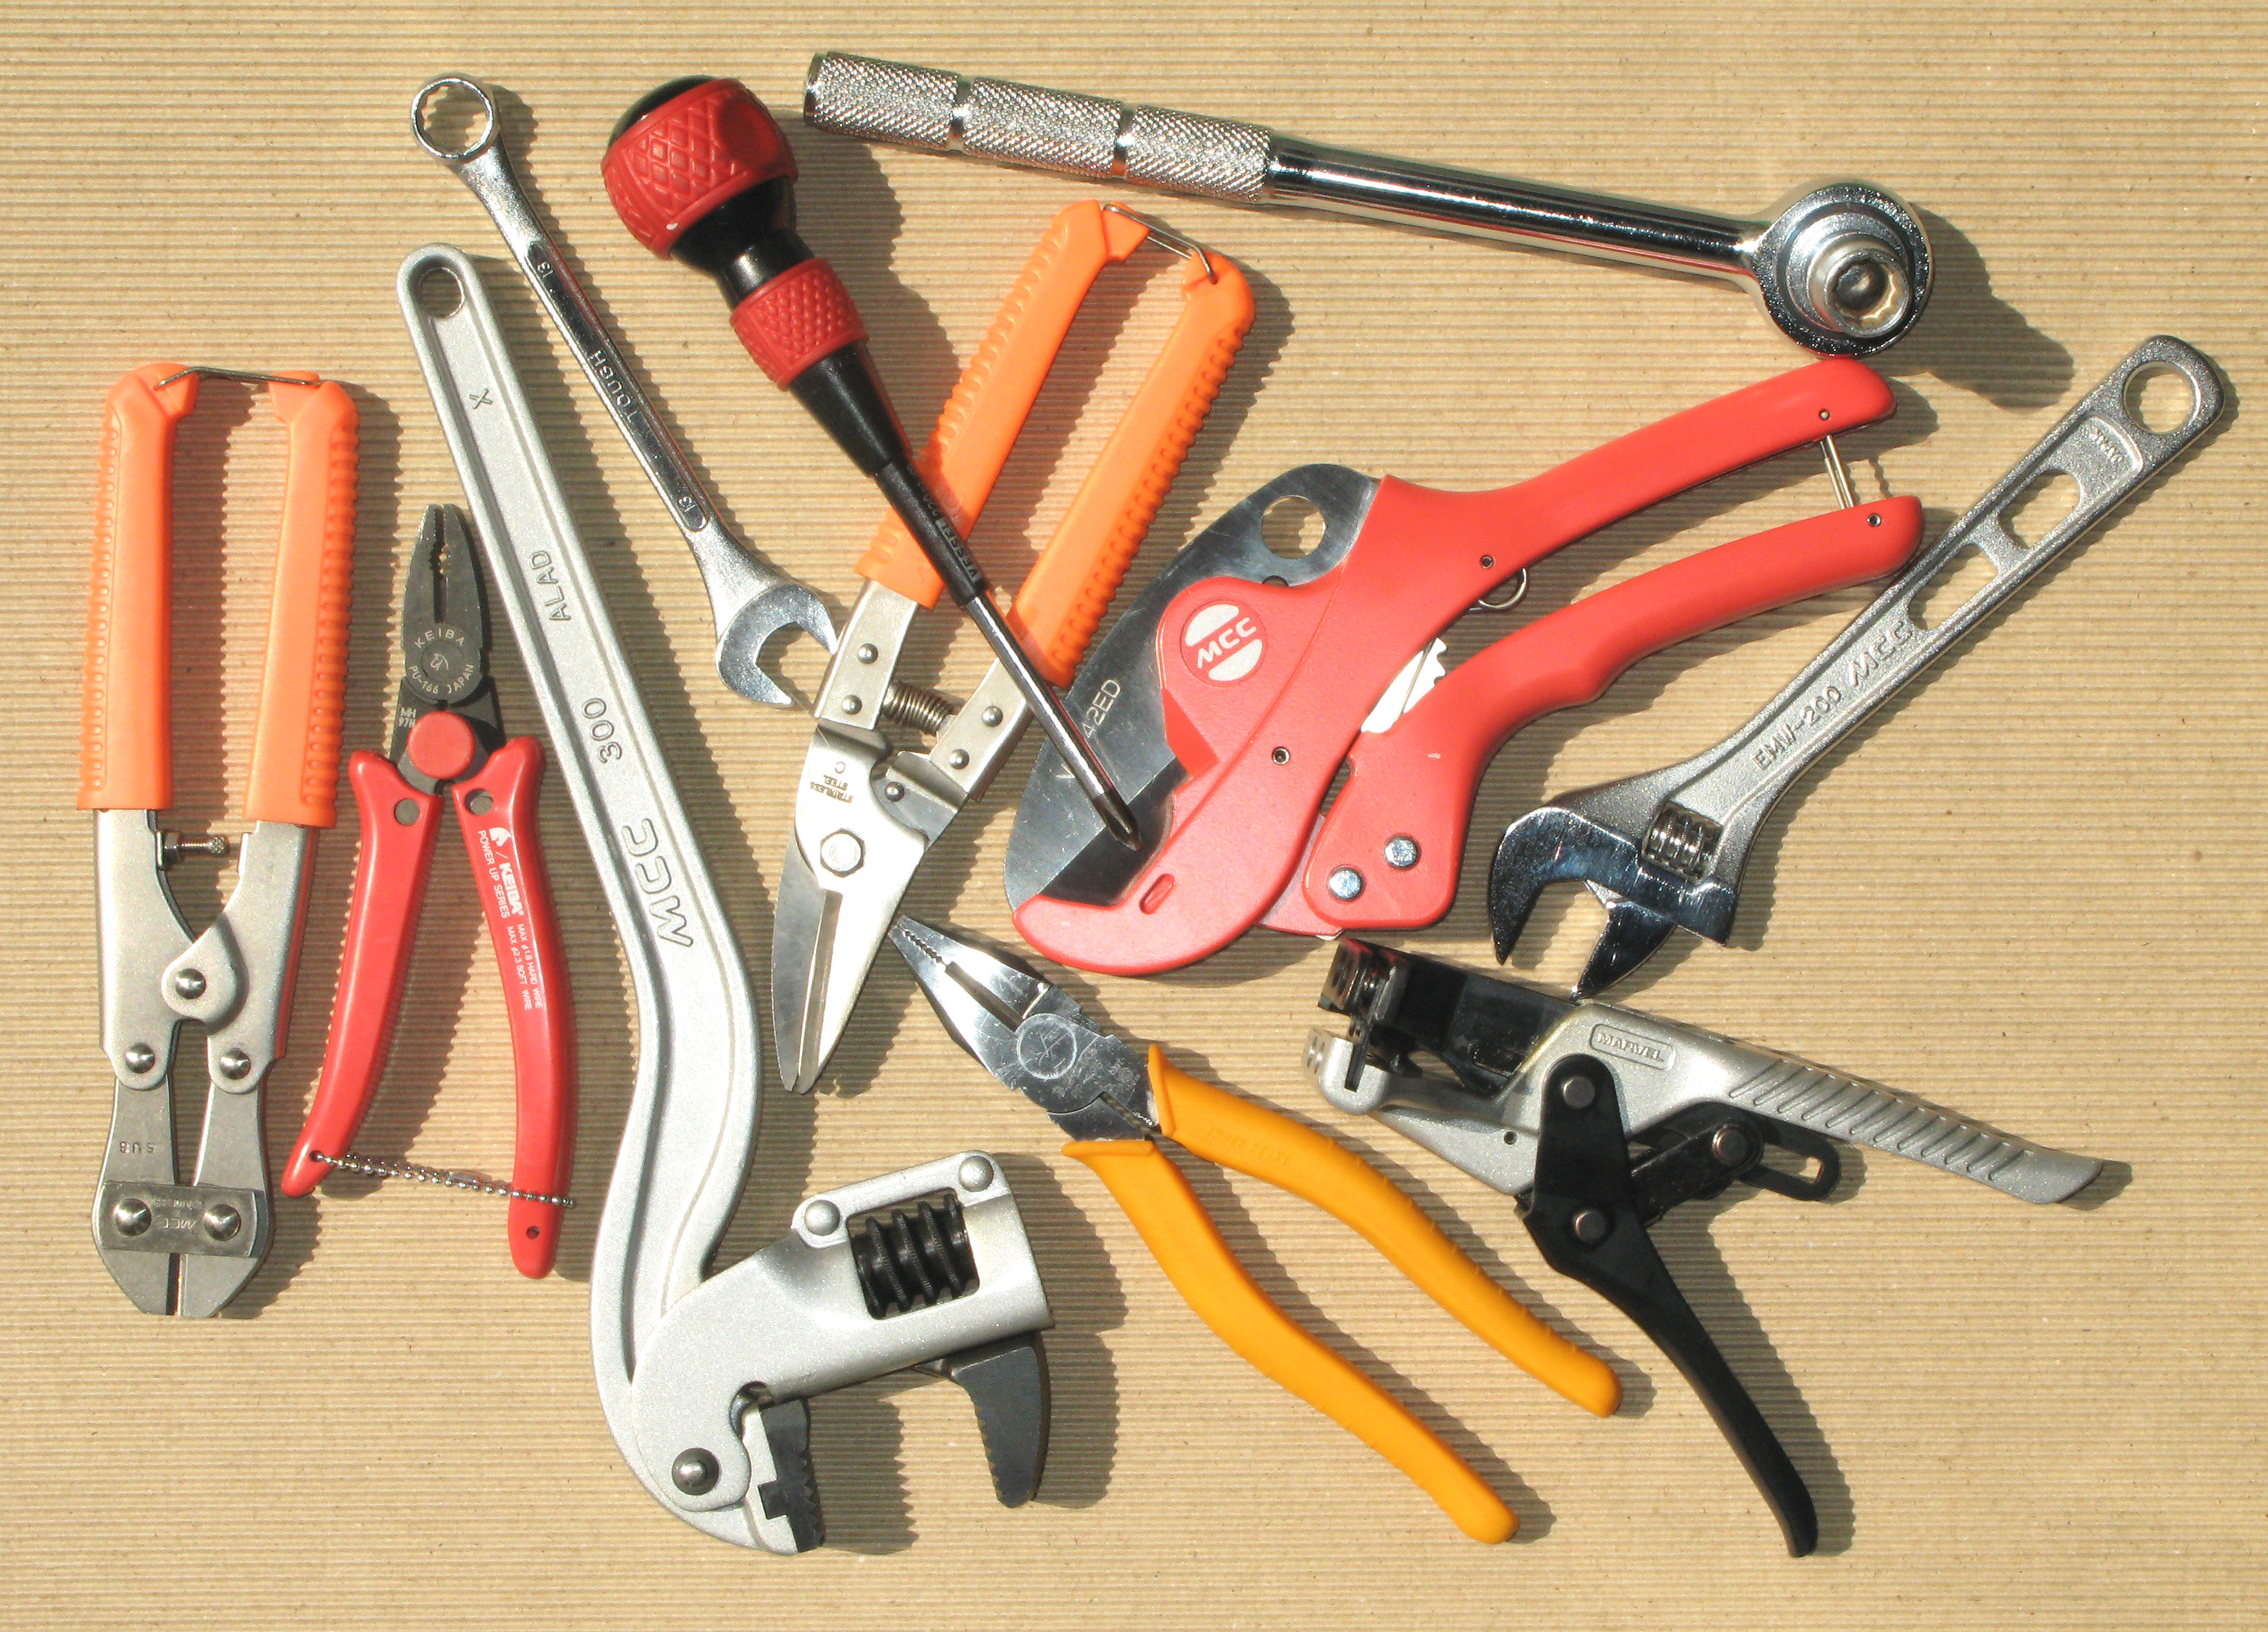 Assorted hand tools. Image: M338, released into the public domain via Wikimedia Commons.
1. Build the kit around household tasks, not tool-count marketing
Starter tool sets are often sold by piece count: 39 pieces, 100 pieces, 200 pieces, and so on. That number can be misleading because bits, sockets, tiny hex keys, disposable blades, or duplicate drivers may each be counted as a separate “piece.” A compact kit containing 15 carefully chosen tools can be more useful than a case containing 150 low-quality components.
Before buying anything, write down the tasks you expect to perform during a normal year. For many households, the list looks surprisingly ordinary: assemble flat-pack furniture, tighten loose knobs, mount lightweight décor, adjust a door hinge, measure furniture, replace batteries, clean an appliance access panel, tighten a hose fitting, open packages, remove a small nail, patch a minor wall dent, and inspect a dark cabinet or utility space.
Now translate each task into a capability. Measuring requires a tape measure and sometimes a level. Fastening requires screwdrivers, hex keys, sockets, and perhaps a drill/driver. Gripping requires pliers. Light plumbing connections often require an adjustable wrench or tongue-and-groove pliers. Cutting cardboard, caulk, or packaging requires a controlled cutting tool. Inspection requires a flashlight. Hanging or light carpentry often requires a hammer. Patching requires a putty knife.
This “capability first” method keeps you from buying duplicates. For example, if your multi-bit screwdriver already includes Phillips #1 and #2, slotted bits, Torx bits, and common hex bits, you may not need a large screwdriver set immediately. If your furniture uses metric hex fasteners, a compact metric hex-key set may be far more useful than an oversized SAE socket collection.
How to verify your plan: For every tool on your shopping list, write one task next to it. If you cannot name a realistic task, postpone the purchase. The exception is safety equipment, which you buy because you may need it before a task starts.
Common mistake: Buying a preassembled kit because it looks complete, then discovering that the pliers flex, the driver bits strip quickly, the tape measure is hard to read, or the case is full of sizes you never use.
If that happens: Keep the case if it is useful, replace the highest-use tools individually, and treat the original kit as secondary rather than throwing everything away.
2. Start with a reliable tape measure
A tape measure is one of the least dramatic tools in the box and one of the most frequently useful. It helps you decide whether furniture fits through a doorway, whether a shelf is centered, how wide a replacement appliance can be, how much curtain rod you need, and whether two mounting points are evenly spaced.
For a general home kit, a 16- to 25-foot tape is usually practical. The longer model gives more reach, but it is also bulkier. The exact size matters less than readability, a positive blade lock, a case that feels comfortable in your hand, and a hook that moves only as intended. The end hook on a conventional tape measure is designed with a small amount of movement so inside and outside measurements can compensate for the hook thickness; that movement is not automatically a defect.
Practice three types of measurements: from an outside edge, between two inside surfaces, and from a reference line that you mark yourself. When precision matters, measure twice and use the same reference point both times. For furniture planning, also record doorways, stair turns, elevator openings, trim projections, and the height of any object that must tilt during delivery.
Success check: Measure a table from the same two points three times. If your reading varies, slow down and check whether the tape is angled, bowed, or changing reference points.
Alternative: A folding rule or laser distance meter can be useful in some jobs, but neither replaces a conventional tape measure for a beginner.
3. Choose screwdrivers by fastener fit, not by appearance
A screwdriver works well when the driver profile matches the screw recess closely. A poor fit concentrates force on small areas and makes cam-out, slipping, or damage more likely. The most common home screws are Phillips, slotted, hex, and increasingly Torx, but furniture, appliances, electronics, and fixtures vary.
A beginner has two sensible options. The first is a small set of dedicated screwdrivers with common sizes. The second is a good multi-bit driver with replaceable bits. Dedicated drivers are fast and comfortable for frequent work; a multi-bit tool saves space and covers many profiles.
Phillips #2 is especially common in household construction and hardware, while smaller fasteners may use Phillips #1. Slotted screws require a blade that fills the slot without being too thick. Torx fasteners need the correct numbered bit. Hex socket fasteners require the correct hex key or hex bit; using an undersized key is a fast way to round the recess.
Before turning a stubborn screw, press the driver fully into the recess and make sure it sits square to the fastener. If the tool rocks, feels loose, or only contacts the corners, stop and change size. For a screw that is already damaged, more force with the same poor-fitting bit usually makes the problem worse.
Common mistake: Using a screwdriver as a pry bar, chisel, punch, or scraper. Screwdrivers are designed to transmit torque to a fastener. Side loading can damage the shaft or tip and can cause the tool to slip unexpectedly.
What to buy: Look for clear size markings, tips that are well formed, comfortable handles, and replaceable bits from a common standard if you choose a multi-bit system. Magnetic tips are convenient for holding steel screws, but they do not compensate for an incorrect bit size.
4. Add a claw hammer, but match its weight to the work
A general-purpose claw hammer handles light fastening, picture-hanging hardware, small wood repairs, and nail removal. You do not need the heaviest framing hammer for everyday home tasks. A moderate-weight hammer is easier to control and less tiring for a beginner.
Inspect the head-to-handle connection before use. A loose head, cracked handle, or badly damaged striking face is a reason to remove the tool from service. OSHA’s hand-tool guidance for workplaces similarly emphasizes maintaining tools in safe condition and keeping wooden handles free of cracks and splinters. Although household DIY is not governed by workplace rules in the same way, the underlying safety principle is useful: a damaged hand tool is not “good enough for one more job.”
When driving a small nail, begin with light taps until the nail is stable, then use controlled swings. Keep fingers away from the striking zone. To pull a nail with the claw, protect a finished surface with a scrap of wood and use that scrap as a fulcrum when practical. This reduces denting and gives the claw better leverage.
If a nail bends: Do not keep hammering it sideways into the material. Pull it out, determine why it bent, and start with a fresh fastener. Hard material, an oversized nail, poor angle, or striking too aggressively can all contribute.
Alternative: A soft-face or rubber mallet is better for assembling pieces that should not be marked by a steel hammer. It is useful, but it is a second-stage purchase rather than a universal substitute.
5. Buy pliers for distinct jobs instead of one “do everything” pair
Pliers are often treated as interchangeable, but their jaw shapes and mechanisms matter. A basic household kit benefits from at least two types: slip-joint or combination pliers for general gripping, and needle-nose pliers for small parts and narrow spaces. Locking pliers can be added when you need to hold an object firmly without continuous hand pressure.
Needle-nose pliers are useful for retrieving dropped hardware, bending light wire, holding a small nut in a confined space, or positioning cotter pins and clips. Standard pliers provide broader contact for general gripping. Tongue-and-groove pliers are useful for larger plumbing fittings, but their teeth can mar decorative finishes, so they are not the first tool you should reach for on chrome-plated hardware.
Do not use pliers as a substitute for a wrench on a nut or bolt you need to preserve. Serrated jaws can chew the corners and make later removal harder. Do not use ordinary pliers on energized electrical conductors simply because the handles are plastic. Electrical work requires correct procedures, properly rated tools where applicable, and knowledge of how to verify that a circuit is de-energized.
Success check: When gripping a part, the jaws should contact it securely without forcing your wrist into an awkward angle. If you are squeezing as hard as possible just to keep the tool from slipping, the tool type or size may be wrong.
6. Add an adjustable wrench, then graduate to sockets and combination wrenches
An adjustable wrench is space-efficient and useful for household fittings where you know the flats can be gripped safely. Adjust the jaws closely around the fastener before applying force. A loose fit makes slipping and rounded corners more likely. OSHA specifically warns against using wrenches when jaws are sprung enough to slip; the same logic applies at home.
For recurring fastener sizes, a properly sized combination wrench or socket usually gives better engagement and faster work. A small socket set is particularly useful for furniture, appliance brackets, bicycle accessories, shelving systems, and hardware where a screwdriver is not the primary fastener interface.
When using an adjustable wrench, orient it so the fixed jaw carries the heavier load when practical, and pull smoothly rather than jerking. If the fastener does not move, reassess before escalating force. Corrosion, thread-locking compound, damaged threads, a reverse-thread design, or hidden backing hardware may change the correct method.
Common mistake: Adding a long pipe over a small wrench handle to gain leverage. That can overload the wrench, fastener, or surrounding part. A stubborn connection is a diagnostic problem, not automatically a “use more force” problem.
7. Include hex keys because modern furniture depends on them
Flat-pack furniture, exercise equipment, cabinet hardware, bicycles, and many fixtures use internal-hex fasteners. A compact set of L-shaped keys takes little space and prevents the common mistake of keeping random furniture-supplied keys in separate drawers.
Metric and SAE sizes are not interchangeable. A key that “almost fits” can round the socket under load. Keep metric and SAE sets visually separated. If most of your furniture is metric, prioritize that set and add SAE only when a real need appears.
Use the short end in the fastener when you need more leverage from the long arm, and the long end when access requires reach and torque is modest. Ball-end hex keys can work at an angle, but the straight end generally gives stronger engagement for final tightening or loosening stubborn fasteners.
Do not over-tighten furniture connectors. Many fasteners thread into inserts, soft metals, particleboard components, or captive nuts. Stop when the joint is secure and aligned. Extra torque can strip the insert or crush the material.
8. Add a utility knife only if you can store and use it safely
A sharp utility knife is useful for opening cartons, trimming caulk or gasket material, cutting sheet products, scoring certain flooring or plastic materials, and removing packaging. It is also one of the easiest tools in a basic kit to misuse.
Use a knife with a dependable blade lock or automatic-retract design appropriate to your tasks. Cut away from your body and keep the free hand out of the blade path. Place the work on a stable surface rather than holding it in midair. Retract the blade when you stop, even if you expect to resume in a minute.
A dull blade can require more force and can slip unpredictably. Replace blades instead of forcing them. Dispose of used blades in a rigid sharps-style container or another puncture-resistant method appropriate to your local waste rules; do not toss loose blades into a trash bag.
Alternative: For opening packages, a guarded safety cutter may be more appropriate than a traditional utility knife, especially in a household where children could access tools.
9. Use a level to turn “looks straight” into a repeatable check
A small spirit level helps with shelves, wall décor, appliances, curtain rods, brackets, and furniture. A torpedo level is compact enough for a starter box. A longer level is easier to use over long surfaces but can wait until you do larger projects.
To check whether the level itself is trustworthy, place it on a reasonably flat surface and note the bubble position. Rotate the level 180 degrees in the same location. The reading should be consistent. You can repeat a similar reversal check for vertical vials.
Remember that “level” and “aligned with the room” are not always visually identical in older buildings. Walls, ceilings, floors, tile lines, and trim may be out of square. For a shelf that must function correctly, true level matters. For purely decorative alignment, you may sometimes need to balance true level with surrounding visual references.
10. Add a flashlight or headlamp before you need one
A light source is a tool, not just emergency equipment. Cabinets under sinks, appliance recesses, breaker-panel labels, furniture backs, crawl-access doors, and utility closets are difficult to inspect properly without directed light.
A headlamp keeps both hands free. A compact flashlight is easier to aim into narrow spaces. Either is better than trying to hold a phone between your shoulder and chin while working.
Store spare batteries separately if the light uses disposable cells and check them periodically. For rechargeable lights, create a routine for charging them. A dead flashlight discovered during a leak or outage is effectively not part of your tool kit.
11. Include safety glasses before adding power tools
Eye protection belongs in a beginner’s kit even if most jobs seem harmless. Drilling, hammering, clipping wire, scraping brittle material, cutting packaging bands, and working under objects can send particles toward your face.
Choose safety eyewear designed for impact protection rather than relying on ordinary prescription glasses or fashion eyewear. If you wear prescription glasses, choose over-glasses protection or prescription safety eyewear appropriate to the task. Keep the lenses clean enough that you are not tempted to remove them simply to see better.
Gloves are useful for many handling tasks, but they are not universal protection and can be inappropriate near rotating machinery where material could catch. Hearing protection becomes important when you use noisy power tools. Respiratory protection is task-specific; dust masks and respirators are not interchangeable, and hazardous dusts such as lead, asbestos, silica, or mold require more than generic DIY advice.
OSHA’s tool guidance highlights protection from flying, abrasive, splashing, dust, fume, mist, vapor, and gas hazards in workplace settings. The practical lesson for a homeowner is to identify the hazard first and then choose protection for that hazard instead of treating one pair of gloves as a universal safety system.
12. Add a putty knife and scraper for repairs that are mostly preparation
Many successful household repairs depend more on surface preparation than on the glamorous part of the job. A small flexible putty knife helps apply lightweight patching compound, scrape loose material, lift residue, and smooth minor repairs.
Do not use a sharpened scraper carelessly on glass, delicate tile coatings, finished wood, or soft plastic. Test in an inconspicuous area. If you are scraping old painted surfaces in an older home, stop and consider whether lead-based paint could be present. In the United States, the Environmental Protection Agency provides specific information about lead hazards in pre-1978 housing; disturbing suspect paint is not the same as scraping ordinary modern latex paint.
Clean putty knives after use before material hardens. A tool that is stored with dried compound on its edge will not spread smoothly the next time you need it.
13. Add a small set of fasteners and anchors, but label them by purpose
A tool kit becomes much more useful when it contains a small, organized supply of common consumables: picture-hanging hooks, screws, washers, wall anchors appropriate to surfaces you actually have, spare cabinet screws, and a few nails.
The dangerous shortcut is assuming every anchor works in every wall. Drywall, plaster, masonry, tile, wood studs, metal studs, hollow doors, concrete, and panel products need different fastening strategies. Load ratings also depend on the anchor, wall material, installation quality, orientation of load, and manufacturer instructions.
For anything heavy, valuable, overhead, or capable of injuring someone if it falls, use a fastening method designed for that exact substrate and load. A generic plastic expansion anchor is not a universal answer.
Label small bins or zipper bags with both size and intended use. If an anchor came with a shelf or fixture, keep the instructions with it. Unidentified hardware eventually becomes a container of mystery parts that encourages guessing.
14. Decide whether you actually need a cordless drill/driver
A cordless drill/driver is the first power tool many households buy because it saves time installing screws and drilling pilot holes. It is useful, but it also introduces new failure modes: driving a screw too deep, stripping a head, drilling into a pipe or cable, using the wrong bit, snagging material, or losing control when a bit binds.
 Cordless electric drill. Photo by Tony Webster, CC BY 2.0, via Wikimedia Commons.
If your tasks are limited to tightening accessible screws and assembling occasional furniture, a hand driver may be enough. Buy a drill when you repeatedly need pilot holes, long screws, anchors, hardware installation, or faster assembly.
For a general household drill, controllable speed, a clutch with adjustable torque settings, forward/reverse control, a comfortable grip, and readily available batteries are more important than chasing the highest voltage printed on a box. A drill/driver is different from an impact driver. An impact driver is excellent for many fastening jobs but is not necessarily the simplest first tool for a beginner.
Learn the clutch before using the drill on finished furniture. Start at a low torque setting and increase only until the fastener seats correctly. The drill-symbol setting typically bypasses the clutch for drilling, but controls differ by manufacturer, so read the manual for your model.
Before drilling: identify what the surface is made of, choose the correct bit, understand what may be behind it, remove loose clothing and jewelry, secure the workpiece when appropriate, and wear suitable eye protection. Do not drill blindly near plumbing, electrical routes, gas lines, or unknown wall cavities.
OSHA advises disconnecting power tools before servicing or changing accessories, keeping cords away from heat and sharp edges, avoiding damaged tools, and not using ordinary electric tools in wet locations unless they are approved for that use. Battery tools remove the cord but not the hazards of accidental starting, sharp bits, binding, or moving parts. Remove the battery when the manufacturer instructs you to do so for blade or bit changes, clearing jams, or service.
15. Learn the difference between drill bits and driver bits
Driver bits turn screws and other fasteners. Drill bits create holes. Mixing up these two categories causes confusion for beginners because both can fit into a drill chuck or bit holder.
Twist drill bits are commonly used for wood, plastic, and metal depending on the bit design and material. Masonry requires masonry bits and often a hammer-drill function for suitable substrates. Tile, glass, and other brittle surfaces may need specialized bits and techniques. Spade bits, hole saws, brad-point bits, step bits, and countersinks are specialized tools, not automatic starter-kit requirements.
Match the bit to the material and the hole size. If you need a pilot hole for a screw, the pilot diameter depends on the screw, wood species, and purpose. A hole that is too large can reduce thread grip; one that is too small can increase splitting or driving torque.
Common mistake: buying a huge bit assortment and assuming every included bit is appropriate for every material. Read the labels, keep bits in their indexed case, and replace damaged or badly worn bits.
16. Use clamps to make many jobs safer and more accurate
Clamps are easy to overlook because they do not cut, drill, or fasten anything permanently. Their value is that they stop the work from moving while you perform another operation.
A pair of small quick-grip clamps can hold a board while you drill, keep two pieces aligned during glue-up, secure a guide, or stabilize a repair. The exact clamp type depends on the work, but a beginner should understand the principle before buying many sizes.
Do not hold a small workpiece in your hand while drilling simply because clamping takes longer. A bit can catch and spin the material. Protect finished surfaces with pads or scrap material under the clamp jaws, and do not over-tighten soft materials.
17. Add a stud finder only when you understand what it can and cannot tell you
Electronic stud finders can help locate framing behind many finished walls, but they are not X-ray machines. Different models detect changes in density, edges, centers, metal, or electrical signals with varying reliability. Wall construction, plaster, foil-backed insulation, tile, pipes, metal studs, and other materials can affect readings.
Use repeated scans from both directions and compare findings with other clues such as outlet positions, trim fastening patterns, wall dimensions, and construction knowledge. Never treat a “clear” stud-finder reading as proof that an area contains no wire or pipe.
If you are mounting a heavy object, the correct answer may involve locating structural framing, using a rated anchoring system, or following manufacturer-specific mounting instructions. If you cannot confidently identify the substrate and hidden hazards, stop.
18. Keep electrical tools deliberately limited if you are a beginner
A non-contact voltage tester, multimeter, insulated tools, wire strippers, and electrical screwdrivers can be useful in skilled hands, but buying them does not create electrical competence. Electrical faults can expose you to shock, burns, arc energy, fire, or hidden damage.
A beginner tool kit should not encourage live-circuit experimentation. For basic household ownership, your most important “electrical tools” may simply be a flashlight, labels for the electrical panel, and the knowledge of how to shut off the correct breaker for an approved simple task.
Any time you need to open electrical equipment, alter fixed wiring, diagnose repeated breaker trips, work in a wet area, handle damaged service equipment, or deal with uncertainty about circuit identification, treat the job as specialized. Local laws also determine which electrical work homeowners may perform.
Important: A non-contact tester can be a useful screening device, but it is not a universal proof that a conductor is safe to touch. Testing procedures and instrument limitations matter.
19. Build a small plumbing sub-kit only for simple mechanical tasks
Many household plumbing jobs are mechanical rather than invasive: replacing a showerhead, tightening a loose fixture connection, cleaning an aerator, or removing a trap for cleaning when the layout and condition are straightforward. For these, an adjustable wrench, tongue-and-groove pliers, bucket, rags, flashlight, and appropriate replacement seals may be sufficient.
Before loosening any plumbing connection, know how to stop the water supply. Place a bucket and towel before you open a trap or disconnect a hose. Support fittings so torque is not transferred into hidden piping. Decorative finishes can be scratched by serrated jaws, so use protective material or the correct smooth-jaw tool where appropriate.
Stop if you encounter corroded valves, brittle pipes, active leakage inside a wall, sewage, gas piping, or a connection whose failure could flood the property. A wrench does not make every fitting a beginner job.
20. Make storage part of the tool system
A tool you cannot find during a leak, outage, or quick repair is not really available. Storage does not need to be elaborate. A portable toolbox, zippered tool bag, drawer organizer, or wall-mounted system can all work if tools have predictable locations.
 Table of common hand tools. Photo by Jonathan Cutrer, CC0 1.0, via Wikimedia Commons.
Separate cutting tools and loose blades from casual access. Keep batteries where temperature and moisture conditions follow manufacturer guidance. Store oils, adhesives, solvents, caulk, and chemicals separately from ordinary hand tools when their labels require different conditions.
Create small zones inside the kit: measuring, driving, gripping, cutting, fastening, safety, and consumables. This speeds work and makes missing tools obvious.
Monthly one-minute check: Is the flashlight charged? Are safety glasses clean? Are utility blades contained? Is the hammer handle sound? Are bits rusty or damaged? Are battery packs swollen, cracked, or otherwise abnormal? Has any tool been borrowed and not returned?
21. Use a three-tier buying strategy to control cost
You do not have to buy every tool at premium-professional prices, but the cheapest option is not always economical. Divide purchases into three tiers.
Tier 1: frequent-use essentials. Spend enough for comfortable, dependable versions of the tape measure, primary screwdriver or driver, pliers, adjustable wrench, hammer, utility knife, flashlight, and safety eyewear. These tools will be handled repeatedly and poor ergonomics or bad fit become annoying quickly.
Tier 2: task-driven additions. Buy a drill, clamps, sockets, stud finder, specialty bits, longer level, and plumbing tools when actual projects justify them. This prevents your first shopping trip from becoming a garage full of unused equipment.
Tier 3: borrow or rent. Tools for rare jobs can often be rented or borrowed. Some public libraries and community “libraries of things” lend tools or household equipment. Renting also lets you use a purpose-built tool instead of improvising with an inadequate substitute.
Judge value by fit, durability, replacement availability, warranty practicality, battery ecosystem, and how often the tool will be used. For power tools, buying into a battery system can reduce future cost, but only if you genuinely expect to add compatible tools.
22. Learn to inspect a tool before every job
A pre-use inspection takes seconds. Look for cracked handles, loose heads, bent shafts, chipped cutting edges, damaged cords, missing guards, swollen batteries, badly worn bits, loose chuck components, or anything that has changed since the last use.
OSHA workplace standards require tools to be maintained in safe condition and guards to be used when tools are designed for them. Home DIY does not become safer by ignoring those principles. A guard that feels inconvenient is not an invitation to remove it.
If a tool falls from a ladder, gets wet, overheats, emits an unusual smell, develops intermittent power, or behaves differently from normal, stop using it until you understand why. Do not “test it one more time” under load.
23. Set up the work area before touching the fastener
Many DIY errors begin before the tool is used. Clear the floor. Improve the lighting. Move children and pets away. Protect nearby surfaces. Find the shutoff valve if water is involved. Identify the correct breaker if an approved task requires de-energization. Put all required parts within reach before climbing a step stool.
Use a stable work platform designed for the job. Chairs, stacked boxes, buckets, and furniture are poor substitutes for an appropriate ladder or step stool. Do not work overhead with loose hardware balanced on a rung.
Plan where removed screws will go. A magnetic tray, small bowl, or labeled bag prevents lost hardware and helps you remember which screw came from which location.
24. Practice on scrap material before working on the house
If you have never used a drill, do not make your first hole in a visible cabinet door or finished wall. Practice on scrap wood. Learn what a pilot hole feels like, how the clutch behaves, how quickly a screw seats, and how much pressure a driver bit needs.
Practice measuring, marking, drilling perpendicular holes, and driving screws flush without burying them. Try removing the same fastener without stripping it. This teaches more than watching another tutorial because you develop feedback through your hands.
For anchors, use a scrap or test board that mimics the wall material when practical. For caulk or patching compound, practice laying and smoothing a small amount before working in a prominent location.
25. Match the repair to your skill boundary
A strong DIY habit is knowing when a task has changed category. Tightening a cabinet hinge is not the same as repairing a cracked cabinet structure. Replacing a showerhead is not the same as correcting a leaking pipe inside a wall. Hanging a lightweight frame is not the same as mounting a heavy television above a seating area.
Stop when the job involves structural damage, gas, significant electrical work, major plumbing, pressurized systems you do not understand, hazardous materials, roof access without proper equipment, fire-safety systems, large appliances with complex power connections, or any repair where failure could seriously injure someone.
The right tool does not remove the need for the right knowledge. A tool kit expands what you can do safely; it should not pressure you into doing work beyond your competence.
26. Use a common-repair map to choose the right tool
Instead of memorizing tool names, connect problems to diagnostic steps.
Loose cabinet knob: Identify the screw type. Hold the knob aligned. Tighten with the matching driver until secure. If it spins without tightening, inspect the screw and insert rather than applying more torque.
Squeaky or misaligned door hinge: Check whether hinge screws are loose, whether the hinge is bent, and whether the door has shifted. A screwdriver may fix a loose screw, but a screw that no longer grips needs a different repair than simply driving it harder.
Picture hanging: Measure, mark, verify level, identify wall material and expected load, choose a rated fastener or anchor, then install. Do not select the anchor based only on what is already in your miscellaneous-hardware box.
Loose showerhead: Determine whether the leak is at a threaded joint and follow the fitting or manufacturer requirements. Use the correct wrench, protect finishes, support adjacent piping, and know the shutoff strategy. Do not wrench aggressively on plumbing that disappears into a wall.
Flat-pack furniture: Sort hardware first, use the exact hex key or driver, leave joints slightly loose until alignment is correct when instructions call for it, then tighten in sequence. Do not use maximum drill torque on particleboard fittings.
Small drywall dent: Clean loose material, use an appropriate patching product and putty knife, allow proper drying, sand or finish as required, and prime/paint if needed. A large hole, moisture damage, mold, or repeated cracking needs diagnosis beyond cosmetic patching.
Loose shelf bracket: Remove the load, inspect the fastener and wall material, determine whether the original anchor failed, and replace it with a suitable attachment method. Reusing an enlarged damaged hole with the same anchor is often not a repair.
27. Avoid the ten beginner tool mistakes that cause most frustration
Using the wrong driver size. If the bit does not fill the screw recess correctly, change it before applying more torque.
Over-tightening. “Tighter” is not always “safer.” Furniture inserts, plastic parts, soft metals, plumbing seals, and small screws can be damaged by excessive torque.
Using pliers on every nut. Use the proper wrench or socket when preserving fastener flats matters.
Drilling before checking the surface. Identify material, hidden hazards, bit type, anchor requirements, and desired depth first.
Working with dull cutters. Dull blades often demand more force and reduce control.
Ignoring tool damage. Cracks, loose handles, missing guards, and damaged electrical components are reasons to stop.
Buying specialty tools before essentials. A niche gadget cannot replace a good tape measure, correct screwdriver, safe light, and reliable gripping tools.
Skipping protective equipment for a “two-minute job.” Task duration does not determine whether a fragment can hit your eye.
Forgetting shutdown preparation. Know how to stop water, power, movement, or pressure before opening a system.
Improvising beyond the tool’s design. A screwdriver is not a chisel; a wrench is not a hammer; a chair is not a ladder; a drill is not a universal cutting tool.
28. Build your starter kit in three passes
Pass one: the immediate basics. Buy a tape measure, multi-bit screwdriver or small driver set, claw hammer, adjustable wrench, general pliers, needle-nose pliers, utility knife or guarded cutter, torpedo level, flashlight/headlamp, hex keys, safety glasses, and a small organizer. Add gloves suited to the types of handling you expect to do.
Pass two: after your first five repairs. Notice what you repeatedly borrowed or wished you had. Add a compact socket set, locking pliers, putty knife, clamps, a better hardware organizer, and perhaps tongue-and-groove pliers.
Pass three: power and specialization. Add a cordless drill/driver with a modest, clearly labeled bit set when repeated tasks justify it. Add a stud finder, specialty bits, longer level, saw, sander, or other tools only when you have a specific project and can learn the relevant safety procedures.
This sequence prevents “tool collecting” from replacing actual skill building. Your kit grows because your projects grow.
29. Create a one-page tool reference for your household
Write a simple note and keep it inside the box or in your phone. Include the water shutoff location, electrical panel location, flashlight charging reminder, drill battery type, common wall construction if known, sizes of frequently used cabinet or furniture fasteners, and contact information for services you would call for electrical, plumbing, HVAC, or structural problems.
This reference is especially useful when multiple people share the home. A tool system should not depend on one person remembering where everything is.
30. Maintain the kit so it is ready when the problem is urgent
After every project, clean and return tools. Wipe moisture from metal. Remove dust from tool vents as the manufacturer recommends. Store batteries and chargers according to their instructions. Replace blades and damaged bits. Restock consumables you used.
Every few months, open the case and verify that nothing has corroded, leaked, discharged, or disappeared. Check expiration dates on any products that have them. Dispose of chemicals, batteries, and sharp objects through appropriate local channels.
The goal is not museum-level organization. The goal is confidence that when a handle loosens, a package must be opened, a shelf needs measuring, or a small leak needs inspection, the basic tools are present, safe, and easy to identify.
A practical starter checklist
- Tape measure, 16 to 25 feet
- Multi-bit screwdriver or a small set of common Phillips and slotted drivers
- Metric hex-key set; SAE set if your household hardware requires it
- Moderate-weight claw hammer
- Slip-joint or combination pliers
- Needle-nose pliers
- Adjustable wrench
- Locking pliers
- Utility knife or guarded package cutter with safe blade storage
- Torpedo level
- Flashlight or headlamp
- Safety glasses
- Task-appropriate work gloves
- Flexible putty knife
- Small hardware organizer
- Compact socket set after you identify the sizes you use
- Two small clamps
- Cordless drill/driver only when your tasks justify it
- Small, labeled drill/driver bit set matched to your materials
- Portable box, bag, drawer, or wall organizer
Frequently asked questions
Is it better to buy a complete household tool kit or individual tools?
A complete kit can be convenient if the included tools match your needs and are acceptable quality. Individual tools give you more control over ergonomics and durability. A practical compromise is to buy a small starter set, then replace or add high-use tools individually.
What is the first power tool a homeowner should buy?
For many households, a cordless drill/driver is the most broadly useful first power tool because it can drill pilot holes and drive common fasteners. It is not mandatory, however. If you rarely drill or install hardware, hand tools may cover your needs for a long time.
Do I need both a drill and an impact driver?
Not as a beginner. A drill/driver is generally more versatile for learning because it can drill holes and drive screws with adjustable clutch control. An impact driver becomes valuable when your projects involve frequent or demanding fastening. The tools overlap, but they are not identical.
Should I buy metric or SAE tools?
Buy what matches the fasteners you actually encounter. Modern furniture and many products use metric hardware, while SAE sizes remain common in the United States. Do not force one system onto the other because “almost fitting” damages fasteners.
Can I use regular pliers instead of a wrench?
You sometimes can grip an object with pliers, but that does not mean you should. Nuts and bolt heads are designed to be driven on their flats with properly fitting wrenches or sockets. Serrated pliers can mar or round them.
How much should I spend on a starter tool kit?
There is no useful universal dollar target because prices vary by country, brand, promotions, and whether you already own anything. Set a capability target instead: reliable measuring, driving, gripping, cutting, leveling, lighting, and basic protection. Buy the smallest set that meets those needs, then expand when a project creates a clear reason.
What tools should I avoid buying at first?
Avoid large specialty kits, obscure single-purpose gadgets, large saws, advanced electrical tools, and expensive battery platforms unless you have a real project that requires them. Specialized tools make sense when you understand the task, safety needs, and expected frequency of use.
How do I know when a repair is too advanced for DIY?
Stop when failure could cause serious injury, fire, flooding, structural damage, gas release, electrical shock, hazardous-material exposure, or loss of an important safety system. Also stop when you cannot confidently identify what you are working on or what is behind it. Knowing your boundary is part of competent tool use.
Final takeaway
A good home tool kit is a capability system, not a collection. Start with tools that let you measure accurately, turn the correct fastener, grip without damage, make controlled cuts, check level, see the work clearly, and protect yourself. Learn those tools on small, reversible tasks before adding power or complexity.
Your first action should be simple: list five repairs or maintenance jobs you actually expect to do, then build the smallest kit that covers them. The mistake to avoid is buying a giant assortment and assuming ownership equals skill. A compact kit you understand is safer and more useful than a full workshop you do not.
Sources and further reading
Occupational Safety and Health Administration — Hand and Power Tools overview
OSHA — Electrical Incidents: Power Tools
OSHA — Hand Tools, 29 CFR 1926.301
Lowe’s — How to Assemble a Basic Tool Set, updated March 25, 2025
Wikimedia Commons — Hand tools.jpg, public domain