

Quick answer: Clean a camera in stages, starting with the least aggressive method. Remove loose dust from the exterior, use a hand blower on optical surfaces, clean the lens only after grit is gone, and use the camera’s built-in sensor-cleaning function before considering manual sensor work. Never use household glass cleaner, canned compressed air, rough paper, or a dry cloth on a visibly gritty lens. If sensor contamination remains after a blower or if you are not comfortable working around an exposed sensor, professional cleaning is the safer next step.
Dust is normal in photography. A camera that leaves the house will eventually collect fingerprints, fibers, pollen, sand, skin oil, moisture spots, or sensor dust. The goal is not to keep equipment laboratory-clean. The goal is to remove contamination without turning a minor cosmetic issue into scratched coatings, damaged seals, smeared optics, or a scratched sensor cover glass.
This guide explains a practical cleaning system for interchangeable-lens cameras, compact cameras, lenses, filters, viewfinders, screens, mounts, and image sensors. It is designed for beginners who want to clean safely, but it also includes a diagnostic workflow so you can tell whether a mark is actually on the lens, the sensor, the screen, or somewhere else.
Start by identifying what actually needs cleaning
Before touching the camera, determine where the problem is. This prevents unnecessary cleaning and helps you choose the safest method.
1. Look at the problem in photographs, not only on the camera
If a dark spot appears in the same place in multiple photographs, especially at small apertures, sensor dust is a likely cause. If you can see a smudge while looking through the viewfinder but it does not appear in saved images, the contamination may be on the viewfinder optics, focusing screen, mirror, or electronic display instead of the sensor.
Lens contamination behaves differently. A small amount of dust on the front element often has little visible effect in ordinary photographs. Grease, fingerprints, dried droplets, or haze can reduce contrast or create flare, especially when a strong light source is near the frame. A large water spot or fingerprint deserves attention; a few microscopic dust specks usually do not justify aggressive cleaning.
2. Run a simple sensor-dust test
Mount a normal lens, switch to aperture-priority mode, choose a small aperture such as f/11 or f/16, set a low ISO, and photograph a plain bright surface such as a white wall, white paper, or a clear section of sky. Defocus the lens so texture on the target is not distracting. Then inspect the image at high magnification.
Sensor dust usually appears as soft dark marks that remain in the same position from frame to frame. Sony’s current support guidance similarly recommends photographing a plain bright subject at a small aperture and inspecting the image for spots. If the spots are visible only at very small apertures and never affect your normal photography, you may decide that immediate physical cleaning is unnecessary.
3. Check whether the mark moves when the lens changes
If a mark appears only with one lens, clean and inspect that lens first. If the same mark appears with several lenses in the same image location, suspect the sensor. This simple comparison can save you from cleaning the wrong component.
4. Distinguish external dust from internal lens contamination
Dust on the outside of a lens can normally be removed with a blower or proper optical-cleaning method. Dust inside a lens is different. Opening a lens can disturb alignment, sealing, flex cables, lubricants, and calibration. Internal haze, fungus-like growth, separation, or heavy internal dust is generally a repair or service issue rather than a routine home-cleaning task.
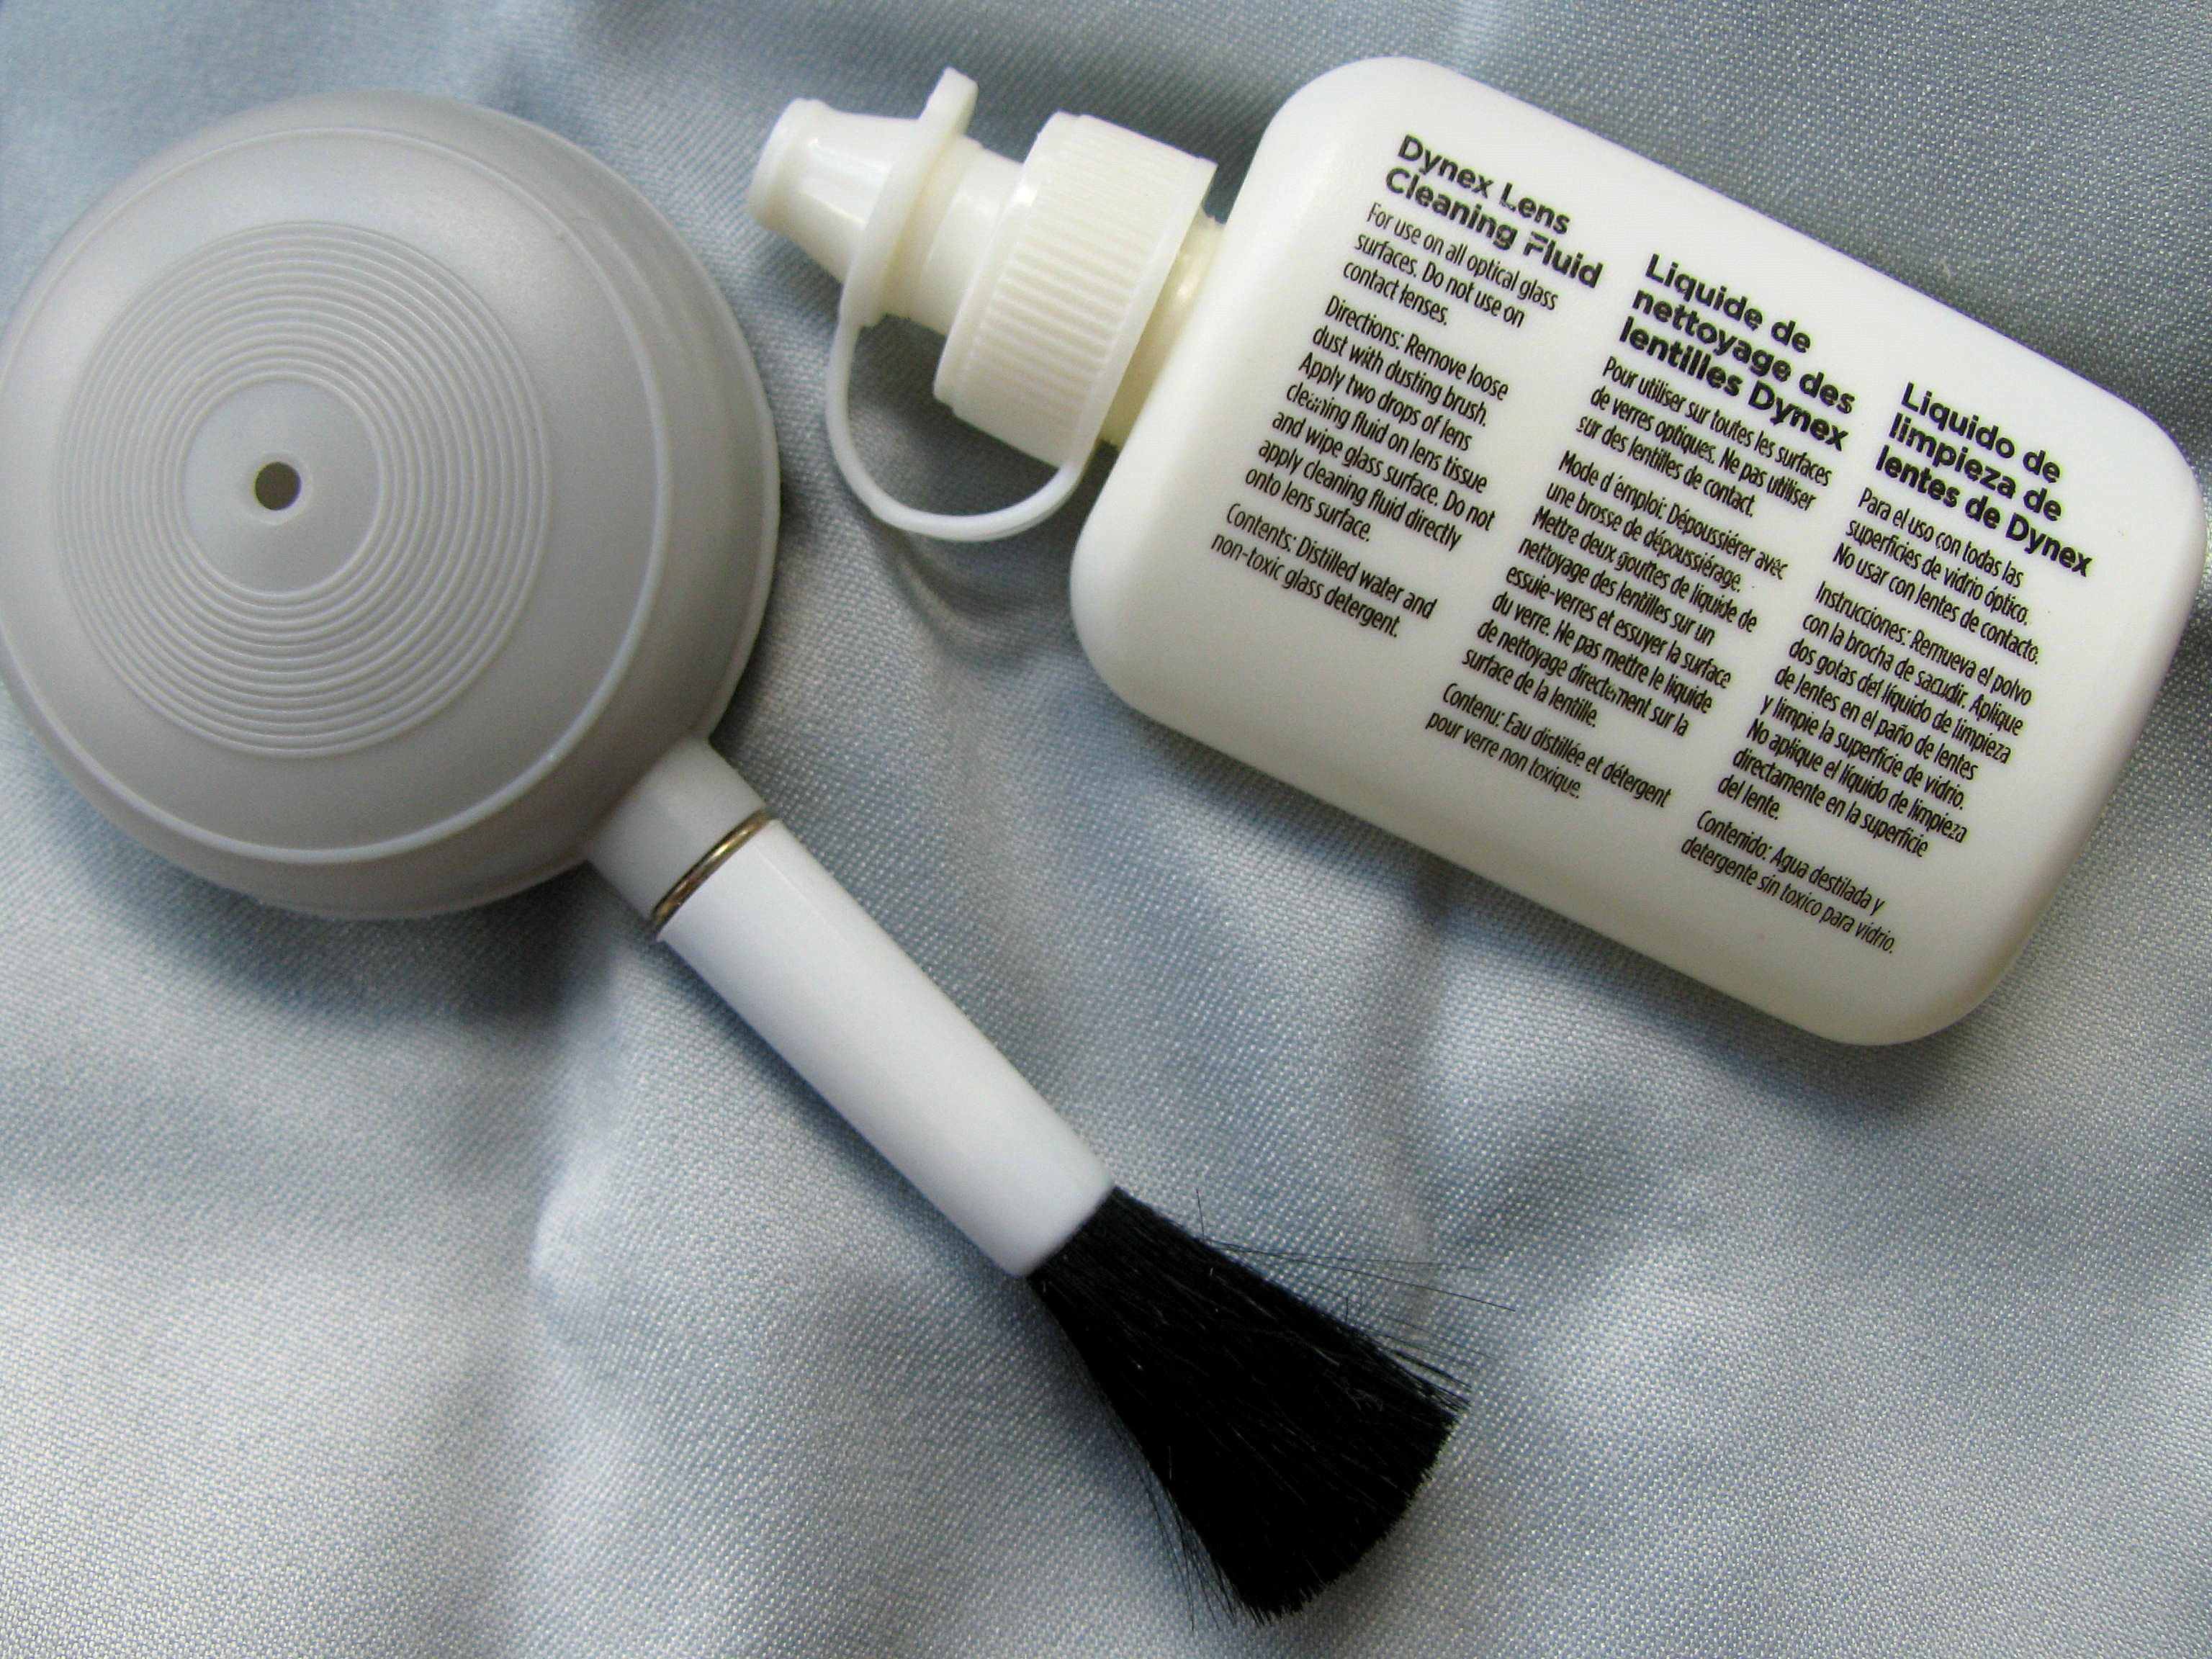 A basic optical-cleaning kit can be simple: a blower, a clean microfiber cloth, and an appropriate lens-cleaning solution. Image: CMBJ, Wikimedia Commons, CC BY-SA 2.5.
Build a small camera-cleaning kit
You do not need a drawer full of specialized products. In fact, too many tools can encourage unnecessary cleaning. A small, controlled kit is easier to keep clean and easier to use correctly.
Recommended basic tools
- A clean hand-squeezed bulb blower with no aerosol propellant.
- Two or more clean optical-grade microfiber cloths stored in sealed bags.
- A soft lens brush used only for optical equipment.
- Lens-cleaning solution specifically intended for coated optical glass.
- Clean cotton swabs for exterior crevices only, not for swabbing the image sensor.
- A small clean tray or mat where caps and accessories can be placed without picking up grit.
- A bright light so you can see dust before touching a surface.
- Fresh body and rear lens caps.
If you intend to perform wet sensor cleaning, use a sensor-cleaning kit designed for the exact sensor size and follow both the camera manufacturer’s instructions and the kit instructions. A full-frame sensor, APS-C sensor, Micro Four Thirds sensor, and medium-format sensor require different swab dimensions. An oversized or undersized tool can make cleaning harder and increase the risk of contamination.
Keep cleaning tools cleaner than the camera
A microfiber cloth is useful only while it is clean. Once it has fallen on a floor, shared a pocket with keys, absorbed skin oil, or collected sand, it can become an abrasive. Store optical cloths separately from general-purpose cleaning cloths. Wash reusable cloths according to the manufacturer’s instructions without fabric softener if the cloth maker advises against it, and retire any cloth that feels contaminated or rough.
Likewise, keep the tip of a blower clean. Do not let it touch the sensor, lens, mirror, or dirty surfaces. A blower works because moving air lifts loose particles; the nozzle itself should never become a contact-cleaning tool.
Choose the right place to clean a camera
The environment matters almost as much as the tool. Cleaning a sensor beside an open window, underneath a ceiling fan, on a sandy beach, or in a room where someone is vacuuming can introduce more contamination than you remove.
Create a low-dust workspace
Choose an indoor table with good light and little air movement. Turn off fans. Keep pets away for a few minutes. Wipe the table before bringing the camera over. Avoid changing lenses immediately after shaking out clothing, blankets, or camera bags because fibers can remain airborne.
You do not need a sterile room. You simply want a calm space where loose dust is not constantly moving through the air.
Let equipment acclimate after temperature changes
If the camera has just come from a cold outdoor environment into a warm humid room, wait before opening the lens mount. Condensation can form on or inside equipment when cold surfaces encounter warm moist air. Leave the camera in its bag while it gradually warms. Cleaning a damp optical surface can create streaks and may move moisture into places where it does not belong.
Charge the battery before sensor cleaning
Some cameras require power to hold a shutter or mirror mechanism in a safe position during cleaning. If the manufacturer specifies a minimum battery level, obey it. A camera losing power while a mechanism is open can create a serious risk if a swab or tool is inside the mount.
Clean the exterior before opening the camera
Cleaning the outside first reduces the amount of dust that can fall into the camera when the lens comes off.
1. Power the camera off
Turn the camera off and remove external cables. For routine exterior cleaning, you may also remove the battery if the manufacturer recommends it. Keep port doors closed unless you are cleaning around them.
2. Blow loose dirt away
Use the hand blower around dials, buttons, the hot shoe, lens mount exterior, seams, strap lugs, and the edges of the screen. The purpose is to move grit away before wiping.
Do not use canned compressed air. Sony’s current camera-cleaning guidance specifically warns against air dusters or compressed air around image sensors because the force or propellant can cause damage or malfunction. The same conservative approach is sensible throughout delicate camera equipment.
3. Brush stubborn dry dust gently
Use a clean soft brush on the body, not the same dirty brush you use for general household cleaning. Work from cleaner areas toward dirtier areas. Sand deserves extra caution because quartz grains can scratch finishes and glass.
4. Wipe grips and body panels
Use a slightly damp soft cloth if the camera maker permits it. The cloth should be damp, not dripping. Do not flood button gaps, card doors, battery compartments, microphones, speakers, or connection ports. “Weather sealed” does not mean waterproof, and sealing performance varies among bodies and lenses.
5. Clean screens without flooding edges
Start with a blower. If fingerprints remain, use a clean microfiber cloth. If needed, apply a screen-safe cleaner to the cloth rather than spraying the camera. Avoid pressing hard on articulating screens.
Clean a camera lens without scratching coatings
The safest lens-cleaning rule is simple: remove particles before you rub. A fingerprint looks worse than dust, but a grain of sand is more dangerous than a fingerprint because rubbing it across the lens can scratch the coating or glass.
Step 1: Inspect under angled light
Remove the lens cap and tilt the lens under a bright light. Look for loose dust, fibers, oily fingerprints, dried droplets, and grit. Do not judge a lens by shining an extremely bright flashlight through it and becoming alarmed by every internal particle; almost any used lens will reveal some internal dust under harsh inspection.
Step 2: Use a hand blower first
Hold the lens so dislodged debris can fall away. Blow across the front element rather than pressing the nozzle close to the glass. Several moderate bursts are better than aggressive contact.
If dust remains at the edge, use a clean soft lens brush. Move the brush lightly. Never scrub a visible grain of sand.
Step 3: Remove oil only after particles are gone
Fold a clean microfiber cloth so you have a clean working section. If the lens is merely fingerprinted, gentle breath is sometimes used by photographers, but a dedicated optical solution is more controlled. Follow the lens or cleaner manufacturer’s guidance. Sony specifically advises not applying lens-cleaning solution directly to the lens; apply a small amount to the cloth instead.
Wipe gently from the center outward. Do not flood the edge where liquid can migrate under retaining rings. If the cloth begins to drag or smear, switch to a clean section rather than applying more pressure.
Step 4: Inspect once, then stop
Cleaning becomes risky when perfectionism takes over. If the grease is gone and the glass looks clean in normal light, stop. Repeated polishing produces no photographic benefit and creates more opportunities for scratches or coating wear.
What not to use on lenses
- Household window or glass cleaner.
- Paper towels, tissues, napkins, shirt fabric, or bathroom tissue.
- Solvents such as acetone, paint thinner, or benzine.
- Aerosol cleaners sprayed directly onto the lens.
- Canned compressed air.
- A cloth that has been used on greasy screens, eyeglasses, or household surfaces unless it has been properly cleaned.
Clean filters separately from expensive lenses
A protective, UV, neutral-density, or polarizing filter can collect the same fingerprints and dust as a front element. Remove the filter when practical and clean both sides rather than allowing fluid to migrate between the filter and lens rim.
Use the same order: blower, brush if necessary, then minimal optical fluid on a clean cloth. Polarizers and some specialty filters can have delicate coatings, so check the filter manufacturer’s instructions before using any chemical cleaner.
If a filter is deeply scratched, chipped, delaminating, or permanently hazy, replacing it is often better than repeatedly trying to polish it. A damaged inexpensive protective filter should not remain in front of an otherwise healthy lens simply because it is still physically attached.
Clean the rear lens element and mount carefully
The rear element is often smaller and can be closer to the sensor, so contamination may have a more noticeable effect than front-element dust. It also sits near electronic contacts and moving mechanisms.
1. Cap the camera body first
If you remove a lens to clean the rear element, protect the camera body immediately with a clean body cap or another clean lens.
2. Blow before wiping
Use a bulb blower to remove loose dust. If the rear element requires wet cleaning, apply solution to the cloth rather than the lens. Avoid dripping fluid into the mount.
3. Keep electronic contacts dry
Do not coat gold contacts with lens cleaner. If contacts appear dirty and communication problems occur, follow the manufacturer’s service guidance rather than scraping them with improvised abrasives.
4. Inspect mount screws and gasket areas
Loose hardware, a damaged rear gasket, or impact damage is not a cleaning problem. If the lens mount appears bent or the lens no longer locks correctly, stop and have the equipment inspected.
 A hand-squeezed blower removes loose particles without aerosol propellant. Image: Tony Webster, Wikimedia Commons, CC BY-SA 2.0.
Prevent dust while changing lenses
The easiest sensor-cleaning job is the one you never need to do. You cannot eliminate dust, but a few habits reduce how much enters the camera.
Prepare the replacement lens before removing the current one
Loosen the rear cap on the replacement lens first. Have it within reach. This minimizes the time the camera mount is open.
Turn the camera off
Sony recommends powering the camera off before changing lenses, noting that an energized sensor can attract dust. Even when a particular model behaves differently, turning off is a simple conservative habit unless the manufacturer instructs otherwise.
Point the mount downward when practical
Keep the camera opening angled downward so gravity works in your favor. Do not balance the camera precariously just to achieve this angle; secure handling matters more.
Avoid dusty or windy locations
On a beach, desert trail, construction site, or windy field, use a sheltered bag, vehicle, indoor space, or your body as a windbreak. If conditions are severe, it may be better to keep one lens mounted and crop later rather than expose the mount to blowing sand.
Keep rear caps and body caps clean
A rear lens cap that spends the day loose in a dusty pocket can transfer contamination directly to the lens. Store caps in a clean compartment and pair them so their interior surfaces stay protected.
Use the camera’s built-in sensor-cleaning function first
Many interchangeable-lens cameras have a sensor-cleaning mode that vibrates the sensor assembly or uses another mechanism to dislodge loose particles. This is the lowest-risk sensor-cleaning step because it requires no physical contact.
Read your camera manual and run the cleaning function as directed. Some cameras perform a cleaning cycle automatically at startup or shutdown; others offer a menu command. After the cycle, repeat the dust test before deciding whether to open the mount.
If the spot is gone, stop. There is no benefit in manually cleaning a sensor that is already producing clean photographs.
How to use a blower on an image sensor safely
If built-in cleaning does not remove loose dust, a hand blower may be the next manufacturer-approved step for many interchangeable-lens cameras. Always check the instructions for your exact model first because shutter and sensor mechanisms differ.
1. Work in a clean, still room
Turn off fans and avoid carpet dust, cooking vapor, smoke, hairspray, and pet hair. Wash and dry your hands before handling the camera.
2. Confirm battery requirements
If your camera has a cleaning mode that locks the mirror or shutter open, ensure the battery charge meets the manufacturer’s requirement. Some cameras will refuse to enter the mode with low power.
3. Remove the lens and orient the mount downward
Hold the camera securely with the opening facing somewhat downward. This helps dislodged particles leave the chamber instead of resettling.
4. Keep the blower tip outside the chamber
Never insert the nozzle deeply enough that it could touch the sensor, shutter, or internal mechanisms. Sony’s guidance explicitly warns not to allow the blower tip to touch the image sensor.
5. Use several controlled puffs
Do not blast with excessive force. A bulb blower provides enough airflow for loose dust. Never substitute canned air, an air compressor, a vacuum nozzle, or your mouth.
6. Reattach the lens and retest
Run the same small-aperture test. If the spots changed or disappeared, the dust was loose. If the same marks remain exactly in place, contamination may be adhered to the sensor cover and require a more advanced method or professional cleaning.
Understand wet sensor cleaning before attempting it
Wet sensor cleaning can remove stubborn oil or adhered particles, but it introduces more risk than built-in cleaning or a blower. The sensor you see is generally protected by cover glass and filter layers, but that assembly is delicate, expensive, and closely integrated with the camera.
If your camera manufacturer does not recommend user wet cleaning, or if you are uncomfortable with the process, use a professional service. The cost of professional cleaning is small compared with a scratched sensor assembly or damaged shutter.
When wet cleaning may be appropriate
- Dust spots remain after the built-in cleaning cycle and careful blower use.
- You see oily or smeared contamination rather than loose fibers.
- The contamination clearly affects normal photographs.
- You have the correct sensor-size swab and compatible cleaning fluid.
- The manufacturer does not prohibit the procedure.
- You can work slowly in a clean environment.
When to avoid DIY wet cleaning
- The camera is under a service arrangement that restricts user cleaning.
- You cannot identify the correct swab or fluid.
- The shutter closes unexpectedly or the cleaning mode is unclear.
- The sensor assembly appears scratched, cracked, shifted, or damaged.
- There is sticky contamination from smoke, saltwater, sugary liquid, or an unknown chemical.
- You feel rushed, shaky, or uncertain.
Use only purpose-made sensor tools
Do not improvise with cotton swabs, tissues, ordinary microfiber cloths, makeup applicators, or household cleaning chemicals. A proper sensor swab is designed for a controlled pass across the sensor width and to minimize fiber shedding.
More passes are not always better
A common beginner mistake is to keep swabbing because one tiny spot remains. Every additional pass is another opportunity to pick up grit or leave streaks. Follow the cleaning-kit instructions exactly, use a fresh swab when required, and retest between attempts.
Do not confuse sensor dust with dead pixels or image artifacts
Cleaning cannot fix every visible spot. A dark fuzzy mark that becomes stronger at small apertures often points to sensor dust. A bright pixel visible in the same location during long exposures may be a hot pixel. Repeating geometric artifacts can come from image processing, lens flare, reflections, damaged filters, or lighting conditions.
If a defect remains identical regardless of lens, aperture, cleaning, and lighting, investigate whether the camera has a pixel-mapping function or requires service. Physical rubbing is not a solution to an electronic pixel problem.
 Sensor contamination often appears as soft dark spots against plain bright areas. Image: Coyau, Wikimedia Commons.
Clean an optical viewfinder without disturbing delicate parts
On a DSLR, dust visible through the viewfinder may not appear in the photograph because the optical path includes the mirror, focusing screen, prism, and eyepiece. The focusing screen can be especially delicate and may scratch easily.
Start by cleaning the eyepiece externally with a blower and clean microfiber cloth. If debris is inside the viewfinder system, consult the camera manual. Do not reach into the mirror box with a cloth or brush unless the manufacturer provides a specific procedure.
The reflex mirror has a front-surface coating and is not like an ordinary household mirror. A visible speck on it may be cosmetically annoying but photographically irrelevant. Aggressive cleaning can do more harm than leaving a small particle alone.
Clean an electronic viewfinder and LCD
Electronic viewfinder eyepieces collect skin oil, eyelashes, sunscreen, and makeup. Use a blower first, then a clean microfiber cloth. If the eyecup is removable according to the manufacturer, remove it gently for access.
For touchscreens, avoid flooding edges and avoid cleaners that can attack anti-reflective or oleophobic coatings. If the manufacturer permits a cleaning solution, apply it sparingly to the cloth rather than spraying the screen.
Clean camera bags because dirty bags re-contaminate clean gear
A perfectly cleaned camera placed into a bag full of dust will not stay clean for long. Empty the bag periodically. Vacuum or wipe removable dividers according to the bag maker’s care instructions. Shake out loose sand outdoors, not beside an open camera.
Inspect pockets where caps, filters, and cloths are stored. Keep clean cloths in sealed pouches. Do not store wet rain covers, food, leaking pens, or open chemical cleaners next to camera equipment.
Handle sand, salt spray, rain, mud, and smoke as special cases
Normal dust is one thing; abrasive or corrosive contamination needs a more cautious response.
Sand
Do not wipe sandy equipment immediately. Blotting or wiping can drag hard grains across paint, screens, and glass. Let dry loose sand fall away, use a blower, and brush gently before any wet wipe.
Salt spray
Salt can attract moisture and promote corrosion. If a camera has been exposed to ocean spray, follow the manufacturer’s weather-exposure cleaning instructions. Wipe exterior surfaces with a properly dampened cloth if permitted, while preventing water from entering controls and ports. Do not dismantle the camera to chase salt internally.
Rain
Dry the exterior with a soft absorbent cloth and let equipment air-dry in a protected area. Do not use a hair dryer or high heat. Remove the battery and card only if the manufacturer’s instructions or the circumstances make that safe; opening compartments while water is still running across the body can move moisture inward.
Mud
Let thick exterior mud stop dripping, then lift it away rather than grinding it into seams. Avoid forcing mud into control gaps. Serious immersion or contamination inside the body is a service issue.
Smoke and oily airborne contamination
Smoke can leave a film on optics and inside equipment. If contamination is internal or extensive, professional cleaning is appropriate. Do not repeatedly flood a lens with cleaner trying to remove internal haze.
Store cameras to prevent fungus and moisture problems
Cleaning is only half of equipment care. Storage conditions determine whether moisture, mold-like growth, corrosion, or battery leakage becomes a future problem.
Dry equipment before storage
Do not seal damp gear inside a closed bag for days. After working in rain or humid conditions, dry exterior surfaces and allow the equipment to return to a normal indoor condition before long-term storage.
Avoid extreme heat
Do not leave cameras for long periods in a hot car, on a sunny windowsill, beside a radiator, or in an attic with extreme temperatures. Heat can affect batteries, lubricants, adhesives, displays, and seals.
Control humidity sensibly
Photographers in humid climates often use dry cabinets or controlled storage. The goal is not to desiccate equipment excessively; it is to avoid prolonged damp conditions. Follow lens and camera manufacturer recommendations for storage temperature and humidity.
Inspect rarely used lenses
Every few months, look through stored equipment, check for unusual haze, odors, corrosion, sticky controls, battery swelling, or fungus-like patterns. Early detection is easier to address than damage discovered years later.
Create a cleaning schedule based on use, not the calendar
There is no universal rule saying a sensor must be cleaned every month or a lens every week. Clean when condition and image quality justify it.
After every demanding outdoor session
Inspect for sand, salt, mud, rain, plant debris, or sticky contamination. Blow loose particles away and dry the exterior before storage.
After ordinary sessions
Replace caps, check the front element for obvious fingerprints, and wipe the grip if needed. Most sessions require no deeper cleaning.
When images show repeatable spots
Run the sensor-dust test, use built-in cleaning, then a blower if necessary. Escalate only if the contamination remains visible.
Before an important assignment or trip
Inspect equipment several days in advance, not the night before. If professional sensor cleaning is needed, you will have time to arrange it and verify the result.
A practical 15-minute maintenance routine
Use this routine when returning from a normal photo outing:
- Place the bag on a clean surface and remove equipment.
- Inspect the camera body and lenses under good light.
- Blow dust from the exterior before wiping.
- Check front elements for fingerprints or droplets.
- Clean only the lenses that actually need contact cleaning.
- Check rear caps and body caps for dirt.
- Inspect batteries for swelling, cracks, or leakage.
- Copy photographs and back them up before formatting cards.
- Return clean, dry gear to a clean bag.
The routine is intentionally conservative. Camera care is not about polishing every surface after every use. It is about noticing problems early and using the least invasive method that solves them.
Troubleshooting common cleaning problems
The lens looks streakier after cleaning
You probably used too much fluid, a contaminated cloth, or kept wiping with a saturated area. Stop, let the surface settle, use a clean cloth, and apply only the amount of optical cleaner recommended by its manufacturer. Clean in gentle passes rather than scrubbing.
Dust keeps returning after sensor cleaning
Check the rear of your lenses, rear caps, body cap, camera bag, and lens-change habits. If you clean the sensor but immediately attach a dusty lens in a dusty environment, contamination can return quickly.
A sensor spot moved but did not disappear
That suggests loose contamination was displaced. Run the built-in cleaning cycle again or use a careful blower. Do not automatically jump to wet cleaning if a non-contact method is still working.
A mark remains after several cleaning attempts
Stop escalating. The mark may be adhered contamination, a scratch, coating damage, a pixel issue, internal optical contamination, or something unrelated to dirt. Professional inspection is safer than repeated aggressive cleaning.
The camera will not enter sensor-cleaning mode
Check battery charge, camera temperature, lens state, shutter settings, and the exact procedure in the manual. Do not force mechanical parts open.
The shutter closes during cleaning
Remove tools immediately if possible without touching anything, stop the procedure, and consult the manual or service provider. Never try to pry the shutter open.
The front element has a stubborn dried droplet
After all abrasive dust is removed, use an approved optical cleaner on a clean cloth and allow it a moment to soften the deposit. Use light pressure. Repeated hard rubbing is worse than repeating a gentle wet-cleaning pass with a fresh clean section of cloth.
What a professional camera cleaning service can do
A professional service is appropriate when contamination is internal, the sensor requires repeated wet cleaning, the shutter or mirror mechanism complicates access, or the camera has been exposed to liquid, smoke, sand, or impact.
Before handing over equipment, ask what the service includes. Sensor cleaning may be separate from exterior cleaning, lens cleaning, internal lens repair, autofocus calibration, or weather-seal inspection. Ask whether the shop provides before-and-after test images or a service report.
Professional cleaning is also a good option before a major paid assignment if you do not want to experiment on essential equipment. The point is not that DIY cleaning is inherently unsafe; it is that knowing when to stop is part of good equipment care.
How to verify that cleaning actually worked
Do not judge only by looking at the sensor or lens under a flashlight. Verify photographically.
For the sensor
Repeat the small-aperture bright-background test using the same settings and lens. Compare the before and after images at the same magnification. If the spots are gone or reduced below a level that affects normal work, stop cleaning.
For the lens
Photograph a scene with fine detail and another with a bright light source near the edge of the frame. Check whether contrast, flare, or haziness has improved. A few internal dust specks that do not affect images are not a reason to disassemble a lens.
For controls and body cleaning
Check that buttons, dials, doors, and the lens mount operate normally. Ensure no cloth fibers remain around switches and no moisture is trapped around ports.
A worked example: cleaning a mirrorless camera after a dusty trip
Imagine you return from a week of travel with a mirrorless camera and two zoom lenses. The camera body is dusty, one lens has a fingerprint, and photographs taken at f/16 show three dark spots in the sky.
First, you do not remove the lens immediately. You set up a clean indoor workspace and use a blower and soft brush to remove exterior dust from the body, lens barrel, caps, and bag. Then you clean the fingerprint: blower first, then a tiny amount of optical cleaner applied to a clean microfiber cloth. The front element becomes clear without repeated rubbing.
Next, you confirm the sensor problem by taking a test photograph at a small aperture. The same three marks remain. You run the camera’s built-in sensor-cleaning function and retest. One mark disappears. That tells you at least some of the contamination is loose.
You charge the battery, check the manual, remove the lens in a low-dust room, hold the mount downward, and use several gentle puffs from a clean bulb blower without inserting the nozzle into the chamber. You reinstall the lens and repeat the test. The remaining marks disappear.
You stop there. You do not wet-clean the sensor “just to be thorough.” The problem is solved at the least invasive level. Finally, you clean the rear lens caps, shake dust from the bag away from the camera, and store the equipment dry.
This example captures the central principle of safe camera maintenance: diagnose, start gently, verify, and escalate only when necessary.
Frequently asked questions
Can I clean a camera lens with eyeglass cleaner?
Not automatically. Eyeglass cleaners vary in composition, and camera lens coatings vary as well. Use a cleaner specifically intended for coated photographic optics or one approved by the lens manufacturer. Apply it to the cloth rather than directly to the lens unless the manufacturer explicitly instructs otherwise.
Can I use rubbing alcohol on a camera lens?
Do not assume that household isopropyl alcohol is appropriate. Concentration, additives, coatings, adhesives, and edge seals vary. Use a purpose-made optical cleaner or the exact method specified by the manufacturer.
Can I use canned air on a camera sensor?
No. Use a hand-squeezed bulb blower if your camera maker permits blower cleaning. Sony specifically warns against air dusters or compressed air on the sensor because they can cause damage or malfunction.
How often should I clean the sensor?
When image tests show contamination that matters to your photography. There is no benefit to routinely touching a clean sensor. Built-in cleaning can be used as designed by the manufacturer, while manual contact cleaning should be performed only when needed.
Will dust on the lens ruin photos?
A small amount of ordinary dust on the front element often has little visible effect. Fingerprints, grease, haze, water spots, and heavy contamination are more likely to reduce contrast or increase flare. Judge by actual image quality rather than by trying to make the lens look perfect under a flashlight.
Why do sensor spots show more clearly at f/16 than at f/2.8?
Small apertures make the shadow cast by sensor contamination more defined, so spots are easier to see. At wide apertures they may become diffuse enough to disappear in ordinary scenes.
Can I vacuum dust out of the camera?
Do not place a household vacuum nozzle near the sensor or shutter. Strong airflow, static, contact risk, and uncontrolled suction make it unsuitable. Use the methods specified by the camera manufacturer.
Should I clean the mirror in a DSLR?
Usually not as routine maintenance. The reflex mirror is delicate and contamination on it generally does not appear in photographs. If a speck in the viewfinder is only cosmetic, leaving it alone may be safer. Consult the manufacturer’s service guidance for internal viewfinder or mirror contamination.
Is sensor cleaning different on a mirrorless camera and a DSLR?
Yes. Mirrorless bodies expose the sensor area differently, while DSLRs may require the mirror to be raised. Some newer cameras also place the shutter in different positions when powered off. Always follow the procedure for the exact model rather than using a generic mechanical assumption.
What if I can see dust inside a lens?
Minor internal dust is common and may have no meaningful effect on photographs. Do not disassemble the lens for routine dust. If there is severe haze, fungus-like growth, element separation, mechanical trouble, or obvious image degradation, seek professional lens service.
Final checklist: the safest order of operations
- Confirm whether the problem is visible in photographs.
- Identify whether it follows the lens or stays in the same sensor location.
- Prepare a clean, still workspace.
- Clean the camera exterior before opening the mount.
- Remove loose lens dust with a blower before touching glass.
- Use optical cleaner sparingly and on the cloth, not directly on the lens.
- Use the camera’s built-in sensor-cleaning function first.
- If the manual permits it, use a hand blower with the mount angled downward.
- Retest before escalating.
- Use wet sensor cleaning only with the correct tools and procedure.
- Stop and use professional service when contamination or damage exceeds routine maintenance.
Conclusion
Safe camera cleaning is less about buying specialized products than about using restraint. The most important habit is to remove loose particles before making contact. The second is to diagnose where contamination actually is. The third is to stop as soon as photographs are clean enough for real use.
If you want one action to take today, inspect your lenses and make a sensor-dust test image before cleaning anything. That single step tells you whether maintenance is actually needed. The biggest mistake to avoid is treating every visible speck as a reason to scrub delicate optical surfaces. Good camera care is controlled, minimal, and verified with photographs—not with endless polishing.
Sources and further reading
- Sony Support: How to clean the lens and image sensor of interchangeable lens cameras and camcorders — updated March 25, 2025.
- Sony Support: How to clean the translucent mirror and image sensor of the camera — updated January 16, 2026.
- Sony Support: How to prevent dust, dirt or moisture from getting on the image sensor.
- Sony Support: How to check for dust specs on the image sensor.
- Wikimedia Commons: Lens Cleaning Kit — CC BY-SA 2.5.
- Wikimedia Commons: Giottos Rocket Blower — CC BY-SA 2.0.
- Wikimedia Commons: Dustspots on CMOS sensor.