

Quick answer: The easiest way to learn a telescope is to make your first session deliberately simple. Assemble and practice with the telescope indoors before dark, align the finder on a distant daytime object while keeping the telescope far away from the Sun, start every observing session with your lowest-power eyepiece, focus first on the Moon or another bright target, and increase magnification only after the object is centered and sharp. A telescope’s magnification is the telescope focal length divided by the eyepiece focal length. Higher magnification is not automatically better: atmospheric turbulence, optical alignment, aperture, and the target itself often make a lower-power image sharper and more useful. Never point an ordinary telescope at the Sun unless a purpose-built solar filter is securely mounted over the front of the optical system; ordinary eclipse glasses at the eyepiece are not a substitute.
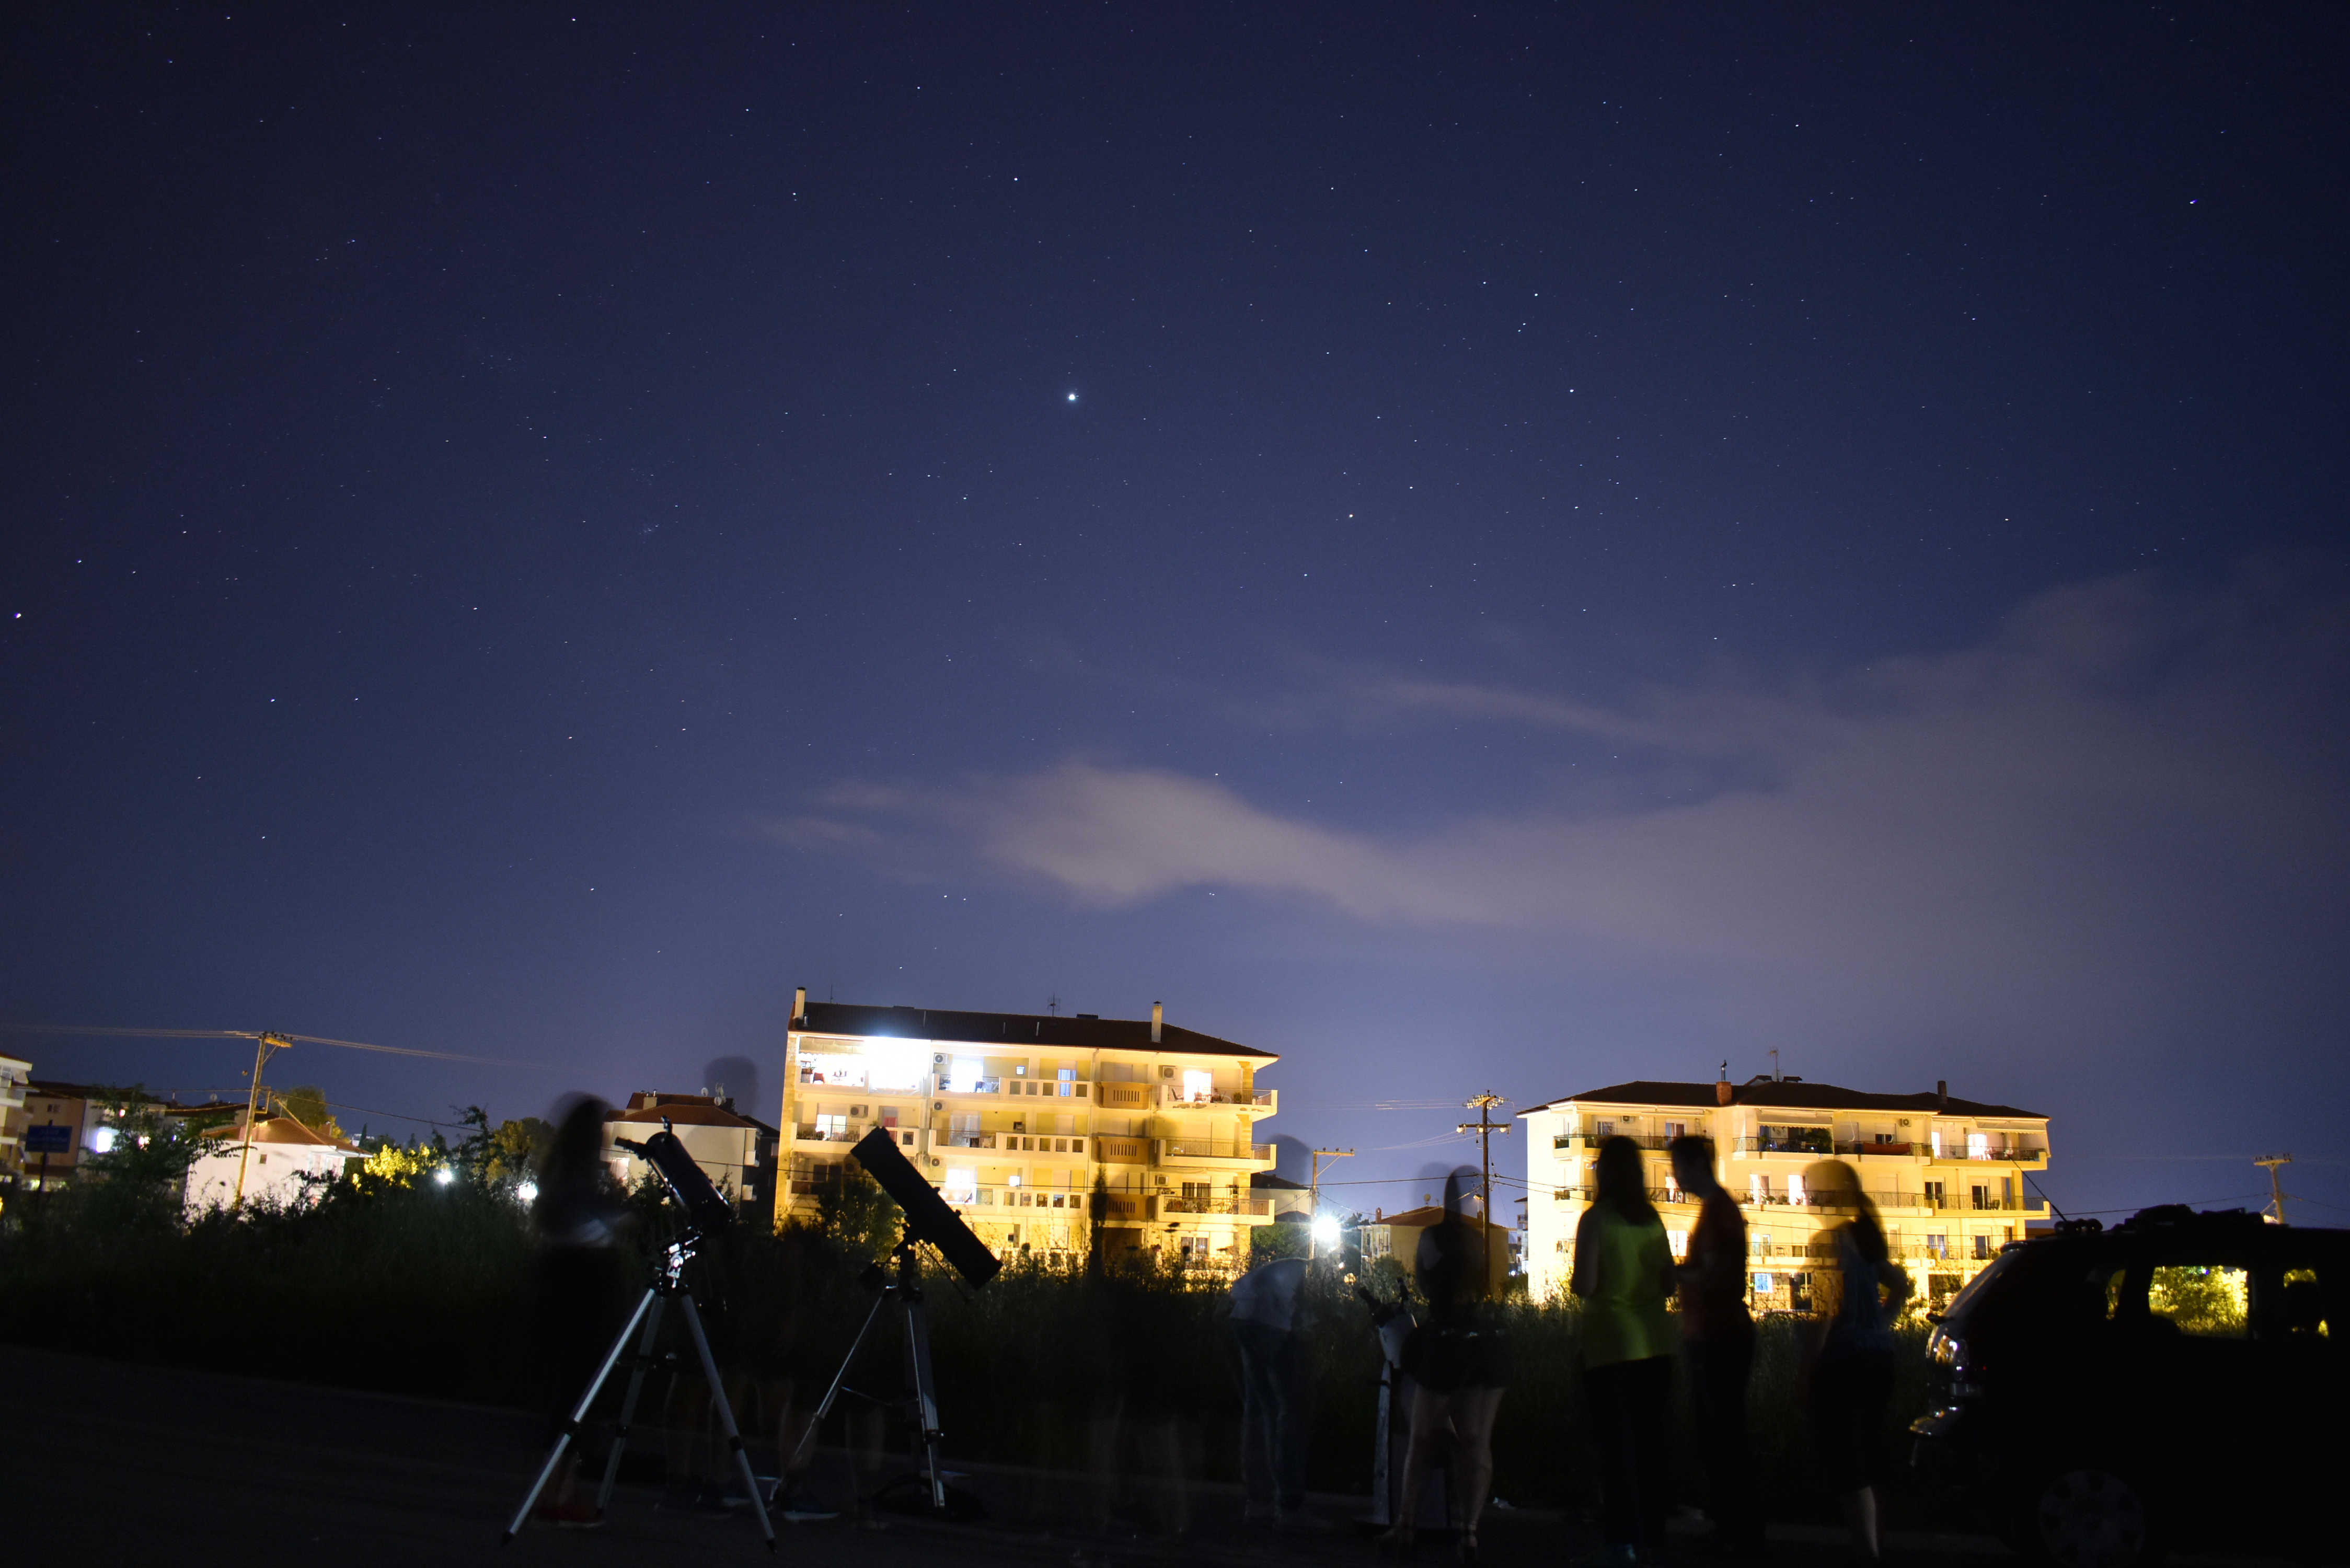 Learning a telescope is mostly a sequence problem: set up correctly, point with a wide field, center the object, focus, and only then increase magnification. Image: Annatsach, Wikimedia Commons, CC BY 4.0.
A first telescope can be surprisingly frustrating. The tube seems simple, yet the image may appear upside down, the finder points somewhere different from the main telescope, a planet races out of view, the short eyepiece looks blurrier than the long one, and faint galaxies look nothing like the colorful photographs printed on the box. None of those experiences necessarily means the telescope is defective. They usually mean the observer is learning several independent skills at the same time.
A telescope is not a television screen for space. It is a light-gathering optical instrument on a mount. You still have to tell it where to point, choose a useful magnification, bring the image into focus, compensate for the sky’s motion, and learn what real astronomical objects look like to the human eye. Once those skills become automatic, even a modest instrument becomes dramatically easier to use.
This guide is designed around that learning curve. It does not assume a particular brand, computerized mount, or optical design. It covers refractors, Newtonian reflectors, Dobsonian reflectors, Schmidt-Cassegrains, Maksutov-Cassegrains, and many beginner computerized telescopes. Whenever your model’s manual differs from a generic procedure, the model-specific manual takes priority.
1. Identify What Kind of Telescope You Actually Have
Before touching adjustment screws, identify the optical tube and mount. Different telescope types require different care and behave differently in the field.
Refractor: A refractor has a lens at the front of the tube. Beginner refractors are often long and narrow. They usually need little or no routine collimation by the owner. The eyepiece is typically at the back, often used through a diagonal that makes viewing more comfortable.
Newtonian reflector: A Newtonian has a large primary mirror at the bottom of an open tube and a smaller secondary mirror near the top. The eyepiece sits on the side near the front. Newtonians can require collimation, especially after transport.
Dobsonian: A Dobsonian is usually a Newtonian reflector placed on a simple alt-azimuth rocker-box mount. It moves up/down and left/right by hand. Dobsonians are popular because they can provide substantial aperture with relatively simple mechanics.
Schmidt-Cassegrain or Maksutov-Cassegrain: These compact folded optical systems have a front corrector plate and a rear focusing mechanism. Many are mounted on computerized alt-azimuth or equatorial systems. They may need more thermal acclimation than a small refractor because the optical system is enclosed and relatively massive.
The mount matters as much as the optical tube. An alt-azimuth mount moves in altitude and azimuth: up/down and left/right. An equatorial mount has one axis designed to align with Earth’s rotation axis so it can track the sky more naturally after polar alignment. A GoTo mount uses motors and electronics to point to selected objects after an alignment procedure.
How to verify: Find the exact product name and model number on the telescope or manual, then download the official manual. Search for the sections on assembly, finder alignment, eyepieces, mount alignment, collimation, and solar warnings. Do not assume a YouTube tutorial for a visually similar telescope has the same controls.
2. Learn the Parts Before Darkness Makes Everything Harder
Set the telescope up indoors during daylight. You should be able to identify these parts without a flashlight:
- optical tube;
- mount head;
- tripod or Dobsonian base;
- focuser;
- diagonal, if used;
- eyepieces;
- finder or red-dot sight;
- slow-motion controls, if present;
- clutches or axis locks;
- counterweight and shaft on many equatorial mounts;
- dust caps;
- power supply or battery compartment on electronic mounts.
Practice installing and removing the lowest-power eyepiece. Learn which screw secures it. Practice focusing on a safe indoor object across a room if the telescope can focus that close, but do not be surprised if it cannot; astronomical telescopes may have a relatively long minimum focus distance.
Move the mount through its normal range. If there are clutches, learn which way releases and locks each axis. On an equatorial mount, identify right ascension and declination rather than treating the mount as an awkward alt-azimuth head.
Why this matters: At night, small black screws disappear. Cold fingers reduce dexterity. A headlamp can destroy dark adaptation. Indoor practice turns mechanical operations into muscle memory before you add the challenge of finding a target.
3. Check the Telescope for Assembly Errors Before Blaming the Optics
Many first-night problems begin with setup rather than glass or mirrors.
Check that tripod legs are fully opened and locked, accessory trays are installed as intended, the optical tube is attached securely, the mount is not dramatically out of balance, the diagonal is inserted fully, and the eyepiece is secured without overtightening.
On an equatorial mount, install the counterweight before placing a heavy optical tube if the manual specifies that order. Keep one hand on the counterweight when loosening the lock so it cannot slide unexpectedly. On a Dobsonian, confirm the altitude bearings are seated correctly and the base rotates freely without loose hardware.
Computerized mounts should be powered from a source that meets the manufacturer’s voltage, polarity, and current requirements. An underpowered GoTo mount can behave erratically even when the telescope optics are fine.
Success check: The telescope should remain where you place it without suddenly dropping, rotating, or slipping. Motions should be smooth enough that you can move the field by small amounts. If the optical tube falls when a clutch is released, balance needs attention before high-power observing.
4. Align the Finder During the Day—But Never Near the Sun
The finder is a wide-field aiming device. If the finder and telescope do not point at the same place, locating anything smaller than the Moon becomes unnecessarily difficult.
Celestron’s current finder-alignment guidance recommends doing this in daylight using a distant, stationary terrestrial target and the lowest-power eyepiece. This is a widely applicable procedure even if your telescope is another brand.
- Set up the telescope where the Sun cannot accidentally enter the optical path. If necessary, work when the Sun is behind a building and cannot be approached by the telescope.
- Insert the longest-focal-length eyepiece you own, such as 25 mm or 32 mm.
- Aim the main telescope at a distant stationary object such as a chimney, antenna, utility pole top, or building feature several hundred meters away.
- Center that object precisely in the main telescope.
- Without moving the main telescope, look through the optical finder or red-dot sight.
- Use the finder’s adjustment screws to put the crosshair or dot on the same object.
- Return to the main eyepiece and make sure the object did not move out of center while you adjusted the finder.
- Repeat until both views agree.
Do not use the Sun as an alignment target. Never sweep a telescope across the daytime sky near the Sun. Celestron explicitly warns that finders should be removed or covered during safe solar observing so no one can accidentally look through them and concentrated sunlight cannot damage them.
If the finder still seems inaccurate at night: Recheck alignment on a bright star. Small mounting shifts can occur when the telescope is moved outdoors. Fine-tune the finder with the main telescope at low power, then verify again at moderate power.
5. Understand Eyepiece Numbers Before Buying More Eyepieces
The number printed on an eyepiece—25 mm, 10 mm, 6 mm, and so on—is its focal length. On the same telescope, a longer-focal-length eyepiece gives lower magnification and usually a wider field. A shorter-focal-length eyepiece gives higher magnification and a narrower field.
This feels backward to beginners because "smaller number" produces "more power." Remember the relationship as division.
Telescope magnification = telescope focal length ÷ eyepiece focal length.
For a telescope with a 1,000 mm focal length:
- 25 mm eyepiece = 40×;
- 10 mm eyepiece = 100×;
- 5 mm eyepiece = 200×.
Celestron’s official knowledge base uses the same formula and advises observers to start at the lowest magnification and work upward. That advice solves several beginner problems at once: the wider field makes objects easier to find, focusing is easier, tracking is easier, the view is generally brighter, and atmospheric turbulence is less magnified.
 Eyepieces determine magnification in combination with the telescope’s focal length; the shorter focal-length eyepiece usually gives the higher power. Image: Tamasflex / Halfblue, Wikimedia Commons, CC BY-SA 3.0.
6. Stop Treating Maximum Magnification as the Main Goal
A telescope box may advertise an enormous magnification. That does not mean the image will be useful at that power.
The telescope’s aperture sets a physical limit on how much fine detail the optics can resolve. Atmospheric turbulence, optical quality, collimation, thermal equilibrium, target brightness, and observer eyesight create additional limits. Increasing magnification beyond the useful point produces a larger blur rather than more information.
Celestron gives a rough theoretical rule of about 50–60× per inch of aperture under ideal conditions, while emphasizing that most observing is done at substantially lower powers and that seeing conditions often lower the usable ceiling. Treat such numbers as upper limits, not nightly targets.
A 4-inch telescope may technically support around 200× or more under excellent conditions, but there will be nights when 120× looks sharper than 200×. Jupiter in unstable air can actually reveal more belts and contrast at the lower power.
Practical rule: Increase magnification only while the image becomes more informative. When the next eyepiece makes the target dimmer, softer, harder to track, or less contrasty without revealing new structure, go back one step.
7. Understand What a Barlow Lens Does
A Barlow increases the effective magnification produced by an eyepiece. A 2× Barlow roughly doubles the magnification; a 3× roughly triples it.
Suppose a 900 mm telescope with a 20 mm eyepiece produces 45×. Add a 2× Barlow and the combination produces about 90×.
A Barlow can expand a small eyepiece collection economically, but it can also create impractical combinations. A 6 mm eyepiece that already produces 150× becomes 300× with a 2× Barlow, which may exceed useful conditions for a small beginner telescope.
Do not insert the Barlow automatically. First observe the target without it and decide whether more power would help.
8. Learn to Focus Without Chasing the Knob Forever
Focusing is easiest on a bright target at low power.
Insert the lowest-power eyepiece. Aim at the Moon or a bright star. Turn the focus knob slowly through a wide range. A star should shrink from a fuzzy disk into the smallest point the atmosphere and optics allow. The Moon should develop a crisp limb and sharp crater edges.
If the focuser reaches the end of travel without a sharp image, check assembly. Common problems include:
- the eyepiece is not fully inserted;
- a required diagonal is missing;
- an extension tube is installed when it should not be;
- an extension tube is missing when it is required;
- the object is too close for the telescope to focus;
- a Barlow or camera adapter is changing the optical path;
- the eyepiece cap is still on;
- the front dust cap is still installed except for a small aperture hole.
Star-focus test: A properly focused star is a point, not a large circle. If you see a donut, the telescope is deliberately or accidentally out of focus.
9. Know Why the Image May Be Upside Down or Reversed
Astronomical telescopes are optimized for optical performance, not terrestrial orientation. An inverted or mirror-reversed image is normal in many telescope designs.
Newtonian reflectors commonly show an image rotated relative to the naked-eye view. Refractors and catadioptric telescopes using a star diagonal may show left-right reversal. Some erect-image diagonals can provide a terrestrial orientation, but they are not required for astronomy.
Do not diagnose an upside-down Moon as a defect. In space there is no preferred "up" in the eyepiece. The important task is learning how the field moves when you nudge the telescope.
10. Start Your First Night With the Moon
The Moon is one of the best first targets because it is bright, large, easy to locate, and rich in visible detail.
NASA’s Moon viewing guidance specifically highlights the terminator—the boundary between lunar day and night—as a productive place to look because low-angle sunlight casts long shadows that make relief more obvious. A full Moon can be spectacular, but the lighting is flatter and many crater forms are less dramatic.
Use the finder to center the Moon, then look through the lowest-power eyepiece. Focus until the limb and crater edges are sharp. Spend several minutes looking before changing power.
At moderate magnification, examine:
- large dark maria;
- bright highlands;
- major craters;
- mountain ranges;
- rays around younger craters;
- the terminator as it changes from night to night.
NASA notes that different lunar phases reveal different terrain and that repeated observations are rewarding. The Moon is not a beginner target you "graduate" from; experienced observers return to it continuously because the lighting changes every night.
11. Learn the Nightly Motion of the Sky
Earth rotates, so astronomical objects drift across a stationary telescope’s field. At low power the drift may seem gentle. At high power it becomes obvious because the field is narrower.
On a manual alt-azimuth or Dobsonian mount, place the object slightly ahead of the direction of drift and let it move across the field. Nudge the telescope again before it reaches the edge.
On a properly polar-aligned equatorial mount, most routine tracking can be done primarily with the right-ascension axis. A motor drive can automate that movement.
A computerized alt-azimuth mount can track after a successful alignment, but tracking does not correct a poor initial alignment. If GoTo accuracy is bad, verify time, date, location, leveling requirements, star alignment, power supply, and finder alignment before assuming a motor is defective.
12. Use Jupiter as Your First Planetary Skill Test
When visible, Jupiter is an excellent next target because it is bright and its four large Galilean moons can often be seen at low power as small points near the planet.
Start low. Center Jupiter. Focus carefully. Then move to a moderate eyepiece.
Beginners often expect a huge disk. In a small telescope, Jupiter remains visually small even at useful magnification. The skill is learning to see subtle detail in that small disk rather than making it enormous.
Look for the major equatorial cloud belts. Spend time at the eyepiece. Atmospheric steadiness changes second by second; brief moments of calm may reveal more detail than the average view.
If Jupiter is a featureless bright white ball, verify focus and reduce magnification. The human eye can also need a moment to adapt to the planet’s brightness.
13. Use Saturn to Learn Why Patience Beats Power
Saturn’s rings are visible through surprisingly modest telescopes when geometry and observing conditions are favorable. The planet is smaller and often dimmer than Jupiter, so aggressive magnification can quickly make the image soft.
Find Saturn at low power, center it precisely, and increase power gradually. Wait for moments of steady seeing. A clean 100× view can be more satisfying than a boiling 250× view.
Do not assume poor ring contrast means the telescope is malfunctioning. Saturn’s ring tilt changes over years, and seeing, altitude above the horizon, haze, and telescope aperture all affect the view.
14. Understand Why Mars Can Be Disappointing
Mars varies dramatically in apparent size as Earth and Mars move in their orbits. At unfavorable times it can appear as a very small orange disk even in a capable telescope.
This is a useful lesson: target selection matters. A telescope cannot change the current geometry of the solar system.
When Mars is well placed, moderate to high magnification under steady air may reveal a polar cap or broad surface shading. When it is tiny and low in the sky, observe it for what it is rather than buying a stronger eyepiece to solve an orbital problem.
15. Understand What Venus Is Supposed to Look Like
Venus is bright but generally does not reveal cloud detail to a beginner visual observer. Its rewarding feature is phase: like the Moon, Venus can appear crescent, half illuminated, or gibbous depending on its position relative to Earth and the Sun.
Because Venus often appears in twilight, solar safety is critical. Do not sweep around the sky with a telescope while the Sun is above the horizon unless you have a deliberate, safe pointing method that guarantees the Sun cannot enter the instrument. An accidental solar encounter can cause immediate injury.
16. Observe Stars for Color, Multiplicity, and Focus
Individual stars remain points even under high magnification because they are enormously distant. A star that turns into a large disk when you increase power is usually just out of focus or blurred by seeing.
Stars can still be rewarding. Look for color contrasts in bright stars and double-star systems. A close double star also provides a useful test of optical quality, seeing, focus, and collimation.
Defocusing a bright star slightly can make color easier to notice, but return to precise focus for resolving close pairs.
17. Learn Deep-Sky Expectations Before Looking for Galaxies
Photographs mislead beginners because cameras accumulate light over long exposures and can reveal color that the dark-adapted human eye does not see easily.
Most galaxies and nebulae appear visually as gray, low-contrast structures. Their beauty comes from recognizing shape, texture, brightness gradients, dust lanes, knots, or associated stars—not from seeing a Hubble-like saturated image.
Sky & Telescope’s current beginner guidance explicitly warns new observers not to expect Hubble-style brightness and color in the eyepiece. Set expectations correctly and faint objects become interesting instead of disappointing.
18. Use Low Power for Many Deep-Sky Objects
Faint extended objects often benefit from low to moderate magnification because the view stays bright and the field remains wide enough to show context.
Good beginner targets, depending on season and hemisphere, can include:
- the Orion Nebula;
- the Pleiades;
- the Andromeda Galaxy;
- bright open clusters;
- globular clusters;
- some bright planetary nebulae.
The best target list changes with date, latitude, sky darkness, Moon phase, and local horizon. NASA’s skywatching pages and monthly "What’s Up" guides are useful for identifying what is currently well placed.
19. Learn Dark Adaptation
For faint-object observing, allow your eyes time to adapt to darkness. Bright white light can reset that adaptation quickly.
Use the dimmest practical red light for reading charts or adjusting equipment, and keep phone brightness very low. Some red screens are still bright enough to damage adaptation, so intensity matters as much as color.
The Moon and planets do not require the same degree of dark adaptation because they are bright. In fact, planetary observers can work under mild ambient light and still see fine detail. Match the lighting strategy to the target.
20. Use Averted Vision for Faint Objects
When a galaxy or nebula is near the threshold of visibility, look slightly beside it rather than directly at it. This places the light on a part of the retina with greater sensitivity to dim light.
The object may become easier to detect as a faint patch or structure. Move your gaze around the target rather than staring rigidly at one exact point.
Averted vision feels strange at first, but it is a genuine observational technique rather than imagination. The challenge is recording only what you repeatedly perceive, not inventing detail because you know what a photograph looks like.
21. Collimation Matters Mostly for Reflectors and Catadioptrics
Collimation is the alignment of a telescope’s optical elements. Poor collimation can reduce sharpness and contrast, especially at higher magnification.
Newtonian reflectors often need periodic collimation. Schmidt-Cassegrains can need adjustment after transport or shock. Many refractors arrive factory-aligned and should not be adjusted casually.
Follow the procedure for your exact telescope. Do not turn random mirror screws because "the image seems blurry." Seeing, focus, thermal equilibrium, dirty optics, excessive magnification, and a low target can all create blur without a collimation problem.
Celestron’s SCT guidance explicitly advises that if you are unsure whether collimation needs adjustment, it may be better not to make changes because unnecessary adjustment can make alignment worse.
22. Let the Telescope Reach Outdoor Temperature
A telescope moved from a warm house into cold night air can produce soft, unstable images while its optics and internal air adjust to the outside temperature.
This is especially noticeable in larger enclosed telescopes and thick mirrors. Set the telescope outside in a secure location before observing so it can acclimate. The required time varies with design, aperture, and temperature difference.
Celestron’s SCT collimation guide recommends thermal equilibrium before judging star images and gives 45 minutes as an example when moving through substantial temperature changes. Do not treat that as a universal stopwatch; use it as evidence that thermal state affects optical testing.
23. Learn the Difference Between Seeing and Transparency
Seeing describes atmospheric steadiness. Poor seeing makes stars twinkle strongly and causes planets to shimmer or boil at high magnification.
Transparency describes how clear the atmosphere is to faint light. Haze, dust, humidity, smoke, or thin cloud can reduce transparency even when the air is steady.
Planetary observing benefits greatly from good seeing. Faint galaxies and nebulae benefit greatly from dark skies and good transparency.
This explains why one night may be excellent for Jupiter but mediocre for galaxies, while another night is the reverse.
24. Observe Objects Higher in the Sky When Possible
When a target is low near the horizon, you are looking through more atmosphere. Turbulence, haze, pollution, and color dispersion can all degrade the image.
If Jupiter looks terrible immediately after rising, wait until it climbs higher. If a deep-sky target is barely above a bright city horizon, plan another session when it transits higher.
Target altitude is often a more effective "upgrade" than changing eyepieces.
25. Learn to Star-Hop With a Chart
Manual telescope users can find faint objects by starting from a recognizable bright star and moving through patterns of progressively fainter stars. This is called star-hopping.
Use a star chart or planetarium app that can match your finder’s orientation and approximate field of view. Start from a naked-eye landmark, move to a finder pattern, then verify the field in the telescope at low power.
Do not jump straight from "I know roughly where the galaxy is" to a 200× eyepiece. At high power your field may be too narrow to know where you are.
A useful workflow is:
- Identify constellation with naked eyes.
- Locate a bright anchor star.
- Center it in the finder.
- Compare the finder field to the chart.
- Move one recognizable pattern at a time.
- Confirm the final area in the main telescope at low power.
- Only then increase magnification if the object benefits.
26. Use a GoTo Telescope as a Navigation Tool, Not a Substitute for Setup
Computerized telescopes can be excellent for beginners, but they still require accurate setup.
Typical alignment requires correct date, time, time zone, location, leveling or home position, and centering of one or more alignment stars. Some modern systems automate several of these steps, but the principle remains: the computer needs a reliable model of the sky and mount orientation.
If a GoTo telescope misses targets consistently:
- align the finder first;
- verify location and time settings;
- use the correct daylight-saving setting if the hand controller requires one;
- center alignment stars with a low-power eyepiece, then refine with higher power;
- use a stable power supply;
- confirm you selected the correct star;
- check that the mount begins in the specified home position.
Do not use GoTo accuracy as the only measure of optical quality. Pointing and image formation are separate systems.
27. Learn Basic Polar Alignment If You Use an Equatorial Mount
An equatorial mount becomes intuitive only after its polar axis is roughly aligned with Earth’s rotation axis.
In the Northern Hemisphere, this commonly means pointing the right-ascension axis near the north celestial pole, close to Polaris. In the Southern Hemisphere, observers use southern-pole alignment methods because there is no equally bright pole star.
For visual observing, rough polar alignment is often enough. Precision astrophotography requires much better alignment than ordinary visual use.
If your beginner equatorial mount feels impossibly awkward, do not unlock every axis and force it to behave like an alt-azimuth mount. Learn the geometry; after alignment, one axis largely follows the sky’s motion.
28. Protect Night Vision Without Creating Trip Hazards
Darkness improves faint-object observing, but safety comes first.
Before nightfall, inspect the observing area for steps, cables, sprinkler heads, uneven ground, insects, or traffic. Mark tripod legs if people will be walking nearby. Keep eyepiece cases closed so small optics are not stepped on.
Use dim red light for charts, but keep a normal white flashlight available for emergencies or cleanup.
29. Keep Eyepieces Covered and Dry
Eyepieces collect dust, fingerprints, eyelash oil, and dew. Handle them by the barrel rather than touching the glass.
Keep caps on unused eyepieces and store them in a case. If an eyepiece dews over, move it to a dry protected place and let it warm rather than wiping moisture aggressively across the coatings.
Clean optical glass only when necessary using methods appropriate for coated optics. A small amount of dust usually has less effect on the image than repeated unnecessary cleaning.
30. Manage Dew Before It Ends the Session
On humid nights, telescope optics can cool below the dew point and collect moisture.
Refractor objectives, Schmidt corrector plates, eyepieces, and finders are particularly exposed. A dew shield slows radiative cooling. Powered dew heaters can prevent condensation during longer sessions.
If the main optic dews heavily, do not scrub it in the dark. Cap the instrument only after the surface has dried or bring it into a controlled environment and let it dry safely according to the manufacturer.
31. Do Not Fear Dust on the Primary Mirror
A Newtonian mirror can look dusty under a flashlight long before image quality is significantly affected. Flashlights exaggerate every speck.
Do not clean a primary mirror after every observing session. Improper washing can damage coatings or create scratches. Follow the telescope manufacturer’s mirror-cleaning guidance and clean only when contamination is substantial.
A few dust particles are an appearance problem more than an observing problem.
32. Know the Sun Rule Before You Ever Point the Telescope in Daylight
This is the most important safety section in the guide.
NASA’s current eclipse safety guidance states that viewing the bright Sun through a camera lens, binoculars, or telescope without a special-purpose solar filter secured over the front of the optics can cause severe eye injury immediately.
Ordinary eclipse glasses do not make an unfiltered telescope safe. NASA specifically warns not to look through a telescope while wearing eclipse glasses because the concentrated sunlight can damage the filter and the eye.
For direct telescopic solar observing:
- use a solar filter made specifically for telescopic use;
- install it securely over the front, Sun-facing aperture before aiming;
- inspect the filter for damage before use;
- follow the filter and telescope manufacturer’s instructions;
- remove or securely cover the finder unless it is also designed and filtered for solar work;
- supervise children continuously;
- never rely on sunglasses, smoked glass, neutral-density photography filters, exposed film, CDs, or improvised materials;
- do not use old eyepiece-mounted solar filters that concentrate unfiltered sunlight through the telescope before the filter.
If you are uncertain about solar equipment, do not experiment. Use a safe indirect projection method that is specifically designed for the purpose, or observe with an astronomy organization using known solar-safe equipment.
NASA reiterated these front-filter requirements for the August 12, 2026 total solar eclipse. The date changes; the optical safety principle does not.
33. Never Leave a Telescope Unattended Around Children in Daylight
A telescope can be pointed at the Sun in seconds. Even if you have no intention of solar observing, a curious child may see the instrument as a giant magnifying glass.
Keep daytime telescopes capped or physically supervised. If you align a finder on a terrestrial target, choose a location where the Sun is blocked by a building and cannot enter the possible pointing range.
This is a stronger safety system than repeatedly saying, "Don’t point it at the Sun."
34. Use the First-Target Ladder
Rather than choosing random objects, learn in a deliberate sequence:
- Distant daytime terrestrial target: finder alignment only, safely away from the Sun.
- Moon: pointing, focus, tracking, eyepiece changes.
- Bright planet: precise focus and useful magnification.
- Bright double star: star focus and seeing.
- Bright open cluster: low-power framing.
- Bright nebula or galaxy: dark adaptation and averted vision.
Each target teaches a different skill. By the time you reach faint deep-sky objects, the telescope mechanics no longer consume your attention.
35. Keep a Minimal Observing Log
An observing log turns random sessions into accumulated skill.
Record:
- date and approximate time;
- location;
- telescope;
- eyepiece and magnification;
- target;
- seeing and transparency notes;
- what you actually saw;
- what you want to try next time.
Do not write what a guide says you should see. Write what you observed. Over months, the log reveals which magnifications work with your telescope, which locations are darkest, and how your ability to see subtle detail improves.
36. Learn to Sketch at the Eyepiece
You do not need artistic skill. A simple sketch forces careful observation.
For the Moon, draw the outline of one crater and its shadow. For Jupiter, mark the major belts and moon positions. For a star cluster, place the brightest stars first. For a nebula, sketch the faint boundary you can repeatedly detect.
The process trains your eye to notice detail instead of glancing for five seconds and moving on.
37. Use a Smartphone at the Eyepiece Only After Visual Skills Work
NASA notes that beginners can take lunar images by placing a phone camera at a telescope eyepiece, a technique often called afocal imaging. It can work surprisingly well on bright targets.
But photography adds alignment, exposure, vibration, and focus problems. Learn to center and track the Moon visually before adding the phone.
A simple phone-to-eyepiece adapter makes alignment much easier than holding the phone by hand. Start with the Moon at low or moderate power. Lock focus if your phone app allows it and reduce exposure so lunar highlights are not blown out.
 The Moon is an ideal first target for both visual observing and simple afocal phone photography because it is bright, large, and rich in high-contrast structure. Image: Best Sci-Fatcs, Wikimedia Commons, CC BY-SA 4.0.
38. Understand Why Deep-Sky Photography Is a Different Hobby
Long-exposure astrophotography adds requirements that visual observing does not: accurate tracking, stable polar alignment, camera control, calibration frames, image stacking, and processing.
A telescope that is excellent for visual observing is not automatically the easiest astrophotography telescope. A large manual Dobsonian may be wonderful for galaxies and nebulae by eye but poorly suited to long tracked exposures without specialized equipment.
Do not judge your first telescope by whether it can immediately produce professional-looking nebula photographs. Learn visual astronomy first unless imaging is your explicit primary goal.
39. Troubleshoot "I Can’t See Anything"
Work from the simplest causes:
- Remove the front dust cap completely.
- Remove the eyepiece cap.
- Use the longest-focal-length eyepiece.
- Aim at the Moon or a distant bright target.
- Make sure the eyepiece is inserted into the correct optical path.
- Turn the focus knob slowly through its full range.
- Check that the finder is aligned.
- Remove unnecessary Barlows or adapters.
If the view is bright but featureless in daylight, you may be aimed at empty sky or too close to focus. If the night view is black, you may simply be nowhere near the target.
40. Troubleshoot "Everything Is Blurry"
Check these in order:
- reduce magnification;
- refocus carefully;
- wait for the target to rise higher;
- let the telescope acclimate;
- check for dew;
- evaluate atmospheric seeing;
- verify collimation if your telescope type requires it;
- inspect whether the eyepiece is fogged or dirty.
Do not buy a premium eyepiece before testing these factors. The atmosphere and thermal state can ruin the view through excellent optics.
41. Troubleshoot "The Object Disappears When I Change Eyepieces"
Higher power has a narrower field, so small centering errors become large.
Before changing eyepieces:
- center the object precisely;
- tighten the mount enough that it will not move;
- swap eyepieces gently;
- refocus;
- if the object is gone, return to low power rather than hunting blindly at high power.
On a manual mount, remember the sky continues moving during the eyepiece change. Put the object slightly ahead of the drift direction before swapping.
42. Troubleshoot "My Finder Is Right but the Telescope Is Wrong"
Finder alignment may have shifted. Center a bright star or the Moon in the main telescope at low power, then realign the finder without moving the telescope.
Check whether the finder bracket is loose. Some inexpensive finder brackets can be bumped easily during transport.
If an optical finder shows an inverted view, remember that its field orientation may differ from the naked-eye chart. Alignment can still be correct.
43. Troubleshoot "GoTo Says It Found the Object but I See Nothing"
First insert a low-power eyepiece. Then inspect the alignment quality.
Common causes include:
- wrong date;
- wrong time or time zone;
- wrong latitude/longitude or city;
- wrong daylight-saving setting;
- poorly centered alignment stars;
- mistaken identity of an alignment star;
- unleveled or incorrectly initialized mount when the model requires it;
- low power-supply voltage;
- finder misalignment.
Test GoTo on a bright object you can identify visually. If it repeatedly lands near—but not on—the target, the problem is usually pointing alignment rather than optics.
44. Troubleshoot "Stars Look Like Comets"
Stars stretched into asymmetric shapes can indicate poor collimation, optical aberration, severe coma near the edge of a Newtonian field, a pinched mirror, or simply an eyepiece that performs poorly at the edge of a fast telescope.
Move the star to the exact center of the field. If it becomes symmetric there, the issue may be normal off-axis aberration. If it remains badly asymmetric at center, check focus and collimation according to the telescope manual.
45. Troubleshoot "The Telescope Shakes Too Much"
High magnification amplifies mount vibration.
Reduce tripod height if possible, tighten connections without overtightening delicate parts, balance the telescope, avoid touching the tube while focusing, and observe from solid ground rather than a flexible wooden deck.
A motorized focuser is not necessary for most beginners. Learn a light touch first.
If the mount is fundamentally undersized for the telescope, no amount of tightening will make it behave like a heavy observatory mount. Use lower power and shorter settling-time expectations.
46. Troubleshoot "I See a Black Circle or Kidney-Bean Shape"
Your eye position may be wrong relative to the eyepiece’s exit pupil.
Move your head slightly away from the eyepiece and center your pupil over the light beam. Eyepieces with long eye relief can be sensitive to eye position; adjustable eyecups help maintain the correct distance.
Do not press your eye against the glass. Celestron’s eyepiece guidance recommends maintaining appropriate eye relief rather than crowding the lens.
47. Build a Three-Eyepiece Strategy Instead of a Drawer Full of Glass
A beginner can do a great deal with three useful magnification ranges:
- low power: locating, large clusters, nebulae, sweeping;
- medium power: general lunar and planetary observing, many clusters;
- higher power: planets, lunar detail, double stars when conditions support it.
Choose focal lengths based on your telescope’s focal length, not another person’s eyepiece collection.
For a 1,200 mm telescope, 30 mm gives 40×, 12 mm gives 100×, and 6 mm gives 200×. For a 600 mm telescope, those same eyepieces produce only 20×, 50×, and 100×. The same eyepiece label means different power in different telescopes.
48. Know When an Accessory Will Actually Help
Useful accessories solve identified problems.
A dew shield helps if dew repeatedly ends sessions. A comfortable observing chair helps because steady seated viewing improves patience and eye position. A red flashlight protects dark adaptation. A good star chart improves navigation. A phone adapter helps with afocal Moon photography. A narrowband nebula filter can improve contrast on certain emission nebulae but will not magically improve every object.
Do not buy accessories because they are listed as "essential" in a generic bundle. Spend several nights with the telescope and let real frustrations define purchases.
49. Build Your First Five Observing Sessions
Session 1: Mechanics
Goal: Learn setup, finder alignment, focusing, and mount movement. Observe only the Moon. Use two eyepieces at most. End while the session is still enjoyable.
Session 2: Tracking
Observe the Moon plus one bright planet or double star. Practice keeping an object centered for ten minutes. Learn which direction to nudge the mount.
Session 3: Magnification
Observe one bright target with each eyepiece. Record which power produces the most detail. Notice that the "strongest" eyepiece may not win.
Session 4: Navigation
Use a chart to locate one bright open cluster or nebula. Spend at least 15 minutes on the target and practice averted vision.
Session 5: Independent setup
Set up, align, observe, and pack away without following every line of the manual. Keep the manual nearby for checks. At this stage, the instrument should begin feeling like a tool rather than a puzzle.
50. Worked Example: A 130 mm Newtonian With 650 mm Focal Length
Suppose a beginner owns a 130 mm Newtonian reflector with a 650 mm focal length and two eyepieces: 25 mm and 10 mm.
The 25 mm eyepiece produces 26×. The 10 mm produces 65×. A 2× Barlow produces 52× with the 25 mm and 130× with the 10 mm.
First night: Use 26× on the Moon. Center and focus. The Moon appears bright and sharp with a large field. Move to 65× and inspect the terminator. If the atmosphere is steady, try 130×. If the image softens, return to 65×.
Jupiter: Start at 26× to locate and center. Move to 65×. If belts appear steady and the planet remains sharp, try 130×. Do not assume the Barlow combination is automatically superior.
Open cluster: The 26× view may be better because it includes more of the cluster and surrounding star field.
Collimation: Because the telescope is a Newtonian, learn the model’s collimation procedure. Check alignment rather than adjusting blindly.
This example shows why eyepiece decisions depend on target and conditions rather than a single preferred power.
51. Worked Example: A 90 mm Refractor With 900 mm Focal Length
Imagine a 90 mm refractor supplied with 25 mm and 10 mm eyepieces.
The powers are 36× and 90×.
At 36×, the Moon fits comfortably, bright open clusters are easy to frame, and the telescope is easy to aim. At 90×, lunar craters and planets show more detail under decent seeing.
If the owner buys a 5 mm eyepiece, power becomes 180×. That may be usable on the Moon or a bright planet during good seeing, but the smaller aperture and atmospheric conditions may often make 90× or 120× more satisfying.
Because many small refractors rarely need owner collimation, the beginner should not assume every soft image requires lens-cell adjustment. First check seeing, focus, dew, temperature, and magnification.
52. Worked Example: "I Bought a Telescope and Can Only See the Moon"
This is a common stage, not a failure.
The Moon is obvious because it is large and bright. Most deep-sky objects require navigation.
Fix the problem in this order:
- Align the finder accurately.
- Learn two constellations visible this month.
- Choose one bright deep-sky target inside one of those constellations.
- Use a planetarium app to identify a naked-eye anchor star.
- Star-hop with the finder.
- Use the lowest-power eyepiece.
- Observe from the darkest practical location.
- Allow your eyes to adapt.
- Use averted vision.
The missing skill is usually celestial navigation, not telescope power.
53. A Ten-Minute Pre-Session Checklist
- Check weather, clouds, wind, and dew risk.
- Choose three realistic targets.
- Confirm the Moon phase and target positions.
- Set the telescope outside to acclimate when useful.
- Install and verify the finder.
- Start with the lowest-power eyepiece.
- Check power for electronic mounts.
- Dim phone and red-light settings.
- Place caps and eyepiece case where they will stay clean.
- Inspect the observing area for trip hazards.
This preparation prevents most "wasted night" problems before darkness.
54. A Ten-Minute Post-Session Routine
Before packing:
- cap eyepieces;
- check for dew;
- do not seal wet optics into a closed case;
- power down electronics correctly;
- remove batteries if the manufacturer recommends it for storage;
- record one or two observing notes;
- replace dust caps once optics are dry;
- store the telescope in a dry, stable location.
Do not clean optics automatically after every session. Maintenance should be driven by actual contamination, not anxiety.
Frequently Asked Questions
What should I look at first with a telescope?
The Moon is usually the easiest first target. It is bright, large, easy to locate, and reveals obvious detail at low and moderate magnification. Bright planets are excellent next targets when they are visible.
Why can I see the Moon but not stars?
You may be out of focus or pointed at empty sky. Stars become tiny points when focused. Use a bright star, start at low power, and turn the focuser slowly until the star becomes as small as possible.
Why does my 10 mm eyepiece look more zoomed-in than my 25 mm?
Eyepiece focal length works inversely with magnification. Divide telescope focal length by eyepiece focal length. The shorter eyepiece therefore produces higher power on the same telescope.
How much magnification do I need for planets?
There is no universal number. Many small telescopes show useful planetary detail between roughly moderate and moderately high powers, but the best value changes with aperture and atmospheric seeing. Start low, increase gradually, and stop when the image no longer gains detail.
Why does Jupiter move out of the field so fast?
Earth’s rotation causes objects to drift across the field of a stationary telescope. Higher magnification narrows the field, so drift appears faster. Nudge a manual telescope periodically or use a properly aligned tracking mount.
Do I need to collimate my telescope every time?
It depends on telescope type and transport. Newtonian reflectors may need regular checks. Schmidt-Cassegrains can need adjustment occasionally. Many refractors require little or no user collimation. Check before adjusting.
Can I use eclipse glasses with a telescope to look at the Sun?
No. NASA warns not to look through an unfiltered telescope while wearing eclipse glasses. A telescope concentrates sunlight. Safe direct solar observing requires a purpose-built solar filter secured over the front of the telescope or another approved solar observing system.
Can I look at the Sun through a telescope if it is cloudy?
No. Clouds are not an optical safety filter. The Sun can remain hazardous even when dimmed by haze or cloud. Use proper solar equipment or do not look through the telescope.
Why are galaxies gray instead of colorful?
They are usually too faint for human color vision to respond strongly. Long-exposure cameras accumulate much more light and reveal color that is not obvious visually. Gray visual appearance is normal.
Is a bigger telescope always better?
Larger aperture can collect more light and resolve finer detail, but size also affects cost, weight, cooldown, storage, transport, mount requirements, and ease of use. A smaller telescope that you use often can be more valuable than a large telescope that is difficult to deploy.
Should I buy more eyepieces immediately?
Usually not. Learn the eyepieces you already have, calculate the powers they provide, and identify a real gap before buying another. Three well-chosen magnification ranges can cover a great deal of visual observing.
Can I photograph through the telescope with my phone?
Yes, especially for the Moon and bright planets. An eyepiece phone adapter helps alignment. Learn visual centering and tracking first because photography adds another layer of difficulty.
Do I need dark skies to see the Moon and planets?
No. The Moon and bright planets tolerate substantial light pollution. Dark skies matter much more for faint galaxies, nebulae, and other deep-sky objects.
Why does my telescope show objects upside down?
That is normal for many astronomical optical systems. Correct terrestrial orientation is not necessary for astronomy.
How do I know if bad seeing is the problem?
Strong twinkling, boiling planetary detail, and constantly changing focus-like sharpness are signs of unstable air. Reduce magnification and try again when the target is higher or on another night.
Conclusion: Learn the Sequence Before You Chase More Equipment
A telescope becomes easy when the order of operations becomes automatic: assemble securely, align the finder, begin at low power, center the target, focus carefully, observe patiently, then increase magnification only if the image benefits.
The biggest mistake to avoid is trying to solve every problem with more power. A wider field, better finder alignment, steadier air, higher target altitude, better thermal equilibrium, or more observing time often reveals more than a shorter eyepiece.
Your first practical step should be simple: set the telescope up in daylight away from the Sun, learn every control, and align the finder on a distant stationary object. Then make the Moon your first nighttime target. If you can find it, focus it, change eyepieces without losing it, and track it for several minutes, you have already learned the core mechanics needed for planets, stars, clusters, nebulae, and galaxies.
Sources and Further Reading
- NASA Science — Skywatching
- NASA Science — Skywatching FAQ
- NASA Science — Moon Viewing Tips
- NASA Science — Eclipse Viewing Safety
- Celestron — Telescope Magnification and Power
- Celestron — Aligning a Finderscope
- Celestron — Choosing Telescope Eyepieces
- Celestron — SCT and EdgeHD Collimation Guide
- Sky & Telescope — How to Start With Your New Telescope
Image Credits
- “Amateur astronomers and telescopes.jpg” — Annatsach, Wikimedia Commons, CC BY 4.0.
- “Eyepiece three types.jpg” — Tamasflex / Halfblue, Wikimedia Commons, CC BY-SA 3.0.
- “The Moon Through Telescope.jpg” — Best Sci-Fatcs, Wikimedia Commons, CC BY-SA 4.0.