

Learn how to sharpen kitchen knives at home with a whetstone, choose the right grit and angle, raise and remove a burr, test the edge safely, and avoid common mistakes that shorten blade life.
A dull kitchen knife does more than make prep slower. It encourages extra force, crushes delicate ingredients, slips more easily when the edge skates instead of biting, and can turn a simple onion or tomato into a frustrating job. The solution is not to grind away metal every time a knife feels less lively. Good knife maintenance is a sequence: diagnose what the edge actually needs, sharpen only when necessary, hone or strop when appropriate, protect the edge during daily use, and know when damage is serious enough for professional repair.
This guide explains that sequence from a home cook’s point of view. The focus is a typical double-bevel chef’s knife, santoku, utility knife, or paring knife sharpened by hand on a whetstone. Serrated knives, single-bevel Japanese knives, ceramic blades, and expensive collector pieces need different methods, so they are handled separately later. You do not need to chase a mirror finish or a competition-level edge. The practical goal is a clean, stable edge that cuts food predictably and can be maintained without shortening the life of the knife unnecessarily.
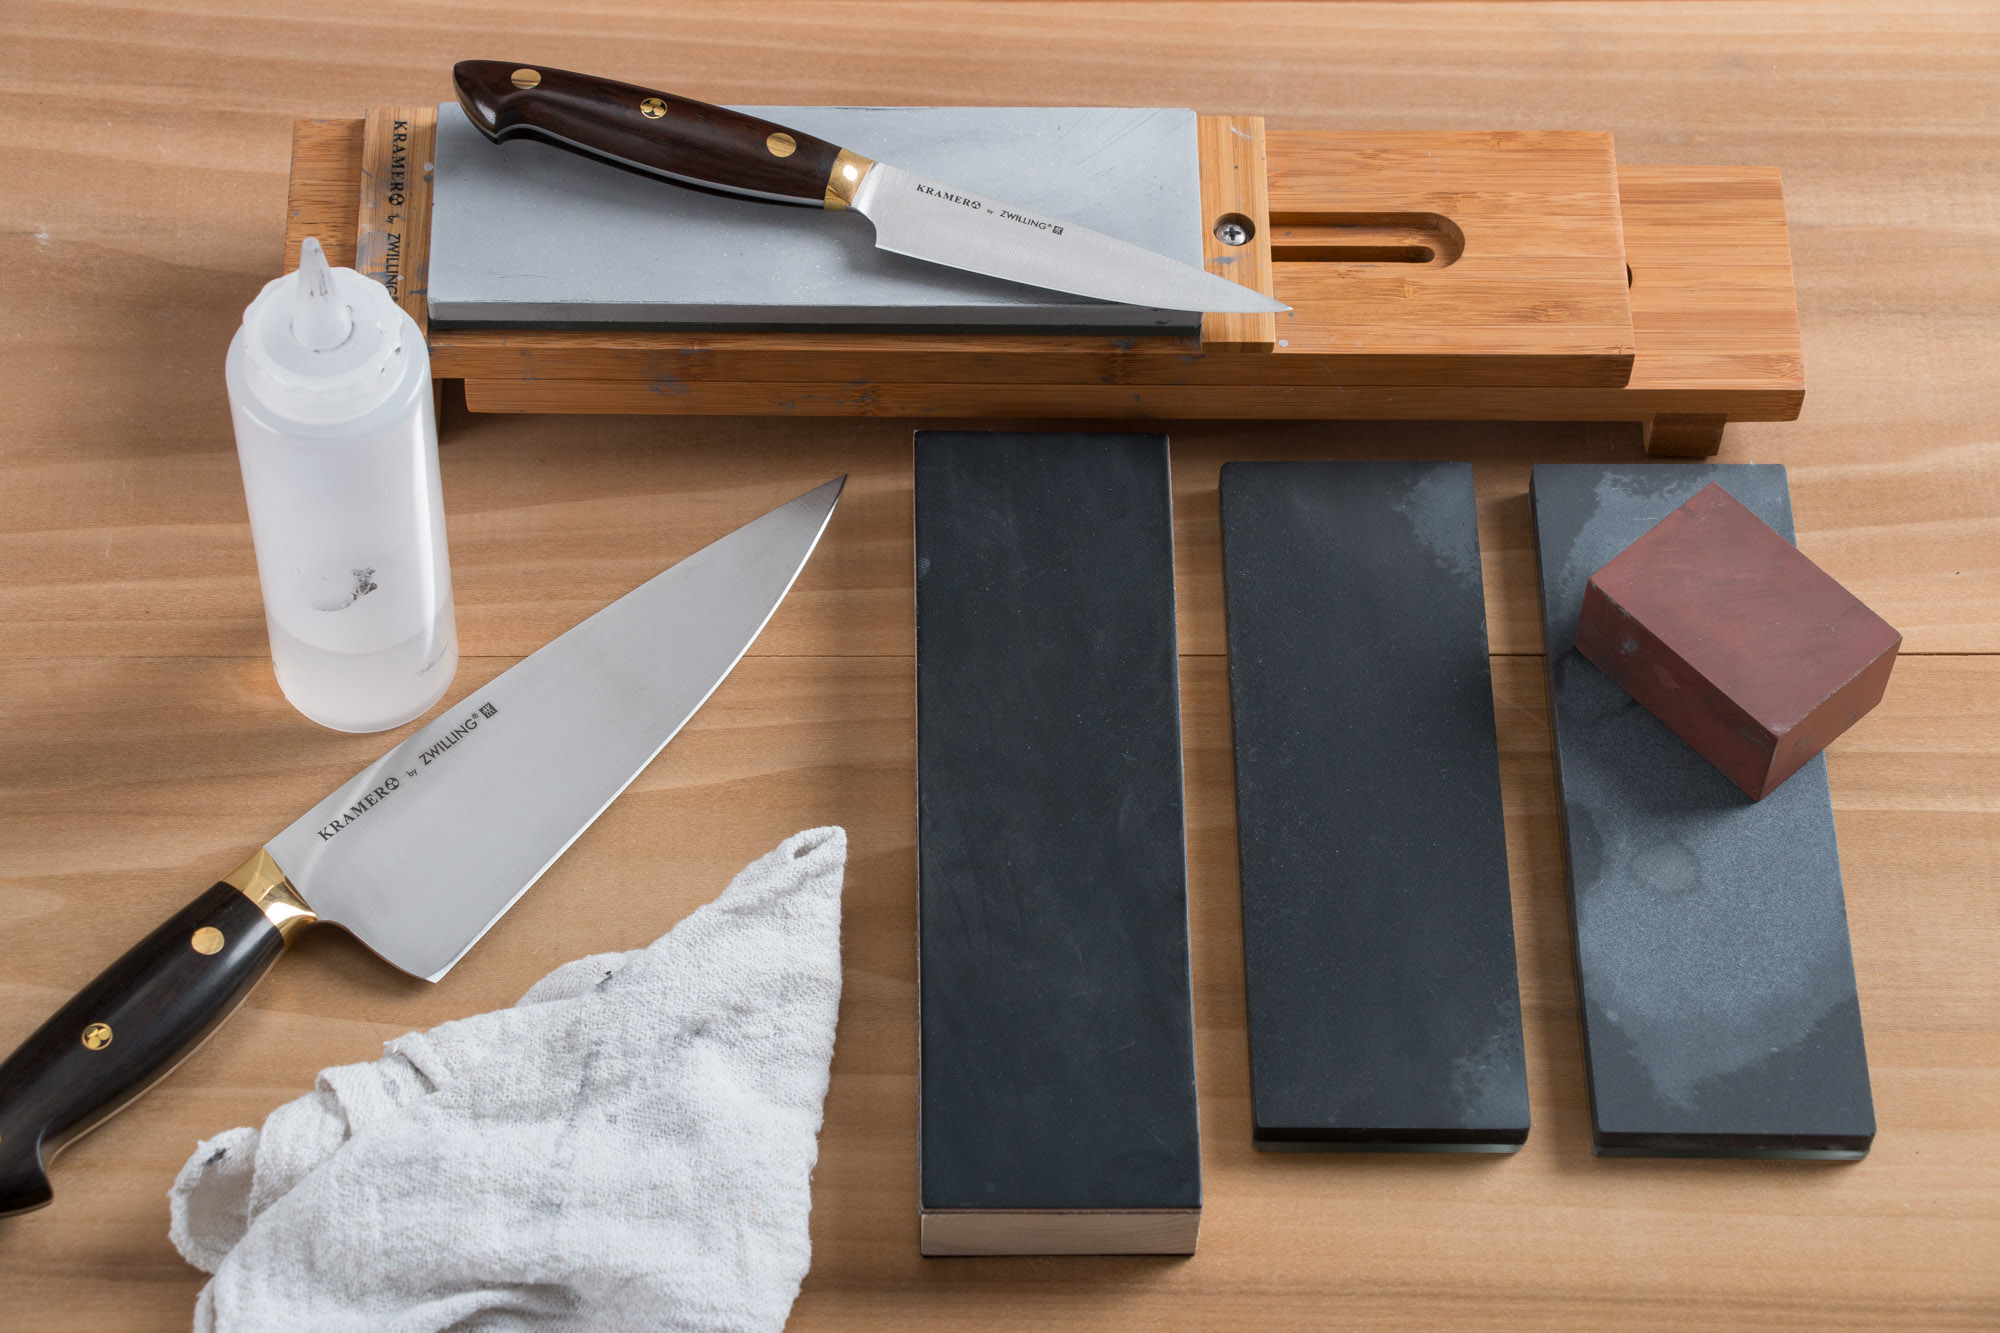 Whetstones allow controlled sharpening when you match the grit and technique to the condition of the edge. Photo: Didriks, CC BY 2.0, via Wikimedia Commons.
Start by deciding whether the knife needs sharpening at all
Before touching an abrasive stone, identify the problem. A knife can feel “dull” for several different reasons. The very edge may simply be slightly rolled or misaligned after normal use. The apex may be rounded from repeated contact with cutting boards. The blade may have small chips. A thick shoulder behind the edge can also make a knife feel wedged in dense foods even if the apex is technically sharp. These conditions are not solved in exactly the same way.
Begin with ordinary cutting behavior. Try slicing a ripe tomato with very little downward force, shaving a thin slice from an onion, or cutting a sheet of printer paper while keeping your fingers well away from the path of the blade. A knife that bites immediately but drags slightly may only need light honing or stropping. A knife that slides over tomato skin, tears paper, or requires obvious force usually needs actual sharpening. If you can see flat shiny reflections along the very edge under a bright light, those spots often indicate rounded or damaged areas that are no longer meeting at a fine apex.
The important habit is to sharpen based on condition, not the calendar. Two households can own the same knife and need completely different schedules because cutting boards, technique, steel, food volume, storage, and dishwashing habits all affect edge wear.
Understand the difference between sharpening, honing, and stropping
These terms are often used interchangeably, but they describe different jobs. Sharpening removes steel to create a new apex where the two sides of the bevel meet. A whetstone, diamond plate, or abrasive sharpener does this. Honing usually means maintaining or realigning the very edge with a rod. Some honing rods are abrasive, however, so they can remove a small amount of metal as well. Stropping uses a comparatively mild abrasive surface, often leather or another material, to clean up and refine the edge after sharpening.
This distinction matters because over-sharpening is wasteful. If a knife responds to a few controlled strokes on an appropriate honing rod, there is no reason to remove substantially more steel on a coarse stone. Conversely, honing cannot restore a genuinely rounded apex forever. Once the edge geometry has worn away, you need abrasion to rebuild it.
A practical maintenance cycle is therefore: use the knife normally, touch up the edge lightly when performance declines, sharpen when touch-ups stop restoring clean cutting, and repair or thin only when edge damage or blade geometry calls for it. Serious Eats makes the same broad distinction: sharpening removes metal to recreate the edge, while honing is primarily a maintenance step between sharpenings.
Choose a sharpening method that matches your skill and knife
There is no single tool that is ideal for every kitchen. Whetstones give excellent control over angle, pressure, and how much metal is removed, but they require practice. Guided systems hold a fixed angle and can make consistency easier. Manual pull-through sharpeners are fast and simple but offer less control and may remove more metal than necessary depending on their design. Electric sharpeners are convenient for users who value repeatability, though they are not automatically appropriate for every blade profile or steel.
For most home cooks who want to learn a durable skill, a medium-grit whetstone plus a finer finishing stone is a flexible starting point. It can handle routine dullness without forcing you into a fixed factory angle. If the knife is badly chipped, extremely thick, or made from unusually hard or brittle steel, starting with a professional sharpener can be wiser than turning an expensive blade into a practice project.
Whichever system you choose, read the manufacturer’s instructions for both the knife and sharpener. Some makers specify edge angles, asymmetric bevels, or restrictions on particular sharpening devices. A good method is not “good” if it is incompatible with the blade in front of you.
Build a simple sharpening kit instead of buying every grit
A beginner does not need a wall of stones. A compact kit can handle most ordinary maintenance. Start with one medium stone around the range commonly used for routine sharpening, plus a finer stone for refinement. Exact grit numbers are not perfectly standardized between manufacturers, so treat them as relative categories rather than universal measurements. If your knives are only moderately dull, a medium stone is more useful than an extremely coarse repair stone.
You will also need a stable base or non-slip mat, clean water if the stone is water-compatible, a towel, and good lighting. A flattening plate or lapping stone becomes useful because whetstones can dish in the center over time. A permanent marker can help beginners check whether they are reaching the entire bevel. A loupe is optional, not required.
A coarse stone belongs in the kit only if you actually repair chips, reset bevels, or work with extremely dull edges. Coarse abrasives remove steel quickly and magnify mistakes just as quickly. When learning, control is more valuable than speed. It is better to spend a few additional minutes on a medium stone than to erase years of blade life through uncontrolled grinding.
Check whether your stone should be soaked, splashed, or used dry
Do not assume all whetstones need the same preparation. Traditional soaking water stones, splash-and-go ceramic stones, oil stones, and diamond plates behave differently. Soaking a stone that is not designed to be soaked can damage the binder or shorten its life. Using an oil stone with water may prevent it from working as intended. Diamond plates often need little more than the lubricant or cleaning method recommended by the manufacturer.
Read the stone instructions before the first session. If it is a soaking water stone, give it the specified time to absorb water. If it is splash-and-go, wet the surface as directed and begin. During sharpening, keep the surface from drying if the manufacturer calls for water. The slurry—the mixture of abrasive particles, water, and removed steel—can contribute to cutting and polishing behavior, but you do not need to obsess over it as a beginner.
The success check is simple: the stone should remain stable, the blade should move smoothly without grabbing unpredictably, and the surface should stay prepared according to the product directions. If you are unsure what stone you own, stop and identify it rather than improvising with oil or extended soaking.
Secure the work area before you handle a wet knife
Knife sharpening combines a sharp object, repetitive hand movement, and often water. A poor setup can be more dangerous than the sharpening technique itself. Place the stone on a purpose-built base, rubber mat, damp folded towel, or another stable support that prevents sliding. Work on a counter at a comfortable height with enough clear space that your elbows will not hit appliances, dishes, or cabinet handles.
Keep the knife handle and your dominant hand as dry as practical. Put the water container where you can reach it without crossing over the edge. Remove children, pets, and distractions from the immediate work area. Never balance a stone on the edge of a sink or on an unstable plate. If you need to reposition the knife or answer a phone, place the knife flat in a deliberate safe location first.
FoodSafety.gov advises washing knives, cutting boards, utensils, and countertops with hot soapy water after they contact raw meat, poultry, seafood, or eggs. Sharpen only a clean knife. A sharpening station should not become a route for moving raw-food contamination around the kitchen.
Find the existing bevel before trying to choose a new angle
People often ask for one exact sharpening angle, but kitchen knives are not all ground the same way. Many Western-style knives use a moderately robust double bevel; many Japanese knives use a more acute edge; some knives are asymmetric; and true single-bevel knives require a completely different technique. If the knife already cuts well when maintained, preserving its existing bevel is usually easier and safer than inventing a new one.
A marker is a practical learning tool. Color the bevel lightly, place the knife at the angle you believe matches the bevel, make one or two gentle strokes, and inspect where the marker is removed. If the ink disappears only near the shoulder above the edge, the angle is too low. If it disappears only at the very apex, the angle may be too high. Adjust until the stone contacts the bevel evenly.
This method does not give you a numeric degree measurement, but it teaches the more important skill: consistent contact. Consistency matters more than repeatedly stopping to measure a theoretically perfect number.
Use a body position that helps you repeat the same angle
Sharpening is easier when large muscles provide stability and the hands make small corrections. Stand squarely or slightly angled to the counter, keep the stone oriented so a comfortable stroke can travel along it, and avoid locking the wrist into an awkward position. Grip the handle securely but not so tightly that your forearm becomes rigid.
Your non-dominant fingertips can rest on the flat of the blade, well above the edge, to control pressure near the section being sharpened. They should never curl over the cutting edge. Move the knife in a controlled path and reposition the supporting fingers as you work from heel toward tip. Slower, deliberate strokes are more useful than fast showy movements because they reveal whether the angle is changing.
If you cannot maintain the angle for an entire long stroke, sharpen the blade in sections. Work the heel, middle, and tip, blending the sections as your control improves. There is no prize for copying the sweeping motion of a professional sharpener before your hands can reproduce it safely.
Begin with light pressure and learn what the stone is telling you
Abrasive stones do not require maximum force. Heavy pressure can make the angle wobble, gouge a softer stone, accelerate wear, and remove more steel than intended. Start with moderate, controlled pressure during the first sharpening passes and reduce pressure as the edge develops. The exact force is difficult to prescribe because stone hardness, knife steel, blade size, and technique vary.
Listen and feel. A stable stroke usually produces a consistent sound and resistance. If the blade suddenly feels as if it is climbing or digging into the stone, pause. You may have changed the angle or led with the edge too aggressively. Inspect the bevel and reset your hand position.
Pressure is also not constant along a curved tip. The tip often needs a small lift or change in orientation to keep the bevel on the stone. Do this gradually. Many beginners round off tips because they lift the handle abruptly or continue the stroke after the tip has left the abrasive surface.
Sharpen the first side until you create a continuous burr
The burr is one of the most useful feedback signals in hand sharpening. As you remove metal from one bevel and reach the apex, a tiny foil-like lip of steel forms on the opposite side. You do not need a huge burr. In fact, trying to create an obvious wire edge wastes steel. The goal is a small, continuous burr from heel to tip showing that the new bevel has reached the edge everywhere.
Work along the blade systematically. After several passes, stop, rinse or wipe the blade carefully, and feel for the burr from the spine toward the edge—not along the edge. Keep the motion perpendicular to the cutting edge so you are not sliding a finger lengthwise across something sharp. If you are uncomfortable checking by touch, use visual inspection under strong light or a cotton swab very cautiously near, not along, the edge.
If the burr exists near the heel but not the tip, do not keep grinding the whole blade equally. Concentrate controlled strokes on the area that has not reached the apex. This targeted correction prevents the already-finished section from losing unnecessary metal.
Repeat on the second side without changing the geometry
Once the burr is continuous, turn the knife over and reproduce the same bevel angle on the opposite side unless the knife manufacturer specifies asymmetry. The second side often reaches the apex faster because the bevel has already been established from the first side. Your objective is to move the burr back, not build a larger burr.
Use the marker again if your angle drifts. Watch the bevel width: if one side becomes dramatically wider, you may be sharpening at a different angle or removing unequal amounts of steel. Small differences are common on mass-produced knives, so do not chase visual perfection at the expense of function.
As the second side reaches the apex along the full length, lighten your pressure. Finish with alternating strokes—one side, then the other—to reduce the burr and center the apex. Think of this as refining the edge you already created rather than continuing to grind.
Deburr carefully because a wire edge can feel sharp but fail quickly
A knife can pass a quick paper test while still carrying a fragile burr. That burr may fold or break off during the first minutes of chopping, leaving the knife feeling mysteriously dull again. Deburring is therefore not cosmetic; it is part of creating a stable edge.
Reduce pressure to very light alternating strokes on the same stone. Depending on the steel and stone, a few edge-leading or edge-trailing finishing passes can help, but technique preferences vary. The key is to avoid repeatedly flipping a large burr from side to side. You want the remaining metal at the apex to become smaller and more centered.
A strop can further clean the edge after the stone, but it should not become a way to hide poor sharpening. If the bevels never meet cleanly, stropping will not magically create a durable apex. Deburr on the stone first, then strop lightly if desired.
Move to a finer stone only when the coarse work is complete
A finer stone refines scratches and can improve slicing feel, but it does not compensate efficiently for an apex that was never formed on the previous stone. Before changing grits, confirm that the bevel reaches the edge along the entire blade and that major chips or flat spots are gone.
On the finer stone, use less pressure and fewer strokes. Your task is refinement, not a second full regrind. Reestablish consistent contact with the existing bevel, polish away the deeper scratch pattern, and finish with alternating light passes. Extremely high-grit finishing is optional for household knives. A slightly toothy edge from a medium-to-fine stone can perform very well on tomato skin, peppers, and fibrous foods.
Match the finish to the job. A kitchen edge should be durable, easy to maintain, and suited to real food preparation. Chasing the highest possible polish can consume time without improving the tasks you actually perform.
Use stropping as a finishing tool, not as a substitute for sharpening
Stropping can remove remnants of a burr and refine the apex. Leather is traditional, but commercial strops come in several materials and may be used bare or with abrasive compound. Always use edge-trailing strokes on a soft strop so the cutting edge does not dig into the material.
Keep the angle close to or slightly below the sharpening angle and use very light pressure. Too much pressure compresses the strop around the edge and can round the apex you just worked to create. A handful of controlled passes per side is often enough.
 A magnified view of a kitchen knife edge after stropping shows that a functional edge is not necessarily microscopically perfect. Photo: Wtshymanski, CC BY-SA 4.0, via Wikimedia Commons.
Test sharpness with food and paper, not your thumb
Never drag a thumb across a freshly sharpened edge to “see if it is sharp.” That test gives little useful information and creates an obvious cut hazard. Safer performance tests are available. Slice printer paper away from your body, try a ripe tomato with almost no downward force, or cut a soft herb without crushing it.
A successful edge should engage food predictably across the full length of the blade. If the heel cuts paper cleanly but the middle catches, that local section likely did not reach or retain a clean apex. Return to the stone only for the area that needs correction. If the knife passes paper but wedges badly in carrots or squash, the issue may be thickness behind the edge rather than sharpness at the apex.
Testing should answer a specific question: did the sharpening process improve real cutting behavior? It should not become a stunt such as shaving arm hair or slicing free-hanging objects. Kitchen knives belong in controlled kitchen tasks.
Wash and dry the knife immediately after sharpening
Sharpening leaves abrasive slurry and fine metal particles on the blade. Wash the knife carefully with warm water and dish soap, keeping the edge pointed away from your hands and avoiding clutter in the sink. Rinse, then dry the blade and handle thoroughly. Never leave a sharpened knife hidden under soapy water where another person might reach for it.
Many good kitchen knives should not go through a dishwasher even if the steel itself resists corrosion. Dishwasher detergents, heat, rattling contact, and moisture can damage handles, dull edges, or encourage corrosion on some steels. Follow the knife manufacturer’s instructions, but hand washing is the conservative default for quality cutlery.
Clean the stones too. Rinse away loose swarf and slurry as recommended, allow water stones to dry fully in a ventilated location, and avoid storing them damp in sealed containers. Stones that stay wet can develop odors, damage, or cracking depending on construction.
Flatten whetstones before dishing affects your angle
Water stones wear during use, often creating a shallow hollow where most sharpening strokes occur. A dished stone makes angle control harder because the blade is no longer moving across a flat reference surface. The more you sharpen, the more important stone maintenance becomes.
Check flatness by drawing a pencil grid across the stone and rubbing it on an appropriate flattening plate or lapping surface. When the pencil marks disappear evenly, the surface is flat again. Follow the stone maker’s recommendations because different stone types tolerate different flattening methods.
Do not wait until the center is visibly scooped. A quick flattening session after sharpening can be easier than restoring a severely dished stone later. Maintaining the tool maintains the edge.
Learn how a honing rod fits between full sharpenings
A honing rod can refresh an edge that has lost some crispness but is not truly blunt. Smooth steels primarily realign; ceramic and diamond rods are abrasive and can remove more material. Match the rod to the knife and manufacturer guidance, particularly with hard Japanese steels that may chip if treated carelessly.
For safer home use, place the rod tip on a stable cutting board with the rod nearly vertical. Hold the knife at the intended angle and draw the edge from heel to tip down the rod using light pressure. This stationary method reduces the dramatic sword-crossing motion seen in demonstrations and gives beginners better control.
Alternate sides and stop after a small number of passes. More is not automatically better. If honing no longer restores cutting performance, the apex is probably worn enough to need sharpening.
Avoid pull-through sharpeners when they conflict with your knife
Pull-through sharpeners are not universally bad, but they are not universally appropriate either. Some use carbide cutters that remove metal aggressively; some use ceramic stages that are gentler; many impose a fixed angle. A thick, inexpensive Western knife may tolerate one well, while a thin Japanese knife with a different bevel may not.
If convenience is your priority, choose a device specifically compatible with your knife style and use the least aggressive stage that solves the problem. Do not repeatedly drag a knife through a coarse slot simply because it still feels easy. Inspect the edge for deep scratches, uneven bevels, and excessive removal.
For an expensive knife, a guided system or professional sharpening service may offer more control than an unknown countertop sharpener. Convenience should not come at the price of irreversible geometry changes.
Do not use the bottom of a mug unless you understand the compromise
The unglazed ceramic ring under a mug can abrade steel and is sometimes suggested as an emergency sharpener. It can work for a cheap knife in a pinch, but the surface is small, the abrasive behavior is inconsistent, and stability is poor compared with a proper stone. It is easy to scratch the blade, wobble the angle, or push the mug unexpectedly.
If you care about the knife, use a purpose-built abrasive. A modest whetstone costs less than replacing a damaged quality blade and provides a predictable flat surface. Improvised methods are useful to understand, but they are not automatically good routine maintenance.
Repair small chips cautiously and outsource major damage
Small chips can sometimes be sharpened out by removing enough metal to bring the entire edge back to the depth of the chip. The cost is blade material. The deeper the chip, the more steel must disappear along the rest of the edge, and the more the geometry may need thinning afterward.
Do not grind only the chipped spot into a concave notch. Work the edge in a controlled, blended way. For a large chip, broken tip, bent blade, cracked blade, or expensive laminated knife, professional repair is usually the rational choice. A skilled sharpener can assess whether reshaping, thinning, or heat-sensitive grinding is appropriate.
Stop immediately if you discover a crack. A cracked blade is a structural problem, not a sharpening problem.
Recognize when thinning is the real solution
Every full sharpening moves the edge slightly upward into thicker steel. Over years, a knife can become thick behind the edge and wedge in hard foods even though the apex is sharp. Thinning removes steel from the blade faces behind the primary edge to restore cutting geometry.
Thinning is more advanced than routine sharpening because it changes a larger area of the blade, affects finishes and logos, and can take substantial time. If your knife slices paper but splits carrots abruptly, binds in onions, or feels progressively more wedge-like despite a sharp apex, thickness behind the edge may be the cause.
Beginners should not start thinning valuable knives without understanding the grind. Use a professional sharpener or practice on an inexpensive blade first. The goal is geometry, not cosmetic polish.
Treat Japanese single-bevel knives as a separate category
Traditional single-bevel knives such as some yanagiba, deba, and usuba are not sharpened like ordinary 50/50 chef’s knives. The front bevel and hollow-ground back have specific relationships, and careless sharpening can erase important geometry. Likewise, many Japanese double-bevel knives may use asymmetric edges or very acute angles that are different from a German-style chef’s knife.
If you own a specialty knife, identify the exact model and manufacturer recommendations before sharpening. Look for documentation on bevel ratio, target angle, steel hardness, and appropriate stones. If you cannot identify the geometry, use a reputable specialist rather than defaulting to the method in this article.
A good sharpening habit begins with respecting what the knife is, not forcing every blade into one universal technique.
Use the right method for serrated knives
A bread knife stays useful longer because each serration has protected cutting points and recessed scallops, but it eventually needs maintenance. A flat whetstone is not the correct tool for grinding across the entire serrated edge; doing so can flatten the teeth.
Use a tapered ceramic rod or another tool designed for serrations, matching the diameter to each gullet. Work from the beveled side, sharpening each scallop individually with light strokes. Remove any burr from the flat side with an extremely light pass if the manufacturer recommends it.
Serrated sharpening is slow and easy to do unevenly. Because bread knives are often affordable and require infrequent service, professional sharpening or replacement can sometimes be more sensible than buying specialty tools.
Be especially cautious with ceramic knives
Ceramic blades are hard, brittle, and behave differently from steel. Ordinary steel honing rods are not suitable, and common water stones may not be effective or safe for all ceramics. Diamond abrasives are typically used, but chipping is a real risk if pressure or angle is wrong.
Check whether the manufacturer offers sharpening service or specifies an approved sharpener. If the blade is chipped, professional service is usually safer than experimenting. Never twist a ceramic knife in a cut or use it on bones, frozen food, or hard surfaces; prevention is far easier than repair.
Choose cutting boards that preserve the edge
Your sharpening results will disappear quickly if every meal is prepared on glass, stone, ceramic, or another very hard surface. Use a proper cutting board made for food preparation. Wood and many quality plastic boards are much kinder to the edge than countertop materials.
 A dedicated cutting board protects both the work surface and the knife edge. Photo: Donovan Govan, CC BY-SA 3.0, via Wikimedia Commons.
Food safety matters too. FoodSafety.gov recommends separate cutting boards for fresh produce or ready-to-eat foods and for raw meat, poultry, or seafood, and replacing boards when they become excessively worn. Wash boards and knives with hot, soapy water after raw animal products. Deep grooves that are difficult to clean are a reason to retire a board.
Do not scrape chopped food sideways with the sharp edge. Turn the knife over and use the spine, or use a bench scraper. Sideways scraping rolls or damages the apex for no culinary benefit.
Store knives so the edge does not collide with other metal
A loose knife drawer is bad for the edge and bad for hands reaching into the drawer. Protect knives with a well-designed block, magnetic strip, in-drawer organizer, or individual blade guard. Whichever system you use, the cutting edge should not bang against other knives, peelers, or metal utensils.
Magnetic strips should hold the knife securely without forcing the edge to strike metal when you attach or remove it. In a block, insert and remove the knife without dragging the edge against the slot if possible. Blade guards are inexpensive and useful for drawers or transport.
Storage is part of sharpening because every impact you prevent is steel you do not need to remove later.
Keep carbon steel dry and protected from corrosion
Carbon-steel knives can take excellent edges, but they generally require more attention to moisture and reactive foods. Wash and dry them promptly. A normal patina—stable discoloration from use—is different from active orange rust. Do not leave acidic food residue on the blade or store it wet.
If rust appears, address it early with a method appropriate to the finish. Abrasive rust removal can scratch polished or collectible blades, so consult the maker for high-value knives. After cleaning, dry thoroughly and store in a low-humidity environment. Food-safe protective oil may be appropriate for knives stored long-term, but it is usually unnecessary for a knife used and washed daily.
Avoid habits that destroy a fresh edge
Several everyday behaviors undo careful sharpening: twisting the blade while it is stuck in dense food, chopping bones with a thin chef’s knife, cutting frozen food, prying lids, opening cans, slicing on plates, scraping the edge sideways, and dropping the knife into a sink full of dishes. Use a tool designed for the task instead.
Technique also matters. Keep the board stable with a damp towel underneath if needed. Use controlled slicing or rocking motions appropriate to the knife. Do not slam the edge repeatedly into the board for speed. A sharp knife should reduce effort, not encourage force.
If other people use the kitchen, explain the storage and board rules. One person’s five-minute shortcut can erase an hour of sharpening.
Do not chase a razor-thin angle on every knife
More acute edges can cut beautifully, but they place less steel behind the apex. Whether that is appropriate depends on steel, heat treatment, blade geometry, cutting style, and what you cut. A robust workhorse used around dense squash and occasional cartilage may benefit from a stronger edge than a fine slicer used on boneless proteins and vegetables.
If an edge chips or rolls repeatedly after you sharpen at a very low angle, the geometry may be too fragile for your use. Increase the angle slightly on the next sharpening or add a tiny micro-bevel. Conversely, if a knife is extremely thick and stable but feels wedge-like, a geometry change may improve performance—but thinning is more advanced work.
The useful edge is the one that stays sharp long enough for your kitchen, not the one that wins an internet angle contest.
Use a micro-bevel when you need a little more durability
A micro-bevel is a very narrow secondary bevel created at a slightly higher angle than the main edge. It removes little steel but can strengthen the apex. After sharpening normally, raise the spine a small amount and make one or two extremely light alternating passes per side on a fine stone.
This technique can be useful when a thin edge tends to roll or microchip during ordinary work. It also makes future touch-ups fast because you can refresh the tiny bevel without grinding the entire primary bevel immediately.
Keep it tiny. If the secondary bevel becomes wide, you have effectively changed the edge angle and may lose some of the cutting performance you were trying to preserve.
Track what works instead of guessing every session
If you own several knives, keep a simple maintenance note. Record the knife, stone progression, approximate angle or marker reference, date, and how the edge performed afterward. If one knife chips after a low-angle finish but lasts months with a slightly stronger edge, that observation is more useful than generic advice.
Tracking also helps you notice whether sharpening frequency is increasing. If you suddenly need to sharpen every few weeks, investigate the cutting board, storage, technique, or a damaged edge rather than assuming the steel has become worse.
A small log turns sharpening into a controlled process. You can change one variable at a time and learn what your actual knives prefer.
Know when to stop during a sharpening session
Sharpening should end when the edge is complete, stable, and performs the intended task. Continuing after that point only removes more steel. Stop when both bevels meet continuously, the burr is minimized, the desired refinement is achieved, and real cutting tests are clean.
If you find yourself making dozens of extra passes “just in case,” pause and inspect. More abrasion cannot fix a wrong angle, dished stone, or poor deburring strategy. Diagnose the reason for the problem before grinding further.
Efficiency in sharpening is not moving faster. It is removing exactly enough material to restore performance and no more.
Troubleshoot a knife that still feels dull after sharpening
If the knife still slides over tomato skin, examine the process in order. First, did you actually reach the apex along the whole blade? A continuous burr during the initial stages is one sign. Second, did you remove the burr, or is a fragile wire edge folding over? Third, did your angle change constantly, creating a rounded bevel? Fourth, is the blade thick behind the edge, causing wedging even though the apex is sharp?
Use a marker and strong light. Revisit only the faulty stage. If marker remains at the very edge, the stone is not contacting the apex. If a large burr flips from side to side, reduce pressure and deburr. If the bevel is convex and wide because of angle drift, slow down and stabilize your wrist.
When the diagnosis is unclear and the knife is valuable, stop. Professional sharpening costs less than grinding away a large amount of steel while troubleshooting blindly.
Troubleshoot scratches on the blade face
Unexpected scratches usually come from slurry, loose abrasive particles, a muddy stone, or fingers pressing the blade face into the stone at the wrong angle. Cosmetic scratches do not necessarily affect cutting performance, but they matter on polished or collectible knives.
Use clean stones, rinse the blade when moving between grits, and keep fingertips on the blade without letting them push the face into abrasive slurry. Masking the blade face can reduce accidental cosmetic marks during practice, but tape should stay well away from the actual bevel and edge.
Removing scratches can require a full refinishing progression and may alter logos or finishes. Do not polish aggressively just because one scratch appears. On a working knife, cosmetic restraint is often the better decision.
Troubleshoot an edge that gets sharp but dulls immediately
An edge that cuts paper beautifully and then collapses during the first meal usually points to a deburring or durability problem. A retained wire edge can mimic sharpness temporarily. An angle that is too acute for the steel and task can roll or microchip. Excessive overheating from powered sharpening can also damage temper at the edge, although that is less likely with hand stones.
First, improve deburring and finish with lighter strokes. If the problem continues, try a slightly more robust angle or tiny micro-bevel. Check the cutting board and avoid twisting or scraping the edge. If only one knife behaves this way while others hold an edge, the knife’s steel, heat treatment, or prior damage may be involved.
Decide when professional sharpening is the smarter option
Home sharpening is satisfying and economical when you maintain ordinary knives. Professional service makes sense for major chips, broken tips, severe recurve, bent blades, expensive single-bevel knives, specialty serrations, major thinning, or blades whose geometry you do not understand. It is also reasonable if you simply do not want sharpening to become another hobby.
Choose a sharpener who can explain the method used, expected angle, how much metal will be removed, and whether powered equipment is cooled and controlled. Ask how they handle Japanese knives or high-hardness steels if relevant. Avoid services that automatically force every knife through the same aggressive machine.
A professional result should preserve the intended geometry, not merely produce a sharp apex for the first day.
Create a low-effort maintenance routine
A practical routine for most home kitchens is straightforward. Before cooking, check whether the knife still bites cleanly. Use an appropriate honing rod or light strop when performance has declined slightly. Sharpen only when those touch-ups no longer restore the edge. Wash and dry by hand, use a knife-friendly cutting board, store the edge protected, and flatten stones as needed.
Once a month, inspect the blade under strong light for chips, corrosion, or flat reflective spots. Inspect the cutting board for deep grooves and the storage system for edge contact. This five-minute check prevents small problems from turning into aggressive sharpening jobs.
After each full sharpening, write down what you did and how the knife performed. Over time you will discover the maintenance interval and finish that fit your actual cooking rather than someone else’s kitchen.
A beginner-friendly 30-minute sharpening workflow
- Clean and inspect the knife. Decide whether it truly needs sharpening and check for chips or unusual bevel geometry.
- Prepare the stone correctly. Soak or splash only according to manufacturer instructions, then secure it on a non-slip base.
- Mark the bevel. Use a marker to confirm the existing sharpening angle.
- Sharpen the first side. Work from heel to tip with controlled pressure until a small continuous burr forms.
- Sharpen the second side. Match the angle and move the burr back across the full edge.
- Reduce pressure. Alternate sides with increasingly light strokes to minimize the burr.
- Refine on a finer stone if needed. Use fewer strokes and lower pressure.
- Strop lightly if desired. Use edge-trailing strokes only.
- Test safely. Use paper or food, not your thumb.
- Wash, dry, and store. Clean the knife and stones, let the stone dry completely, and protect the edge.
Do not force the session to fit 30 minutes if the knife is badly damaged. The point of the workflow is sequence, not a race.
Frequently asked questions
How often should I sharpen a kitchen knife?
There is no universal schedule. Sharpen when actual cutting performance declines and honing or light touch-ups no longer restore it. A home cook who uses a soft cutting board and stores knives carefully may go months between full sharpenings, while heavy professional use can require much more frequent maintenance.
What grit whetstone should a beginner buy first?
A medium-grit stone designed for routine sharpening is usually the most versatile first purchase, often paired later with a finer finishing stone. Because grit scales differ between manufacturers, follow the maker’s description rather than treating one number as universal. Avoid very coarse stones until you actually need repair work.
Should I use 15 degrees or 20 degrees?
Match the existing bevel and the knife manufacturer’s recommendation whenever possible. Many knives fall somewhere in that broad neighborhood, but specialty knives can differ significantly. Consistency at the correct existing bevel matters more than chasing a generic number.
Can I sharpen a knife with a honing steel?
A traditional smooth honing steel mainly maintains or realigns an edge rather than performing a full re-sharpen. Abrasive ceramic or diamond rods remove some metal and can sharpen lightly. When the bevel no longer reaches a fine apex, use an actual sharpening abrasive or professional service.
Why does my knife get dull so soon after I sharpen it?
Common causes include a retained burr, an edge angle that is too fragile for the knife and task, hard cutting surfaces, poor storage, sideways scraping, twisting the blade in food, or failure to reach a stable apex during sharpening. Diagnose the pattern before removing more steel.
Can a knife be too sharp?
For normal kitchen use, the practical concern is not excessive sharpness but excessive fragility. An extremely acute edge can be wonderful for slicing yet chip or roll if the steel, heat treatment, or task does not support it. Build an edge that balances cutting performance with durability.
Final checklist: restore the edge without wasting steel
Successful home sharpening is less about owning expensive stones than about disciplined feedback. Diagnose before grinding. Match the existing bevel. Keep the stone flat and stable. Use controlled pressure. Raise only a small burr, then remove it. Refine only after the edge is complete. Test with real cutting tasks, and protect the result with sensible boards, storage, washing, and technique.
The most common mistake is continuing to remove metal when the real problem is inconsistency. If the edge will not improve, stop and inspect angle, burr, stone flatness, and blade geometry. Your first goal should be repeatability, not speed. Once you can hold an angle and recognize what a finished apex feels and cuts like, sharpening becomes a predictable maintenance task rather than guesswork.
Start with one ordinary double-bevel kitchen knife and one medium stone. Learn that combination well. A reliable edge produced with simple tools is more valuable than a drawer full of equipment you cannot yet control.