

Quick answer: When a houseplant starts declining, do not immediately water it, fertilize it, repot it, or move it into direct sun. Start by identifying the pattern of damage, checking the soil and roots, confirming whether the plant is receiving appropriate light, and inspecting closely for pests. Most indoor-plant problems come from a small group of causes—watering mistakes, unsuitable light, poor drainage, abrupt environmental change, root stress, pests, or fertilizer problems—but the same symptom can have several causes. The safest approach is to change one major variable at a time and watch for healthy new growth rather than expecting damaged leaves to recover.
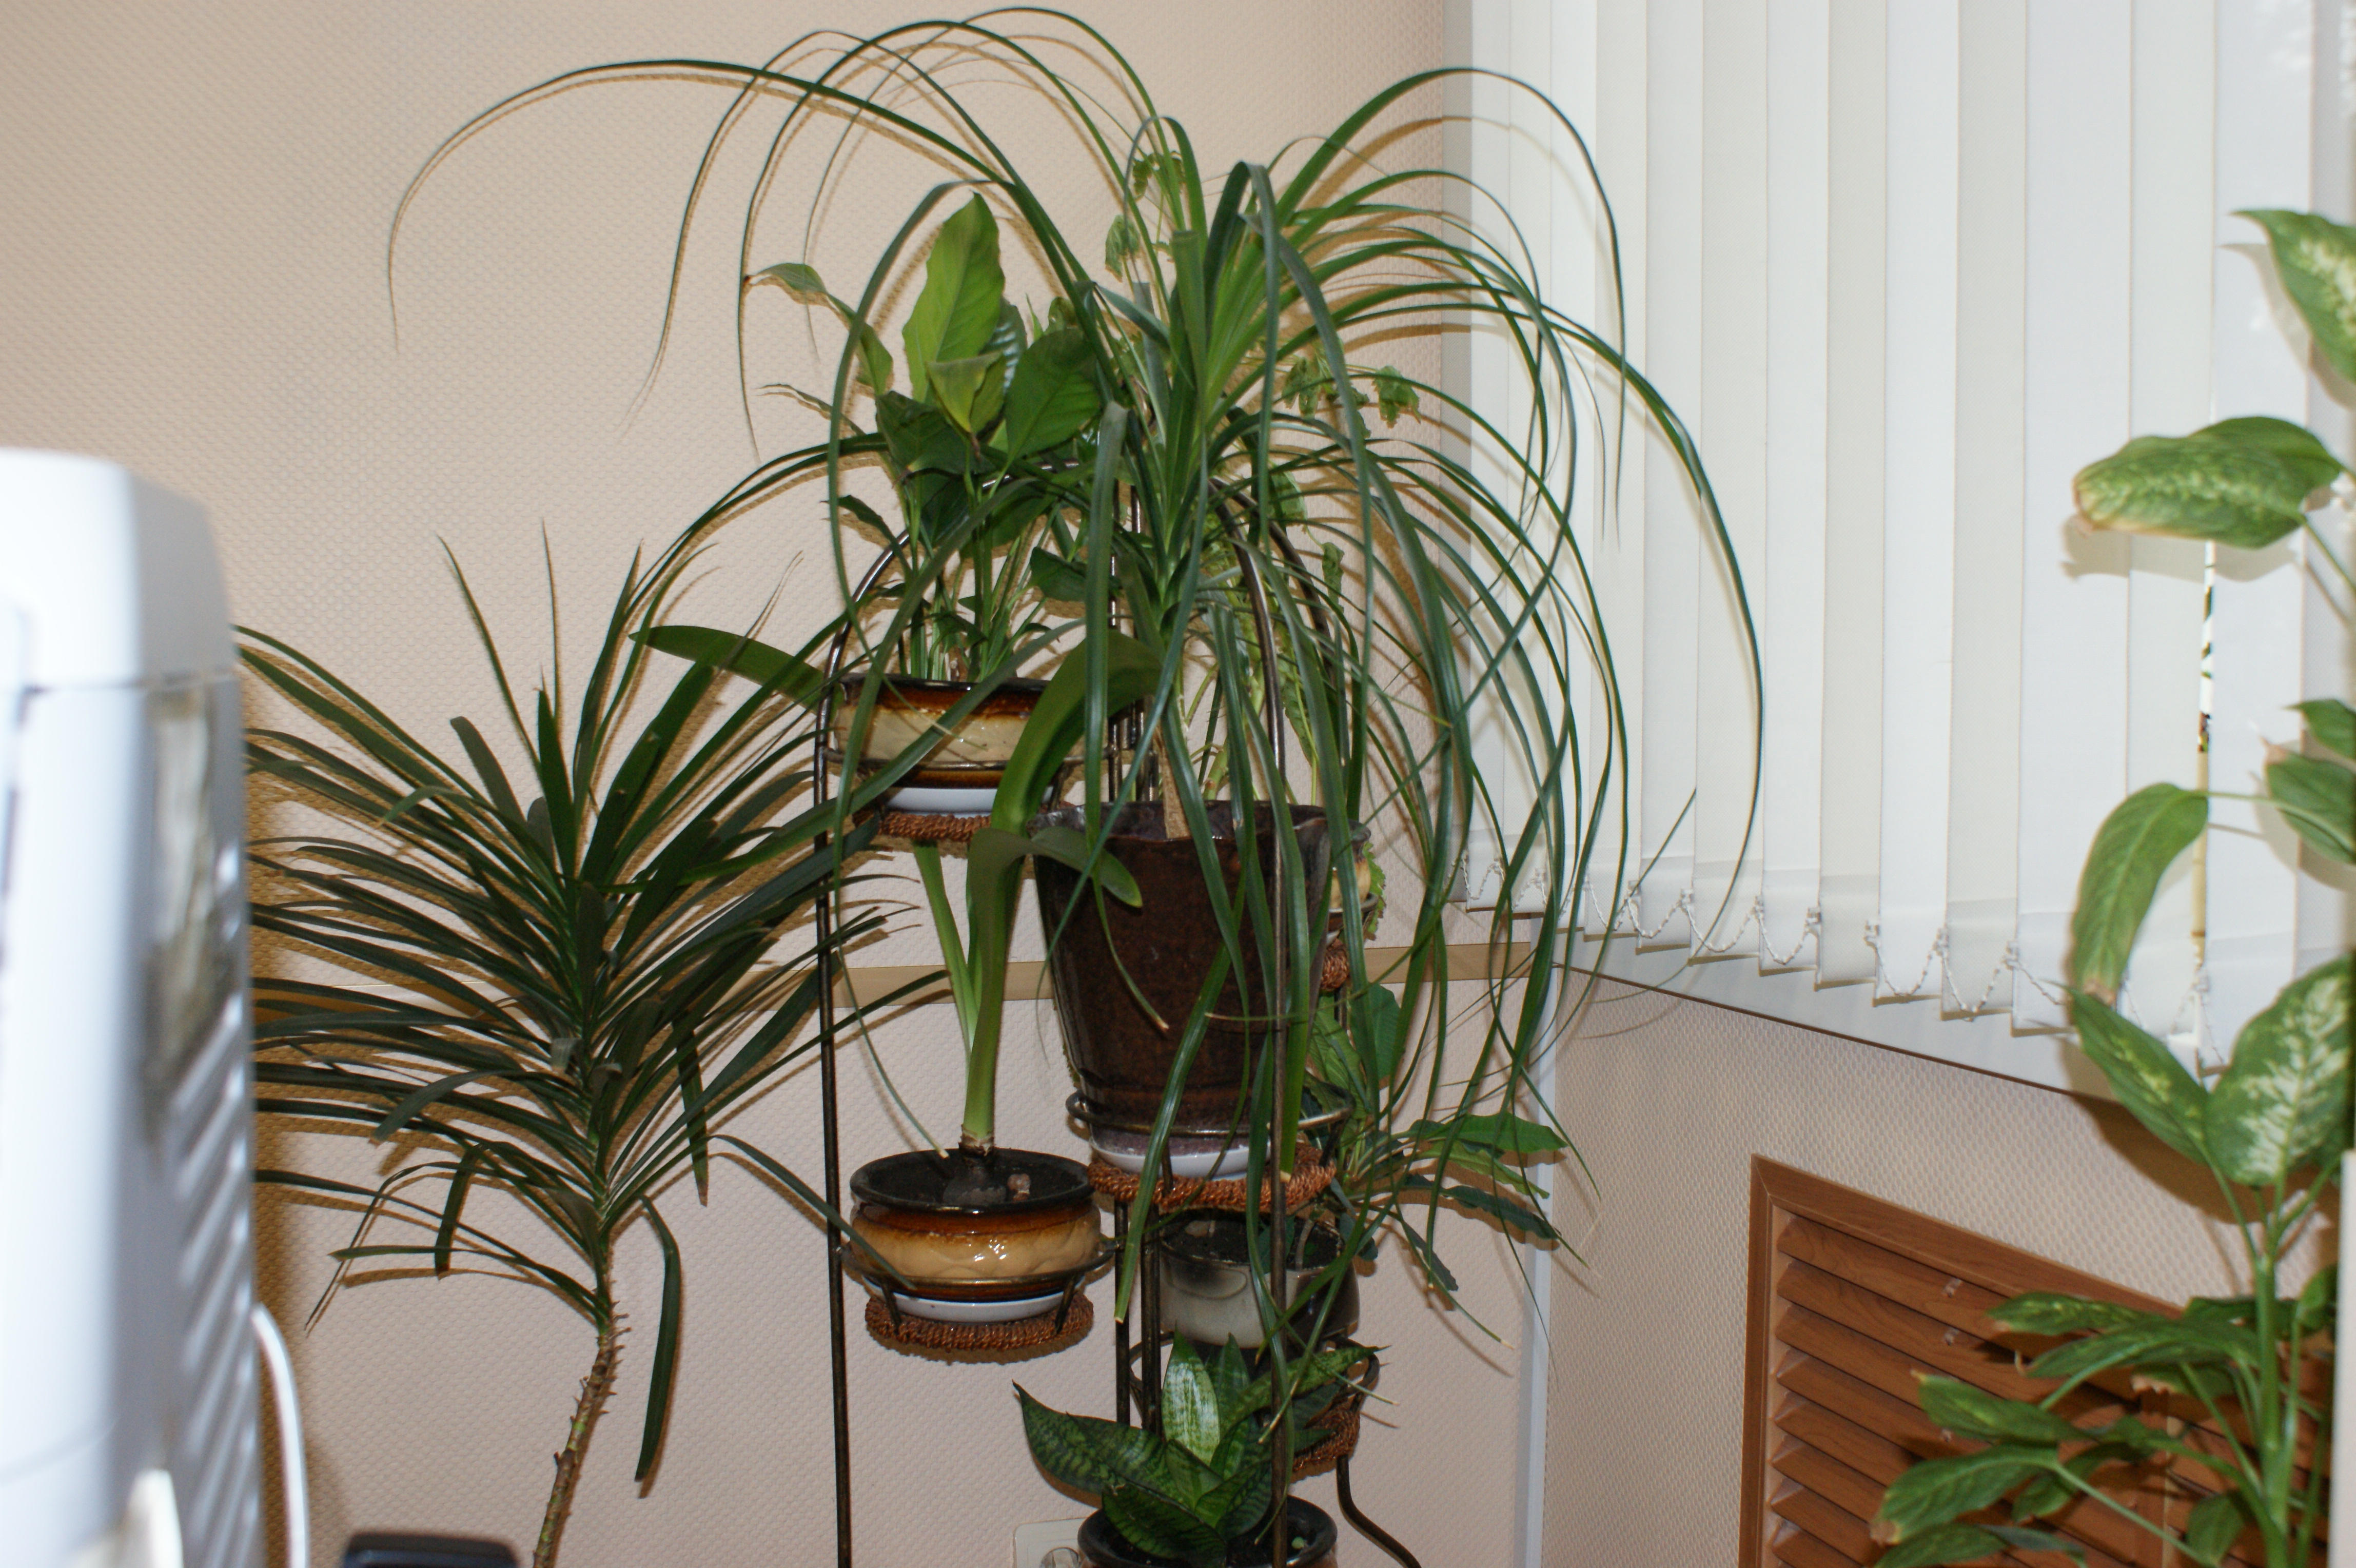 Healthy houseplants are easier to maintain when light, water, container size, and plant choice match the room. Photo by Ruslan V Albitsky, CC BY-SA 3.0, via Wikimedia Commons.
Why houseplant troubleshooting is harder than it looks
A yellow leaf does not diagnose a plant any more than a cough diagnoses a person. Yellowing can follow overwatering, underwatering, insufficient light, natural aging, root damage, pest feeding, nutrient imbalance, or a sudden environmental change. Brown tips can come from irregular watering, salt accumulation, low humidity, cold drafts, root stress, or excess fertilizer. Wilting can mean the roots are dry, but it can also mean the roots are so wet and damaged that they can no longer move water efficiently.
This overlap is the reason random fixes often make a weak plant worse. A person sees wilted leaves, assumes the plant is thirsty, and adds water to already saturated soil. Someone sees pale growth, assumes the plant needs fertilizer, and feeds roots that are unhealthy. Another person notices leaf drop, moves the plant into full afternoon sun, and creates scorch on top of the original problem.
The goal of a good diagnosis is not to name a disease as quickly as possible. It is to reduce uncertainty. You want to answer a sequence of practical questions: What changed? Which parts of the plant are affected? Is the potting mix wet or dry? Are the roots healthy? Is the plant getting enough usable light? Are insects, webbing, sticky residue, eggs, or scale-like bumps present? Did the problem begin after repotting, moving, fertilizing, a cold night, or a change in season?
University extension guidance consistently emphasizes that watering, light, environmental change, pests, and plant selection are central to indoor-plant health. Illinois Extension lists improper watering, sudden environmental change, cold drafts, fertilizer problems, insects, and disease among common causes of unhealthy houseplants. University of Minnesota Extension similarly recommends matching the plant to the available light, temperature, humidity, and growing conditions rather than trying to force every plant to thrive in every room.
Step 1: Stop making multiple changes at once
The first useful action is surprisingly simple: stop treating the plant for a day and observe it. Unless the plant is sitting in standing water, suffering an obvious pest outbreak, freezing near an open window, or completely bone dry, avoid stacking several interventions together.
Changing the location, adding fertilizer, spraying a pesticide, repotting, pruning heavily, and watering on the same afternoon may feel productive, but it destroys your ability to learn which factor mattered. It can also overload a stressed plant. Repotting disturbs roots. Fertilizer raises the concentration of dissolved salts around those roots. A bright location may raise water demand. Pesticides and soaps can sometimes injure foliage if misused. Heavy pruning reduces photosynthetic area. Each action has a purpose, but combining them without a diagnosis can create a second problem.
Instead, make a short record. Write the plant name if known, the date, its current location, how long you have owned it, when it was last watered, whether it was recently repotted, and what changed in the previous two or three weeks. Take clear photographs from the front, the soil surface, the underside of affected leaves, and the drainage holes. Those images are useful because memory is poor at tracking gradual decline or recovery.
Success check: You should be able to describe the problem in one sentence without guessing at the cause. For example: “The lower leaves are turning yellow and dropping while the soil stays wet for more than a week,” or “New leaves are small and the stems lean strongly toward the window.” This kind of description is much more useful than “my plant is dying.”
Step 2: Identify exactly where the damage starts
Location on the plant is a clue. Begin with three observations: old leaves or new leaves, one side or the whole plant, and roots/stems or foliage only.
If only the oldest leaves at the bottom are yellowing slowly while healthy new leaves continue to develop, some leaf loss may be ordinary aging. If many old leaves yellow rapidly, the plant may be staying too wet, receiving too little light, or experiencing a major change. If the newest leaves are distorted, unusually pale, or damaged as they emerge, pay more attention to pests, root function, micronutrient availability, or severe environmental stress.
One-sided damage often points toward the environment. Leaves closest to hot glass may scorch. Leaves next to a cold draft may blacken or collapse. Growth on the darker side of a room may become sparse, while stems stretch toward the window. Damage restricted to one branch may indicate a localized stem injury or pest colony.
Look at the texture as well as the color. Dry, crisp tissue suggests a different path from soft, translucent, water-soaked tissue. Fine pale stippling can indicate sap-feeding pests such as spider mites. Sticky residue may be honeydew from aphids, mealybugs, whiteflies, or scale insects. Black surface growth on sticky leaves can be sooty mold growing on that honeydew rather than a primary leaf disease.
Common mistake: Removing every damaged leaf before inspection. Pruning ugly leaves may make the plant look better, but it can erase evidence. Photograph and inspect first; prune later.
Step 3: Check the soil before you decide the plant needs water
Houseplants should not be watered solely by the calendar. A plant that needs water every four days in bright summer conditions may need much less during a darker season. Pot size, pot material, air movement, temperature, humidity, root mass, and the composition of the potting mix all change how quickly the container dries.
Push a clean finger into the upper layer of the mix. For many common foliage plants, the condition of the top inch or two provides useful information, although individual species differ. Lift the pot and learn its weight when freshly watered versus partially dry. If the container has drainage holes, inspect them. A wooden skewer inserted into the mix can also help reveal whether deeper layers remain wet even when the surface looks dry.
Do not confuse “the top looks dry” with “the root zone is dry.” Peat-based mixes may develop a dry crust while staying wet below. Conversely, extremely dry peat can pull away from the pot and allow water to rush down the sides without rewetting the root ball. In that case, a plant may appear to have been watered while the center remains dry.
If the plant is genuinely dry and its species prefers regular moisture, water thoroughly until excess drains from the bottom. Empty the saucer after drainage. A small splash that moistens only the surface encourages shallow, uneven wetting and makes moisture harder to judge.
If the mix is still wet and the plant is wilting or yellowing, do not add more water automatically. Move to the root and drainage checks.
Step 4: Distinguish underwatering from overwatering
Both problems can produce drooping leaves, which is why this distinction matters. Underwatered plants commonly have a light pot, dry mix, shrinking or pulling soil, and leaves that are limp or crisp. Some recover noticeably after a thorough watering if roots remain healthy.
Overwatered plants often have a heavy pot, persistently wet mix, yellowing lower leaves, soft growth, fungus-gnat activity, or a stale smell. The critical issue is not simply “too much water at one moment.” It is a root zone that remains poorly aerated for too long. Roots require oxygen. A waterlogged, compacted mix can reduce oxygen and encourage root decline.
The remedy for a mildly wet plant is usually not an emergency repot. Stop watering, ensure the drainage hole is open, empty decorative cachepots or saucers, increase normal air circulation, and let the mix approach the appropriate moisture level for that species. If the plant is in a decorative outer pot, remove the inner nursery pot after watering so excess water can drain completely before replacing it.
If wet conditions persist for an unusually long time, ask why. The pot may be much too large. The mix may be dense. The plant may be in very low light and therefore using little water. Drainage holes may be blocked. Roots may have declined so much that they are no longer taking up moisture efficiently.
Success check: After correcting watering, judge the plant by new growth and by the rate of further decline. Existing yellow leaves usually do not become green again.
Step 5: Verify that the container can actually drain
A beautiful pot is not automatically a functional growing container. Check for at least one unobstructed drainage hole. Water should be able to leave the root zone freely. A layer of pebbles at the bottom of a pot without a drainage hole is not a substitute for drainage to the outside.
Decorative pots can be used safely as cachepots: keep the plant in a draining inner container, remove it for watering, allow it to drain, and return it only after excess water has stopped dripping. This arrangement also makes root inspection easier.
Look for standing water hidden inside an outer pot. This is common after enthusiastic watering because the visible soil surface gives no indication that several centimeters of water are collecting below the inner container.
Also check whether roots or compacted soil are sealing the drainage hole. If necessary, tilt the pot and clear the opening gently without aggressively stabbing into the root mass.
If this does not solve the problem: Examine root health before changing the potting mix. Drainage alone cannot repair roots that are already badly decayed.
Step 6: Inspect roots when the evidence points below the soil
Root inspection is justified when the plant remains wet for an abnormally long time, has a sour or rotten smell, collapses despite moist soil, shows extensive yellowing after chronic overwatering, or has become extremely rootbound.
Slide the root ball out carefully. Healthy roots vary by species, but many are firm and pale, cream, tan, or light brown. Concerning roots are often mushy, hollow, slimy, foul-smelling, or so degraded that the outer layer slips away. Do not declare every brown root rotten—older healthy roots can naturally darken. Texture and smell matter.
If only a small portion is damaged, trim clearly dead tissue with clean tools and repot into an appropriate fresh mix in a container only slightly larger than the remaining healthy root system. Oversizing the pot after root loss leaves a large volume of wet mix around a small root system and can restart the cycle.
If roots circle the entire pot but remain healthy, the plant may simply be rootbound. University of Minnesota Extension recommends repotting when roots circle tightly, push through drainage holes, or when the mix dries unusually quickly. Moving up one pot size is generally safer than jumping to a dramatically larger container.
Common mistake: Washing every particle of soil from healthy roots during routine repotting. Unless there is a specific reason, unnecessary root manipulation can increase stress.
Step 7: Measure the light instead of guessing from room brightness
A room that looks bright to human eyes may still provide modest plant light. Our vision adapts extremely well to indoor conditions; plants do not have that advantage. Light intensity falls dramatically as you move away from a window, and curtains, tinted glass, neighboring buildings, overhangs, trees, and window orientation all change usable light.
 Distance from a window matters: indoor light falls quickly as plants are moved deeper into a room. Photo by Tangopaso, released into the public domain, via Wikimedia Commons.
Signs of insufficient light include elongated internodes, weak or leaning stems, smaller new leaves, loss of variegation in some plants, slow drying soil, and sparse growth. Plants may also drop older leaves because they cannot support as much foliage under reduced light.
Too much direct light can cause pale patches, bleached tissue, crisp tan areas, or scorch concentrated on the window-facing side. A plant moved suddenly from a dim shop, office, or winter room to strong direct sun may burn even if that species can eventually tolerate brighter conditions.
Use a light-meter app as a rough comparison tool if you wish, but do not become trapped by a single number from an uncalibrated phone. More useful is a map of the room: record which windows receive direct sun, when, for how long, and where shadows fall. Compare the plant’s known light requirements with the actual spot.
If the plant needs more light, move it gradually closer to a suitable window or add a grow light. University of Minnesota Extension notes that supplemental lighting can compensate for insufficient natural light. If moving a plant into stronger sun, acclimate it over days rather than making an abrupt jump.
Step 8: Separate low-light stress from watering problems
Light and water are connected. A plant in low light generally grows more slowly and uses water more slowly. If you move a plant from a sunny window to a dark corner but continue the same watering schedule, the root zone may remain wet much longer than before.
This is why “I have always watered every Sunday” is not reliable evidence that watering is correct. The same schedule can be appropriate in one season and excessive in another.
When a plant is both wet and in low light, improving light often helps the soil dry at a more normal rate. However, do not place a severely stressed or shade-adapted plant directly into harsh afternoon sun. Give it bright, appropriate light and allow a gradual transition.
A useful experiment is to move the plant to a brighter location with similar temperature and no harsh direct sun, then track how long the pot takes to reach its next watering point. If drying becomes more normal and new growth improves, low light was likely an important contributor.
Step 9: Check for temperature shock and drafts
Indoor plants are frequently tropical or subtropical, but even hardy species can react badly to sudden changes. Cold air from winter doors, direct contact with icy window glass, air-conditioning vents, radiators, heaters, and hot dry airflow can damage foliage.
Environmental shock often appears shortly after a move: bringing a plant home from a store, moving it from outdoors to indoors, changing offices, rearranging furniture, or opening windows during a cold night. Leaf drop after such a move does not automatically mean the plant needs more water.
Place the plant where temperatures are relatively stable and keep delicate foliage away from direct blasts of hot or cold air. If leaves touch cold glass, pull the pot back slightly. If a heating vent blows directly across the plant, redirect the vent or move the plant.
When moving houseplants outdoors for summer, acclimate them gradually. University of Minnesota Extension warns that sudden exposure to stronger sun or wind can damage leaves, and recommends waiting until nighttime temperatures are consistently suitable for tropical houseplants.
Step 10: Inspect for pests with more than a quick glance
Many houseplant pests are easy to miss until populations are large. Use bright light and examine the undersides of leaves, leaf joints, stems, new growth, pot rims, drainage holes, and the soil surface. A magnifying glass helps with mites, thrips, eggs, and immature stages.
University of Minnesota Extension recommends regular inspection and isolation of infested plants. It also notes several clues: honeydew can indicate sap-feeding insects, fine webbing may reveal spider mites, and sticky traps can help detect flying insects such as fungus gnats, whiteflies, and some aphids or thrips.
Do the white-paper test for suspected spider mites. Hold a sheet of white paper beneath an affected leaf and tap the leaf gently. Tiny moving dots can be easier to see against white. Look especially for stippled, speckled foliage and fine webbing.
 Fine webbing together with stippled or discolored foliage is a classic clue for a serious mite infestation. Photo by Eish scorpion, CC BY-SA 4.0, via Wikimedia Commons.
Mealybugs often appear as white cottony clusters in leaf axils and other protected areas. Scale insects can look like small brown, tan, or pale bumps attached to stems and leaves. Aphids are often visible around tender new growth. Fungus gnats are small flies associated with moist potting media; adults are annoying, while larvae thrive in damp organic conditions.
Success check: If you find a pest, identify it before treating. “Bug spray” is not a diagnosis.
Step 11: Isolate the plant before treating pests
Move an infested plant away from the rest of the collection. Check neighboring plants immediately because pests may already have spread. Use separate cleaning cloths when possible, wash hands after handling heavily infested plants, and clean tools before moving to healthy plants.
For small infestations, physical removal is often a sensible first step. University of Minnesota Extension recommends options such as washing foliage, wiping leaves, pruning heavily infested portions, or physically removing visible pests. Mealybugs can sometimes be removed individually with a cotton swab and alcohol, while a strong but safe stream of water can dislodge some soft-bodied pests.
Insecticidal soaps and horticultural oils can be useful when labeled for the pest and plant, but follow the product label. Test on a small area when appropriate, avoid treating heat- or drought-stressed plants unless the label directs otherwise, and understand that repeat applications may be needed because many products do not kill every life stage at once.
Avoid homemade mixtures with random concentrations of dish detergent, vinegar, essential oils, bleach, or other household chemicals. A mixture that kills an insect can also damage leaf tissue or roots.
Step 12: Diagnose fungus gnats without confusing them with fruit flies
Fungus gnats are small dark flies that often hover around the soil surface, especially after watering. Their presence is usually a moisture-management clue. They thrive in consistently damp organic potting media.
First, reduce unnecessary moisture. Let the upper portion of the mix dry to the degree the plant can safely tolerate. Improve drainage and remove decaying plant debris. Yellow sticky cards can capture adults and help monitor whether populations are declining.
Do not repeatedly drench the pot with unverified home remedies. If the problem persists, choose a product specifically labeled for fungus-gnat management and follow directions.
Common mistake: Treating adult gnats while continuing to keep the pot permanently wet. If the breeding environment remains ideal, adults continue to emerge.
Step 13: Understand what yellow leaves are actually telling you
Yellowing is a symptom, not a single problem. Use context. If the soil is wet, lower leaves are yellowing, and the pot dries slowly, investigate overwatering, low light, or root stress first. If the plant is dry, wilted, and the pot feels very light, underwatering is more plausible.
If yellowing begins after a sudden move, consider environmental change. If leaves show yellow stippling, webbing, sticky residue, or insects, investigate pests. If the plant is actively growing in good light but new leaves remain pale, nutrition or root function may deserve attention.
Do not expect a fully yellow leaf to return to normal. Evaluate the next leaves that develop. A recovery is successful when the decline slows, stems remain firm, roots function, and new foliage appears healthy.
Step 14: Read brown tips and brown edges carefully
Brown tips can reflect inconsistent watering, excessively dry conditions, salt accumulation, overfertilization, damaged roots, or species-specific sensitivity to water quality. They can also result from hot or cold drafts.
Before reaching for a humidifier, check the basics. Is the root ball cycling between extreme dryness and saturation? Does water drain freely? Has the plant been fertilized heavily? Is a heater blowing over the foliage? Is the plant rootbound?
If fertilizer salts are suspected and the pot drains well, thoroughly watering the mix and allowing excess water to drain can help flush accumulated soluble salts. Do not do this repeatedly if the plant already has waterlogged soil or damaged roots.
Low humidity is real, but pebble trays and occasional misting usually have limited influence on room-wide humidity. A humidifier can raise humidity more effectively when a species truly requires it, but it should be used with normal household moisture awareness to avoid condensation or mold problems.
Step 15: Treat leaf scorch as an exposure problem, not a hydration emergency
Sunscorch often produces pale, bleached, tan, or crispy patches on the side exposed to intense light. It may appear after moving a plant closer to a window, taking it outdoors, cleaning a window that previously filtered light, or changing seasons when solar angle and intensity increase.
Move the plant out of the harshest exposure but do not plunge it into darkness. Choose bright indirect light appropriate for the species and acclimate gradually if stronger light is desired.
Scorched tissue will not heal. Leave partially healthy leaves in place if they still contribute useful green area, unless disease or severe damage makes removal sensible.
Step 16: Recognize when fertilizer is the problem rather than the solution
Fertilizer supports growth; it does not create healthy roots or compensate for poor light. Feeding a plant that is severely stressed, waterlogged, root-rotted, or nearly dormant can add another burden.
Excess fertilizer may contribute to brown tips, crusty deposits on soil or pot rims, and root injury. When light is low and growth is slow, plants often need less fertilizer than during active growth.
Follow the label of a fertilizer suitable for houseplants. More is not better. University of Minnesota Extension recommends easing back into fertilizer as plants return to active spring growth rather than applying heavy doses suddenly.
If you suspect chronic overfertilization, pause feeding, verify drainage, and allow normal watering to leach excess soluble salts over time. If the mix has become badly degraded or crusted and the plant is otherwise stable, repotting into fresh appropriate media can be considered.
Step 17: Repot only when there is a reason
Repotting is not a universal cure. A plant can decline after unnecessary repotting because roots are disturbed, moisture behavior changes, and the new pot may stay wetter.
Good reasons to repot include severe rootbinding, degraded or inappropriate potting media, root disease that requires cleanup, or a container problem that cannot be corrected otherwise. Roots emerging from the drainage holes alone do not always mean an emergency, but tightly circling roots plus rapid drying and poor growth are stronger evidence.
Choose a pot only modestly larger than the root ball. Match the potting mix to the plant. Succulents and cacti generally need a more freely draining mix than moisture-loving tropical foliage plants. Orchids, aroids, African violets, carnivorous plants, and other specialty groups may have distinct requirements.
After repotting, return the plant to stable appropriate light and avoid additional major stressors. Do not assume it needs fertilizer immediately if the fresh mix already contains nutrients.
Step 18: Decide whether the soil itself has become a problem
Potting mix changes with time. Fine particles settle, organic components break down, salts accumulate, roots fill pore space, and repeated watering can alter structure. A mix that once drained well may eventually become compacted.
Warning signs include water sitting on the surface for a long time, a pot that remains wet much longer than it used to despite similar conditions, a sour smell, or roots struggling in a dense mass. Conversely, old peat-heavy mix may become hydrophobic when extremely dry, causing water to run around the root ball.
If the plant is healthy enough to tolerate repotting, fresh species-appropriate media can restore structure. If the plant is severely stressed, balance the benefit of changing media against the risk of root disturbance.
Step 19: Correct leggy growth without simply cutting everything back
Long, weak stems with wide gaps between leaves frequently indicate inadequate light. Pruning alone can make the plant temporarily compact, but if light remains poor, new stems may become leggy again.
First improve the light gradually. Then prune above healthy nodes to encourage branching where appropriate for the species. Rotate the pot periodically if growth leans strongly toward one side, but remember that rotation does not fix insufficient total light.
Some plants naturally trail or vine; their growth habit should not be mistaken for weakness. Compare the current growth with what is normal for that species.
Step 20: Handle leaf drop as a timeline problem
Ask when the leaves started falling and what happened immediately before. Sudden leaf drop is often associated with a sharp environmental change: moving house, bringing plants indoors, cold exposure, a dramatic watering error, root disturbance, or a major change in light.
If the stems remain alive and roots are healthy, stabilize conditions rather than making daily adjustments. New leaves may take time. Repeatedly moving the plant between windows, changing watering frequency, and fertilizing in response to each lost leaf can prolong instability.
Mark a stem with a small removable tie near the newest healthy leaf and photograph it weekly. This creates an objective record of new growth.
Step 21: Check for natural dormancy or seasonal slowdown
Not every period of slow growth is a crisis. Many houseplants reduce growth as day length and light intensity fall. Some species have stronger seasonal cycles than others.
When growth slows, water use often declines too. The correct response may simply be to reduce watering frequency, pause or reduce fertilizer, and maintain stable light and temperature.
Forcing growth with heavy fertilizer in weak winter light can produce thin, stretched foliage rather than a healthier plant.
Step 22: Use pruning as sanitation and shaping, not punishment
Remove leaves that are fully dead, badly pest-infested, or decayed. Use clean, sharp scissors or pruners. Make deliberate cuts rather than tearing tissue.
Do not strip a stressed plant of every imperfect leaf. Green portions still photosynthesize. Removing too much foliage at once can reduce the plant’s ability to rebuild roots and shoots.
When pests are concentrated on a few leaves or stems, pruning those sections can reduce the population significantly. Bag heavily infested material before moving it through a room full of plants.
Step 23: Build a simple recovery environment
A recovering houseplant usually benefits from consistency more than from “extra” everything. Give it appropriate light, stable temperature, correct watering, good drainage, and protection from active pests. Avoid heavy feeding, constant relocation, and unnecessary repotting.
If roots were damaged, reduce the mismatch between the root system and foliage only when necessary. A plant with very few viable roots may be unable to support a huge canopy, but severe pruning is species-dependent and should not be automatic.
Keep notes. Record watering dates, not as a schedule but as data. Note how long the pot takes to reach the next watering point. Photograph new leaves. A pattern over several weeks is far more meaningful than a single day of drooping.
Step 24: Know when propagation is safer than rescue
If root or stem rot is advancing, saving the original root system may become unrealistic. Many common houseplants can be propagated from healthy stem sections, leaves, divisions, or offsets depending on species.
Take propagation material only from firm, healthy tissue well above any rot. Use clean tools and a propagation method appropriate for the plant. For a pothos or philodendron, a healthy stem node may root readily. A snake plant can be divided or propagated by leaf sections, although variegation may not always remain identical. Succulents vary widely in what parts can produce a new plant.
Propagation is not failure. It can preserve a plant genetically when the original root system is lost.
Step 25: Diagnose problems in newly purchased plants differently
A new plant has experienced shipping, greenhouse conditions, retail display, transportation, and a new home environment in a short period. It may also arrive with pests.
Isolate new plants for one to two weeks when practical, as University of Minnesota Extension recommends, and inspect them before adding them to a dense collection. Keep them in suitable light and avoid immediate repotting unless the container or soil condition is clearly problematic.
Expect some acclimation. A few dropped leaves after a major environmental change can occur even when care is reasonable. Widespread collapse, active pests, or rotten roots require more direct intervention.
Step 26: Troubleshoot plants in decorative pots and terrariums separately
Plants grown in sealed or semi-sealed containers behave differently from ordinary potted houseplants. Evaporation can be much slower, so overwatering is especially easy. Closed terrariums may recycle moisture and require little added water once balanced.
Decorative arrangements often combine several species in one container even though their water and light requirements differ. If one plant repeatedly fails while another thrives, the problem may be incompatibility rather than poor care.
Where practical, separate species with very different needs into individual containers.
Step 27: Do not use “low light” to mean “no light”
Low-light-tolerant plants still require light for photosynthesis. “Tolerant” means they can survive and often grow under lower illumination than sun-loving species, not that they can remain healthy indefinitely in a windowless dark corner.
If a room has no useful natural light, use an appropriate artificial grow light on a timer. Position and duration depend on the light output and the species. Follow the manufacturer’s guidance and watch the plant’s response.
A decorative lamp across the room may make a plant visible to you without delivering useful growing light.
Step 28: Avoid the most common rescue myths
Myth 1: Yellow leaves always mean overwatering. They can, but many other problems produce yellowing.
Myth 2: Misting fixes low humidity. Misting temporarily wets leaves and may briefly change local humidity, but it is not equivalent to managing room humidity.
Myth 3: A bigger pot helps a weak plant. An oversized pot can stay wet too long and increase root problems.
Myth 4: Fertilizer is plant medicine. Fertilizer supplies nutrients; it does not cure poor light, root rot, or pests.
Myth 5: Ice cubes are a universal watering method. Watering method should match the plant and allow the root zone to be wetted properly. A generalized gimmick is less useful than understanding the plant’s actual moisture needs.
Myth 6: Coffee grounds improve every houseplant. Adding kitchen waste directly to indoor pots can alter moisture, structure, and microbial activity unpredictably. Use a formulated potting mix and appropriate fertilizer instead.
Myth 7: More sunlight always helps. Sudden strong sun can scorch shade-adapted leaves.
A symptom-to-cause troubleshooting table
| Symptom | Check first | Common possibilities | Safe next step |
|---|---|---|---|
| Lower leaves yellowing | Soil moisture and light | Overwatering, low light, aging | Verify moisture before watering; improve appropriate light |
| Whole plant wilting in wet soil | Roots and drainage | Root stress, waterlogging | Stop adding water; inspect drainage and roots |
| Crispy brown edges | Watering consistency and airflow | Dryness, salt buildup, hot/cold draft | Stabilize watering and location |
| Fine pale stippling | Leaf undersides | Spider mites or other sap-feeding pests | Isolate and inspect with magnification |
| Sticky leaves | Stems and leaf joints | Aphids, scale, mealybugs, whiteflies | Isolate and identify the pest |
| Long weak stems | Light level | Insufficient light | Gradually improve light before pruning |
| White crust on soil or pot | Fertilizer and water | Soluble salt accumulation | Pause fertilizer and flush only if drainage is good |
| Blackened soft tissue after cold night | Temperature history | Cold injury | Move to stable warmth and remove dead tissue later |
| Soil stays wet for many days | Pot size, mix, light, roots | Oversized pot, low light, dense mix, root decline | Correct the underlying cause rather than watering again |
A 48-hour houseplant diagnosis protocol
If you want a repeatable process, use this sequence.
- Photograph the plant before treatment. Capture the whole plant, damaged leaves, soil, pot, and leaf undersides.
- Record recent changes. Note moves, repotting, fertilizer, temperature events, vacations, and unusual watering.
- Check moisture at several depths. Do not judge from the surface alone.
- Check drainage. Look for standing water in cachepots and blocked holes.
- Inspect for pests. Use bright light and magnification.
- Assess light. Compare the plant’s actual position with its species requirements.
- Check roots only if evidence justifies disturbance.
- Choose one major correction. Examples: stop overwatering, move gradually to brighter light, isolate and treat a confirmed pest, or repot damaged roots.
- Wait for evidence. Do not expect damaged leaves to become perfect. Watch new growth.
How to tell whether recovery is working
Recovery is measured by stabilization, not instant cosmetic improvement. Look for a slowing rate of leaf loss, firm stems, roots that resume normal water use, and healthy new leaves. The plant may continue to lose already-damaged leaves after the cause is corrected.
Track three numbers if you want an objective record: the number of new leaves, the number of leaves lost, and the number of days between waterings. A plant that was staying wet for ten days may begin drying in five or six after its light and root health improve. A plant losing four leaves per week may slow to one and then none.
Do not obsess over daily measurements. Weekly photographs from the same angle are often enough.
When a plant is probably beyond practical rescue
A plant may be too far gone when all stems are mushy or hollow, the entire crown has rotted, roots are almost completely destroyed, or pest infestation is so severe that saving it would endanger a valuable collection. Even then, inspect for healthy propagation material.
Discard severely infested plants in a sealed bag if needed, clean the surrounding area, and inspect neighboring plants. Reusing pots is usually possible after thorough cleaning appropriate to the material.
There is no benefit in keeping a hopelessly infested plant beside twenty healthy ones purely out of guilt.
Frequently asked questions
Should I cut off yellow leaves?
Fully yellow leaves generally will not turn green again and can be removed once you have inspected them for diagnostic clues. If a leaf still has substantial healthy green tissue, leaving it temporarily may help a stressed plant continue photosynthesizing. Always use clean tools.
Should I water immediately when a plant droops?
No. Check the potting mix first. Drooping can result from dry soil, but it can also happen when roots are damaged in wet, oxygen-poor media. Water only after confirming that the plant actually needs it.
How often should houseplants be watered?
There is no universal interval. Watering frequency depends on plant species, root mass, pot size and material, potting mix, light, temperature, humidity, and season. Use the moisture condition of the root zone as your guide rather than a fixed weekday.
Can a plant recover from root rot?
Sometimes. Recovery depends on how much healthy root and stem tissue remains and on the species. Remove clearly dead tissue, correct the moisture and drainage problem, and repot only as needed. If little healthy root remains, propagation from healthy tissue may be a better strategy.
Why is my plant getting yellow leaves after I moved it?
A sudden change in light, temperature, humidity, airflow, or watering demand can trigger leaf loss. Stabilize the new environment and check the basics before assuming the plant needs fertilizer or extra water.
Do houseplants need direct sunlight?
Some do, many do not. The correct light depends on species. Bright indirect light is common for tropical foliage plants, while cacti and many succulents generally require stronger light. Even low-light-tolerant plants still need usable light.
Why are tiny flies coming from the soil?
They may be fungus gnats, which are associated with moist organic potting media. Let the upper layer dry as much as the plant safely permits, improve drainage, remove decaying debris, and use sticky traps to monitor adults. Confirm identification before using pesticides.
Can I save a plant by putting it outside?
Sometimes outdoor conditions help, but sudden direct sun, wind, cold, or heat can make a stressed plant worse. Acclimate houseplants gradually and move them outdoors only when temperatures are suitable for the species.
Build a prevention routine so diagnosis becomes easier next time
The best houseplant routine is short enough to repeat. Once a week, walk through the collection without automatically watering. Touch or probe the soil, inspect undersides of a few leaves, look for sticky residue or webbing, empty standing water from saucers, and rotate plants only when needed for balanced growth.
Once a month, clean dusty leaves, check drainage holes, inspect for roots emerging from the pot, and review whether seasonal light has changed. As the sun angle shifts, a place that was gentle in winter may become intense in summer, while a bright summer corner may become too dim in winter.
When you buy a new plant, identify it, read reliable care information, quarantine it briefly, and choose a location that fits the plant instead of choosing a plant solely because it fits the décor.
The most important habit is to respond to evidence rather than anxiety. A plant with one yellow leaf does not need five interventions. Observe, check moisture, check light, inspect for pests, and make the smallest correction that matches the evidence.
Conclusion
A struggling houseplant becomes much easier to rescue when you stop treating every symptom as a separate emergency. Start with the root zone, light, recent environmental changes, and a careful pest inspection. Correct the clearest mismatch first, then give the plant time to respond.
The biggest mistake to avoid is stacking remedies—extra water, fertilizer, repotting, direct sun, and pesticide—before you know what went wrong. Healthy new growth is the real measure of recovery. Your first action today should be simple: photograph the plant, check the soil at more than one depth, and inspect the underside of the leaves. Those three observations will usually tell you what to investigate next.