

Learn a practical diagnostic workflow for printers that are offline, stuck in a queue, printing blank or streaked pages, jamming paper, or refusing to connect on Windows and Mac.
Quick answer: When a printer stops working, do not begin by reinstalling everything. First identify which layer has failed: power and hardware, paper and consumables, the local USB connection, the Wi-Fi or Ethernet path, the print queue, the operating-system driver, or the application that created the job. A controlled test at each layer is faster than random fixes and makes it much easier to tell whether the problem is in the printer, the computer, or the network.
 An office printer in a normal work environment. Photo by Victor Grigas, licensed CC BY-SA 3.0 via Wikimedia Commons.
A printer can fail in several completely different ways while displaying the same frustrating symptom: nothing useful comes out. One computer may show the printer as offline even though another computer can use it. A document may remain in the queue while the printer is physically ready. An inkjet may feed paper correctly but produce faint horizontal bands. A laser printer may print perfectly for ten pages and then jam only during duplex printing. A wireless printer may work for months and suddenly disappear after the router is replaced. Treating all of those situations as “the printer is broken” leads to wasted time, unnecessary cartridges, repeated driver installations, and sometimes accidental damage.
This guide uses a layer-by-layer troubleshooting method. You will start with observations that cost nothing, move to low-risk tests, isolate the failing component, and only then perform resets, driver changes, or maintenance. The process is designed for common home and small-office inkjet and laser printers on Windows 11 and current versions of macOS. Menus vary by model, and some maintenance tasks are manufacturer-specific, so your printer’s official manual remains the final authority for model-specific procedures.
1. Identify the Exact Failure Before You Touch Anything
The first useful question is not “Why won’t my printer work?” but “What exactly happens between pressing Print and the expected page appearing?” Write down the symptom in one sentence. Examples include: “The printer is listed as offline,” “the job stays at 0 bytes in the queue,” “the printer wakes but does not pull paper,” “paper feeds but every page is blank,” “black text is sharp but color is missing,” or “the printer jams only when printing double-sided.” That sentence determines your next test.
Then perform a simple cross-check. If possible, print the printer’s own internal status or configuration page from its control panel. This bypasses the computer, network print queue, application, and most driver problems. If the internal page prints correctly, the mechanical print engine can probably move paper and create an image. Your attention should shift toward connection, queue, driver, or application settings. If the internal page itself is blank, streaked, jammed, or impossible to produce, the problem is much more likely to be inside the printer or related to paper, ink, toner, a door sensor, or another physical condition.
Next, try printing a very simple file from a different application. A one-page plain-text document is ideal. If a complicated PDF fails but a simple text document prints, the printer is not generally offline; the problem may be the file, the PDF renderer, memory usage, a corrupted embedded font, or an application-specific print setting. Likewise, if one computer fails but another computer on the same network prints successfully, do not reset the printer first. The stronger evidence points to the first computer.
How to verify success: You should be able to say which side of the system is still working. A useful diagnosis sounds like “the printer can print its own test page, but Windows jobs remain stuck,” not merely “it still doesn’t work.” That narrower statement saves time.
Common mistake: Performing several changes at once. If you restart the router, reinstall the printer, update the driver, replace the cartridge, and clear the queue before testing again, you will not know which action mattered. Change one layer at a time and test.
2. Check Power, Error Lights, Doors, Trays, and Supplies
Before troubleshooting software, look at the printer as a machine. Confirm that it is actually awake rather than in a deep sleep or error state. Check the display or status LEDs for a specific message. Open and close every user-accessible door that you recently touched. Reseat the paper tray. Look for protective packaging, a partly closed rear access panel, a waste-toner warning, an empty ink tank, or a cartridge that is not fully latched.
Printers often refuse to process a job when a safety interlock reports that a cover is open, even if the cover appears almost closed. A paper-size mismatch can also stop a job while making the device look “ready” from the computer. For example, the application may request Letter while the printer thinks the loaded tray contains A4, or a photo-paper setting may be paired with plain paper. Check both the physical tray guides and the paper size selected on the printer’s panel.
If you recently installed ink or toner, verify that all shipping seals and vent tapes were removed according to the manual. Do not peel labels or puncture vents that the manufacturer does not instruct you to remove. A cartridge can be physically present but unable to deliver ink if a required vent remains sealed. On the other hand, improvised modifications can cause leaks, contamination, or permanent errors.
For laser printers, do not touch the imaging drum surface. Oils and scratches can create repeating marks. For inkjets, do not manually force the print-head carriage if the printer is powered and controlling it. If you need to inspect a paper path, switch the printer off and follow the manufacturer’s jam-clearing instructions so motors and gears are not fighting your movement.
Expected result: The printer should reach a normal ready state without a warning related to covers, paper, ink, toner, or maintenance. If it cannot, solve that physical warning first. Computer troubleshooting will not make a printer ignore a real hardware fault.
3. Power-Cycle the Printer Correctly
A restart is useful because printers contain embedded computers, network interfaces, job memory, and sensors that can become stuck. However, a proper power cycle is more informative than repeatedly tapping the power button. Save or cancel active work first. Turn the printer off using its normal power control when possible. If the manufacturer permits it, disconnect power for about 30 seconds, then reconnect and allow the printer to complete its startup sequence before sending a new test job.
Microsoft’s current Windows printer guidance explicitly recommends turning the printer off, unplugging it, waiting 30 seconds, plugging it back in, and turning it on as an early troubleshooting step. The reason is not that 30 seconds is magical; it gives the device time to clear temporary state and fully restart hardware and network components.
Do not immediately send five copies of the same document after the printer comes back. Start with a single one-page test. If the job works, the issue may have been a temporary firmware, memory, or connection state. If it fails in the exact same way, you have learned that a simple restart is insufficient and can move to the next layer.
If the printer freezes during startup: Disconnect optional USB devices, memory cards, or accessories that are not required for basic printing, then restart again. A persistent startup error should be investigated using the exact code shown on the printer and the manufacturer’s support documentation.
Common mistake: Power-cycling the printer while a computer queue continues sending the same corrupted or stuck job. Clear or pause the queue before retesting if the printer repeatedly locks up as soon as it reconnects.
4. Decide Whether the Problem Is USB, Wi-Fi, Ethernet, or the Printer Itself
Connection problems become much easier when you deliberately change only the transport. If the printer normally uses Wi-Fi and supports USB, a temporary direct USB test can tell you whether the print engine and computer driver basically work. If printing succeeds over USB but fails over Wi-Fi, the problem is not likely to be the ink system or paper feed. Focus on the network. Conversely, if USB and network jobs both fail while the printer’s internal test page works, look more closely at the operating-system queue or driver.
With USB, connect directly to the computer rather than through an unpowered hub during troubleshooting. Try a known-good cable and another port. On a Mac, Apple suggests checking System Information to see whether a USB-connected printer appears as an active hardware connection. On Windows, a device that repeatedly connects and disconnects may indicate a damaged cable, loose port, power problem, or driver issue.
With Ethernet, check link lights on the printer and router or switch if they are available. A valid cable connection does not guarantee that the printer has a usable IP address, but it confirms the physical network path. With Wi-Fi, verify that the printer and computer are on the intended network. Guest networks can isolate devices from one another. Mesh systems, multiple SSIDs, and 2.4 GHz versus 5 GHz support can also complicate discovery. Some older printers support only 2.4 GHz Wi-Fi even though the computer connects to a dual-band network.
How to verify: Print or view the printer’s network configuration page. Record the network name, connection state, and IP address. An address beginning with 169.254 on many networks can indicate that the printer did not receive a normal address from the router. Compare the printer’s network with the computer’s network before assuming the driver is at fault.
5. Fix a Printer That Shows “Offline” in Windows 11
When Windows says a printer is offline, the label describes the operating system’s current relationship with that printer. It does not necessarily mean the device has no power. Start by confirming the printer is on and connected to the same network as the computer. Then open Settings > Bluetooth & devices > Printers & scanners, select the printer, and open its print queue.
Cancel old jobs that no longer matter. A failed job can block everything behind it. If Windows is managing the default printer automatically, verify that you are actually printing to the device you intend to use. In homes and offices with old printer entries, PDF printers, label printers, and previous installations, it is surprisingly easy to send a job to the wrong queue.
On current Windows 11 systems, Microsoft recommends starting with the automated printer troubleshooter in the Get Help app. Use it before deeper manual intervention because it can detect common configuration and service problems. If that does not solve the issue, restart the Print Spooler service. Search for Services, find Print Spooler, right-click it, and choose Restart. This restarts the Windows service that manages print jobs.
If the printer remains offline, remove and re-add it from Printers & scanners. Re-adding creates a fresh device relationship and often clears stale ports or queue configuration. Do not delete a working printer from every computer on the network just because one PC has a problem. Fix the affected computer first.
Important 2026 note: Microsoft ended free Windows 10 software updates, technical assistance, and security fixes on October 14, 2025. A printer may still work on Windows 10, but current troubleshooting and driver support increasingly center on Windows 11. If you are troubleshooting an old system, check both the printer manufacturer’s compatibility page and Microsoft’s current support status.
Success check: The printer should appear ready, the queue should accept a one-page job, and the job should leave the queue after printing. If the queue says the job was sent but the printer never reacts, continue with network and port checks.
6. Clear a Stuck Windows Print Queue Without Creating More Problems
A stuck queue can look like a printer failure because every new job simply waits behind the broken one. First try the normal method: open the printer queue and cancel all jobs. Wait a moment for the list to clear. If a job refuses to disappear, restart the Print Spooler service and check again.
Microsoft also documents a deeper spooler reset for persistent cases. The process stops the Print Spooler service, clears files from the Windows spool directory, and starts the service again. This should be used carefully because deleting spool files removes pending print jobs. Do not perform it on a shared workstation where another person may be relying on the queue without first confirming what will be lost.
After clearing the queue, test with a simple one-page document. If that prints, the previous job may have been corrupted or too complex for the current driver. Try recreating the original document, exporting it to a new PDF, or printing a smaller range of pages. For a PDF that fails repeatedly, try printing a single page that contains mostly text. If simple pages work and image-heavy pages do not, the issue may involve the PDF renderer, memory, or driver.
Common mistake: Clicking Print repeatedly while the first job is already stuck. This produces a queue full of duplicates, making recovery slower and sometimes causing the printer to eject several copies after the problem is resolved.
Alternative test: Print from another application. If Notepad or a browser prints while one specific program does not, troubleshoot the application and its print settings rather than reinstalling the whole printer.
7. Troubleshoot Printing Problems on macOS
Apple’s current guidance follows a similar isolation process. Confirm the printer is powered, has paper and ink or toner, and is connected. For a network printer, make sure the Mac and printer are still on the same network. Open the printer’s queue through Print Centre and look for a paused queue or a job with an error. Resume the printer if it is paused, or delete the single job that is blocking the rest.
If the queue appears normal, try printing from another application. This distinguishes a general printer problem from an app-specific problem. If the printer no longer appears correctly in macOS, remove it and add it again in System Settings > Printers & Scanners. When possible, macOS uses AirPrint automatically for supported printers. For models that require manufacturer software, verify that the installed software is current and compatible with your macOS version.
Apple also supports adding a network printer by IP address when discovery fails. This can be useful in networks where automatic discovery is blocked or unreliable, but you must know the correct printer IP and choose the appropriate protocol or driver. If the IP address changes later because the router assigns a different one, the manually configured queue can stop working. In that case, consider a DHCP reservation in the router so the printer keeps the same address.
As a last-resort software step, macOS includes Reset Printing System. Apple warns that this removes all printers from the printer list, deletes information about completed print jobs, and deletes printer presets. Use it only after simpler fixes fail. After the reset, add your printers again and recreate any custom presets you need.
Success check: A new queue should print a simple page. If a newly created queue works while the old queue did not, delete the broken queue and keep the working one.
8. Fix a Wi-Fi Printer That Keeps Disappearing
A wireless printer that works intermittently is often a network-stability problem rather than a printing problem. Begin by checking the printer’s signal strength and IP address. If the printer is far from the access point, hidden behind metal furniture, placed near dense appliances, or sitting in an area with weak coverage, move it temporarily closer to the router and test again.
Next, check whether the printer’s IP address changes after a restart. Many home routers use DHCP to assign addresses dynamically. Normally device discovery handles those changes, but some installed printer ports refer to a specific IP. If the printer receives a different address, the computer may keep sending jobs to the old one. A DHCP reservation in your router can stabilize the address without manually hard-coding network settings into the printer.
Also look at network isolation. A guest Wi-Fi network may allow internet access but block communication between local devices. A printer connected to the main network cannot necessarily be discovered from a laptop on the guest network. Some mesh routers combine bands under one network name, while older printers may have limitations around 5 GHz or WPA3-only configurations. Follow the printer manufacturer’s networking requirements rather than forcing settings it does not support.
Restarting the router is a reasonable test only after you confirm that other network devices are also behaving strangely. If every other device is stable and only the printer disappears, repeatedly rebooting the entire network masks the real issue.
Diagnostic shortcut: If Ethernet printing works reliably but Wi-Fi does not, use Ethernet permanently when practical. A wired connection eliminates radio interference and is often the simplest solution for a stationary printer.
9. Fix Driver and Compatibility Problems
Drivers translate print jobs into instructions the printer understands. A driver mismatch can produce symptoms that look mechanical: blank output, wrong paper sizes, missing duplex options, distorted graphics, or jobs that never leave the queue. If the printer began failing immediately after an operating-system update or driver change, compatibility should move higher on your list.
On Windows 11, first allow Windows to install its recommended printer driver. If important features are missing or the device still fails, check the printer manufacturer’s official support page for your exact model and Windows version. Avoid generic “driver download” websites. Printer drivers run with meaningful system access, and unofficial bundles can be outdated, modified, or simply wrong.
Microsoft also documents driver rollback when a problem begins after a recent driver update. In Device Manager, the Roll Back Driver option may be available in the printer or print-queue device properties. Use rollback only when you have a clear before-and-after relationship and understand that the older driver may have its own limitations.
On macOS, many supported printers work through AirPrint without a separate manufacturer driver. If the printer is added with the wrong software, remove it and add it again, selecting AirPrint when available. If advanced functions such as finishing, secure printing, special trays, or professional color controls are missing, manufacturer software may still be required.
How to verify: After a driver change, print a basic black-text page, then a color page, then a duplex page if supported. Do not assume the driver is correct merely because the printer icon appears.
10. Diagnose Blank Pages, Missing Colors, and Horizontal Bands on an Inkjet
 An inkjet cartridge. Image released to the public domain by Julo via Wikimedia Commons.
If an inkjet feeds paper but prints blank pages, faint text, missing colors, or horizontal gaps, first check the ink levels and cartridge or tank status. Then print the printer’s built-in nozzle-check pattern. The nozzle check is more useful than repeatedly printing documents because it isolates the print system from application formatting and shows which color channels are missing.
Epson’s current documentation, for example, instructs users to print a nozzle check and inspect the pattern for gaps. If the pattern is faint or missing lines, the manufacturer’s cleaning utility can be used. Epson also warns against endless cleaning cycles: for a current model, its guidance says that after repeated cleaning attempts, users may need to wait before trying again, and more aggressive maintenance such as Power Cleaning has specific conditions. Other manufacturers use different names and limits, so follow the instructions for your exact printer.
Cleaning consumes ink and sends that ink into a waste-ink system. More cleaning is not automatically better. If a cartridge is empty, improperly vented, incorrectly seated, or electronically rejected, head cleaning cannot create ink that is not reaching the print head. Likewise, if every nozzle is perfect on the test pattern but your document still prints incorrectly, the problem is likely not a clogged head.
For tank printers, check that shipping valves, transport locks, and tank vents are in the correct operating position. If the printer was moved recently, follow the manufacturer’s transport procedure before assuming the head failed.
Success check: The nozzle-check pattern should show continuous lines or blocks for all expected colors. Once the nozzle pattern is correct, print a normal document again. If the document remains wrong, investigate driver settings, color mode, media selection, or the application.
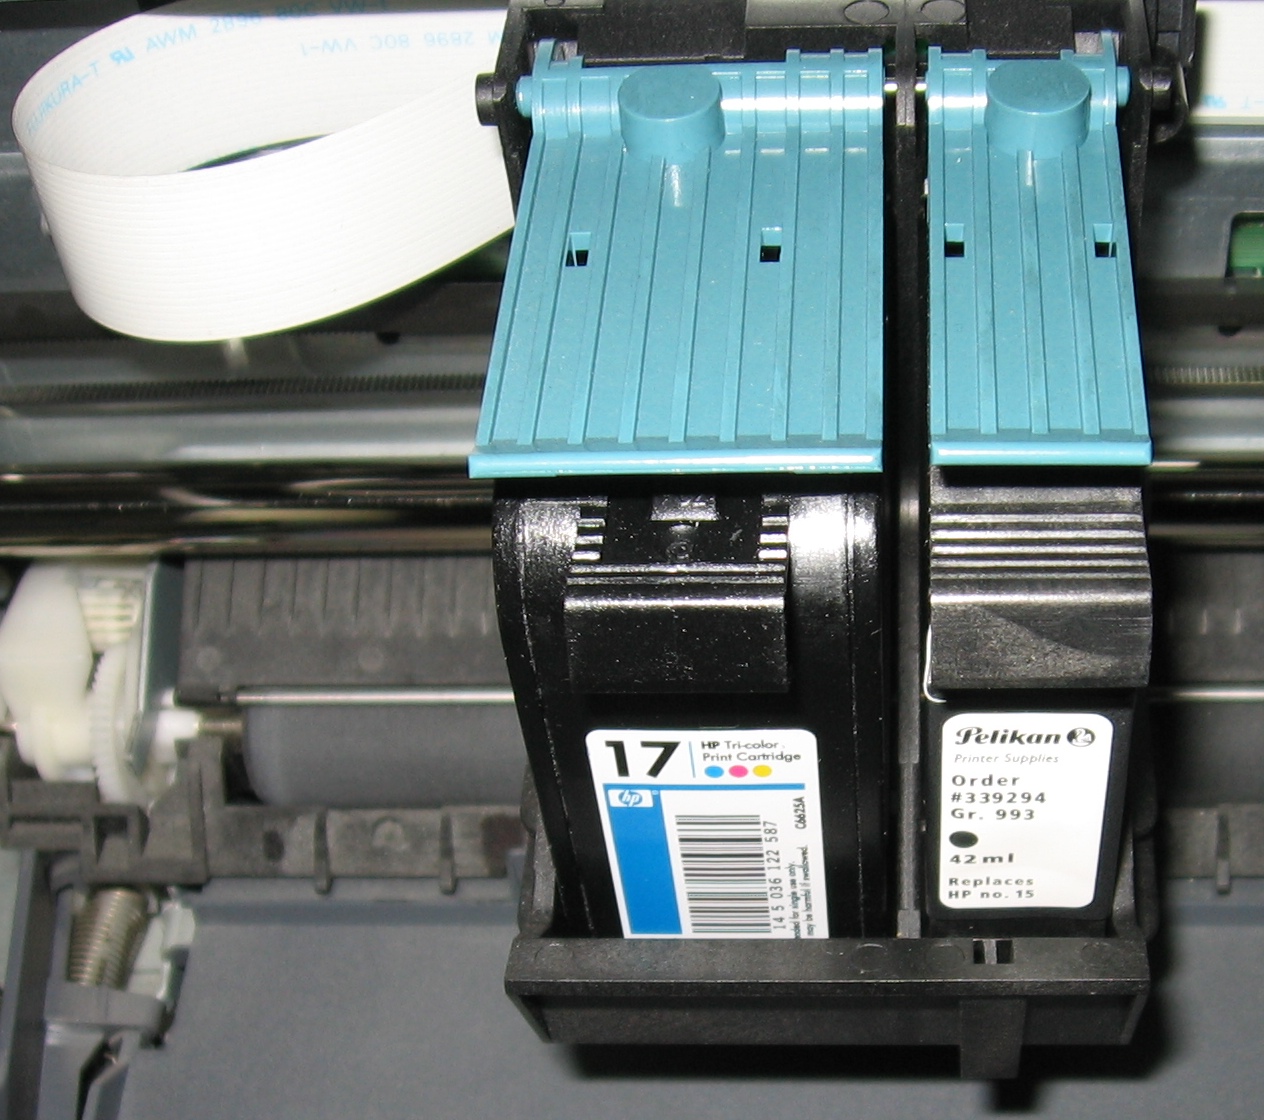 Inside an inkjet printer with cartridges installed. Image released to the public domain by Julo via Wikimedia Commons.
11. Diagnose Faded, Gray, Streaked, or Repeating Marks on a Laser Printer
Laser-print problems have different causes from inkjet problems. Faded output can result from low toner, an incorrect media or density setting, a worn imaging component, transfer problems, or environmental conditions. Repeating marks at regular intervals often point to a rotating component such as a drum, roller, or fuser because the defect repeats once per rotation.
Start with the printer’s internal configuration or test page. If the defect appears there, the computer is not the cause. Remove and inspect only the user-serviceable consumables described in the manual. Do not expose a photosensitive drum to strong light for longer than necessary, and do not touch its surface. If toner has leaked, avoid blowing it around with compressed air unless the manufacturer explicitly recommends a safe procedure. Fine toner particles are not ordinary dust.
Check that the paper type setting matches the actual paper. Laser printers adjust heat and speed for different media. Heavy stock printed with plain-paper settings can produce poor fusing, while unsupported glossy or coated media can create serious problems. Never use inkjet-only media in a laser printer unless the paper manufacturer explicitly rates it for laser heat.
If the print rubs off the page, stop using the printer until you confirm the paper and fuser-related settings are correct. If the same repeating defect persists after replacing an end-of-life user-replaceable cartridge or drum, the printer may need professional service.
12. Clear Paper Jams Without Tearing Paper or Damaging Sensors
A jam is not simply “paper stuck somewhere.” The printer tracks paper movement through sensors, rollers, and timing. A torn scrap left behind can keep the jam message active even after most of the sheet is removed. Start by stopping the job and following the exact paper-path diagram shown on the printer or in its manual. Power the printer down if the instructions tell you to do so.
Remove accessible trays and open the intended jam-access doors. Pull paper slowly in the direction recommended by the manufacturer, using both hands when possible. Avoid ripping the sheet. If a small corner tears off, use a flashlight to inspect for scraps. Do not reach deep into a hot laser-printer fuser area until it has cooled and the manual says the area is safe to access.
After clearing the paper, inspect the tray. Fan the stack, remove curled or damp sheets, and adjust the guides so they touch the paper lightly without bending it. Do not load above the tray’s maximum line. Confirm that the paper size and type are supported. Very thin, heavily curled, glossy, perforated, or previously folded paper is more likely to misfeed if the printer was not designed for it.
If the same printer jams repeatedly at the same physical location, pay attention to where the leading edge stops. That location can help identify a worn pickup roller, dirty separation pad, damaged duplex path, broken paper guide, or obstruction. Repeated jams should not be “fixed” by pulling harder.
Success check: Print ten simple pages from the same tray. If the printer feeds all ten reliably, then test duplex printing separately. A printer that passes single-sided printing but jams in duplex has narrowed the problem to a different paper path.
13. Fix Paper Feeding Problems When There Is No Visible Jam
Sometimes a printer says “out of paper” while the tray is full, grabs several sheets at once, or makes pickup noises without moving paper. Start by removing the stack and checking the paper condition. Humidity can make sheets stick together; very dry paper can build static. Store paper flat in its original wrapping until needed, especially in climates with large humidity swings.
Adjust the tray guides to the correct size. Guides that are too tight can bow the stack, while loose guides let sheets enter crooked. Check that the tray extension, bypass feed, or rear support is positioned as required for the paper size. If the printer has multiple trays, confirm the driver is not requesting a different tray.
Pickup rollers become smooth or contaminated over time. Many manufacturers provide a cleaning procedure using a lint-free cloth and a specified liquid or dry method. Do not improvise with household solvents, oils, or abrasive cleaners. If the roller has a replaceable maintenance interval, replacement may be more effective than repeated cleaning.
For labels, envelopes, cardstock, and photo media, use only a feed path rated for that material. Some printers require a rear or manual feed so the media bends less. Do not run damaged labels through a printer: a loose adhesive label inside the paper path can create a much larger repair.
14. Fix Printing That Is Extremely Slow
Slow printing can be normal when the job is demanding. High-resolution photo mode, borderless printing, duplexing, large PDFs, and complex graphics all require more processing than a one-page text document. First compare like with like. Print a simple text page using standard quality and plain-paper settings. If that page is fast but a photo is slow, the printer may be functioning normally.
Microsoft’s current Windows guidance recommends checking print quality and paper settings because unnecessarily high quality can reduce speed. It also suggests testing a wired connection when Wi-Fi is suspected, updating printer firmware, and checking the driver. Those are sensible isolation steps because they separate rendering time from network delay and device processing.
If the first page takes a long time but later pages are fast, the printer may be warming up, waking from sleep, negotiating a network connection, or processing the job. If every page pauses for an unusually long time, check the driver, memory-heavy settings, bidirectional communication, and network stability.
For large PDFs, try printing a small page range. If pages 1–10 print but the full 300-page file fails or stalls, split the job into sections or optimize the PDF. A printer with limited memory can struggle with huge rasterized pages even when the computer has plenty of RAM.
15. Diagnose Wrong Colors, Incorrect Page Size, Cropping, and Margin Problems
When a printer works mechanically but the output is the wrong size or color, the problem is usually in settings rather than hardware. Compare the document page size, print-dialog paper size, printer tray size, and physical paper. All four should agree unless you intentionally scale the document.
For unexpected cropping, look for “Actual size,” “Fit,” “Shrink oversized pages,” borderless mode, and custom scale. A PDF created as A4 can be slightly cropped when printed at 100 percent on Letter paper, and the reverse is also true. Borderless printing enlarges the image slightly on many printers so ink reaches the edge; that intentional enlargement can crop a small amount of the original image.
For color, confirm whether the application or printer driver is managing color. Professional photo workflows can produce poor results when both the application and driver apply independent color corrections. For ordinary office printing, reset experimental color settings to defaults before troubleshooting further.
If only one application prints with wrong colors, compare its settings with a second application. If every application prints the same incorrect color and the nozzle check is also wrong, return to the ink or print-head troubleshooting path.
16. Separate an Application Problem From a Printer Problem
A printer can be completely healthy while one program refuses to print. This is especially common with complex PDFs, web pages, spreadsheets with custom scaling, and documents containing unusual fonts or graphics. The fastest test is to print from another application.
If a browser prints but a word processor does not, check that program’s selected printer, page setup, permissions, and updates. If one PDF fails, create a new PDF from the source document or try another trusted PDF viewer. Print one page at a time to identify whether a specific page triggers the problem.
When a document causes the printer to emit pages of symbols or random characters, stop the job. That can indicate a driver or language mismatch, corrupted print data, or a print file being sent in a format the queue is not interpreting correctly. Clear the queue before the printer consumes a ream of paper.
Useful test: Print the same document to a PDF file. If the PDF output is already wrong before it ever reaches the printer, fix the document or application first.
17. Use Firmware Updates Carefully
Printer firmware can fix bugs, security issues, network problems, and compatibility problems. It can also change behavior. Check the manufacturer’s official support page for your exact model and read the release notes when available. Avoid interrupting power during a firmware update, because an incomplete update can leave the printer unusable.
Do not update firmware as the first response to a paper jam, empty cartridge, or visibly damaged roller. Firmware is most relevant when the problem involves communication, known bugs, new operating-system compatibility, security, or features that the manufacturer specifically identifies.
In a small office, document the printer’s current firmware version and configuration before changing it. If the printer uses static addressing, scan-to-email settings, address books, secure-print PINs, or custom finishing options, back up configuration data when the manufacturer provides that option.
18. Know When Not to Keep Troubleshooting
Stop and seek qualified service when you smell burning, see smoke, hear grinding that continues after a jam is cleared, find melted plastic, see toner or ink leaking into areas not intended for user access, encounter exposed electrical components, or receive a persistent hardware service code that the manual identifies as non-user-serviceable. Unplug the device if there is a genuine electrical or fire concern.
Also consider the economics. An old consumer inkjet with a failed main board or print head may cost more to repair than replace, while a business laser printer with replaceable maintenance kits may be worth servicing. Compare the printer’s age, duty cycle, supply costs, warranty, available parts, and the value of features you actually use.
Before replacing a printer, confirm that the failure really follows the printer. Test another computer or connection method, print the internal test page, and document the exact error. This avoids throwing away a working device because of a broken Wi-Fi configuration or damaged USB cable.
A Practical 15-Minute Printer Diagnostic Workflow
When you need a quick process, use the following sequence:
- Read the printer display. Resolve paper, door, ink, toner, or maintenance warnings first.
- Print an internal test page. If it fails, stay on the hardware side. If it works, move to computer and network troubleshooting.
- Power-cycle once. Restart the printer cleanly and send only one test job.
- Check the connection. Verify USB, Ethernet, or Wi-Fi and confirm the computer and printer are on the same intended network.
- Inspect the print queue. Remove stuck jobs and confirm you selected the correct printer.
- Try another application. Use a simple one-page document.
- Try another device. If another computer prints, focus on the first computer.
- Refresh the queue or driver. Restart the Windows Print Spooler, or remove and re-add the printer on Windows or macOS.
- Run printer-specific maintenance only if the output itself is defective. Use nozzle checks, cleaning cycles, or manufacturer diagnostics as appropriate.
- Stop if the evidence points to a hardware fault. Do not continue forcing jammed mechanisms or running repeated cleaning cycles without a reason.
This order works because every step either fixes a low-risk problem or provides evidence about the next layer. It prevents the common pattern of changing settings blindly until the printer eventually works, only to fail again because the real cause was never identified.
Troubleshooting by Symptom
The printer is “ready,” but nothing prints
Check whether the job appears in the queue. If no job appears, confirm the application selected the right printer. If the job appears and remains, clear the queue and restart the spooler or print service. If the job disappears immediately but the printer does nothing, verify the connection and printer port or recreate the printer queue.
The printer says offline
Confirm power, network, and IP address. On Windows 11, use the Get Help printer troubleshooter, verify the default printer, inspect the queue, restart the Print Spooler, and remove/re-add the printer if necessary. On macOS, check the queue, network, and printer entry, then remove and add the printer again before resorting to Reset Printing System.
Pages are blank
Print an internal nozzle check or printer test page. If that page is blank, inspect ink, toner, cartridges, print-head status, and shipping seals. If the internal page is correct but computer documents are blank, test another application and driver.
Pages are streaked
For inkjets, run a nozzle check and use the manufacturer’s cleaning utility only when the pattern shows missing nozzles. For laser printers, inspect user-serviceable toner and imaging components and look for repeating defects.
Paper keeps jamming
Clear the entire paper path carefully, remove scraps, load supported dry paper, set the tray guides correctly, and test single-sided and duplex printing separately. Repeated jams at the same point suggest a roller, guide, sensor, duplex path, or mechanical service issue.
The printer works by USB but not Wi-Fi
The print engine and basic driver are probably functional. Focus on Wi-Fi signal, network name, guest isolation, IP address changes, router settings, and printer network setup.
The printer works from one computer but not another
Leave the printer alone. Compare the failing computer’s queue, driver, network, permissions, and application settings with the working computer.
The printer is slow only with photos or PDFs
Compare standard-quality text printing with the slow job. Large image-heavy documents, high-resolution settings, borderless printing, and network transfer can add substantial processing time. Print a smaller page range and reduce unnecessary quality settings.
Frequently Asked Questions
Should I reinstall the printer driver first?
No. Reinstalling can help when a driver or queue is corrupted, but it should not be the first step for every problem. First prove that the printer itself can print an internal test page and that the connection is working. Reinstalling software cannot fix an empty toner cartridge, a paper jam, or a clogged ink channel.
Why does my printer say offline when it is turned on?
The computer may be unable to communicate with the printer even though the printer has power. Common causes include a changed Wi-Fi network, a new IP address, a stale queue, a paused print service, the wrong default printer, or local network isolation.
Why is one print job blocking everything?
Print queues normally process jobs in order. A corrupted or stalled first job can prevent later jobs from reaching the printer. Cancel the problem job, then restart the print service if it refuses to clear.
How many times should I run inkjet head cleaning?
Follow the printer manufacturer’s instructions. Cleaning uses ink and fills the waste-ink system, so endless cycles are not good troubleshooting. Use a nozzle check to decide whether cleaning is actually needed, and observe any waiting periods or limits specified for your model.
Can I use compressed air inside a printer?
Only if the manufacturer specifically recommends it for the area you are cleaning. Blowing toner, paper dust, or debris deeper into sensors and optics can make a problem worse. Use the cleaning method specified in the manual.
Should a Wi-Fi printer have a fixed IP address?
It can help in environments where computers or print servers refer to the printer by IP address. A router-side DHCP reservation is often easier to manage than manually setting a static address on the printer because it keeps addressing centralized.
Why does my printer keep asking for a different paper size?
The document, application print dialog, driver, and physical tray may disagree. Check the requested size and the size registered on the printer. A4 and Letter are close enough to confuse users but different enough to trigger size warnings or cropping.
When should I reset the macOS printing system?
Use it only after simpler steps fail. Apple states that the reset removes all printers, information about completed jobs, and printer presets. It is a system-wide cleanup, not a routine first step.
Final Checklist Before You Declare the Printer Fixed
- The printer starts with no unresolved hardware warning.
- An internal printer test or configuration page prints correctly.
- The computer sees the printer on the intended USB or network connection.
- The print queue accepts and completes a simple one-page job.
- A second application can print successfully.
- Color, black text, page size, and margins look correct.
- Five to ten consecutive pages feed without a jam.
- Duplex printing works separately if you use it.
- The printer remains reachable after both the printer and computer restart.
- You know what caused the failure or at least which layer was corrected.
Conclusion: Diagnose the Layer, Not the Symptom
The most important printer-troubleshooting skill is learning to isolate the failure. Start with the printer’s own test page, then move outward through paper and supplies, connection, network, queue, driver, and application. That sequence turns a vague “printer not working” problem into a small set of testable possibilities.
Your first action should be simple: read the printer’s display and print an internal test page. The biggest mistake to avoid is changing multiple things at once. A careful, one-layer-at-a-time process usually reaches the real cause faster and leaves you with a fix you can repeat the next time the problem appears.
Sources and Further Reading
- Microsoft Support: Fix printer connection and printing problems in Windows
- Microsoft Support: Troubleshooting offline printer problems in Windows
- Microsoft Support: Fix printer driver compatibility issues in Windows
- Apple Support: Solve printing problems on Mac
- Apple Support: Reset the printing system on Mac
- Epson Support: Checking nozzles and cleaning the print head