

Learn how to read a sewing pattern, choose the right size, prepare fabric, understand grainlines and markings, cut accurately, assemble a simple garment, troubleshoot fit and construction problems, and finish your first pattern-based sewing project with confidence.]
If you can operate a basic sewing machine but a commercial sewing pattern still looks like a sheet of mysterious lines, symbols, numbers, and tiny diagrams, the problem is probably not your sewing skill. A pattern is a technical map. Before you sew a single seam, it asks you to make decisions about size, fabric, grain, layout, markings, seam allowance, construction order, and fit. Beginners often get into trouble because they treat the pattern as if it were only a paper shape to cut around. It is much more than that.
This guide shows you how to read a sewing pattern and turn it into a finished first garment without relying on guesswork. The goal is not to memorize every symbol used by every pattern company. The goal is to understand the logic that most modern patterns share, build a repeatable workflow, and know what to check when something does not look right. The same habits apply whether you are using a folded tissue pattern from a store, a large-format printed independent pattern, or a tiled PDF you assemble at home.
For a first garment, choose a simple woven project with few pieces and little fitting complexity: an elastic-waist skirt, loose pajama pants, an easy pull-on top, or another design marked for beginners. Avoid making your first project a fitted blazer, tailored trousers, a lined coat, a bias-cut satin dress, or anything with many closures. A simple pattern gives you room to learn the language of sewing without asking you to master advanced construction at the same time.
 A sewing pattern is a technical template for turning flat fabric into a three-dimensional garment. Image: Henna/Wikimedia Commons, CC BY-SA 2.5.
1. Start With the Pattern Envelope or Information Page
Before you open the tissue, print the PDF, or buy fabric, read the information that comes before the actual pattern pieces. On a traditional commercial pattern, much of this information appears on the back of the envelope. On an independent PDF, it is usually in the first pages of the instructions. This section tells you what the project requires and whether the pattern is a good match for your current skills.
Look for the pattern’s difficulty level, suggested fabrics, notions, body-size chart, finished-garment measurements, fabric requirements, line drawings, and the list of pattern pieces. If the garment has several views, such as three sleeve lengths or two skirt styles, identify exactly which view you are making. Then circle, highlight, or write down the pieces and notions that belong to that view. This one small step prevents a common beginner mistake: cutting or sewing parts for the wrong version.
The line drawing is more useful than the fashion photograph. A styled photo can hide seams, darts, closures, pockets, or construction details. A technical line drawing reveals them. Study the front and back. Ask: Where does the garment open? Does it pull over the head? Is there a zipper? Are there darts? Is the waist shaped or elastic? Are there sleeves? Are the pockets separate pieces? Understanding the finished structure makes the later instructions far easier to follow.
What to verify before continuing: You should be able to name the view you are making, identify the pieces required, and list the fabric and notions you need. If you cannot, do not cut anything yet. Go back to the pattern key and separate the instructions for your chosen version from optional variations.
2. Choose a Size From Body Measurements, Not Store Clothing
Pattern sizing and ready-to-wear sizing are not interchangeable. A person who buys one size in a retail shop may need a completely different number on a sewing pattern. Pattern companies publish their own body-measurement charts, and those charts are the correct starting point.
Use a flexible measuring tape and measure over the undergarments or thin clothing you expect to wear with the garment. Keep the tape level with the floor and snug without pulling it tight. For most garments, the most important measurements are the full bust or chest, natural waist, and fullest hip. Depending on the project, you may also need back waist length, inseam, shoulder width, high bust, bicep, or finished length.
For a skirt or loose pants, the hip measurement often controls size selection because the garment must pass over the widest part of the lower body. For a fitted top or dress, the bust or high-bust measurement may matter more, depending on the pattern’s fitting method. Always follow the size-selection guidance supplied with the specific pattern instead of applying a universal rule.
Utah State University Extension’s sewing resources emphasize careful body measurement and recommend using a good tape measure, avoiding bulky clothing, standing straight, and keeping the tape snug rather than pinching. Those basics sound simple, but a one-inch measuring error can send you into the wrong size range before you have even opened the pattern.
Body measurements and finished-garment measurements are different
The body-size chart describes the person. Finished-garment measurements describe the sewn item. The difference between the two includes ease. Wearing ease provides room to breathe, sit, reach, and move. Design ease is extra room intentionally added for style, such as an oversized shirt or full skirt. A knit garment may use very little ease or even negative ease because the fabric stretches.
If your body measurement falls between two sizes, check the finished-garment measurements and think about how you want the item to fit. Multi-size patterns often allow you to grade from one size at the bust to another at the waist or hip. That is normal. Bodies are not standardized columns, and you do not need to match one size number everywhere.
Common mistake: choosing a larger size "just to be safe." Oversizing can create low armholes, dropped shoulders, excessive neckline width, and distorted proportions that are harder to correct than a simple side-seam adjustment. Choose from measurements, then use fitting adjustments deliberately.
3. Read the Fabric Recommendations as Technical Requirements
When a pattern says "lightweight woven cotton, linen, chambray, or rayon" or "two-way stretch knit with at least 40% stretch," those words are not decorative suggestions. Fabric structure changes how a pattern behaves.
A crisp cotton holds shape. A fluid rayon drapes. Linen may soften with washing but can still have body. A stable woven does not stretch much across the grain, while jersey may stretch significantly. A design drafted for stretch fabric may be impossible to put on if you substitute a non-stretch woven. A design that depends on crisp structure may collapse if made in very limp fabric.
For a first garment, choose a medium-light woven cotton, cotton-linen blend, chambray, or another stable fabric that presses well and does not slide around the table. Avoid very stretchy knits, slippery satin, velvet, sequins, loose open weaves, and fabrics with extreme directional nap until you understand layout and grain more comfortably.
Check fabric width before buying yardage
Patterns list different fabric requirements for different widths because a 60-inch-wide fabric can hold pattern pieces differently from a 45-inch-wide fabric. Measure or confirm the actual usable width, excluding unusable selvage if necessary. If your fabric is narrower than the listed width, buy extra rather than assuming the printed yardage will work.
Directional prints, nap, and one-way designs need more fabric
If flowers, animals, words, stripes, velvet pile, corduroy ribs, or another surface pattern must all face the same direction, every major pattern piece may need to be oriented consistently. That removes some of the space-saving options available with nondirectional fabric. Use the "with nap" or one-way layout when the pattern provides one.
Quick success check: before buying fabric, you should know whether it is woven or knit, whether the design requires stretch, whether the print or pile has a direction, and whether the width matches the yardage chart.
4. Prewash and Press Fabric Before Cutting
Many washable garment fabrics should be prewashed using the care method you plan to use after the garment is finished. This allows normal shrinkage, relaxation, or dye release to happen before you invest hours in cutting and sewing. Utah State University Extension sewing instructions routinely recommend washing suitable fabrics before cutting to eliminate shrinkage and remove excess dye, then straightening and pressing the fabric.
Do not automatically wash materials that require special handling. Some dry-clean-only fabrics, coated textiles, specialty woolens, structured interfacings, or delicate materials may require another preparation method. Follow the fabric manufacturer’s care guidance and the pattern instructions.
After laundering, press the fabric flat. Do not confuse pressing with aggressive back-and-forth ironing. Lift and place the iron where possible, especially on fabrics that distort easily. Wrinkles can change the shape of a pattern piece while you cut. A seemingly small wrinkle through a curved side seam can create a noticeable mismatch later.
If the fabric has a clear right and wrong side, decide which is which before layout. Mark the wrong side lightly with removable chalk or a small piece of painter’s tape near the edge if they look nearly identical. Consistent right-side identification will save time when instructions tell you to place "right sides together."
5. Understand Selvage, Lengthwise Grain, Crosswise Grain, and Bias
Grain is one of the most important ideas in garment sewing because the same fabric behaves differently depending on direction.
The selvage is the finished lengthwise edge produced during manufacturing. The lengthwise grain runs parallel to the selvage. The crosswise grain runs from one selvage to the other. The true bias lies approximately 45 degrees to the straight grain and usually has more mechanical give in woven fabric.
Utah State University Extension notes that the lengthwise grain is parallel to the selvage and usually has little give, while the crosswise grain has somewhat more give. Pattern designers use these properties intentionally. A trouser leg or skirt panel cut correctly on grain hangs more predictably. A piece cut accidentally off grain can twist, ripple, or pull even if every seam is sewn accurately.
How to align a grainline arrow
Most pattern pieces have a long arrow marked "grainline." Unless your instructions specify otherwise, that arrow should be parallel to the selvage. To place it accurately:
- Lay the fabric flat without stretching it.
- Place the pattern piece roughly where the cutting layout shows.
- Measure from one end of the printed grainline to the selvage.
- Measure from the other end of the same grainline to the same selvage.
- Pivot the pattern until both measurements are equal.
- Pin or weight the pattern so it cannot shift.
This equal-distance method is also taught in Utah State University Extension sewing materials. It is more reliable than eyeballing the arrow.
If the pattern piece says "place on fold": the marked edge must sit exactly on the folded fabric edge. Do not cut that folded edge unless the instructions explicitly tell you to do so. When opened, the resulting fabric piece becomes symmetrical and twice the width of the paper pattern half.
6. Decode the Main Pattern Symbols Before You Cut
Pattern symbols vary somewhat by brand, so always use the legend printed in your specific instructions. Still, several markings appear so often that beginners should recognize them immediately.
Cutting lines
These outline the size you will cut. On a multi-size pattern, several outlines may overlap. Trace your chosen size with a highlighter or washable marker on the paper—not on the fabric—if following nested lines is difficult. Check curves carefully around the armhole, crotch, neckline, and hip where size lines often cross or nearly touch.
Grainline arrows
These control orientation on the fabric, as described above. Never rotate a piece simply because it fits a scrap more efficiently unless the pattern specifically allows a different orientation.
Notches
Notches are small triangles, diamonds, or short marks along seam edges. They help you match the correct sections of two pieces. One notch may identify one seam position and two or three notches another. Their exact meaning is pattern-specific, but their purpose is alignment.
Dots, circles, squares, and other placement marks
These can indicate where a pocket begins, where gathering stops, where a sleeve cap matches the shoulder, where a zipper ends, or where a seam changes direction. Transfer the important marks to the fabric before removing the paper pattern.
Darts
Darts are wedge- or diamond-shaped areas that remove excess fabric and create three-dimensional shaping. The pattern usually marks dart legs and a point. Transfer those accurately. Sewing a dart too long, too short, or with unmatched legs changes fit.
Lengthen/shorten lines
These parallel lines show where the designer intends length adjustments to be made with minimal distortion to surrounding shaping. If you know you routinely need more or less length, use these lines rather than chopping length randomly from a curved hem or shaped seam.
Buttonholes, buttons, pleats, gathers, and fold lines
Each has its own marking. Do not assume you will remember them after removing the paper. Transfer them at the correct stage.
 Tracing a multi-size pattern lets you preserve the original sheet and copy only the size you need. Image: MissMessie/Wikimedia Commons, CC BY-SA 2.0.
7. Decide Whether to Cut the Original Pattern or Trace It
If the pattern contains multiple sizes and you may need another size later, tracing is often worth the extra time. Place pattern-tracing paper, Swedish tracing paper, medical exam paper, or another translucent drafting material over the original and copy the cutting line, grainline, notches, fold marks, darts, piece name, size, and any other essential symbols.
Tracing also makes alterations easier. You can slash, spread, overlap, tape, or redraw the copy without destroying the master. For children’s clothing, where sizes change quickly, preserving the original can be especially useful.
If you are confident in the size, the pattern is inexpensive and easily reprinted, or you are using a PDF with separate layers for each size, cutting the selected size may be faster. There is no universal rule. The important thing is to make a conscious decision before you cut through all the nested sizes.
For tiled PDF patterns, verify the scale first
Print only the page containing the test square before printing dozens of pages. Set the printer to 100%, "actual size," or the setting specified by the designer. Do not use "fit to page" unless explicitly instructed. Measure the test square with a physical ruler. If it is wrong, stop and fix the printer settings before assembling the pattern.
After printing, trim or overlap pages according to the pattern’s instructions and align the registration marks precisely. A tiny error repeated across eight sheets can create a major shape distortion. If the PDF supports size layers, turn off sizes you do not need before printing. That reduces visual clutter and makes tracing the correct line easier.
8. Read the Cutting Layout Before Placing Any Piece
A cutting layout is not just a suggestion for saving fabric. It communicates fold direction, whether pieces are cut on a single or double layer, whether a piece goes on the fold, whether pieces must face one direction, and how the required yardage was calculated.
Find the layout that matches all of these variables:
- your chosen view;
- your size range;
- your fabric width;
- whether the fabric has nap or a one-way design;
- whether interfacing, lining, or contrast fabric uses a separate layout.
Mark the layout you are using and ignore the others. Beginners sometimes jump between diagrams accidentally because several similar rectangles appear on the same instruction sheet.
Arrange every piece before cutting the first one. This dry run lets you confirm that all required pieces fit, directional prints point the correct way, and fold pieces actually meet the fold. It also gives you a chance to spot an omitted sleeve or waistband while the fabric is still intact.
When it is reasonable to deviate from the layout
Experienced sewists sometimes create their own layout to conserve fabric, pattern-match a print, or work around a flaw. A beginner can also do this carefully, but four rules must remain intact: grainline, direction, number of pieces, and mirroring. If you cannot explain why your alternative arrangement respects those four conditions, follow the supplied layout.
9. Understand "Cut 1," "Cut 2," "Cut on Fold," and Mirrored Pieces
A pattern piece should state how many pieces to cut and from which material. Read this instruction every time. "Cut 2" on folded fabric often produces two mirrored pieces automatically because the fabric layers face opposite directions. If you cut two separate pieces from a single layer without flipping the paper pattern, you can end up with two left sleeves or two identical front pieces when you needed a left and right pair.
"Cut 1 on fold" means the paper piece represents half of a symmetrical fabric piece. Its fold edge lies on the fabric fold and remains uncut. "Cut 1" from a single layer means exactly one full piece. A facing, pocket, collar, or interfacing piece may require a different material and a different number.
Create a cutting checklist from the pattern-piece list. As each fabric piece is cut, tick it off. Keep small pieces grouped in a labeled envelope or resealable bag. Losing a tiny facing or pocket piece after cutting is surprisingly easy.
10. Transfer Markings Before Removing the Paper
Cutting gives you the outer shape; markings preserve the internal roadmap. Transfer all marks that affect construction: dart legs and points, pocket placement, buttonholes, matching dots, gathering limits, pleat lines, center front/back, fold lines, and any special reference points.
Choose a marking method appropriate to the fabric. Tailor’s chalk, chalk pencils, washable fabric markers, removable pens, thread tracing, tailor’s tacks, and small clips in the seam allowance are common options. Test any pen or chalk on a scrap first. Some marks disappear with heat; others become permanent with heat. Some do not wash out of certain fibers.
For notches, many sewists make tiny snips into the seam allowance rather than cutting outward triangles. Keep the snip short enough that it cannot reach the final stitching line. If the seam allowance is narrow, use chalk instead.
Verification: once the paper pattern is removed, you should still be able to identify the front, back, center lines, dart positions, major matching points, and any opening or pocket placements from the fabric markings alone.
11. Check the Seam Allowance Before You Sew
Seam allowance is the distance between the raw cut edge and the stitching line. Many commercial garment patterns include a standard seam allowance, but the amount is not universal. Independent, European, historical, and specialty patterns may use different allowances or omit them entirely. Always read the pattern instructions instead of assuming 5/8 inch, 1.5 cm, 1 cm, or any other value.
This matters because seam allowance directly changes finished size. Suppose a side seam is designed for a 5/8-inch allowance and you accidentally sew it at 1 inch. You have removed an additional 3/8 inch from each layer at that seam. Repeated on both sides of a garment, the difference can become significant.
Build a seam guide before starting
Locate the measurement markings on your sewing machine’s needle plate. If they are difficult to see, place removable painter’s tape on the machine bed at the required seam allowance, keeping tape away from moving parts and feed dogs. Sew a practice seam on scrap fabric, measure from the raw edge to the stitching, and adjust your guide until it is consistent.
Do not stare at the needle while sewing a long straight seam. Watch the fabric edge against the seam guide. The needle tells you where one stitch is happening; the guide controls the overall seam width.
12. Read the Entire Construction Sequence Before Step One
Patterns are easier when you know where the instructions are taking you. Read the full construction section once without sewing. You do not need to memorize it. You are building a mental map.
Look for the major phases: staystitching, darts, pockets, shoulder seams, side seams, sleeves, collars or facings, closures, waistband, hem, and final pressing. Identify any steps that require interfacing, special machine settings, gathering, or finishing raw edges.
Circle unfamiliar terms and look them up before you reach them with half-assembled fabric under the presser foot. If the pattern uses diagrams, learn its shading key. One texture may represent the right side of the fabric, another the wrong side, another the interfacing. Misreading a diagram can make a correct instruction look impossible.
A useful habit: before each new seam, say aloud or write: "Which pieces? Which sides together? Which edges? What seam allowance? What must match?" That five-question pause prevents many errors.
13. Use Right Sides and Wrong Sides Deliberately
"Right sides together" means the finished faces of the fabric are touching each other. The wrong sides face outward while you sew. When you open and press the seam, the seam allowances remain inside the garment.
"Wrong sides together" means the inside faces touch. This appears in specific techniques such as French seams, binding, or some folded components. Do not assume every seam begins the same way.
If your fabric looks identical on both sides, mark the wrong side of every piece before construction. Use small removable chalk arrows, tiny bits of low-tack tape outside the stitching area, or another method that will not damage the fabric. Consistent marking matters especially when sewing pairs such as sleeves or pocket bags.
14. Pin or Clip at Structural Points First
When two curved or differently shaped pieces must be joined, do not start at one end and force the rest to fit. First match the pattern’s structural points: seam ends, notches, dots, centers, and other reference marks. Then distribute the remaining fabric between those points.
This is particularly important for sleeve caps, curved waist seams, princess seams, collars, and gathered sections. Two seam edges can have compatible stitching-line lengths even if their raw cut edges look different because curves and seam allowances distort what you see.
Pin perpendicular to the seam when appropriate and remove pins before they reach the needle. Sewing directly over pins can bend or break the needle and may damage the machine. Clips are useful for thick fabrics or when pin holes would be undesirable.
15. Press as You Sew, Not Only at the End
Pressing is part of construction. It shapes darts, flattens seam allowances, sets stitches, creates clean edges, and makes later steps more accurate. A garment sewn with excellent stitches but no intermediate pressing often looks less precise than one sewn with ordinary stitches and careful pressing.
Follow the pattern’s pressing direction. Some seams are pressed open; others are pressed to one side. Darts may be pressed toward the center or downward depending on location and fabric. Curved seams often benefit from clipping, notching, or grading before pressing, but only when the technique is appropriate to the pattern.
Use a press cloth when needed and test temperature on scrap fabric. Synthetic fibers can melt or become shiny. Wool and velvet require special handling. Interfacing adhesives also have their own heat, moisture, and dwell-time requirements.
16. Test Machine Settings on Scraps From the Actual Fabric
Keep the offcuts from cutting. They are your testing laboratory. Fold two layers together and sew the same seam arrangement used in the garment.
Check stitch length, thread tension, needle type, needle size, presser-foot pressure if adjustable, and how the fabric feeds. If the seam puckers, stitches skip, loops appear, or the fabric is pulled into the needle plate, solve the problem on scraps first.
For many stable woven fabrics, a standard universal needle and ordinary straight stitch work well, but the correct needle depends on fabric. Knits often need a ballpoint, stretch, or jersey needle. Denim may need a denim needle. Fine woven fabrics may need a smaller sharp needle. Follow your machine manual and needle manufacturer’s recommendations.
Replace a damaged or dull needle. A needle can look visually fine while causing skipped stitches, snagging, or a rhythmic popping sound through fabric.
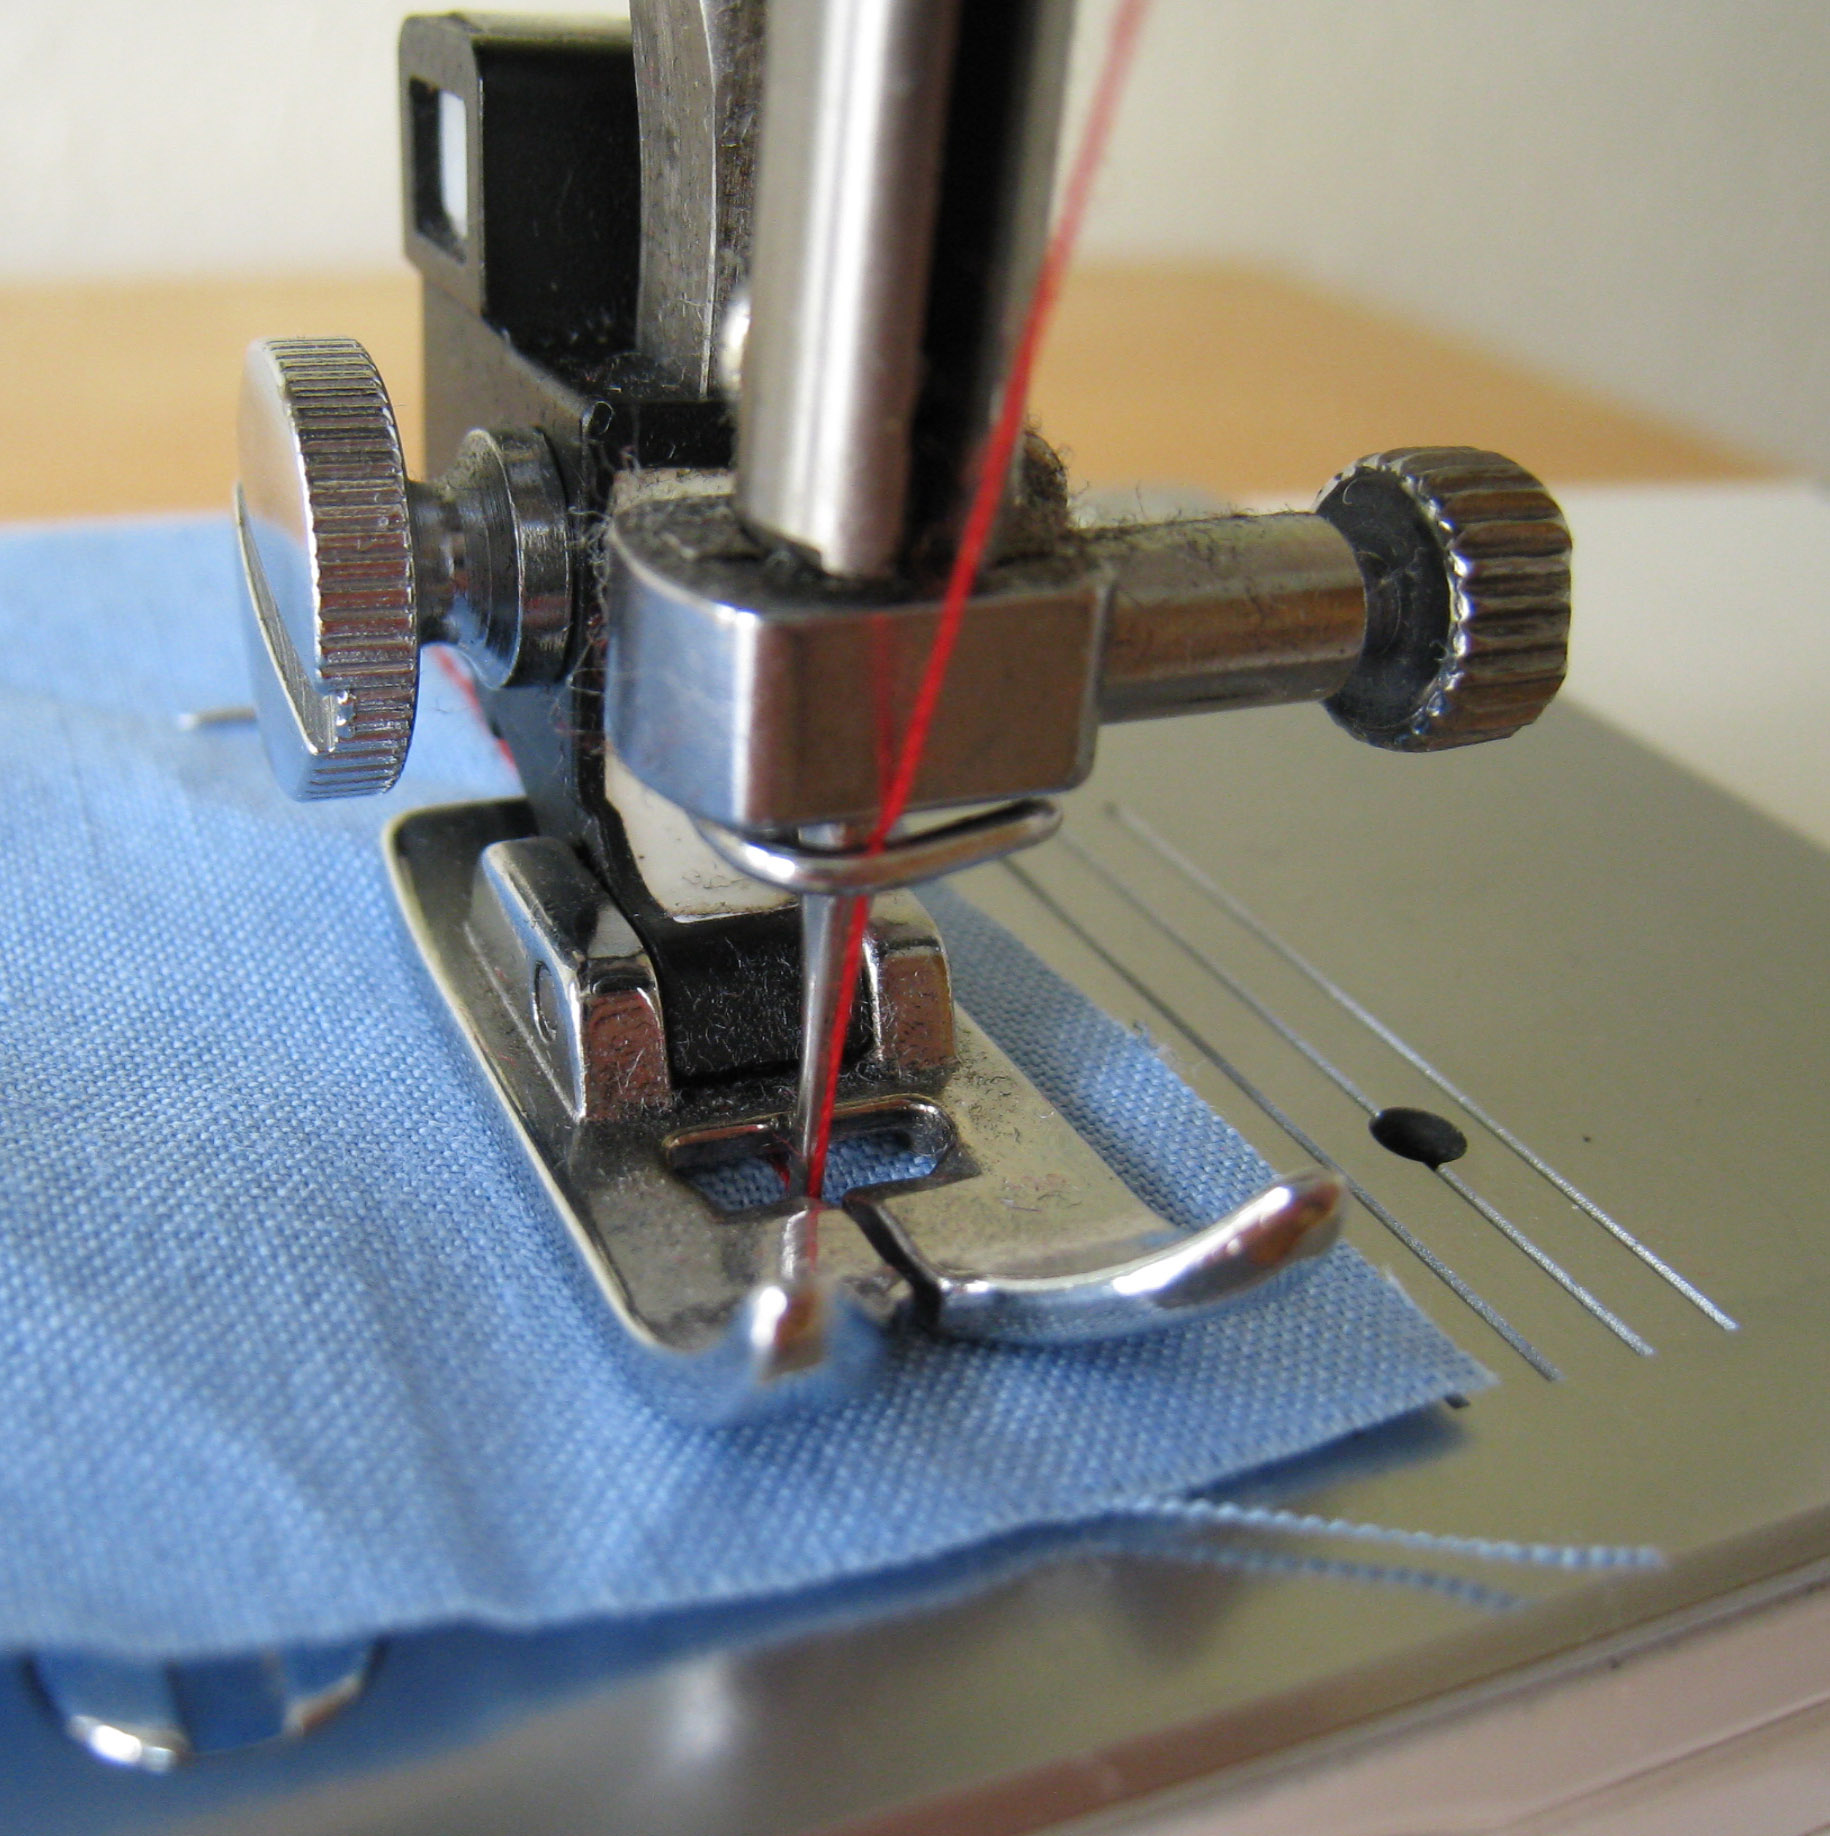 Test your stitch and seam allowance on scraps before committing to the garment. Image: Dvortygirl/Wikimedia Commons, CC BY-SA 3.0.
17. Make a Fitting Check Before the Garment Becomes Hard to Alter
Do not wait until the hem is finished to discover the garment is too tight. Identify the earliest stage at which the main body can be tried on safely. For a simple skirt, that may be after side seams but before the waistband is permanently finished. For pants, you may baste major seams and test the fit before final stitching. For a top, shoulder and side seams can often reveal basic width and length issues.
Basting uses long temporary stitches. It is slower than blindly sewing everything permanently, but much faster than ripping finished seams, overlocking, understitching, and topstitching later.
What to look for during a basic fitting
- Does the garment sit at the intended waist, shoulder, or neckline position?
- Can you sit, bend, lift your arms, or walk comfortably?
- Are side seams roughly vertical rather than pulling toward the front or back?
- Does the hem hang reasonably level?
- Are there horizontal strain lines showing tightness?
- Are there large pools of fabric suggesting excess length or width?
- Does the garment match the intended design ease?
Do not overfit a loose design until it becomes a different garment. The pattern’s style matters. Compare your result with the technical drawing and finished measurements, not only with a mental image of how you think every garment should fit.
18. Learn the Difference Between a Construction Error and a Fit Error
When a first garment looks wrong, beginners often assume they chose the wrong size. Sometimes they did. But many apparent fit problems actually begin at the cutting or sewing stage.
If one side seam twists while the other hangs normally, check grain and cutting accuracy. If the garment is uniformly smaller than the finished measurements, check seam allowance. If a neckline is stretched and gaping, review handling, staystitching, and pressing. If one sleeve seems impossible to insert, check whether you cut two mirrored sleeves and whether you are matching front and back notches correctly.
Use a ruler and the paper pattern to diagnose. Compare the sewn garment against expected measurements at key points. Measure seam allowances. Confirm piece orientation. A technical diagnosis is more useful than simply deciding you are "bad at sewing."
19. What to Do When Two Pattern Pieces Do Not Seem to Match
Stop before trimming anything. Pattern edges are not always supposed to look identical when held raw-edge to raw-edge. Curves, easing, gathers, darts, pleats, and different seam allowances can create apparent mismatches.
First verify that you have the correct pieces and size. Then match the seam line rather than only the raw edge. Check notches and dots. Confirm whether one section is meant to be eased or gathered. Read the next instruction. If the pattern includes a seam diagram, compare it with your pieces.
If a true mismatch remains, place the paper pattern pieces together at the stitching lines to understand the intended geometry. On a reliable pattern, this often reveals that a dart will consume length, a pleat will fold away, or a curved edge will align once pinned at the notches.
Do not "make it fit" by stretching a stable woven, trimming an unexplained inch off an edge, or moving notches randomly. Those fixes may solve one seam while creating three later problems.
20. Handle Darts, Gathers, and Pleats as Controlled Shaping
These details convert flat fabric into volume. Accuracy matters more than speed.
Darts
Bring the dart legs together with right sides facing. Pin through matching marks. Sew from the wide end toward the point, tapering smoothly rather than making a sudden angle. Many patterns recommend tying thread tails at a dart point instead of backstitching there, which can create a pucker. Follow your pattern’s method. Press the dart in the direction specified.
Gathers
Gathers intentionally compress a longer edge to fit a shorter edge. Patterns often have you sew one or two rows of long basting stitches, leave long thread tails, and pull the bobbin threads to distribute fullness. Match notches and endpoints first, then spread gathers evenly unless the design calls for concentration in a particular area.
Pleats
Pleats depend on transferred markings. Fold the correct lines toward the correct direction and baste them before attaching another piece. A pleat reversed at the beginning may still physically fit, making the error harder to notice until the final garment looks wrong.
21. Treat Interfacing as Structure, Not an Optional Extra
Interfacing supports areas that need more stability: waistbands, collars, cuffs, facings, button plackets, pocket openings, and some zipper areas. If the pattern calls for interfacing, omitting it can produce a limp waistband, distorted buttonholes, rolling collar, or stretched opening.
Interfacing comes in woven, nonwoven, knit, fusible, and sew-in forms, with different weights and stretch characteristics. Match its weight and behavior to the fabric and project. A very stiff interfacing on delicate fabric can create a board-like result; one that is too soft may provide little support.
When using fusible interfacing, test a scrap first. Follow the manufacturer’s heat, steam, pressure, and cooling instructions. Lifting the fused piece while hot can break the bond. Protect your ironing board and iron from adhesive.
22. Finish Raw Edges According to Fabric and Project
Not every seam needs an elaborate finish, but raw edges on woven fabric may fray during washing and wear. Common finishes include zigzag stitching, overcasting, serging, pinking on suitable tightly woven fabric, bound seams, French seams, and clean-finished turned edges.
Choose a finish compatible with the pattern, fabric thickness, transparency, seam position, and your equipment. A bulky seam finish can be uncomfortable inside a lightweight blouse. A French seam is elegant on a sheer woven but unsuitable for some tight curves. A simple zigzag may be entirely adequate inside casual cotton pajama pants.
The goal of a first garment is durable, neat construction—not reproducing every couture technique at once.
23. Slow Down at Necklines, Curves, Corners, and Clipped Seams
Straight side seams are forgiving. Tight curves and corners are where accuracy becomes visible.
Reduce speed and keep your eyes on the seam guide. For corners, stop with the needle down at the turning point, raise the presser foot, pivot the fabric, lower the foot, and continue. For curves, guide the fabric gradually without pulling it from behind. Let the feed dogs move the fabric.
After stitching, some curved seam allowances need clipping or notching so they can spread or overlap when turned. Convex and concave curves behave differently. Follow the pattern’s illustrations and stop short of the stitching line. If you cut through the seam, the finished edge may develop a hole.
24. Understand Why a First Garment May Need Small Pattern Adjustments
Commercial patterns are drafted to standardized size charts, but real bodies vary in shoulder slope, torso length, bust shape, hip distribution, posture, and many other dimensions. Needing a pattern adjustment is not a failure.
For a first garment, keep alterations conservative. Lengthen or shorten at the printed adjustment lines if necessary. Grade between adjacent sizes at the side seams if your measurements span sizes. If you have a consistent fitting issue—such as needing a full-bust, small-bust, swayback, broad-back, or crotch adjustment—learn that specific alteration from a reliable fitting resource before changing multiple areas at once.
Make one change, record it, and observe the result. Randomly pinching fabric wherever it looks loose can shift grainlines and balance.
25. Build a "First Garment" Workflow You Can Repeat
Here is a practical sequence that turns the entire process into a checklist:
- Choose a beginner-friendly pattern designed for your fabric type.
- Read the technical drawing and select one view.
- Take body measurements and select the pattern size.
- Check finished-garment measurements and ease.
- List the required fabric, interfacing, thread, elastic, zipper, buttons, and other notions.
- Buy the correct amount for your fabric width and direction.
- Prewash or otherwise prepare fabric as appropriate.
- Press the fabric.
- Print and scale-check a PDF, or unfold and smooth a paper pattern.
- Trace or cut the selected size.
- Identify every required piece.
- Study the cutting layout.
- Align grainlines by measuring to the selvage.
- Cut accurately without lifting or distorting fabric.
- Transfer notches, darts, dots, fold lines, and placement marks.
- Read the full construction sequence.
- Test needle, thread, tension, and seam allowance on scraps.
- Sew in the prescribed order.
- Press after each construction stage.
- Baste and fit before irreversible finishing when practical.
- Complete closures, facings, waistband, sleeves, or other details.
- Finish raw edges as appropriate.
- Let the garment hang if the pattern or fabric requires it before hemming.
- Mark and sew the hem.
- Give the garment a final press and inspect inside and out.
This may look like a long list, but after a few projects many steps become automatic. The point is not speed. The point is consistency.
26. Troubleshooting: The Garment Is Too Small Everywhere
Check three things before blaming the pattern: size selection, seam allowance, and printing scale.
If you chose from store size instead of the pattern’s body chart, the size may simply be wrong. If a PDF test square was printed too small, every piece may be reduced. If you used wider seam allowances than specified, the garment can lose substantial circumference.
Measure the finished garment at major points and compare with the pattern’s finished measurements. Measure the width of several sewn seam allowances. If the error is consistent, you can identify whether it came from scale, cutting, or stitching.
If the garment is only slightly tight and has generous seam allowances, you may be able to resew side seams narrower. Do not reduce seam allowance below a safe amount for the fabric and stress of the garment.
27. Troubleshooting: The Garment Is Too Large or Shapeless
First determine whether the design is intentionally loose. Check the illustration and finished measurements. If it is truly too large, identify where the extra room is concentrated.
Taking in side seams may fix excess body circumference but does not correct a neckline that is too wide, shoulders that are too broad, or armholes that are too low. Those issues may come from choosing a size based on the wrong body measurement or using a pattern with proportions that need a more specific adjustment.
Pin temporary changes while wearing the garment and move. A garment that looks trim while standing may become restrictive when sitting or reaching.
28. Troubleshooting: Seams Twist or the Hem Hangs Unevenly
Possible causes include off-grain cutting, fabric distortion during layout, uneven handling during sewing, or a fitting imbalance.
Check whether the grainline was measured parallel to the selvage. Review whether fabric lay flat before cutting. Look at directional weave or print lines. If a pant leg twists consistently around the calf, cutting off grain is a likely suspect.
For a skirt or dress hem, fit and bias stretch can also affect levelness. Some fabrics need time to hang before hemming because bias sections can lengthen. Follow the pattern’s instructions. Do not blindly trim a dramatic unevenness until you know why it occurred.
29. Troubleshooting: The Fabric Puckers Along Seams
Puckering can come from excessive thread tension, an inappropriate needle, a dull needle, stitch length, incompatible thread, fabric being stretched while sewing, poor pressing, or feed problems.
Replicate the seam on scrap. Change one variable at a time. Re-thread the machine with the presser foot raised according to your manual, insert a fresh appropriate needle, test tension, and let the feed dogs move the fabric without pulling.
If the seam looks smooth immediately after sewing but ripples after pressing, the iron may be too hot or the fabric may be shrinking unevenly.
30. Troubleshooting: You Sewed a Piece Backward
Stop as soon as you notice. Do not continue hoping later steps will hide it. Photograph the current state if needed, compare it with the instruction diagram, and remove only the stitches required to return to the last correct stage.
Use a seam ripper carefully. Cut a few stitches on one side, then pull thread from the other side rather than aggressively slicing along the entire seam. Work under good light and keep the seam ripper point away from the fabric body.
After correcting the seam, repress the area. If stitch holes remain in a woven fabric, gently manipulate the fibers with steam or your fingernail rather than stretching the seam.
31. Choose Your First Project for Skill Progression, Not Appearance Alone
The best first garment teaches several foundational skills without stacking too many new problems.
An elastic-waist skirt or pajama pants can teach body measurement, grainline, cutting two mirrored pieces, seam allowance, casing, elastic insertion, hemming, and pressing. A pull-on woven top can add neckline finishing and simple sleeves. A basic skirt with a zipper can introduce closures after you are comfortable with accurate seams.
Build complexity gradually:
- Level 1: stable woven, straight or gently curved seams, elastic, simple hem.
- Level 2: facings, pockets, simple sleeves, gathering.
- Level 3: zipper, collar, cuffs, buttonholes, more precise fitting.
- Level 4: lining, tailoring, slippery fabrics, bias construction, complex fit.
Progress is faster when each project adds two or three new skills rather than twelve.
32. Keep a Sewing Record So the Next Garment Is Better
After finishing, record the pattern name or number, view, size, fabric type, fabric width, adjustments, seam allowance, needle, and any construction changes. Photograph the finished garment on the body if possible.
Write what you would change next time. Examples: "Add 1 inch at lengthen line," "size 14 shoulders with size 16 hip," "waistband interfacing was too stiff," "use a shorter stitch on topstitching," or "fabric needed one extra half-yard for print matching."
This turns every garment into data. Without notes, you may solve the same problem repeatedly. With notes, your pattern library becomes increasingly customized to your body, equipment, and preferences.
33. A Worked Example: Making Simple Elastic-Waist Pajama Pants
Imagine you have a beginner pajama-pants pattern with front, back, and waistband or casing instructions.
Step one: You measure waist and hip. The hip measurement puts you in size M, while the waist falls near size S. Because elastic adjusts the waist and the pants must pass comfortably over the hip, the pattern’s size chart tells you to use M.
Step two: You choose stable cotton poplin. The pattern allows 45- or 60-inch fabric. You confirm your fabric is 44 inches usable width and buy the yardage specified for the narrower option.
Step three: You prewash, dry, and press the cotton. You identify the right side.
Step four: The cutting layout shows folded fabric. You place front and back pieces with each grainline parallel to the selvage. You measure both ends of each grainline arrow and adjust until the distances match.
Step five: You cut two mirrored fronts and two mirrored backs. You transfer notches and mark the center front and center back.
Step six: Before sewing, you test the seam allowance on scraps and confirm your machine is making balanced stitches.
Step seven: The instructions tell you to sew front pieces together at the crotch, then back pieces together, then join inseams and side seams. You follow that order rather than inventing one.
Step eight: Before creating the elastic casing, you try on the pants. The hip and rise feel comfortable. You check the finished waist height.
Step nine: You sew the casing, insert elastic without twisting it, overlap or join the ends as instructed, distribute gathers evenly, then close the opening.
Step ten: You try the pants on again, mark the finished hem while wearing the intended footwear or barefoot as appropriate, press, and stitch the hem.
At no point did you need an advanced technique. The success came from interpreting the pattern accurately, preserving grain, testing seam allowance, and fitting before finishing.
34. Frequently Asked Questions
Do all sewing patterns use the same symbols?
No. Many symbols are similar across brands, but details differ. Always read the legend and instruction sheet supplied with your pattern. Treat universal-looking conventions as clues, not substitutes for the designer’s key.
Do sewing patterns always include seam allowance?
No. Many commercial patterns do, but some independent, historical, European, projector, or specialty patterns may use a different amount or require you to add it. Check before cutting and again before sewing.
Should I cut my exact body measurements?
No. Choose a pattern size using the size chart and fitting guidance. The actual pattern contains wearing and design ease. Cutting fabric to your raw body circumference would usually produce an unusable garment.
Why does the pattern size seem larger than my store clothing size?
Pattern size systems and ready-to-wear size systems are different. The number itself is not meaningful across brands. Use measurements.
Can I use a knit fabric for a woven pattern?
Sometimes an experienced sewist can redesign a pattern for another fabric type, but it is not a simple substitution. Stretch, recovery, seam stabilization, fit, and construction change. For a first garment, use a fabric type recommended by the pattern.
Can I rotate pattern pieces to save fabric?
Only if doing so preserves the specified grainline and any directional requirements. On most woven garment pieces, rotating 90 degrees changes grain and is not equivalent. With one-way prints or nap, even rotating 180 degrees may be wrong.
How accurately should I cut?
As accurately as reasonably possible. A difference of a few millimeters may not ruin a loose beginner garment, but accumulated errors around multiple seams can affect fit and matching. Smooth, careful cutting is more useful than cutting quickly.
Is a rotary cutter better than scissors?
Both can produce accurate results. A rotary cutter works well with a proper self-healing mat and ruler but has an exposed sharp blade and requires disciplined safety. Good fabric shears are simpler for many beginners. Use whichever tool you can control accurately and safely, and never use fabric shears for paper.
What if I accidentally cut the wrong size?
If you cut too large, you may be able to trim to the smaller size after carefully aligning the smaller paper pattern. If you cut too small, options are limited and depend on the design, seam allowances, and available extra fabric. Do not improvise additions without understanding how they affect grain and fit.
Should I make a muslin or toile first?
For a loose beginner garment in inexpensive fabric, a full test garment may not be necessary. For a fitted dress, jacket, trousers, expensive fabric, or a pattern requiring major adjustments, making a test version can save money and reveal fit issues before the final fabric is cut.
35. Final Checklist Before You Cut Your Next Pattern
- I selected a pattern suitable for my current sewing level.
- I chose a size from current body measurements.
- I checked finished-garment measurements and ease.
- I bought a recommended fabric type in the correct width and yardage.
- I prepared the fabric appropriately and pressed it flat.
- I verified PDF scale or identified the correct printed size line.
- I know exactly which pattern pieces belong to my chosen view.
- I know whether seam allowance is included and how wide it is.
- I selected the correct cutting layout for width, size, and nap.
- I aligned every grainline parallel to the selvage as required.
- I confirmed fold placement, mirroring, and number of pieces.
- I transferred all essential construction marks.
- I read the construction sequence before sewing.
- I tested stitch settings and seam allowance on scraps.
- I will press during construction and fit before final finishing.
Conclusion
Learning to read a sewing pattern is less about memorizing a secret code and more about following a disciplined sequence. Measure first. Read before cutting. Treat fabric recommendations as engineering information. Respect grainline. Transfer the marks that carry construction information from paper to fabric. Verify seam allowance. Sew in the intended order. Press as you go. Fit before the garment becomes difficult to change.
Your first pattern-based garment does not need to look factory-made to be successful. A useful first project teaches you how two-dimensional pieces become a three-dimensional object and gives you a record of what to improve next time. The most important mistake to avoid is irreversible action before verification: cutting before checking size, sewing before checking seam allowance, or trimming before understanding why two edges seem different.
For your next step, take one beginner pattern and complete only the preparation phase: choose the view, measure your body, select the size, identify the pieces, confirm fabric requirements, and study the layout. If those decisions are correct, the sewing itself becomes dramatically easier.
Sources and Further Reading
- Utah State University Extension — Youth Elastic Waist Skirt: body measurement, fabric preparation, selvage, and grainline guidance.
- Utah State University Extension — Reversible Tied Pillow: pattern markings and the equal-distance method for aligning grainline to selvage.
- Oregon State University Extension — Clothing Construction: progressive clothing-construction skill development.
- Wikimedia Commons — Sewing pattern.jpg, Henna, CC BY-SA 2.5.
- Wikimedia Commons — Tracing pattern sewing.jpg, MissMessie, CC BY-SA 2.0.
- Wikimedia Commons — Use sewing machine 22.jpg, Dvortygirl, CC BY-SA 3.0.