

Quick answer: The most effective way to organize a small kitchen is to organize it around actions rather than around objects. Put the tools and ingredients used for the same task together, keep everyday items between knee and shoulder height, reserve prime counter space for preparation, separate raw-food handling from ready-to-eat food, and move rarely used equipment out of the daily work zone. A good system should reduce reaching, searching, countertop clutter, cross-contamination risks, and the number of steps required to cook an ordinary meal.
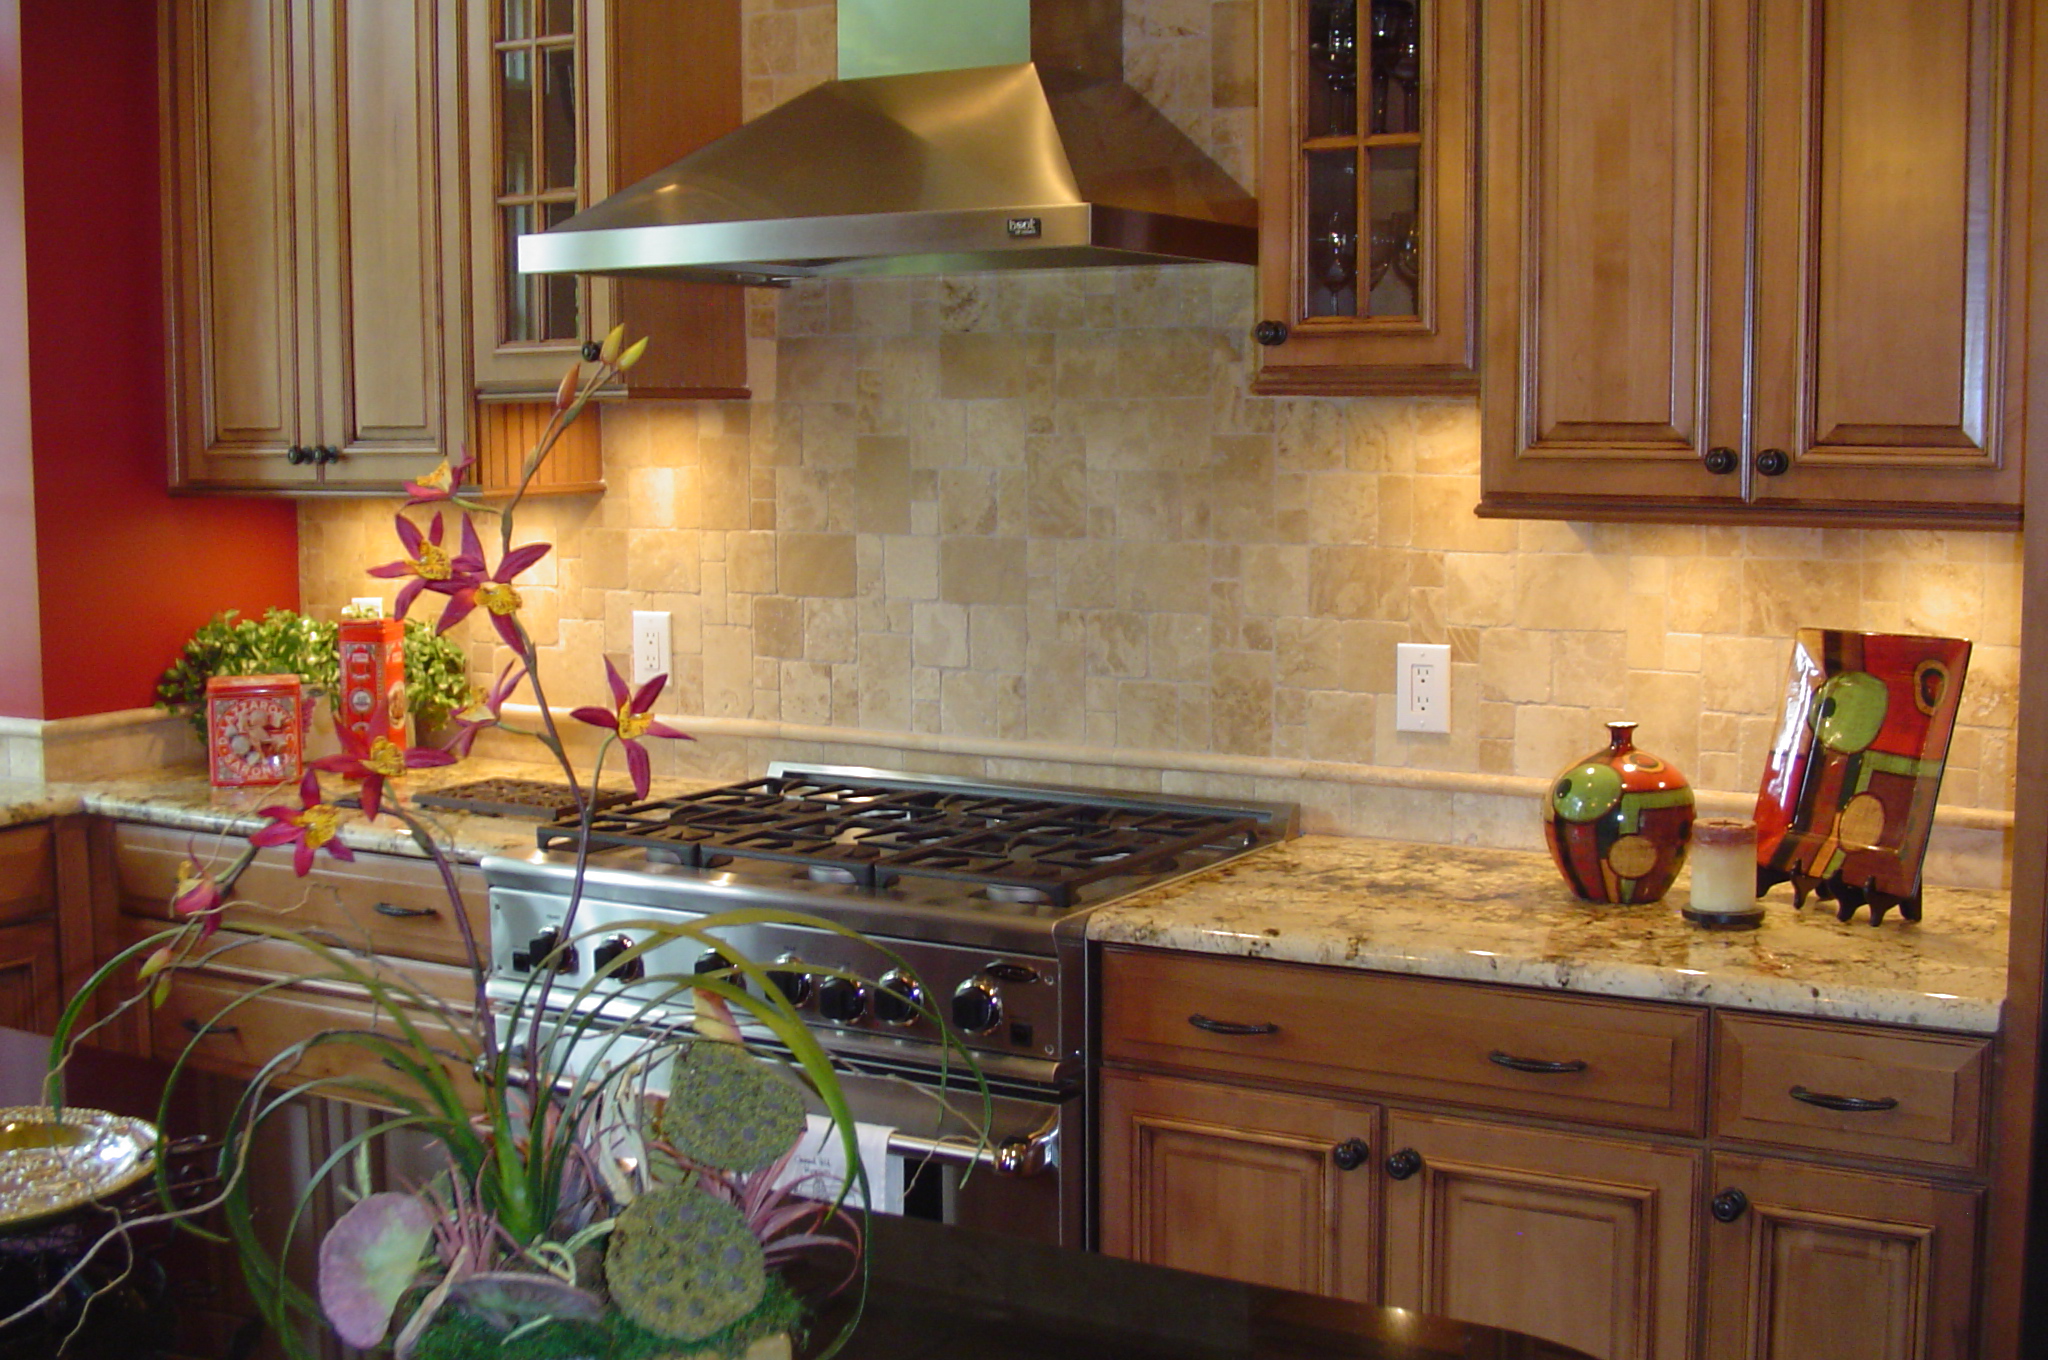 A small kitchen works better when each stretch of counter and nearby storage has a clear job. Image: EddieRider, public domain, via Wikimedia Commons.
A small kitchen can feel inefficient even when it is technically clean. The problem is often not the number of cabinets or the square footage. It is the distance between the things you use together, the number of objects competing for the same prime space, and the lack of a repeatable path from groceries to preparation to cooking to cleanup.
This guide shows how to rebuild that path. It is designed for apartments, compact houses, galley kitchens, shared kitchens, rental kitchens, and ordinary family kitchens where storage is limited. You do not need matching containers, a remodeled pantry, custom cabinetry, or an expensive set of organizers. You need a map of what you actually do in the room, a few safety rules, and a storage hierarchy that makes common actions easy.
Start with the work, not the storage
Before moving a single plate, identify the jobs your kitchen performs. Most kitchens support a surprisingly consistent group of actions: unloading groceries, storing food, making drinks, preparing ingredients, cooking, serving, packing leftovers, washing dishes, and cleaning surfaces. Some homes add baking, school lunches, pet feeding, coffee preparation, or bulk meal prep.
The mistake is to begin with an empty drawer and ask, “What can fit here?” That approach optimizes the drawer rather than the kitchen. Instead, ask, “What action happens here, and what do I need within one or two steps to complete it?” A drawer beside the stove may be more valuable for spatulas and tongs than for neatly folded dish towels. A cabinet above the coffee maker may be better for mugs and coffee than for rarely used serving bowls.
Make a one-day movement map
For one normal day, notice your repeated movements. You do not need a formal diagram. A note on your phone is enough. Record moments such as walking across the room for salt, moving a toaster to make counter space, opening three drawers to find a measuring spoon, carrying dripping produce from the sink to a distant cutting board, or pulling a heavy appliance from a high shelf.
Each repeated inconvenience is a clue. If you reach for an item several times a week, it deserves better access. If you move an object every day just to use the counter beneath it, that object probably does not deserve permanent counter space. If two people regularly collide while one cooks and the other makes drinks, their work zones need separation.
How to know this step worked: you should be able to name the three to five actions that cause the most wasted motion or clutter. Those become the first problems you solve.
Give every area a priority level
Small kitchens fail when every cabinet is treated as equally valuable. Storage near your hands, eyes, sink, and stove is premium space. Very high shelves, deep corners, the back of lower cabinets, and storage outside the kitchen are lower-value space. Assign items based on frequency and risk, not on whether they physically fit.
Use a simple three-tier access system
Tier 1: daily access. These are items used almost every day: plates, drinking glasses, your main pan, cooking utensils, cutting board, chef’s knife, frequently used seasonings, coffee equipment, dish soap, and food-storage containers. Put them where they can be reached with minimal bending, climbing, or unpacking.
Tier 2: weekly access. These might include baking sheets, mixing bowls, less common pots, baking ingredients, lunch containers, specialty knives, and small appliances used several times a month. They can occupy less convenient shelves or nested storage.
Tier 3: occasional access. Holiday platters, oversized stockpots, party glassware, duplicate appliances, specialty cake pans, and items used a few times a year should not consume the best kitchen space. If you have safe storage elsewhere, move them there.
A useful test is to ask, “Would I notice if this item were stored ten steps farther away?” If the answer is no, it probably does not need prime kitchen real estate.
Declutter by function instead of by emotion
Decluttering a kitchen does not require adopting a minimalist identity. It requires reducing competition for limited working space. The easiest way to make decisions is to compare items that perform the same job.
Pull out all can openers, peelers, whisks, spatulas, reusable bottles, food-storage containers, travel mugs, frying pans, and other duplicate categories one at a time. Keep the pieces that reliably do the work. Remove broken tools, warped containers, lidless containers you cannot realistically match, chipped items that are unsafe to use, and duplicate gadgets you never choose when the better version is available.
Do not empty the entire kitchen at once unless you have a full uninterrupted day. In a small home, a huge sorting project can make the room unusable and encourage rushed decisions. Work one function at a time: food containers, then cooking tools, then dishes, then pantry food, and so on.
Use a “first-choice” test for duplicates
Imagine two vegetable peelers in a drawer. If one is always the tool you choose and the other is only used when the first is dirty, the second may still have value. But if three additional peelers remain untouched for months, they are consuming space without adding meaningful resilience.
The same logic works for pans. Two frying pans of different sizes can solve different problems. Four nearly identical pans may simply create stacking friction. The goal is not a specific item count. The goal is to make every retained object earn its storage cost.
Create a preparation zone with guaranteed empty counter space
The most valuable feature in a small kitchen is often not additional storage but a reliably clear preparation surface. A counter covered by appliances and decorative items forces you to move objects before every meal. That adds friction and can push cutting, mixing, or hot cookware into awkward spaces.
Choose the safest available stretch of counter for food preparation, ideally near the sink but not so close to the stove that pot handles, heat, or splatter make the area uncomfortable. The exact location depends on your layout. Your objective is to preserve enough clear space for a cutting board and one or two ingredient containers.
Store the tools that support preparation close to this area: your main cutting board, knives, vegetable peeler, colander, mixing bowl, measuring tools, and a small set of prep utensils. If counter space is extremely limited, a board designed to fit securely over a sink or a stable kitchen cart may provide extra surface area, but it must be used according to its manufacturer’s load and stability limits.
Keep the preparation surface from becoming a parking lot
Countertops attract mail, packages, shopping bags, keys, chargers, medication, reusable bottles, and items waiting to be returned to another room. Create a landing place outside the preparation zone. Even a small tray at the far end of the counter can contain temporary objects so they do not spread across the cooking workspace.
Apply a simple rule: anything that must be moved before chopping an onion does not belong permanently in the main prep area.
Build a cooking zone around the stove without creating a fire hazard
The stove zone should make cooking efficient while keeping combustible clutter away from heat. Store commonly used pans, pot holders, cooking utensils, and frequently used ingredients close enough to reach conveniently, but do not turn the stovetop and the area immediately around it into storage.
The U.S. Fire Administration advises keeping items that can catch fire—such as paper towels, oven mitts, wooden utensils, food packaging, towels, and curtains—away from the stovetop. It also advises staying in the kitchen during frying, boiling, grilling, or broiling and turning pot handles away from the stove’s edge. These rules matter more than the visual neatness of your organization system.
If you keep utensils in a countertop crock, place it where heat and grease do not continually coat the tools. If you use a wall rail or hooks, make sure hanging objects cannot swing over a burner. Oils and seasonings may be convenient near the stove, but heat and direct sunlight can also degrade some foods; follow product storage instructions rather than assuming every cooking ingredient belongs beside the range.
Create a “pan + tool + seasoning” triangle
For most everyday cooking, you repeatedly need a pan, a stirring or flipping tool, and basic seasonings. Position those categories so they can be accessed without crossing the room. This does not mean placing everything directly beside the flame. It means minimizing unnecessary travel while respecting safe clearances.
For example, pans can live in the cabinet below or beside the range, utensils in the nearest safe drawer, and salt and frequently used dried seasonings in a cabinet one step away. A cook should be able to begin a simple sauté without opening five unrelated storage areas.
Organize drawers by task, not by utensil shape
 Keeping every kitchen tool together can become cluttered; grouping the tools by the tasks you perform makes retrieval faster. Image: Darren Lewis, CC0, via Wikimedia Commons.
A drawer full of visually similar objects can still be functionally disorganized. Instead of grouping everything under the broad label “utensils,” divide tools into meaningful jobs.
A prep drawer might contain peelers, measuring spoons, a can opener, kitchen shears, and small prep tools. A stove drawer might contain spatulas, tongs, a wooden spoon, and a thermometer. A baking area might hold pastry brushes, measuring cups, scrapers, and specialty tools. The specific grouping depends on what you cook.
Drawer dividers help only when they support these jobs. Buying a complex organizer before deciding what the drawer needs to hold can waste space. Measure the drawer’s internal width, depth, and height before purchasing inserts, and remember that long handles and bulky tools often need one open compartment rather than many narrow sections.
Use the one-hand retrieval test
Open a drawer and try to retrieve the tool you use most with one hand. If you must lift a pile, untangle handles, or remove another organizer first, the storage is too dense. Small kitchens benefit from high space utilization, but there is a point at which maximizing capacity makes every action slower.
Store knives so they are protected and predictable
Do not allow sharp knives to disappear loose underneath other tools. Choose a storage method that protects the blade and prevents someone from reaching blindly into a sharp edge. Depending on your space and household, this may be a properly designed knife block, a suitable in-drawer knife organizer, blade guards, or a securely mounted magnetic strip installed according to its instructions.
If children or other vulnerable household members can access the kitchen, consider their reach and behavior when choosing storage. The most space-efficient solution is not automatically the safest solution for every home.
Use vertical cabinet space deliberately
Many small cabinets waste volume above short objects. Shelf risers, stackable shelves, vertical dividers, and under-shelf baskets can improve access, but each accessory should solve a specific problem.
Use vertical dividers for baking sheets, cutting boards, trays, and pan lids that are frustrating to unstack. A narrow vertical file often uses less effort than a tall horizontal pile. Use shelf risers for plates, bowls, or canned foods when you need to access both levels independently. Avoid stacking fragile objects so high that removing one destabilizes the pile.
Measure first. An organizer that reduces usable width or prevents a cabinet door from closing is not an improvement. In rentals, prefer removable systems unless the landlord permits permanent mounting.
Give small appliances a strict counter-space budget
Small appliances can consume the entire working surface in a compact kitchen. Decide which machines genuinely deserve permanent counter space based on frequency, weight, cleanup difficulty, and how disruptive it is to retrieve them.
A coffee maker used every morning may reasonably stay out. A blender used twice a month may belong in a cabinet. A heavy stand mixer used three times a week may be safer on a stable counter than repeatedly lifted from a low shelf. There is no universal answer.
Consider electrical safety as part of placement. Do not create a system that requires inappropriate extension-cord use or puts appliance cords where they can contact water or hot surfaces. Follow the appliance manufacturer’s instructions for ventilation, electrical connection, and clearance.
Run a two-week appliance experiment
Temporarily move uncertain appliances away from the counter for two weeks. If retrieving one becomes a repeated annoyance, it may deserve to return. If you barely notice its absence, you have gained permanent preparation space at almost no cost.
Design a pantry around visibility and rotation
Pantry organization should help you answer three questions quickly: What do I have? What should I use first? What am I about to run out of?
Start by grouping food into categories that match the way you cook. Possible zones include breakfast, pasta and grains, canned foods, baking, snacks, sauces, quick meals, and lunch supplies. Do not create so many categories that putting groceries away becomes a classification exercise. A family that cooks rice daily may need a large grains zone; another household may need only one shelf.
 Visible categories and clear labels can make pantry inventory easier to read. Image: Shixart1985, CC BY 2.0, via Wikimedia Commons.
Put older food where it will actually be seen
When you buy another package of the same shelf-stable food, avoid automatically placing the new package in front of the old one. Rotate stock so the older suitable product is used first. Check package dates and condition rather than assuming “first in, first out” overrides food-safety guidance.
Keep a small “use soon” area for ingredients that are approaching their quality date or that you have opened and want to finish. This is more useful than hiding half-used packets throughout several cabinets.
Do not decant everything for appearance
Clear containers can improve visibility for foods you buy repeatedly, but decanting every package is not necessary. Original packaging often contains cooking directions, allergen information, lot codes, and best-by information. If you transfer food, preserve any information you may need, label the container clearly, and use containers appropriate for food storage.
The goal is not to make the pantry look like a photograph. It is to make the correct ingredient easy to identify and the inventory easy to maintain.
Organize the refrigerator for food safety first
The refrigerator is not simply another cabinet. Its organization affects temperature control, food visibility, cross-contamination, and waste. The U.S. Food and Drug Administration and USDA recommend keeping the refrigerator at or below 40°F (4°C) and the freezer at 0°F (-18°C). An appliance thermometer is useful for verifying actual temperature.
Do not pack the refrigerator so tightly that cold air cannot circulate. Keep raw meat, poultry, and seafood sealed or securely wrapped so juices cannot contaminate other foods. USDA specifically advises storing raw animal products in a sealed container or securely wrapped to prevent drips.
Door shelves experience more temperature variation than the main cabinet, so USDA advises against storing highly perishable foods there and specifically recommends keeping eggs in their carton on a shelf rather than in the door.
Create refrigerator zones that match how food leaves the fridge
Consider a ready-to-eat shelf for leftovers, prepared foods, yogurt, and items that require no raw-food preparation. Create a produce area using the crisper drawers as intended by your refrigerator manufacturer. Reserve a secure low area or designated container for raw meat and seafood so leaks cannot drip onto ready-to-eat foods.
Add a clearly visible “eat first” bin or section for leftovers and opened foods that need attention. This should not become a permanent graveyard. Review it whenever you plan meals.
USDA notes a general refrigerator storage guideline of about four days for cooked leftovers, while exact storage times vary by food. Use authoritative cold-storage guidance for specific foods rather than relying solely on smell or appearance.
Separate raw-food tools from ready-to-eat work
Efficient organization should reinforce safe behavior. USDA’s core food-safety principles are Clean, Separate, Cook, and Chill. In practice, this means your layout should make it easy to prevent raw meat, poultry, seafood, and their juices from contacting ready-to-eat foods.
You can use separate cutting boards for raw animal foods and produce or ready-to-eat ingredients, or carefully wash and sanitize appropriate equipment between tasks. Store boards so they can dry and so their intended use is obvious. If you use color coding, make sure everyone in the household knows the code.
Keep cleaning cloths, sponges, and reusable towels on a routine that prevents them from becoming permanently damp, dirty objects spread around the food-preparation area. The exact cleaning method depends on the material; follow care instructions and replace items that can no longer be cleaned effectively.
Create a cleanup zone that shortens the end of every meal
The best kitchen systems make cleanup almost automatic. Place everyday dishes, glasses, and flatware close to the dishwasher or drying area when possible. This reduces steps during unloading. Keep trash, recycling, and compost arrangements close enough to the food-preparation and cleanup path to be useful without obstructing walking space.
Dish soap, dishwasher detergent, brushes, and routine cleaning tools should be easy to reach from the sink but stored securely, especially in homes with children or pets. Follow product labels and keep household chemicals away from food.
Treat the space under the sink as a chemical zone, not miscellaneous storage
The under-sink cabinet often becomes a dumping ground for grocery bags, cleaners, spare sponges, light bulbs, tools, pesticides, and food-related items. That mix is hard to manage and can be unsafe.
Use this area primarily for compatible cleaning supplies and sink-related items if that fits your household. Keep products in their original labeled containers unless the manufacturer provides another safe method. Never transfer household chemicals into food or beverage containers. If leaks occur around plumbing, fix the moisture problem rather than letting paper goods or stored items absorb it.
Build a beverage station that does not interrupt cooking
If people frequently enter the kitchen for coffee, tea, water, or snacks while someone else cooks, separate that traffic from the stove and main preparation area.
Place mugs, tea, coffee, filters, sweeteners, and related tools near the coffee or kettle area. Keep drinking glasses near the refrigerator or water source when practical. If children prepare their own snacks, give age-appropriate items a reachable location away from sharp tools and heat.
This kind of zoning is especially useful in galley kitchens, where two people moving through the same narrow aisle can block one another.
Make food-storage containers behave like a system
Food-storage containers are a common source of small-kitchen chaos because bodies and lids are often stored separately, multiply over time, and vary in shape.
Choose a strategy you can maintain. One method is to nest compatible container bodies and store lids vertically in a narrow organizer. Another is to keep each lid attached to its container, which uses more volume but eliminates matching. Neither is universally better.
Remove damaged containers that are no longer suitable for their intended use. Avoid keeping dozens of takeout containers simply because they might be useful someday. Decide how many leftovers your household realistically stores at one time and keep a comfortable margin above that number.
Use awkward spaces for low-frequency items, not for daily frustration
Corner cabinets, deep lower cabinets, and very high shelves can hold substantial volume but provide poor access. Assign them items that are bulky or infrequently used instead of burying everyday tools behind other objects.
In a deep cabinet, use removable bins as drawers: pull the whole bin forward to access its contents rather than reaching blindly to the back. Label the front so you do not need to unpack each bin. For high shelves, keep light, stable items rather than heavy appliances that are difficult to lower safely.
If you need a step stool, use a stable product designed for that purpose and follow its safety instructions. Do not climb on chairs, counters, drawers, or unstable boxes to reach storage.
Use the walls only when wall storage improves access
Wall-mounted rails, magnetic strips, pegboards, hooks, and shelves can free cabinets, but visible storage is not automatically efficient. Too many objects on a wall can create visual clutter, collect grease, and make cleaning harder.
Use vertical storage for a tightly defined set of frequently used items. Install hardware into appropriate wall structure using the correct fasteners and follow load ratings. Renters should obtain permission when required and choose removable solutions when permanent drilling is not allowed.
Create a baking zone only if you actually bake
Generic kitchen-organization advice often assumes every household needs a dedicated baking station. Do not sacrifice space to an identity you do not practice. If you bake weekly, grouping flour, sugar, leaveners, measuring tools, mixing bowls, pans, and cooling equipment can save time. If you bake twice a year, those objects can live in secondary storage.
This principle applies to every specialty activity: cocktails, espresso, fermentation, cake decorating, juicing, bread making, canning, or meal prep. Space should follow real behavior.
Design the kitchen for the people who use it
Organization must match reach, strength, mobility, vision, habits, and household roles. Frequently used heavy items should not require unsafe overhead lifting. People with limited bending may benefit from moving daily supplies upward from low cabinets. Clear labels can help shared households and people who have difficulty remembering where items belong.
For a household with children, accessibility and safety may pull in different directions. You can give children safe, age-appropriate dishes and snacks in a reachable drawer while keeping knives, chemicals, medications, alcohol, and other hazardous items secured according to the needs of your household.
If a household member has a disability or significant mobility limitation, generic “kitchen triangle” advice may not be sufficient. Occupational therapists and accessibility specialists can help design adaptations around the person’s actual movements and assistive devices.
Label selectively
Labels are useful where multiple people use the system, where containers hide their contents, or where a category is easy to misunderstand. They are less useful on obvious objects.
Good labels describe decisions: “Lunch containers,” “Open snacks,” “Baking,” “Use first,” or “Pet supplies.” A cabinet labeled merely “Stuff” does not help anyone put items away.
Before making permanent labels, test the new layout for a week. Real cooking will reveal whether your first categories make sense. Temporary masking tape or removable labels are enough during the trial period.
Do not buy organizers until the layout survives real life
Buying bins first is one of the most expensive organization mistakes. Containers can make an inefficient category look tidy without solving why it is in the wrong place.
Use boxes, trays, or existing containers as temporary prototypes. Test them for a week. If the grouping makes your routine faster, measure the exact space and then consider a durable organizer. This prevents a drawer from becoming a collection of organizers that do not quite fit.
Measure three dimensions and the opening
For cabinets and drawers, measure usable width, depth, and height. Also measure door hinges, plumbing, drawer lips, and the actual opening through which an organizer must pass. A container that technically fits inside a cabinet may not fit through the door or may block a hinge.
Use a 90-minute reset when the kitchen is already overwhelming
If your kitchen is currently crowded, do not wait for a perfect weekend. A focused reset can create immediate improvement without reorganizing every cupboard.
Minutes 0–15: clear the main work surface
Remove everything from the primary preparation counter that does not directly support daily food preparation. Return objects to their real homes or place unresolved items in one temporary box outside the kitchen. Do not spend the entire session making decisions about paperwork or unrelated possessions.
Minutes 15–30: repair the sink and dish path
Load or wash dishes, clear the drying area, empty the dishwasher if needed, and put dish supplies together. Your kitchen will feel substantially more usable once the sink and counter are not blocked.
Minutes 30–50: build the cooking zone
Gather your most-used pan, cooking utensils, pot holders, and basic seasonings. Give them reliable homes close to the stove while maintaining a safe area around heat. Move decorative or rarely used objects away from this zone.
Minutes 50–70: create one visible pantry shelf
Choose the shelf that contains your most frequently used food. Group similar items, remove empty packaging, check questionable or damaged packages, rotate older appropriate stock forward, and create a small use-soon section.
Minutes 70–85: fix the refrigerator’s obvious problems
Check temperature, remove food that should be discarded according to food-safety guidance, contain raw meat securely, group leftovers where they are visible, and avoid blocking airflow with overpacking.
Minutes 85–90: write down the next three fixes
Stop before turning the reset into an all-day project. Note the next three high-value improvements, such as sorting food containers, moving the blender, or adding a shelf riser after measuring. A useful kitchen can be improved incrementally.
Organize groceries as part of the system
A kitchen becomes disorganized at the moment new groceries enter it. Create a predictable unloading sequence.
Put refrigerated and frozen food away first. FDA advises refrigerating or freezing perishables promptly and following the two-hour rule for foods that require refrigeration, reduced to one hour when air temperature is above 90°F (32°C). After cold food is secured, put away pantry goods by category and rotate identical products as appropriate.
Break down bulky outer packaging only when it is safe and useful to do so. Do not discard preparation instructions, safety information, allergen information, or identifying codes you may need.
Make the system easy to reset after dinner
A good kitchen should be able to return to baseline in a short closing routine. Try this sequence:
- Put leftovers into appropriate containers and refrigerate them promptly.
- Return ingredients to their zones rather than leaving them on the counter.
- Load or wash cookware and dishes.
- Wipe food-preparation surfaces appropriately.
- Put the main cutting board and tools back in their assigned homes.
- Clear the prep counter so tomorrow begins with usable space.
If this routine consistently takes too long because storage is difficult, the system needs adjustment. Organization is not successful because it looks good immediately after a major cleanup. It is successful when an ordinary tired person can restore it after an ordinary Tuesday dinner.
Troubleshoot the most common failures
Problem: the counter becomes cluttered again within days
Likely cause: items do not have convenient homes, or the counter is functioning as the household’s general landing zone.
Fix: identify the three categories that return most often. Give each a specific nearby home or move the household landing zone outside the cooking area. If an appliance repeatedly returns to the counter because its cabinet is hard to access, reconsider whether it deserves permanent space.
Problem: family members ignore the system
Likely cause: categories are too specific, locations are unintuitive, or one person created the system without considering other people’s routines.
Fix: simplify. “Snacks” may work better than five snack subcategories. Put dishes where the person unloading the dishwasher naturally reaches. Use labels only where they clarify a decision.
Problem: you still buy duplicates of pantry food
Likely cause: inventory is not visible.
Fix: stop stacking identical products in multiple places. Create one home for each category. Before shopping, scan that zone or keep a simple running grocery list in a location everyone can update.
Problem: lower cabinets are full but hard to use
Likely cause: they are packed front to back with loose objects.
Fix: group deep-cabinet items in removable bins or place low-frequency bulky items in the back and daily items near the opening. Consider vertical dividers for flat cookware.
Problem: organizers made the kitchen feel smaller
Likely cause: the organizers were purchased before the categories were reduced.
Fix: remove the organizers, declutter and regroup by task, then reinstall only the pieces that improve access.
Problem: the refrigerator looks organized but food gets forgotten
Likely cause: matching bins hide food or create too many layers.
Fix: prioritize visibility. Use transparent containers where appropriate, avoid deep bins for unrelated items, maintain one use-first area, and review leftovers before buying or cooking more food.
How to organize a rental kitchen without permanent changes
Renters can improve workflow without drilling or remodeling. Start with movable solutions: shelf risers, tension-based dividers used according to their instructions, drawer trays, freestanding carts, removable bins, and vertical pan organizers. Confirm any adhesive or mounted product is suitable for the surface and allowed by the lease.
Because rental kitchens often have odd cabinet dimensions, measure before purchasing. Standard-looking cabinets can vary enough that an organizer advertised for kitchens may not fit.
A narrow rolling cart can act as mobile storage or additional prep support if it is stable, rated for the load, does not block an exit, and does not create a trip hazard. Locking casters can be useful when the cart is used as a work surface.
How to organize a galley kitchen
In a galley layout, traffic management matters as much as storage. Put the most frequently paired actions on the same side when possible so you are not constantly turning across a narrow aisle. If the refrigerator is at one end, create grocery and beverage storage nearby to prevent people from walking through the cooking area.
Keep floors and the center aisle clear. Avoid storage solutions that protrude into walking space or require cabinet doors to stay open. If two people cook together, assign parallel tasks—such as prep on one side and stove work on the other—rather than having both repeatedly cross the same midpoint.
How to organize a kitchen with almost no drawers
Prioritize the limited drawer space for tools that benefit most from protected horizontal storage, such as flatware and certain sharp tools in appropriate organizers. Move bulky cooking utensils to a stable countertop holder or safe wall storage if practical. Use vertical cabinet dividers for cutting boards and baking sheets, and bins for small tools that would otherwise disappear on shelves.
Do not solve missing drawers by placing every tool on the counter. Open storage should be selective.
How to organize a kitchen for meal prep
If you regularly prepare several meals at once, your system needs space for temporary volume. Keep a set of stackable, compatible food-storage containers in one zone. Store frequently used batch-cooking tools together. Preserve a large prep surface by removing low-frequency countertop appliances.
Plan refrigerator space before cooking. Cooling and storing multiple portions is difficult if the refrigerator is already packed. USDA recommends dividing large amounts of hot food, such as soups or stews, into smaller portions and shallow containers so they cool more rapidly in the refrigerator.
Label prepared food when dates or contents are not obvious, and follow appropriate refrigerated storage guidance.
How to maintain the system in five minutes a day
Long-term organization is more about correction than perfection. Use a tiny daily reset:
- Return stray tools to their task zones.
- Clear the primary prep surface.
- Move one use-soon food to the front.
- Put clean dishes away.
- Remove one empty package or obvious piece of trash.
Once a week, scan the refrigerator for leftovers and food that needs attention, check the pantry before shopping, and notice whether one cabinet is becoming difficult to close. Fix small drift before it becomes another full reorganization project.
A practical checklist for testing your new kitchen layout
Cook three ordinary meals before declaring the project finished. During those meals, ask:
- Can I begin preparation without moving objects off the counter?
- Are my most-used knife, board, pan, and utensils easy to retrieve?
- Can I reach basic seasonings without leaving the cooking area?
- Are combustible items kept away from the stovetop?
- Can raw meat or seafood be handled without contaminating ready-to-eat food?
- Can someone get a drink without blocking the cook?
- Can I identify leftovers and food that should be used soon?
- Can I unload the dishwasher without walking back and forth excessively?
- Can every frequently used object be returned to its home without unpacking another category?
- Does the main counter return to empty after cleanup?
If you answer no to several questions, do not buy more storage immediately. Move the categories first. A ten-inch relocation can be more useful than a new organizer.
Frequently asked questions
Should I organize a kitchen by category or by zone?
Use both, but let zones lead. A zone represents an action—preparation, cooking, beverages, cleanup, baking. Within each zone, group related categories. This keeps the system intuitive while preventing unrelated objects from being mixed together.
What should stay on a small kitchen counter?
Keep only items that are used frequently enough to justify their footprint, are safe in that location, and do not interfere with preparation. The answer may include a coffee maker, kettle, knife block, or utensil holder, but it should reflect your actual routine. Protect at least one reliably clear preparation area.
Are clear pantry containers necessary?
No. They can improve visibility for frequently purchased dry goods, but original packaging is often perfectly functional and preserves important product information. Use containers when they solve a storage, visibility, or pest-control problem, not because every pantry needs to match.
Where should raw meat go in the refrigerator?
Keep raw meat, poultry, and seafood in sealed containers or securely wrapped so their juices cannot contaminate other foods. A lower designated area can help contain leaks, but follow your appliance design and official food-safety guidance.
What is the fastest place to start if my kitchen is very cluttered?
Clear one safe preparation counter, restore the sink/dishwashing path, and create a simple stove zone. Those three improvements immediately make the room more usable. You can organize pantry shelves and specialty equipment later.
How often should I reorganize the kitchen?
You should not need frequent total reorganizations. Make small corrections whenever your habits change, and review the system seasonally or when the same frustration repeatedly appears. A layout that needs a complete reset every few weeks is probably too complicated.
Conclusion: optimize for the next ordinary meal
The point of kitchen organization is not to make every shelf photograph-ready. It is to reduce the work between deciding to cook and sitting down to eat. The most successful small kitchen is one where daily tools are easy to reach, preparation space stays clear, food is visible and stored safely, cleanup has a predictable path, and occasional equipment does not crowd out everyday needs.
Start with one action rather than one cabinet. Clear your main preparation surface, watch how you move during the next meal, and relocate the tools that force unnecessary steps. The biggest mistake to avoid is buying storage products before you know what problem they need to solve. Once the workflow makes sense, organizers become optional refinements rather than the foundation of the system.
Sources and further reading
- USDA Food Safety and Inspection Service: Keep Food Safe — Food Safety Basics
- USDA Food Safety and Inspection Service: Refrigeration and Food Safety
- U.S. Food and Drug Administration: Are You Storing Food Safely?
- U.S. Fire Administration: Cooking Fire Safety
- Wikimedia Commons image source: Kitchen interior design
- Wikimedia Commons image source: Kitchen utensils
- Wikimedia Commons image source: pantry container storage