

Updated for 2026. A fire-safe home is not created by buying one extinguisher, placing it under the sink, and hoping you never need it. Real protection comes from a system: early warning, fast escape, fewer ignition hazards, clear responsibilities, and regular practice. The good news is that you do not need to rebuild your house or complete everything in one exhausting weekend. You can create a strong, practical plan in 30 days by improving one part of your home at a time.
This guide turns fire safety into a room-by-room project that ordinary households can actually finish. It is designed for homeowners, renters, families with children, people who live alone, older adults, pet owners, and residents of apartments or multi-story homes. Each step explains not only what to do, but why it matters, how to avoid common mistakes, and when to call a qualified professional instead of attempting a repair yourself.
Important: If you see flames, smell heavy smoke, hear an alarm, or suspect carbon monoxide, leave immediately and call your local emergency number from outside. Do not delay escape to investigate, collect possessions, fight a growing fire, or re-enter the building.
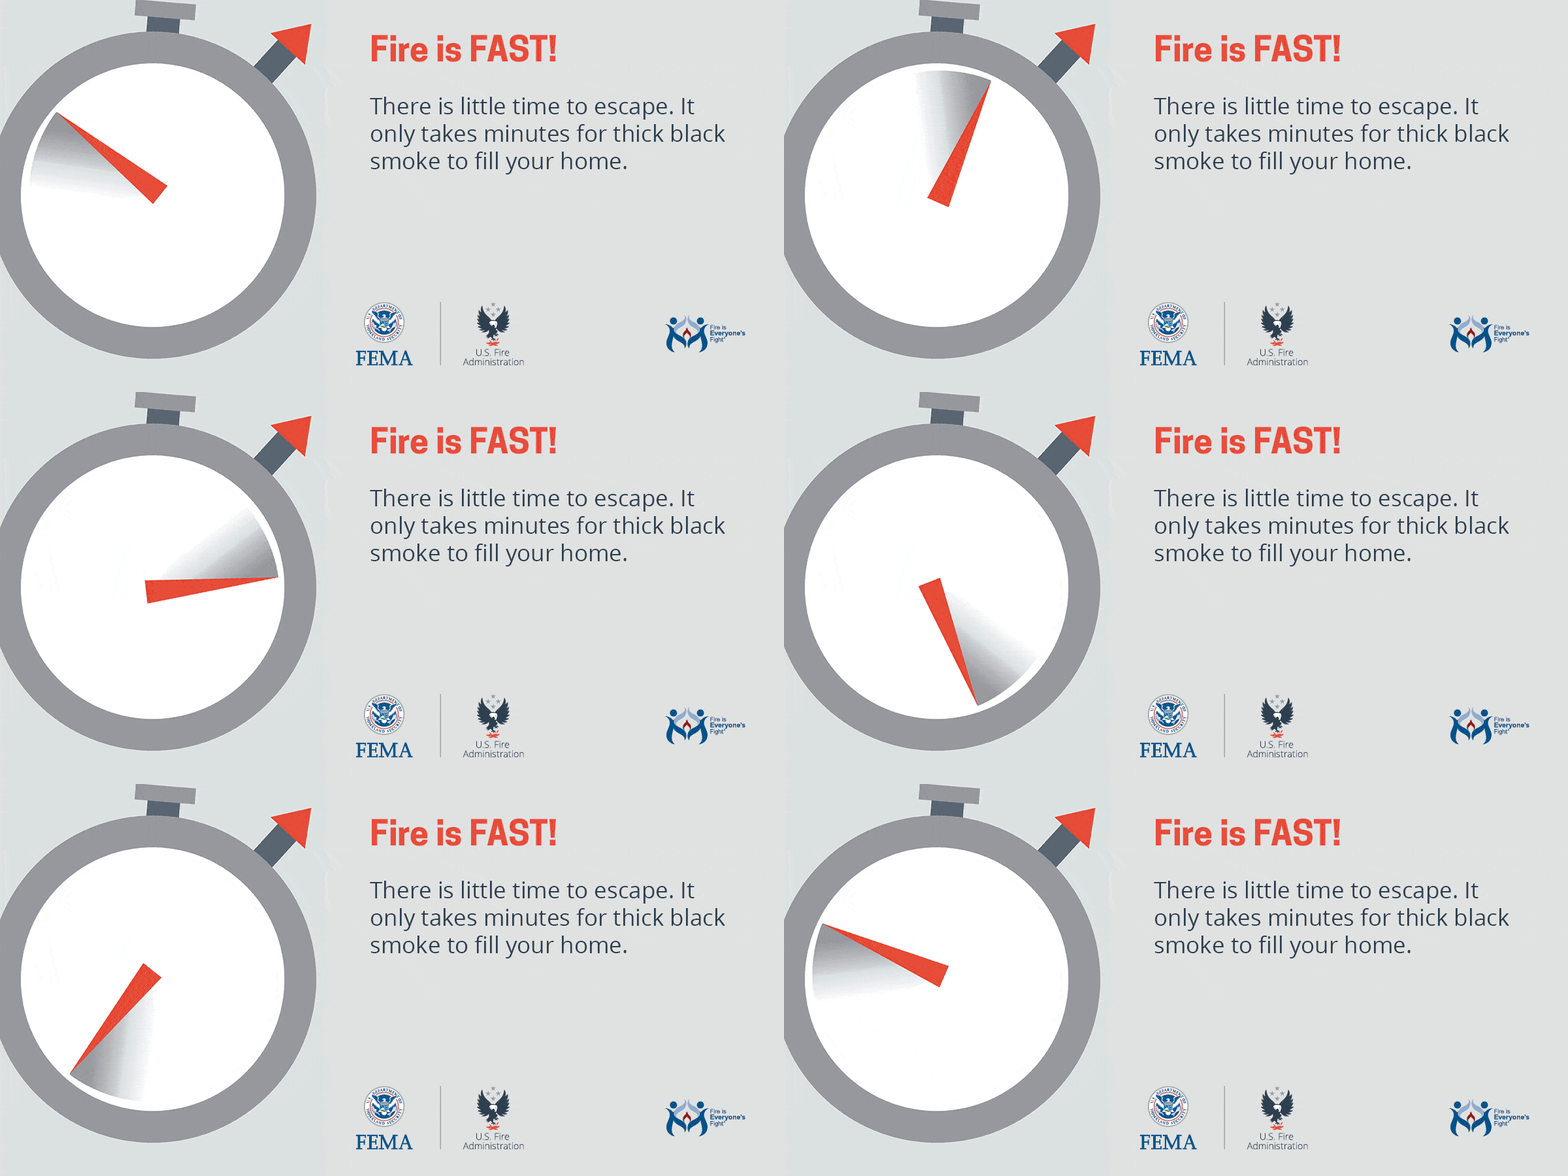 Fire can spread quickly, so preparation must happen before an emergency. Image: U.S. Fire Administration.
What You Will Build in 30 Days
By the end of this plan, you will have an alarm map, two escape routes from sleeping areas where possible, a written household escape plan, a designated outdoor meeting point, safer cooking and electrical habits, a schedule for testing equipment, and a drill that includes the people most likely to need help. You will also know which problems are simple housekeeping tasks and which require an electrician, heating technician, landlord, alarm installer, or fire-safety professional.
The plan is divided into five phases. Days 1–5 establish your baseline. Days 6–12 improve warning systems and escape routes. Days 13–20 remove common hazards room by room. Days 21–26 adapt the plan for people, pets, apartments, and special circumstances. Days 27–30 test the entire system and turn it into a repeatable routine.
Before You Start: Gather Simple Supplies
- A notebook, printed floor plan, or drawing paper
- A phone camera for documenting hazards and equipment labels
- A permanent marker and small labels
- A step stool used according to its safety instructions
- Fresh batteries if your alarms use replaceable batteries
- A tape measure and flashlight
- A folder for receipts, manuals, inspection records, and your final plan
Do not buy new alarms, extinguishers, ladders, or electrical equipment until you complete the first inspection. The correct product depends on your home, local code, alarm type, fuel-burning appliances, sleeping arrangement, and the equipment you already own. Buying first often leads to incompatible alarms, unnecessary duplication, or devices placed where they create nuisance alerts.
Phase 1: Understand Your Home and Its Risks
Day 1: Draw a Simple Floor Plan
Start with a basic map of every level of your home. It does not need to be architectural. Draw walls, bedrooms, doors, windows, stairs, balconies, attached garages, and exterior exits. Mark where people sleep, including temporary sleeping areas such as a sofa bed, nursery, converted office, or guest room. Then mark the locations of smoke alarms, carbon monoxide alarms, fire extinguishers, electrical panels, gas shutoff points, heating equipment, and any fire escape ladder.
This map becomes the foundation for every later decision. It reveals alarm gaps, blocked exits, long travel paths, and rooms with only one practical way out. Add the date to the plan because homes change. Furniture moves, children change rooms, older relatives may move in, and renovations can alter escape paths. Keep one digital photo of the map and one paper copy where household members can reach it.
Day 2: Identify the People Who May Need Help
Write down who lives in the home and what assistance each person might need at night. A toddler cannot be expected to execute an adult escape plan. A person who uses a wheelchair may need a protected route, a ground-floor sleeping location, or help from a designated partner. Someone who is deaf or hard of hearing may need visual or tactile alert equipment. A heavy sleeper may not wake to an alarm in another part of the home. A visitor may not know the exits.
Assigning help does not mean one person should risk re-entering a burning building. It means responsibilities are decided in advance. For example, one adult may assist a young child while another calls emergency services from the meeting point. Build redundancy: if the primary helper is absent, someone else should know the role. Record medication, mobility devices, and communication needs only as much as necessary for emergency planning, and keep private information secure.
Day 3: List Your Most Likely Ignition Sources
Walk through the home and list anything that produces heat, flame, sparks, or high electrical demand. Common examples include stoves, ovens, portable heaters, fireplaces, candles, grills, clothes dryers, charging stations, overloaded power strips, damaged cords, workshops, smoking materials, fuel containers, and lithium-ion battery devices. Include seasonal items such as holiday lights or outdoor heaters even if they are stored away.
Do not assume that a familiar appliance is low risk simply because it has worked for years. Look for changes: a plug that feels warmer than before, a breaker that trips repeatedly, a dryer taking longer to dry clothes, soot near a heater, a damaged battery, or an outlet that no longer grips a plug firmly. These are not problems to cover with tape or “watch for a few days.” Stop using questionable equipment and arrange qualified inspection where appropriate.
Day 4: Check Your Address Visibility and Emergency Access
Stand at the road or building entrance in daylight and after dark. Can emergency responders quickly identify your address? Trim vegetation that hides numbers, replace faded labels, and use numbers that contrast clearly with the background. In an apartment building, confirm the building number, floor, unit number, stairwell, and the best entrance for responders. Teach household members to provide the full address rather than assuming a phone automatically communicates the correct location.
Keep driveways, gates, hallways, and access paths clear. Do not store bicycles, boxes, or furniture in shared corridors or stairwells. If your property has a locked gate, understand how emergency access works in your area. A visible address and clear route will not prevent a fire, but they can reduce confusion during the minutes when fast response matters most.
Day 5: Create a “Fix, Replace, or Refer” List
Review your notes and divide problems into three columns. “Fix” includes simple tasks such as clearing a blocked exit or moving paper away from a stove. “Replace” includes expired or damaged consumer items that can be safely swapped according to the manufacturer’s instructions. “Refer” includes work for a landlord or professional, such as recurring breaker trips, damaged fixed wiring, gas odors, a malfunctioning furnace, chimney concerns, inaccessible alarm wiring, or missing building safety equipment.
This list prevents a common failure: noticing many hazards, feeling overwhelmed, and completing none of them. Give urgent items a deadline and stop using equipment that appears unsafe. Renters should notify the landlord or property manager in writing and keep a copy. Local requirements differ, so contact the appropriate building or fire authority when a serious condition is not corrected.
Phase 2: Build Early Warning and Clear Escape Routes
Day 6: Map Smoke Alarm Coverage
Compare your floor plan with current fire-safety guidance and local rules. A widely recommended arrangement places smoke alarms in every sleeping room, outside each separate sleeping area, and on every level of the home, including the basement. Interconnected alarms offer stronger protection because when one alarm detects smoke, all compatible alarms sound. Follow the manufacturer’s installation instructions and local code, especially for ceiling or wall placement and distance from cooking appliances.
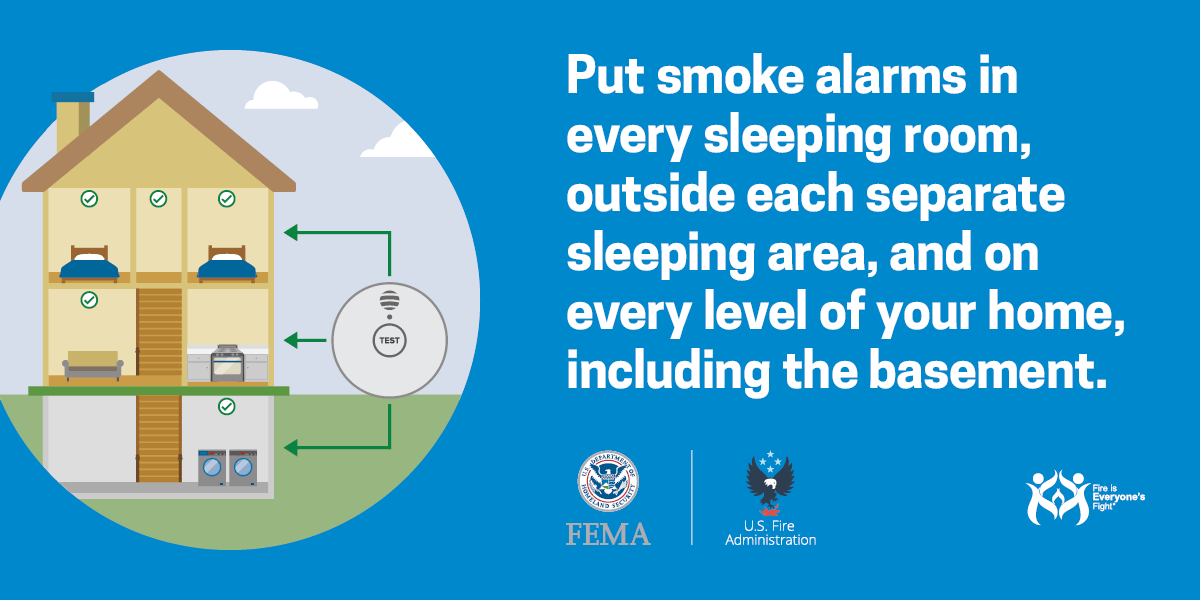 Map alarm coverage by sleeping area and level. Image: U.S. Fire Administration.
Do not remove a battery because cooking smoke or shower steam triggers nuisance alarms. Use the alarm’s hush feature, improve ventilation, and ask a qualified person whether the alarm should be repositioned within permitted limits. A silenced or disabled alarm creates a dangerous gap. In rentals, report missing or nonworking alarms promptly rather than assuming another alarm elsewhere is sufficient.
Day 7: Record the Age and Type of Every Smoke Alarm
Photograph the back or side label of each alarm and record its manufacture date, replacement date, power source, model, and whether it interconnects with other units. Smoke alarms do not last forever; U.S. fire-safety guidance commonly recommends replacing them when they are 10 years old. However, always follow the model’s instructions, end-of-life signal, and local requirements. Replace any alarm that is damaged, contaminated with paint, missing parts, or fails its prescribed test.
Write the planned replacement month on a small label near the alarm or in your home maintenance calendar. Do not paint alarms or cover openings. When buying replacements, check compatibility before connecting new and old units. Hardwired alarm replacement may require a qualified electrician or alarm professional, especially if wiring, connectors, or local regulations are involved.
Day 8: Test Alarms Correctly
Tell everyone in the home that you are conducting a test, then use the test button exactly as the manufacturer directs. Do not test a smoke alarm by holding a flame, burning paper, or creating smoke indoors. The test button verifies important alarm functions without introducing a new hazard. Listen from bedrooms with doors closed, from the basement, and from areas used by anyone who may have difficulty hearing.
Record the result for every device. If one alarm is weak, intermittent, or silent, follow the manual, replace batteries where applicable, clean only as instructed, and replace the unit if it still fails. Test smoke alarms at least monthly unless your local authority or manufacturer specifies a more demanding schedule. A calendar reminder is more reliable than waiting for a seasonal clock change.
Day 9: Add Carbon Monoxide Protection Where Needed
Carbon monoxide is a colorless, odorless gas associated with fuel-burning appliances and engines. Homes with furnaces, fireplaces, gas water heaters, generators, attached garages, or other combustion sources need careful CO planning. CPSC guidance recommends CO alarms on every level and outside sleeping areas; placement must also follow the manufacturer’s instructions and local code. Avoid placing a CO alarm where furniture, curtains, vents, or an appliance can interfere with it.
Record the age and replacement instructions for CO alarms just as you did for smoke alarms. Combination units are convenient, but they still have product-specific service lives and testing instructions. An alarm is not a substitute for correct appliance installation, ventilation, and maintenance. If a CO alarm sounds, move everyone to fresh air, call emergency services, account for all occupants, and do not re-enter until authorities say it is safe.
Day 10: Find Two Ways Out of Every Sleeping Room
For each bedroom and regular sleeping area, identify a primary exit and a secondary exit where possible. The primary route is often the door leading to a hallway and an exterior door. The second route may be another door or an operable window that leads to a safe place. Check whether windows open without keys, excessive force, or tools. Remove furniture, storage bins, and security devices that prevent quick release.
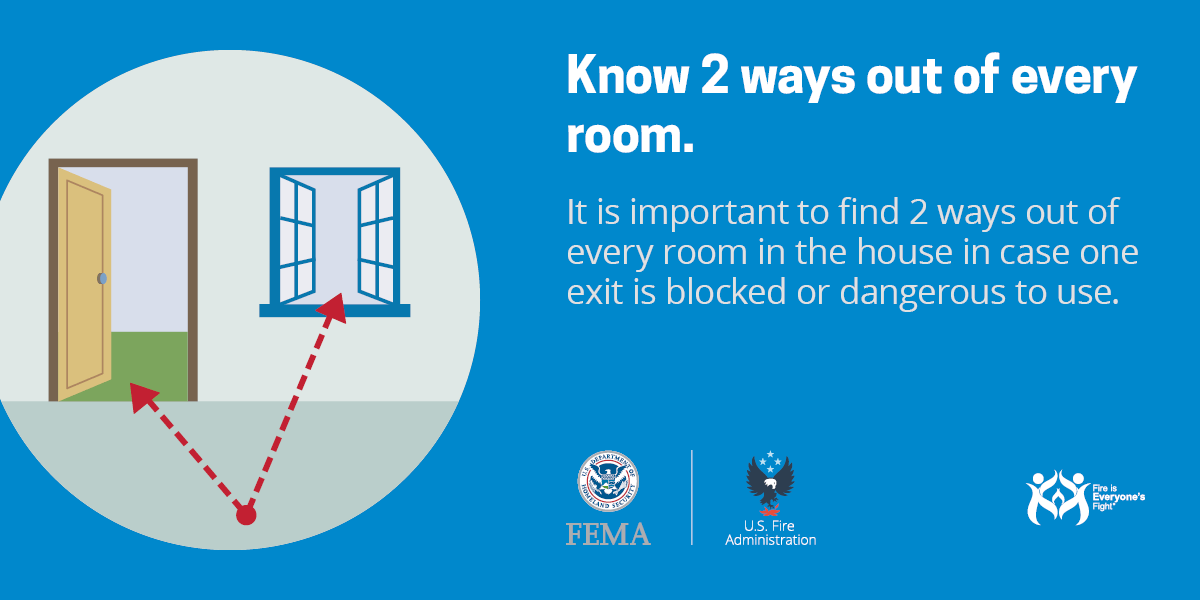 Identify two ways out of each room where possible. Image: U.S. Fire Administration.
Upper-floor windows may require a listed escape ladder selected for the window and building height. Do not assume a decorative balcony, roof, tree, or improvised rope is a safe route. Evaluate ladders with the manufacturer’s instructions and local fire department guidance, and never practice by climbing from an elevated window unless trained professionals specifically supervise the activity. The purpose of planning is to remove uncertainty, not introduce a fall hazard.
Day 11: Clear and Light Escape Paths
Walk every planned route at night with normal doors closed. Move shoes, laundry baskets, boxes, toys, cables, and furniture out of the path. Confirm that doors and windows operate easily and that required keys are not hidden in a place that becomes impossible to reach during smoke or darkness. Keep stairs and landings clear. Use appropriate night lighting that does not overload outlets or create tripping hazards.
In shared buildings, never store items in corridors or stairs. Confirm that exit doors are not chained, blocked, or disguised by storage. Report damaged emergency lighting, locked exits, or missing signs to building management immediately. Residents should know at least two stair routes when the building provides them and should not plan to use an elevator during a fire unless emergency officials direct them to do so.
Day 12: Choose One Outdoor Meeting Place
Select a permanent meeting point in front of the home and a safe distance away, such as a particular tree, mailbox, light pole, or neighbor’s fence. The location should be easy for children and visitors to recognize, visible enough for a head count, and away from traffic, smoke, overhead lines, and arriving emergency vehicles. Everyone must go directly there and stay there.
A meeting point prevents people from re-entering because they think someone is missing. Once outside, one person calls emergency services and reports anyone who may still be inside. Never return for a pet, phone, medication, document, or valuable item. Firefighters have protective equipment, training, and a coordinated search process; household members do not.
Phase 3: Remove Hazards Room by Room
Day 13: Make the Kitchen Safer
Cooking is a leading source of home fires, so begin with behavior rather than gadgets. Stay in the kitchen when frying, boiling, grilling, or broiling. If you leave, turn the burner off. Keep paper towels, packaging, curtains, oven mitts, wooden utensils, and clothing away from the stovetop. Turn pot handles inward and create a child-free zone around hot appliances.
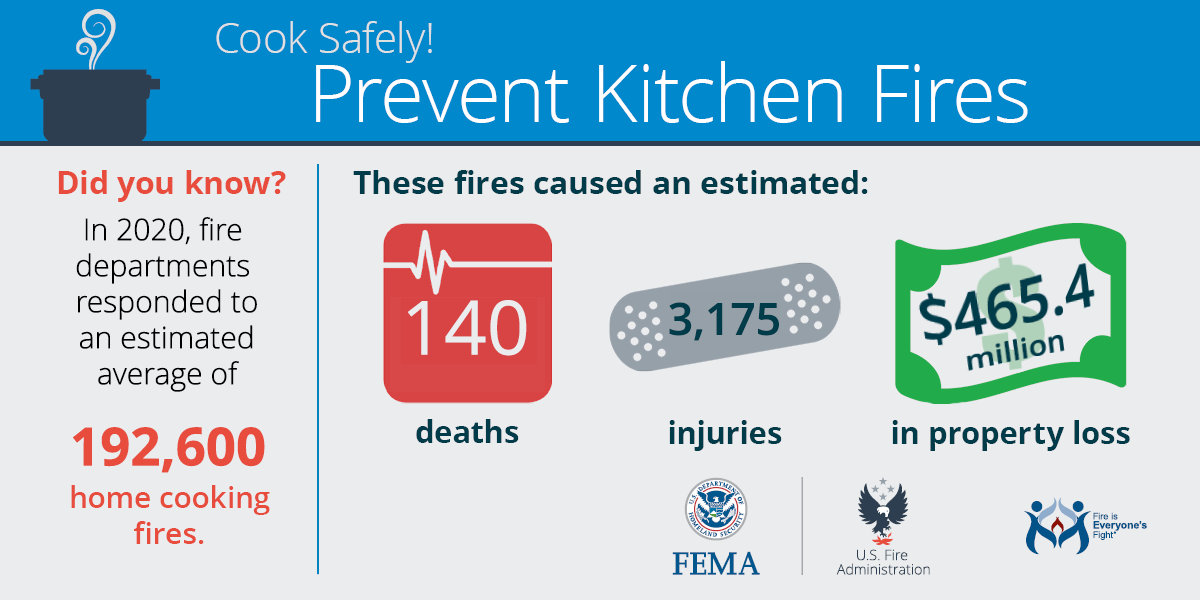 Reduce kitchen risk through supervision and clear space. Image: U.S. Fire Administration.
Keep a lid or baking sheet nearby while cooking. For a small contained grease fire in a pan, official guidance commonly advises sliding a lid over the pan, turning off the burner, and leaving the pan covered until cool. Never move a burning pan or throw water on a grease fire. If flames spread, smoke becomes heavy, or you are unsure, get out, close the door if possible, and call emergency services.
Day 14: Inspect Electrical Cords, Outlets, and Power Strips
Unplug devices before inspecting them. Look for fraying, cracks, scorch marks, loose blades, melted plastic, buzzing, or plugs that fit loosely. Replace damaged extension cords instead of repairing them with tape. Do not route cords under rugs, through doors, or where furniture can pinch them. Avoid daisy-chaining power strips or plugging one extension cord into another.
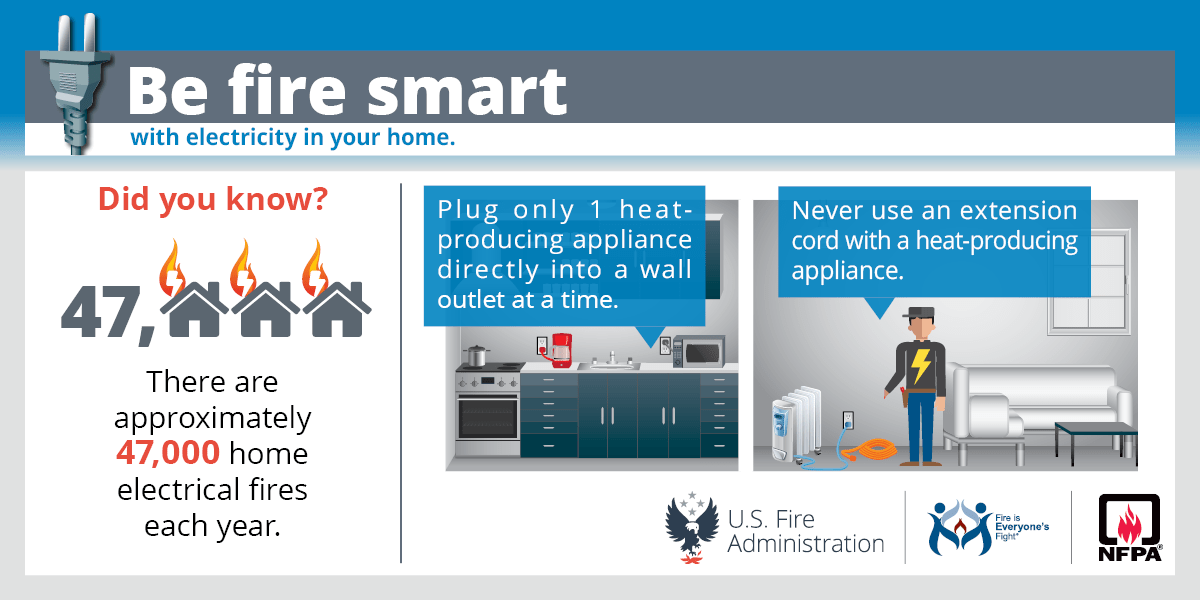 Damaged cords, overloaded outlets, and improper extension-cord use require attention. Image: U.S. Fire Administration.
Major appliances such as refrigerators, washers, dryers, and stoves should generally be connected directly to suitable wall outlets rather than extension cords. Only use power strips with appropriate overload protection and within their ratings. Warm outlets, repeated breaker trips, sparks, burning odors, or discoloration require prompt evaluation by a qualified electrician. Never increase a breaker size or replace a fuse with a higher rating to stop nuisance trips.
Day 15: Clean and Inspect the Laundry Area
Clean the dryer lint screen before or after each load and check the area behind the dryer for lint accumulation. Inspect the vent path for crushing, disconnection, excessive length, or material prohibited by the appliance instructions or local code. Clothes taking unusually long to dry can indicate restricted airflow. Have the exhaust system professionally cleaned or repaired when you cannot safely access it or when performance suggests a blockage.
Do not run the dryer when no responsible adult is home or while everyone is asleep. Keep combustible storage away from the dryer, water heater, furnace, and electrical equipment. Never dry items contaminated with gasoline, cooking oil, solvents, or other flammable substances unless the product and appliance instructions clearly permit a safe method. When uncertain, obtain professional disposal or cleaning advice.
Day 16: Review Heating Equipment and Fireplaces
Maintain a clear zone around space heaters, fireplaces, radiators, and other heat sources. U.S. fire-safety guidance commonly recommends keeping combustible items at least three feet away. Place portable heaters on stable, level surfaces and plug them directly into an appropriate wall outlet according to the manufacturer’s instructions. Turn them off when leaving the room or going to sleep.
Schedule annual inspection and cleaning of heating systems, chimneys, and vents by qualified professionals where applicable. Never use an oven to heat a home. Use a sturdy fireplace screen and dispose of cooled ashes in a metal container stored outside and away from structures, following local instructions. Soot, unusual odors, backdrafting, or a persistent alarm are reasons to stop using equipment and seek help.
Day 17: Secure Candles, Smoking Materials, and Open Flames
The safest candle is an approved flameless alternative, especially in homes with children, pets, oxygen equipment, unstable furniture, or people who may forget a flame. When candles are used, place them in stable holders away from curtains, bedding, paper, decorations, and drafts. Extinguish them before leaving the room or going to sleep. Do not place candles where a pet can knock them over.
Smoking materials require strict control. Smoke outside when possible, use deep sturdy ashtrays, and never smoke in bed or near medical oxygen. Soak cigarette butts and ashes before disposal and keep lighters and matches locked away from children. If anyone uses oxygen, follow the equipment provider’s fire-safety instructions and keep flames, smoking, and sparking devices well away.
Day 18: Organize the Garage, Basement, and Utility Rooms
These spaces often combine ignition sources with clutter. Keep gasoline, paint thinners, propane cylinders, oily rags, pool chemicals, and other hazardous products in their original labeled containers and store them exactly as directed. Do not store fuel in living areas or near heat, pilot lights, electrical panels, or appliances. Dispose of unwanted chemicals through an approved local program rather than mixing them or pouring them into drains.
Keep the electrical panel accessible, with required clearance and no storage stacked against it. Clear pathways to exterior doors. Do not run vehicles or fuel-powered equipment in an attached garage, even with the door open, because carbon monoxide can enter the home. Consider appropriate heat detection for a garage only after consulting local requirements and product instructions; ordinary smoke alarms may not be suitable for every garage environment.
Day 19: Create a Safe Charging Station for Batteries
Gather phones, laptops, tools, power banks, e-bikes, toys, and other rechargeable devices. Use the charger supplied or approved by the manufacturer, and stop using batteries that are swollen, cracked, unusually hot, leaking, hissing, or producing odor or smoke. Do not charge devices on beds, sofas, under pillows, in direct sunlight, or where exits are blocked. Keep charging areas dry and ventilated as the manufacturer requires.
Avoid overnight charging when the product instructions warn against it, and do not leave large batteries charging unattended. Never modify battery packs or use an incompatible charger to “make it work.” Damaged lithium-ion batteries require special handling and disposal; contact local waste or fire authorities rather than placing them in household trash or recycling bins.
Day 20: Check Doors, Windows, and Bedroom Conditions
Every bedroom should have an unobstructed path to its planned exits. Confirm that security bars have approved quick-release mechanisms where required and that occupants can operate them. Remove double-key deadbolts or other arrangements that can trap people when the key is missing, subject to local security and building rules. Keep bedroom doors closed while sleeping when practical, because a closed door can slow the movement of smoke and heat.
Do not place large furniture where it blocks a window or forces someone to climb over obstacles. Keep mobility aids, glasses, phones, and essential devices in consistent locations, but never plan to collect multiple items before leaving. The escape rule remains simple: wake, alert, exit, close doors behind you if possible, go to the meeting point, and stay out.
Phase 4: Adapt the Plan to Real People and Real Homes
Day 21: Teach Children What the Alarm Means
Children need practice, not frightening descriptions. Let them hear the test sound during a planned drill and explain that it means “go outside now.” Show them the primary and secondary routes, how to crawl low if there is smoke, and where to meet. Teach them never to hide from firefighters and never to return for toys or pets. Young children should know their address and how to call the local emergency number when age appropriate.
Assign an adult to assist each young child and a backup adult in case the first person is away. Do not rely on a child to wake a sibling. Practice during daylight before trying a nighttime drill, and keep the exercise calm. The goal is automatic movement toward safety, not speed at the expense of falls or panic.
Day 22: Plan for Older Adults and Mobility Limitations
Place sleeping areas on an accessible level when possible and keep routes wide enough for mobility devices. Check whether doors, locks, ramps, and thresholds can be managed quickly. A person who needs extra time should be as close as practical to an accessible exit and protected by alarms they can perceive. Consider interconnected alarms, strobe alerts, bed shakers, or other listed accessibility devices after consulting appropriate professionals.
Tell the local fire department about formal community programs for residents who may need assistance, if such programs exist. Avoid informal plans that depend on carrying an adult down stairs unless trained responders or healthcare professionals have developed the method. A realistic plan respects the person’s abilities, preserves dignity, and does not put helpers into impossible lifting situations.
Day 23: Include People Who Are Deaf, Hard of Hearing, or Blind
Standard audible alarms may not be enough for everyone. People who are deaf or hard of hearing may need visible notification appliances or tactile devices, while blind residents may benefit from consistent furniture placement, tactile route practice, and voice-enabled alerts that are part of an approved system. Purchase only equipment designed and listed for the intended safety function, and verify compatibility with existing alarms.
Practice the route under realistic but safe conditions. A household member should not assume that shouting from another room will be effective. Likewise, a smart speaker or phone notification should not replace required alarms. Technology can provide additional layers, but the core system must continue to function during sleep, internet failure, or power loss as designed.
Day 24: Make a Pet Escape Plan Without Delaying People
Keep collars, leashes, and carriers near a primary exit, but never place them where they obstruct the path. Include a pet alert note or window sticker only if your local fire department recommends it and keep the information current. During a drill, practice calling pets toward the exit, but do not train people to search multiple rooms or re-enter a building.
Animals often hide when frightened, so the safest strategy is prevention and quick human escape. Tell firefighters from outside how many pets may be inside and their likely locations. Keep pet sleeping and feeding areas away from open flames, heaters, and exposed cords. Secure stove knobs if pets can activate them and avoid leaving candles unattended around animals.
Day 25: Adjust the Plan for Apartments and High-Rises
Learn the building’s official emergency plan, alarm sound, stair locations, fire doors, refuge areas if provided, and procedures for residents who need assistance. Count the number of doors between your unit and the nearest stair so you can navigate in reduced visibility. Never block or prop open fire doors. Report damaged closers, missing signs, cluttered corridors, or locked exits.
During a fire, use stairs rather than elevators unless firefighters direct otherwise. Leave the apartment, close the door behind you, activate the building alarm if appropriate, and call emergency services from outside or a safe location. If smoke or heat blocks your route, remain behind a closed door, seal obvious gaps if instructed by emergency authorities, call for help, and signal your location. Building-specific instructions and local fire department guidance take priority.
Day 26: Learn the Limited Role of a Fire Extinguisher
A portable extinguisher is a backup tool for a very small, contained fire—not a substitute for alarms, escape, or firefighters. Before considering use, everyone else should be leaving, emergency services should be called, the fire should be small and not spreading, smoke should be limited, and you must have a clear escape route behind you. If any condition is uncertain, leave.
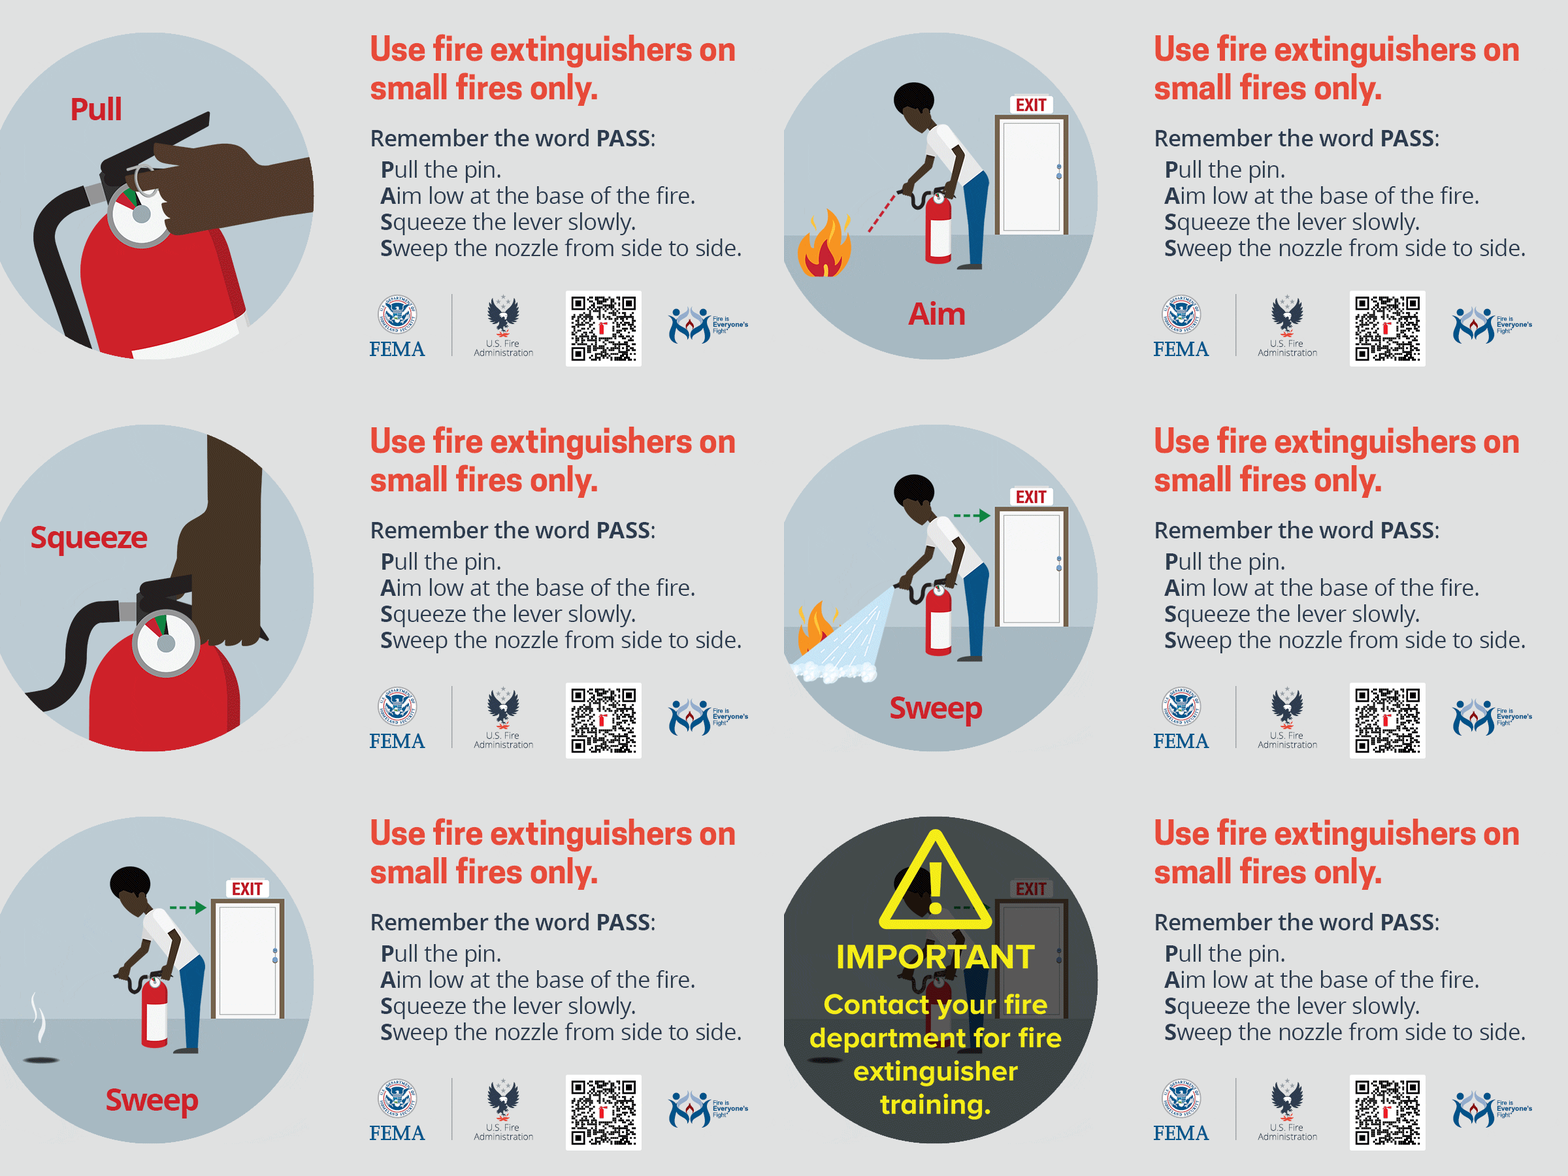 Extinguishers are for small fires only when escape remains safe. Image: U.S. Fire Administration.
Adults who may use an extinguisher should receive hands-on training from a fire department or qualified provider. The familiar PASS sequence—pull, aim, squeeze, sweep—does not replace judgment about when to escape. Select an extinguisher appropriate to the hazards and local recommendations, mount it visibly near an exit rather than beside the most likely fire, inspect it as instructed, and replace or service it after use or when indicators show a problem.
Phase 5: Practice, Measure, and Maintain
Day 27: Write the Final One-Page Escape Plan
Condense your work into one page. Include the address, alarm sound, two routes from sleeping rooms where possible, the outdoor meeting place, assigned helpers, backup helpers, apartment stair routes, and the rule “get out and stay out.” Add the local emergency number and building management contact where relevant. Use simple language that children and visitors can understand.
Place copies where household members will see them, but do not display sensitive medical or personal information publicly. Give overnight guests a 60-second orientation: point out exits, alarms, the meeting place, and any unusual locks. Update the plan whenever people, rooms, or access needs change.
Day 28: Conduct a Daytime Drill
Announce the drill in advance. Press a smoke alarm test button to start, then have everyone follow their assigned route to the meeting place. Close doors behind you where practical. Do not simulate smoke with theatrical products, blindfold participants, turn off lights on stairs, climb escape ladders, or create panic. Observe whether people recognize the alarm, remember the route, and arrive at the correct meeting point.
Time the drill for learning, not competition. U.S. preparedness guidance encourages households to practice getting out quickly, often aiming for under two minutes, but safety during practice comes first. Record problems: a child went to the wrong door, a lock was difficult, a pet carrier blocked the hall, or an alarm could not be heard. Correct the plan rather than blaming the participant.
Day 29: Conduct a Second Drill Under Different Conditions
Repeat the drill from another room or at a different time, still with advance notice for anyone who may be distressed. Ask household members what they would do if the primary exit were blocked. Practice crawling low along a clear path and touching a door cautiously without opening it if the other side may be unsafe. In an apartment, practice locating the stair door without using the elevator.
Do not rehearse dangerous actions such as opening upper-story windows, jumping, or deploying a ladder with people on it unless supervised by qualified professionals. The second drill should test decisions and communication, not physical stunts. Update the plan after the drill and schedule the next one, commonly at least twice a year or as advised locally.
Day 30: Build a Maintenance Calendar
Turn the project into a routine. Create monthly, seasonal, and annual reminders. Monthly tasks can include alarm tests and checking that exits remain clear. Seasonal tasks can include reviewing heaters, cleaning storage areas, inspecting cords, and updating the household roster. Annual tasks can include professional heating or chimney service where applicable, fire extinguisher review, plan updates, and a full home drill.
Add product-specific replacement dates for alarms, extinguishers, batteries, and escape equipment. Keep receipts and manuals in one folder. After any renovation, new appliance, new tenant, birth, mobility change, or bedroom move, repeat the relevant parts of this guide. A fire-safety plan is not finished when it is written; it is effective when it remains accurate.
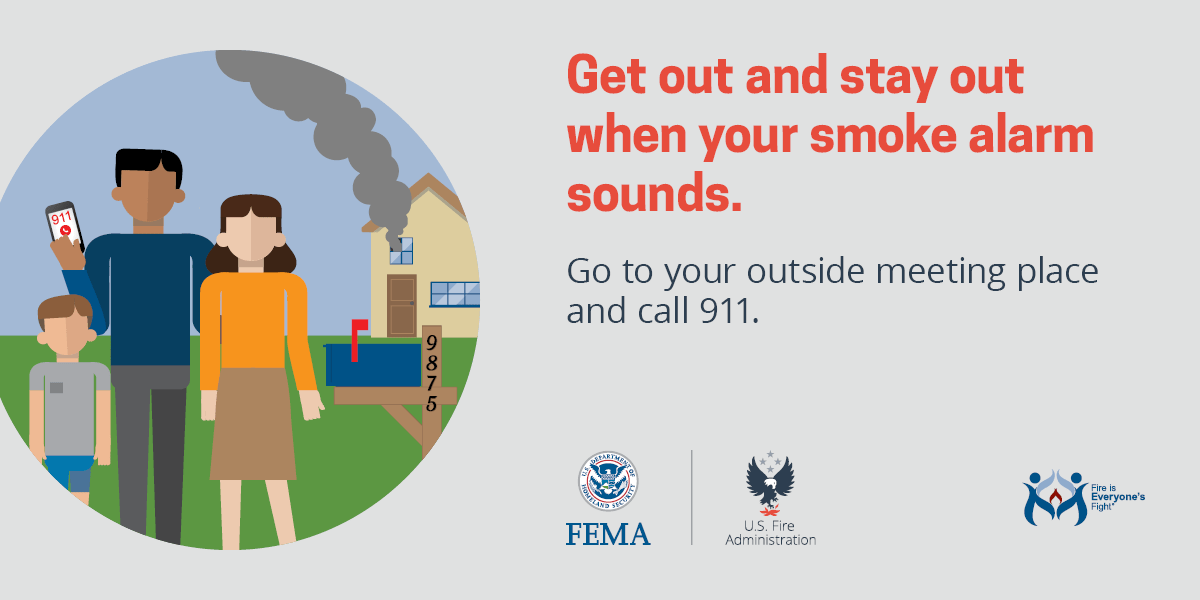 The final rule is always the same: get out, meet outside, and stay out. Image: U.S. Fire Administration.
Room-by-Room Quick Audit
Kitchen
- Combustible items are kept away from burners.
- An adult stays nearby during high-heat cooking.
- Pot handles are turned inward.
- A lid or baking sheet is within reach.
- Appliance cords are undamaged and not used with unsuitable extension cords.
- The route to the exit is clear.
Bedrooms
- Smoke alarms are present as required and tested.
- Doors and windows open without searching for tools.
- Two routes are identified where possible.
- Furniture and storage do not block exits.
- Children and adults know the meeting point.
- Accessibility alert devices work for the people who need them.
Living Room
- Candles and heaters are separated from curtains and furniture.
- Power strips are not overloaded or daisy-chained.
- Charging devices are on stable, non-combustible surfaces.
- Fireplace screens and clearances are maintained.
- Primary pathways remain open at night.
Laundry and Utility Areas
- The lint screen and vent are maintained.
- Combustible storage is away from heat sources.
- Electrical panels and shutoffs remain accessible.
- Fuel-burning equipment receives scheduled professional service.
- Carbon monoxide alarms are installed and tested as required.
Garage and Storage Areas
- Fuel and chemicals are stored in approved locations and containers.
- Battery charging follows manufacturer instructions.
- No engine is run in an attached garage.
- The door into the home closes and latches properly where required.
- Exit routes and access for responders are clear.
Common Fire-Safety Mistakes to Avoid
Buying Devices Without Reading the Instructions
An alarm or extinguisher can be the wrong type, incompatible with existing equipment, placed in the wrong location, or maintained on the wrong schedule. Keep the manual, register the product when appropriate, and check recalls. Product instructions and local codes are part of the safety system, not optional paperwork.
Assuming a Smart Home Replaces Required Alarms
Phone notifications, cameras, smart speakers, and internet-connected sensors can add information, but they may fail during power or network outages. Required life-safety alarms must operate as designed independently of a phone being charged, connected, or within hearing range.
Keeping an Extinguisher Too Close to the Stove
If flames block access to the extinguisher, it is useless. Place equipment near an exit and follow professional guidance. More importantly, do not let the presence of an extinguisher persuade you to fight a fire that is spreading, producing heavy smoke, or cutting off escape.
Creating an Escape Plan That Depends on Collecting Items
Plans fail when they include retrieving a phone, wallet, medicine bag, pet carrier, or document box from another room. Keep helpful items near an exit only if they do not block it, but the plan must work when nothing can be collected.
Practicing Only With Adults
A drill that excludes children, older adults, overnight guests, or people with disabilities does not test the real plan. Adapt the drill so participation is safe and calm, then correct obstacles the drill reveals.
Frequently Asked Questions
How often should I test smoke and carbon monoxide alarms?
U.S. agencies commonly recommend testing smoke and CO alarms monthly, but the manufacturer’s instructions and local rules control your specific equipment. Use the test button and record the date. Replace a unit that does not respond after permitted troubleshooting.
When should smoke alarms be replaced?
General U.S. guidance says smoke alarms should be replaced when they are 10 years old. Some devices have different service-life or end-of-life instructions, so check the label and manual. Replace damaged, painted, contaminated, or unreliable alarms sooner.
Where should carbon monoxide alarms go?
CPSC guidance recommends CO alarms on every level and outside sleeping areas. Exact placement depends on the model and local code. Do not place them where furniture, curtains, vents, moisture, or fuel-burning appliances can interfere unless instructions specifically permit that location.
Should bedroom doors be open or closed at night?
Fire-safety campaigns encourage closing bedroom doors because a closed door can slow smoke and heat. A closed door does not replace a working smoke alarm inside the sleeping room and outside the sleeping area. Your alarm arrangement and escape plan should account for how the household normally sleeps.
Can renters make these improvements?
Renters can clear exits, create a plan, practice drills, improve safe behavior, and report hazards. Installation and maintenance responsibilities for alarms, wiring, fire doors, and building systems vary by law and lease. Notify the landlord in writing and contact local housing or fire authorities when required safety problems remain unresolved.
Should I use an escape ladder?
An escape ladder may be appropriate for certain upper-floor rooms, but it must be designed for the building height and window, stored accessibly, and understood by capable users. Consult the manufacturer and local fire department. Do not improvise and do not conduct risky practice climbs.
What should I do if a smoke alarm sounds while cooking?
First confirm there is no fire. If cooking smoke causes a nuisance alarm, use the hush feature and ventilation according to the instructions. Do not remove the battery. Repeated nuisance alarms may indicate that the alarm needs permitted repositioning, better ventilation, or a different compatible model selected with professional guidance.
What if my carbon monoxide alarm sounds?
Move everyone outside to fresh air, call emergency services, perform a head count, and do not re-enter until authorities give permission. Do not search for the source yourself. Fuel-burning equipment should be checked by qualified personnel before reuse when directed.
How often should we practice the escape plan?
Practice at least twice a year and whenever the household or home changes. Add extra practice when children move rooms, an older adult moves in, construction changes a route, or a new accessibility need appears.
Does a long article or expensive equipment make a home safe?
No. Safety comes from correct equipment, maintained systems, clear exits, fewer hazards, and behavior that continues every day. A simple plan that everyone can follow is more useful than a complicated plan no one remembers.
A Practical Monthly and Annual Schedule
| Frequency | Tasks |
|---|---|
| Monthly | Test alarms, check exits, inspect charging areas, confirm extinguisher indicators, and remove new clutter. |
| Every 3–6 months | Review cords, kitchen storage, heater clearance, dryer ventilation, address visibility, and household assignments. |
| Twice a year | Run a household drill from different starting points and update the written escape plan. |
| Annually | Arrange professional service for heating, chimney, alarm, or extinguisher systems as required; review all product dates and local rules. |
| After any change | Recheck routes and responsibilities after renovation, new furniture, a new resident, a bedroom move, or a change in mobility. |
Final 10-Minute Checklist
- Can everyone recognize the alarm sound?
- Are smoke alarms placed and maintained according to instructions and local rules?
- Are CO alarms present where needed and tested?
- Does every sleeping area have a primary route and a secondary option where possible?
- Are doors, windows, halls, and stairs clear?
- Does everyone know the same outdoor meeting place?
- Are helpers and backup helpers assigned?
- Are cooking, electrical, heating, and charging hazards controlled?
- Is the home address visible to responders?
- Is the next drill already on the calendar?
Conclusion
A complete home fire safety plan is a collection of small decisions made before a crisis: alarms that work, routes that open, hazards that are removed, people who know their roles, and a meeting point that prevents dangerous re-entry. The 30-day structure makes the work manageable, but the real value comes from repetition. Test, practice, update, and teach.
Do not wait for a renovation, a new alarm purchase, or a frightening incident. Start with the floor plan today. One clear route, one working alarm, one corrected hazard, and one practiced drill can improve the entire household’s ability to act when seconds matter.
Authoritative Sources and Further Reading
- U.S. Fire Administration: Home Fire Escape Plans
- U.S. Fire Administration: Smoke Alarms
- U.S. Fire Administration: Cooking Fire Safety
- U.S. Fire Administration: Appliance and Electrical Safety
- U.S. Consumer Product Safety Commission: Carbon Monoxide Fact Sheet
- Ready.gov: Practice Your Home Fire Escape Plan
Editorial note: This educational guide summarizes general safety practices and does not replace local fire codes, building rules, product instructions, professional inspection, or emergency services. Requirements vary by country, state, municipality, building type, and equipment.