

A raised garden bed looks simple: build a frame, add soil, and plant. In practice, the difference between a bed that is easy to use for years and one that becomes an expensive box of compacted soil comes down to decisions made before the first board is cut. The site must receive enough light. The width must match your reach. The depth must suit the surface underneath and the crops you intend to grow. The frame has to resist outward soil pressure. The soil needs enough mineral material and organic matter to hold both water and air. Irrigation should wet the root zone without turning the bed into a swamp or forcing you to stand outside with a hose every evening.
This guide walks through the complete process as a practical project rather than a collection of decorative ideas. It is designed for a first-time gardener building one or a few beds for vegetables, herbs, or annual flowers. It also covers situations that cause many beginner problems: heavy clay underneath, building on concrete, questionable urban soil, very hot summers, limited mobility, deep beds that would cost a fortune to fill, and beds that dry out faster than expected.
 Raised beds can simplify access, soil management, and path planning when the layout is designed before construction. Photo: AcornToOak, Wikimedia Commons, CC BY-SA 4.0.
Start with the problem you actually want the raised bed to solve
Raised beds are useful, but they are not automatically better than growing in the ground. They add cost, create more exposed soil surface, and often dry faster in warm weather. Before buying materials, decide why you want one. A useful reason might be heavy or compacted native soil, poor drainage, limited ability to kneel, a need to keep people from walking on the planting area, a small paved yard, or a desire to manage a concentrated area of high-quality soil. If your existing soil is already loose, fertile, uncontaminated, and easy to work, a simple in-ground bed may grow vegetables just as well for less money.
University of Maryland Extension notes several genuine advantages of raised beds: they can warm faster in spring, drain well, provide a deeper loose rooting area, and reduce compaction because gardeners do not walk on the planting surface. The same guidance also highlights disadvantages, including higher initial cost, more rapid drying, and the permanence of the structure. Treat those tradeoffs as design inputs rather than marketing claims.
Write one sentence that defines your goal. For example: “I need a vegetable bed that I can reach from a path without stepping into it, because my native soil is compacted clay.” Another gardener might write: “I have only a concrete patio, so I need a self-contained bed deep enough for tomatoes.” That single sentence should guide width, height, soil depth, frame material, and irrigation.
Step 1: Choose the location before choosing the bed
The most beautiful raised bed in the wrong location will underperform. For most fruiting vegetables—tomatoes, peppers, cucumbers, beans, squash—choose the sunniest practical part of the yard. Observe the area for several days rather than assuming a bright-looking spot receives full sun. Buildings, fences, mature trees, and even neighboring structures can create long shadows that shift across the season.
Also check drainage around the site. A raised bed can improve the rooting zone, but it does not magically fix standing water around the structure. After heavy rain, look for puddles and soft ground. If the area acts like a basin, you may need to redirect surface water, choose another location, or create drainage outside the bed. Placing a wood frame directly in a persistently wet depression shortens the life of the material and can create waterlogged soil near the bottom.
Next, think about access. You will visit a productive bed constantly to water, harvest, tie plants, remove weeds, check pests, and add compost. A bed at the far edge of the property may receive less attention than one you naturally pass every day. Make sure a hose reaches it without dragging across plants. If you intend to use a wheelbarrow, leave a route wide enough to approach the bed and turn around.
Finally, look overhead and underground. Avoid placing a permanent bed where it blocks access to utility panels, drains, septic components, irrigation valves, or other infrastructure. If you plan to drive stakes, posts, or long anchors into the ground, follow local utility-locating requirements before digging. The garden should make the property easier to use, not create a maintenance obstacle.
How to verify the site before committing
Mark the proposed bed on the ground with string, chalk, scrap lumber, or a garden hose and leave it in place for a few days. Walk around it at the times you would normally garden. Carry a watering can or push a wheelbarrow through the area. Open nearby gates. Check whether the bed blocks mowing or creates a narrow squeeze point. This simple mock-up often reveals layout mistakes more cheaply than rebuilding a finished frame.
Step 2: Size the bed around reach, not around lumber dimensions
The central design rule is simple: you should be able to reach every part of the soil without stepping into the bed. Walking on the planting area compacts the soil and defeats one of the main advantages of raised-bed gardening.
For a bed that can be accessed from both long sides, a width of about 3 to 4 feet works for many adults. Four feet is common, but it is not mandatory. If you are shorter, have limited shoulder mobility, or want children to use the bed, 30 to 36 inches may be more comfortable. If the bed sits against a fence or wall and can be reached from only one side, make it significantly narrower so the back edge is genuinely reachable.
Do not test reach while standing upright with an empty box. Simulate the actual task. Kneel or stand beside the marked bed and imagine planting a seedling precisely in the center, tying a low stem, or pulling a small weed without leaning your entire body onto the soil. If you have to brace yourself on the frame, the bed is probably too wide for comfortable routine work.
Length is more flexible. The practical limits are structural and logistical. Long wooden beds can bow outward because moist soil is heavy. Oregon State University Extension advises reinforcing beds longer than about 6 feet or taller than about 18 inches with stakes, cross-cables, or another method that resists outward pressure. A very long bed can also become an obstacle if you have to walk all the way around it to reach the other side. Two shorter beds with a path between them can be easier to use than one uninterrupted 16-foot bed.
Plan paths at the same time
Paths are part of the garden, not leftover space. Allow enough room for your body, tools, harvesting containers, and any mobility equipment you use. If you plan to move a wheelbarrow between beds, test the path width with the actual wheelbarrow. If accessibility is a priority, smooth, firm paths are generally easier to navigate than deep loose gravel or thick wood chips.
Cover permanent paths with a material that discourages weeds and mud. Wood chips are inexpensive in many locations and work well for informal gardens, though they decompose and need replenishment. Pavers, brick, compacted gravel, or other durable surfaces may suit high-traffic or accessible gardens. Keep path material out of the planting soil when you refresh the bed.
Step 3: Choose a height and soil depth that match the surface below
Bed height and usable root depth are related, but they are not the same thing. A 10-inch frame sitting on healthy native soil does not limit roots to 10 inches; roots can continue into the ground below. By contrast, a 10-inch bed built over concrete provides only the soil inside the frame unless you create a deeper container.
On ordinary garden soil, many vegetables grow successfully in relatively low raised beds because roots can extend downward. A frame 8 to 12 inches tall is often enough to create a loose amended surface while keeping construction and fill costs manageable. If the underlying soil is highly compacted, loosen it with a garden fork before filling rather than placing excellent soil on top of a hard pan.
On an impermeable surface such as concrete or pavement, depth matters much more. University of Maryland Extension recommends at least 8 inches for crops such as leafy greens, beans, and cucumbers, while peppers, tomatoes, and squash are better given 12 to 24 inches. Beds on hard surfaces also dry more rapidly because roots cannot draw moisture from the native soil below.
For gardeners who want to work while standing or sitting, a taller structure can reduce bending. However, a waist-high bed filled completely with premium soil is expensive and extremely heavy. Treat it as a raised planter rather than simply a deeper version of a ground-level bed. Make sure the structure and surface beneath it can support the load, provide drainage, and use a soil depth appropriate to the intended plants rather than filling unnecessary lower volume with costly mix.
Step 4: Test the underlying soil when food safety or soil quality is uncertain
If the bed will sit on existing soil and roots can reach through it, learn what is underneath. A basic laboratory soil test can provide pH and nutrient information and help you avoid guessing about lime and fertilizer. This is especially useful because repeatedly adding compost, manure, and blended soil without testing can push nutrient levels higher than plants need.
Urban and older residential sites deserve extra attention. If you are concerned about historical lead contamination or other site-specific hazards, use an appropriate laboratory test before growing food directly in or in contact with native soil. University of Maryland Extension specifically recommends testing for lead when food crops will be grown and the existing soil is part of the growing system. Local extension offices, public health agencies, or environmental agencies can help interpret locally relevant tests and thresholds.
If you are building over clearly unsuitable soil, you may choose a contained system, but do not assume a thin sheet of landscape fabric makes contamination questions disappear. Root depth, dust, drainage, and the condition of the site all matter. In genuinely contaminated locations, follow local professional guidance rather than improvising a barrier.
Step 5: Pick frame materials for durability, safety, and maintenance
The frame has one job: hold soil in place. It does not need to be elaborate. Wood is popular because it is easy to cut, repair, and customize. Naturally rot-resistant species can last longer but may be expensive. Common construction lumber is cheaper and easier to source but usually deteriorates sooner in constant soil contact.
Modern pressure-treated lumber is also used for raised beds, but gardeners often have questions about preservatives and food crops. Product formulations and regulations change, so avoid relying on old advice based on lumber treatments that are no longer sold for residential use. If you are considering treated wood, review current guidance from your national or local pesticide/environmental authority and the manufacturer for the exact product. Oregon State University Extension and the National Pesticide Information Center both publish educational material about treated wood in garden settings.
Metal beds are durable, quick to assemble, and available in many heights. Galvanized steel products are common. They can become warm in strong sun, and dark-colored thin metal can transfer heat to the soil near the edge, although actual root-zone conditions depend on climate, soil moisture, mulch, and bed size. Look for rolled or capped edges and stable bracing so gardeners are not working next to sharp sheet metal.
Masonry, brick, block, and stone can create long-lived beds but require more labor and a stable base. Avoid unknown salvaged materials that may contain paint, industrial residues, oils, or treatments you cannot identify. Decorative recycling is not worth introducing uncertainty into a food-growing space.
Do you need a bottom?
A raised bed on healthy soil usually does not need a solid bottom. Leaving it open allows drainage and lets roots enter the soil below. Hardware cloth may be used in some regions where burrowing animals are a persistent problem, but choose a corrosion-resistant material and install it securely. A solid plastic floor in a ground-level bed can trap water unless it is engineered as a container with reliable drainage.
Landscape fabric under the entire bed is also not automatically necessary. It can slow some weeds initially, but vigorous perennial weeds may still find openings, and fabric can complicate future soil improvement. In many cases, cutting existing vegetation low, covering it temporarily with plain cardboard, and filling the bed is simpler. Avoid glossy or heavily coated cardboard and remove plastic tape and staples.
Step 6: Build the frame square, level, and strong enough for wet soil
Gather the tools appropriate to your material: typically a tape measure, square, drill/driver, exterior-rated fasteners, saw if boards are not pre-cut, level, stakes, eye protection, and gloves. Pre-cutting at the store can simplify the project if you do not have a suitable saw.
Assemble the rectangle on a flat surface if possible. Measure the two diagonals. When the diagonals are equal, the frame is square. This matters more than appearance: a twisted box is harder to anchor, harder to add trellises to, and more likely to place uneven stress on corners.
Use fasteners that are compatible with the framing material and outdoor exposure. For wood, structural exterior screws are generally easier to service than small interior screws. Predrilling near board ends can reduce splitting. Taller wood beds benefit from corner posts or internal stakes that give fasteners more material to bite into.
Place the frame on the site and check level in both directions. You do not need survey-grade precision, but a severely tilted bed causes irrigation to collect at the low end and creates uneven soil depth. Remove small amounts of soil under high corners or add compacted base material where appropriate. On a slope, do not simply follow the grade with the frame and fill one end massively deeper; terrace or level the structure so it is stable.
Reinforce long sides before filling. Wet soil exerts outward pressure that is easy to underestimate when the bed is empty. Stakes driven next to the boards, internal cross-braces, corner posts, or purpose-built metal braces can prevent bowing. Adding reinforcement after a full bed has spread apart is much harder.
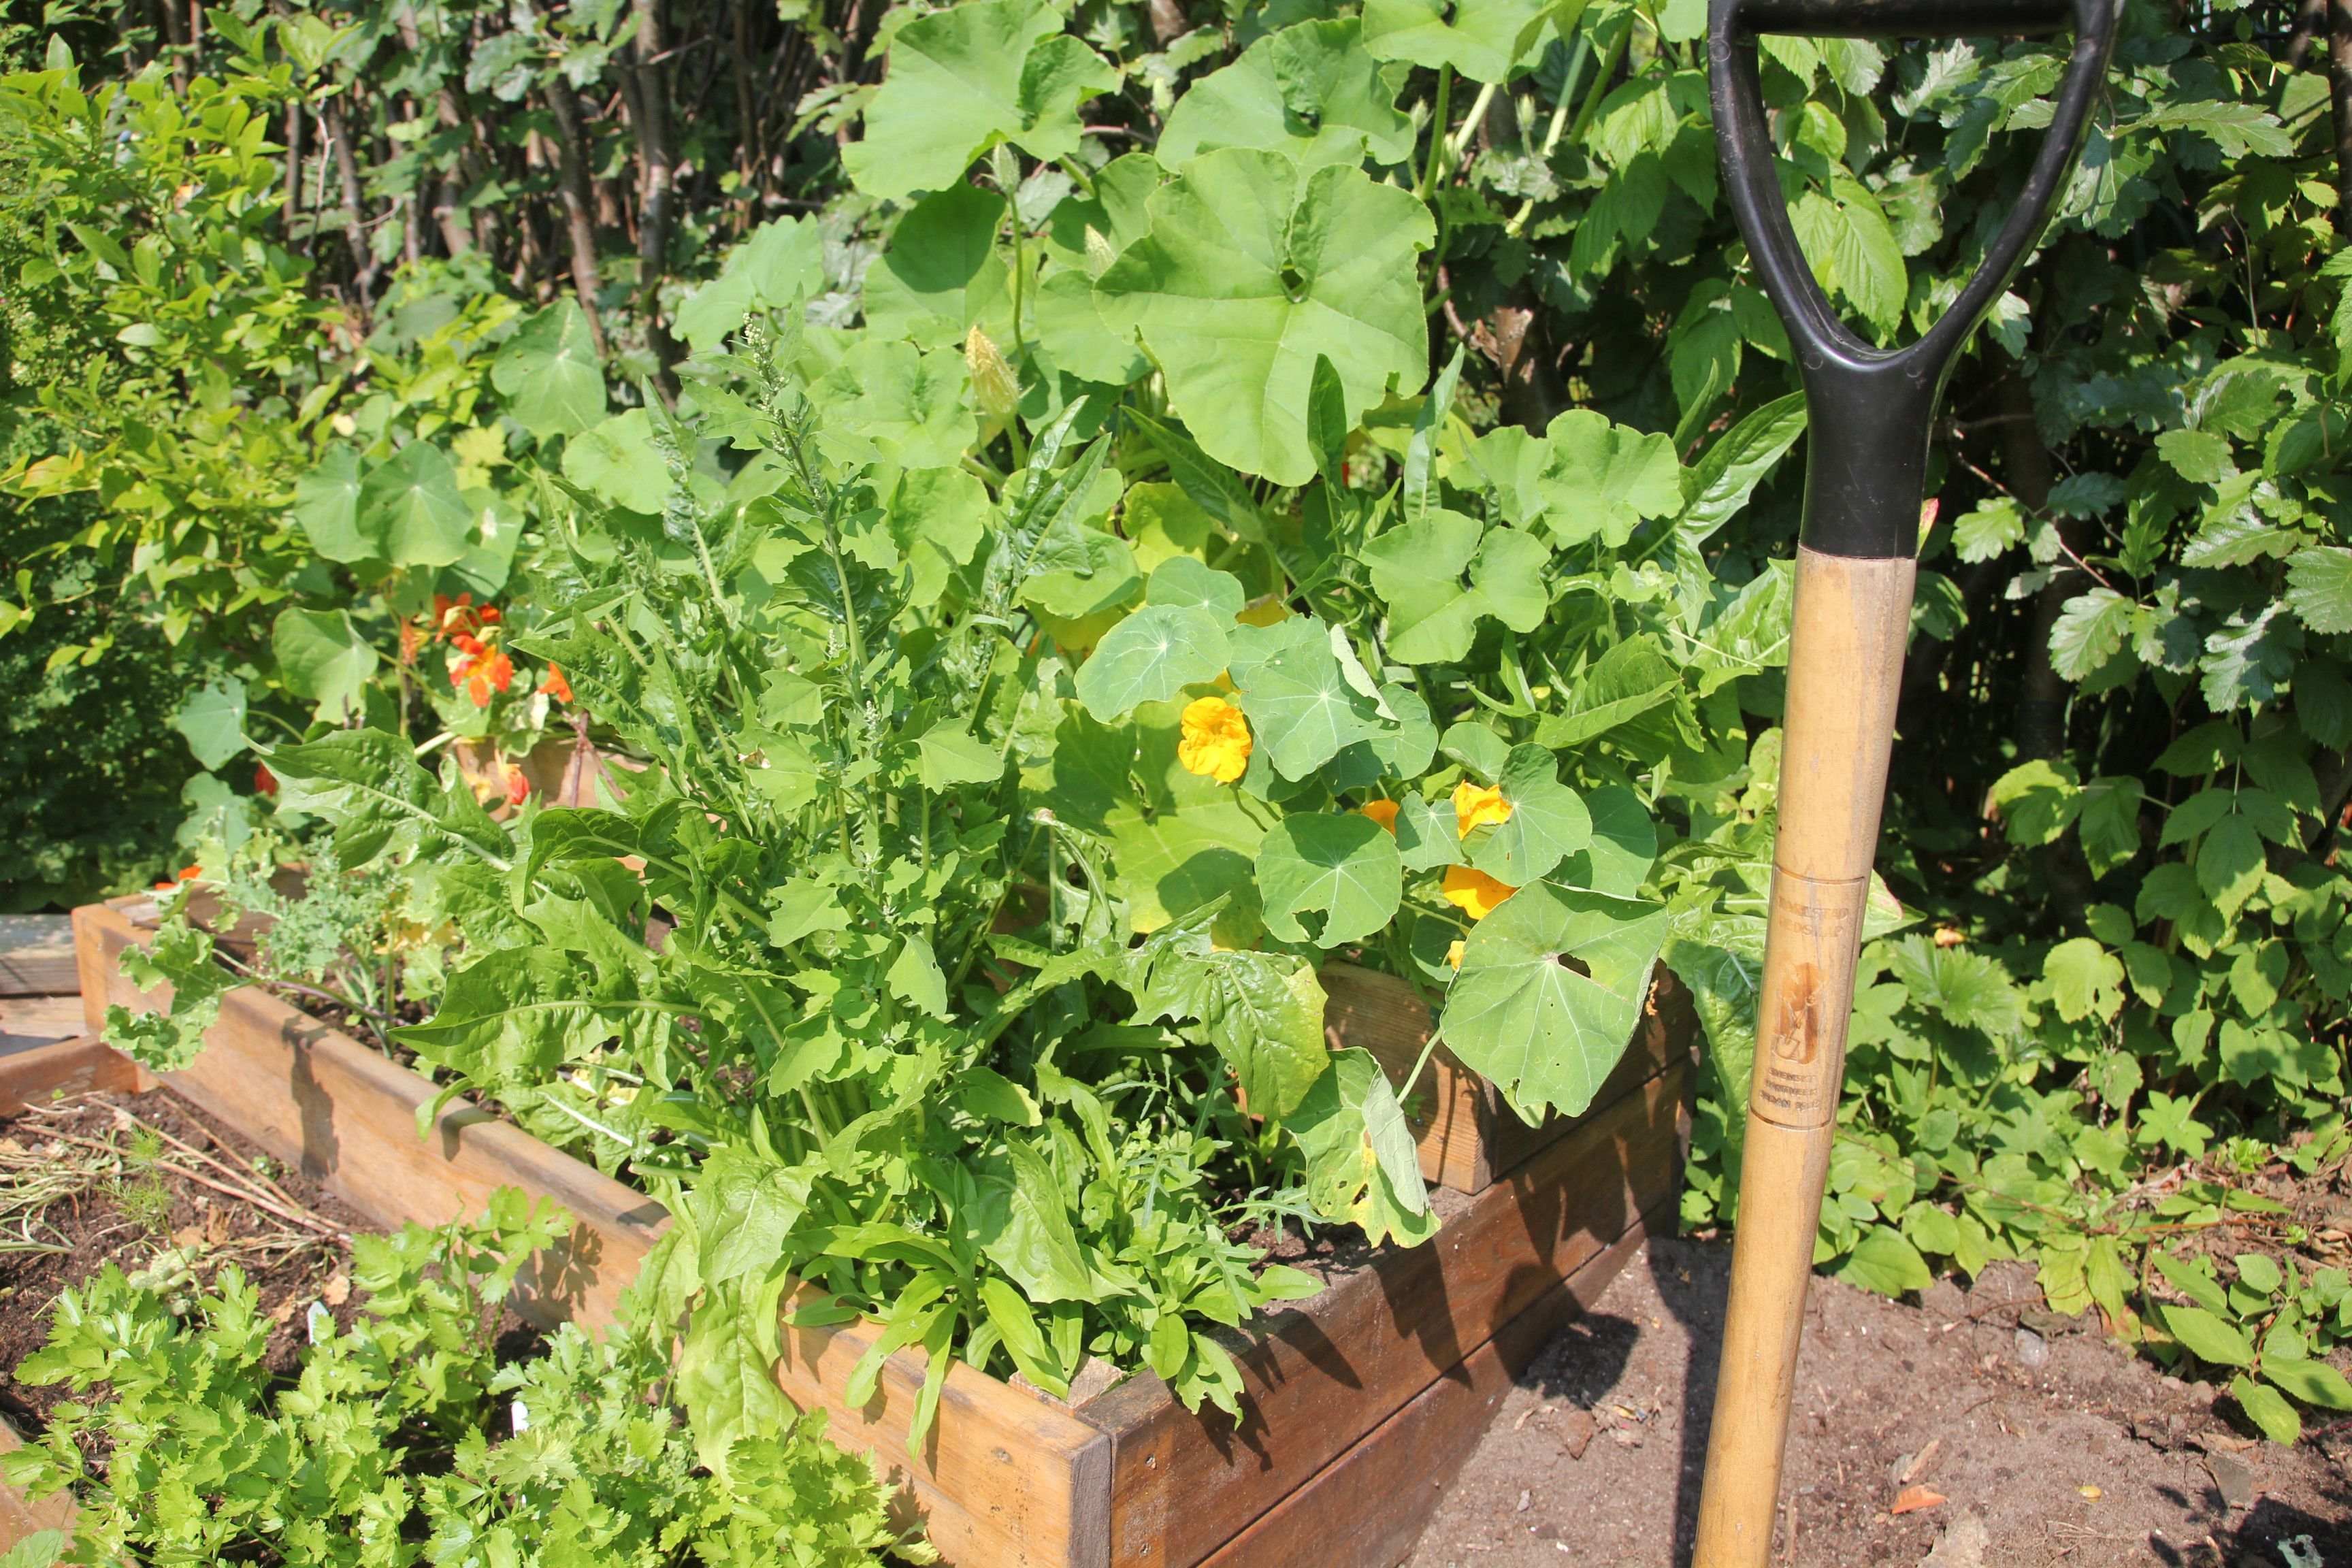 A narrow bed makes routine planting, pruning, and harvesting easier because the center remains reachable. Photo: Kerstin Namuth, Wikimedia Commons, CC BY-SA 4.0.
Step 7: Prepare the ground under the bed instead of burying problems
Once the empty frame is positioned, remove trash, woody roots that interfere with the frame, and aggressive perennial weeds. You do not need to excavate healthy topsoil simply to replace it with bagged material. The goal is to connect the improved bed to the useful soil below whenever the site allows it.
If the native soil is compacted, use a garden fork to loosen it without turning the entire profile upside down. Insert the fork, rock it gently, move several inches, and repeat. This creates channels for roots, air, and water. University of Maryland Extension recommends this minimum-dig approach for compacted or clay-rich sites.
If turf is present, one method is to cut it very short and smother it before adding the new soil. Plain cardboard can be used as a temporary light barrier, overlapped so grass does not immediately grow through seams. It should not become a permanent waterproof layer; the goal is simply to suppress existing vegetation while decomposition begins.
Do not line the bottom with rocks or gravel in the belief that they automatically improve drainage. Drainage depends on the entire soil profile, pore sizes, outlet paths, and the surface beneath the bed. A well-structured growing medium over permeable soil usually performs better than a shallow soil layer perched on a decorative rock layer.
Step 8: Calculate how much soil you need before ordering it
Soil purchases are where raised-bed projects often become unexpectedly expensive. Calculate volume before shopping. For a rectangular bed, multiply internal length × internal width × intended fill depth. Keep the units consistent.
For example, a bed with internal dimensions of 8 feet long by 4 feet wide filled to an average depth of 10 inches uses:
8 × 4 × (10 ÷ 12) = about 26.7 cubic feet.
Because 27 cubic feet equals one cubic yard, that is almost exactly one cubic yard before accounting for settling. If you buy 1.5-cubic-foot bags, you would need roughly 18 bags for the same nominal volume. Comparing bulk and bag pricing with the actual volume prevents a mid-project shortage.
Do not fill to the absolute top of the frame. Leave headspace for mulch, watering, and soil amendments. Fresh mixes also settle after repeated watering, so expect the surface level to drop. Keep a small amount of compatible material available for topping up after the first few weeks.
Step 9: Build a soil mix that holds water and air
The goal is not to create the lightest possible mixture. Vegetable roots need a medium that holds moisture and nutrients while still draining excess water and maintaining air-filled pores. Extremely fluffy mixes can collapse over time, while dense native clay placed in a box can remain dense native clay.
For beds built over soil, a blend of quality topsoil and mature compost is a practical starting point. University of Maryland Extension describes compost-to-topsoil ratios around 1:2 or 1:1 for some situations involving poor or compacted soil. It also notes that raised-bed garden soil containing mineral soil commonly performs well with roughly 25% to 50% organic matter by volume. These are useful ranges, not a command to make every bed half compost regardless of what your inputs contain.
Compost should be mature, stable, and appropriate for food gardens. More is not always better. Repeatedly filling a bed with mostly compost can produce excessive phosphorus or salts depending on the feedstock. If the soil is already rich, future annual maintenance may require only a thin surface addition rather than another large load.
When buying bulk topsoil or a premixed raised-bed blend, inspect it before accepting a large delivery if possible. Look for a crumbly structure and a clean earthy smell rather than sticky clay clods, construction debris, or a foul anaerobic odor. Ask the supplier what the mix contains. The marketing word “organic” does not tell you whether a bag contains mineral soil, compost, bark fines, peat, coir, or another component.
For beds on concrete or another hard surface
Treat the bed more like a very large container. A soilless growing medium mixed with compost can reduce weight and improve porosity. University of Maryland Extension suggests a 1:1 compost and soilless mix for some hard-surface raised beds, with limited topsoil only in deeper beds. Because there is no native soil reservoir beneath the roots, moisture management becomes more important.
Do not create unrelated layers
A popular shortcut is to fill the lower half of a bed with logs, branches, yard waste, plastic containers, or other bulky material to save soil. Some purposeful systems use woody material, but random layering changes water movement and settles unpredictably. If your bed is deeper than plants require, a better solution is to design a shallower planting box or use a structurally appropriate false bottom rather than hiding unsuitable filler under a thin soil cap.
Step 10: Fill the bed without compacting it
Add the mix in lifts and spread it gently with a rake or your hands. Water lightly as you go if the ingredients are extremely dry so that hydrophobic pockets do not remain. Do not stomp on the soil to make more fit. The entire point is to maintain pore space.
If different materials were delivered separately, blend them thoroughly rather than creating a bottom layer of topsoil and a top layer of compost. Roots and water move differently across abrupt texture changes. Mixing creates a more uniform profile.
After filling, water the bed deeply and let it settle. Add more mix where the level drops. This first irrigation is also a useful drainage test. Water should soak in rather than sit on the surface for hours. On a hard-surface bed, confirm that excess water leaves through the intended drainage route and does not flood a doorway or neighboring property.
Step 11: Install irrigation before the plants become a jungle
You can water a small bed by hand, but consistency becomes harder during hot weather or travel. Raised beds commonly dry faster than surrounding ground because they have loose soil and more exposed edges. A simple drip line or soaker system can reduce daily labor and place water near the roots.
Install irrigation while the bed is empty or newly planted. Run lines so water reaches the entire planting pattern rather than only the current row of seedlings. Secure tubing where it will not be pulled out when you harvest. Include a shutoff valve for each bed if multiple beds share a supply; different crops and sun exposures may require different schedules.
Do not set irrigation strictly by the clock and forget it. Weather, soil mix, crop size, mulch, and season change water demand. Oregon State University Extension recommends checking the soil itself. Push a finger roughly two inches into the root zone: if it is dry at that depth, watering is likely needed; if it is still moist, wait. For deeper-rooted crops, occasionally dig farther down with a trowel after irrigation to verify that water is reaching more than the top inch.
Water deeply enough to wet the active root zone, then allow the soil to re-aerate. Frequent tiny sprinklings encourage shallow roots and can leave deeper soil dry. Conversely, constant saturation deprives roots of oxygen. The correct schedule is the one that maintains an adequately moist root zone without permanent sogginess.
Step 12: Add mulch after the soil has warmed and plants are established
Mulch reduces surface evaporation, moderates temperature, suppresses many weeds, and keeps soil from splashing onto leaves. Materials such as clean straw, shredded leaves, or fine wood-based mulch can work, depending on local availability and the crop.
Apply mulch around established plants but keep thick wet material away from the base of stems. In a cool spring, heavy mulch applied very early can slow soil warming. In a hot dry summer, the same mulch may be one of the most effective ways to reduce irrigation demand. Adjust to the season instead of following a fixed calendar.
Do not mix large quantities of undecomposed woody mulch into the planting soil. Wood chips are excellent on paths and as a surface mulch in many systems, but the decomposition dynamics are different when fresh woody material is incorporated throughout the root zone.
Step 13: Plan crops in three dimensions
Raised beds make space valuable, so plan both footprint and height. Put trellises where they will not cast avoidable shade on shorter crops. In the Northern Hemisphere, tall crops are often placed toward the north side of a bed when the garden layout allows it; in the Southern Hemisphere, the relationship reverses because the sun’s path is on the opposite side of the sky.
Use plant spacing from reliable seed packets or extension recommendations rather than assuming every crop benefits from being packed closely. Intensive planting works only while each plant still receives enough light, airflow, nutrients, and root space. Crowded tomatoes may produce a wall of leaves that is difficult to inspect and harvest. Lettuce can tolerate closer spacing but may bolt rapidly in heat.
Succession planting can increase the useful season without overcrowding. A spring crop of radishes or leafy greens may finish before warm-season crops need the full space. Later, another fast crop can follow once summer plants are removed. Keep a simple map so you remember what grew where, particularly if you rotate crop families to manage recurring soilborne problems.
 Paths, crop height, and access become more important once beds are fully planted. Photo: Kolforn, Wikimedia Commons, CC BY-SA 4.0.
Step 14: Add trellises and covers without making the bed difficult to use
It is easier to design support points when the bed is new than after vining crops are established. Trellises for peas, beans, cucumbers, and indeterminate tomatoes should be strong enough for the mature plant plus wind load. Fasten them to dedicated posts or strong frame members rather than thin decorative boards.
If you expect to use insect netting, frost cloth, or shade cloth, consider adding simple hoops. PVC, fiberglass rods, metal conduit, or purpose-built hoops can work depending on the span and weather. Keep covers high enough that foliage does not press hard against them, and secure edges so wind cannot turn the fabric into a sail.
Row covers affect temperature, humidity, pollinator access, and pest exclusion. Remove or open them when a crop requires insect pollination unless the cover is being used only during a non-flowering period. Shade cloth should reduce excessive heat without creating permanent low-light conditions. Use it as a climate-management tool, not as decoration.
Step 15: Build an accessible raised bed around the gardener
Accessibility is not simply making the walls taller. A tall bed can still be unusable if the gardener cannot get close enough to reach it. Think about knee space, path firmness, turning radius, edge shape, and the height at which actual tasks occur.
For seated gardening, a narrow bed or tabletop-style planter may be easier than a massive soil-filled box. Allow space under an overhanging edge if a wheelchair user needs to roll closer. Avoid sharp corners at hand height. Provide a stable surface nearby for tools and harvested produce so the gardener is not constantly twisting to reach the ground.
For standing gardeners who have difficulty bending, a tall bed can help, but the usable width may need to be narrower because reach changes with height. Test a mock-up with cardboard boxes or a table before construction. The ideal dimension is the one that fits the person, not the one most commonly sold.
Step 16: Prevent the four most common raised-bed failures
Failure 1: The bed dries out every day
Likely causes: a very porous mix, shallow soil over a hard surface, full sun and wind, no mulch, undersized irrigation, or mature plants using far more water than seedlings.
Fix: check moisture below the surface instead of judging by color. Water deeply. Add an appropriate organic mulch. Increase irrigation runtime or line coverage rather than simply watering more often for one minute at a time. At the end of the season, use a soil test and evaluate whether the mix needs more moisture-holding mineral soil or mature compost.
Failure 2: Water sits on top or plants look waterlogged
Likely causes: compacted fill, an impermeable bottom with inadequate outlets, a buried low spot, or a mix containing too much fine material.
Fix: stop adding water until you understand the drainage path. On a hard-surface bed, make sure outlets are open. Use a fork to gently loosen a compacted surface without damaging major roots. If the problem is structural, correct it between crops rather than repeatedly adding dry material to the top.
Failure 3: The sides bow outward
Likely causes: long unsupported boards, thin material, weak fasteners, or a tall bed filled without bracing.
Fix: remove enough soil to safely relieve pressure, then add stakes, posts, or cross-bracing. Do not try to force a full bulging wall back into position with a few small screws. Reinforce new long beds before filling.
Failure 4: Plants are lush but yields are poor
Likely causes: insufficient sun, excessive nitrogen, overcrowding, lack of pollination, wrong planting season, heat stress, or a crop-specific pest or disease.
Fix: diagnose the plant rather than blaming the bed. Confirm sun hours, spacing, temperature, flowering pattern, and soil fertility. A laboratory soil test is especially useful if the bed has received large amounts of compost or fertilizer for several years.
Step 17: Maintain the soil rather than replacing it
Healthy raised-bed soil should become an asset over time. Do not empty the bed every season. Remove diseased crop residues when appropriate, cut healthy spent plants at soil level if you want roots to decompose in place, and top-dress with mature compost according to soil condition and test results.
The surface will gradually sink as organic materials decompose. Add compatible soil or compost to restore level, but avoid responding to every inch of settling with another thick compost layer. Periodic soil testing helps you separate a physical volume problem from a fertility problem.
Keep permanent paths mulched so soil is not tracked into the bed. Inspect frames annually for loose screws, rot, corrosion, sharp edges, or bowing. Repair small structural issues before wet soil makes them large. Flush or inspect irrigation emitters at the beginning of the season and watch for leaks.
Crop residues, weeds, and mulch can also hide pests. At least once a year, clear enough of the bed edge to inspect the frame and soil surface. Good garden sanitation does not mean bare sterile soil; it means removing material that is clearly diseased or creating a known pest habitat while retaining healthy organic matter.
A complete example: building one 4-by-8-foot vegetable bed
Imagine a homeowner with compacted clay soil, a sunny backyard, and easy hose access. They want tomatoes, peppers, lettuce, basil, and beans. They can comfortably reach about two feet from either side.
1. Site: They observe the proposed location for a week and confirm strong direct sun for most of the day. Rainwater does not pool there. A 3-foot path can remain on each long side.
2. Dimensions: They choose an 8-foot-long, 4-foot-wide frame about 11 inches high. Because the bed is open to native soil, roots are not restricted to the frame depth.
3. Soil test: A laboratory test shows no unusual contamination concern and gives nutrient and pH recommendations. Because the native clay is compacted, they loosen it with a garden fork without turning the entire soil profile.
4. Frame: They assemble durable exterior boards with reinforced corners and a center brace that prevents the long sides from bowing. The bed is leveled before filling.
5. Fill volume: The bed is not filled to 11 inches because some native soil is incorporated and headspace is needed. At an average new fill depth of 8 inches, the nominal added volume is 8 × 4 × 0.67, or roughly 21.3 cubic feet. They order a little more to allow for settling.
6. Mix: They use a reputable topsoil-compost blend rather than filling the box with straight bagged compost. Different components are mixed rather than layered.
7. Irrigation: Two or more evenly spaced drip lines cover the bed. A timer is installed for convenience, but the gardener still checks soil moisture and adjusts runtime with weather.
8. Planting: A bean trellis is installed along the side least likely to shade shorter crops. Tomatoes receive realistic spacing, lettuce is planted as a quick early crop, and basil is placed where it can be harvested without reaching through tomato cages.
9. Mulch: Once the soil is warm and plants are established, a modest layer of clean organic mulch is added to reduce moisture loss.
10. Review: After the first heavy rain and first hot week, the gardener checks drainage, irrigation coverage, frame movement, and soil settling. Small issues are corrected immediately rather than waiting until midsummer.
This example is intentionally ordinary. A good raised bed does not require an exotic “perfect soil recipe,” a decorative kit, or dozens of accessories. It requires a layout you can reach, a stable frame, suitable soil, reliable drainage, sensible irrigation, and enough observation to adjust the system.
How to adapt the design for special situations
If your yard has heavy clay
Use the bed to create a loose upper rooting zone, but also loosen the native soil below so water does not stop abruptly at a compacted interface. Avoid excavating a deep clay basin and filling it with porous mix; that can behave like a bathtub during wet periods. Build slightly above grade, maintain surface drainage around the bed, and let roots gradually improve the soil below.
If your yard is very sandy
Raised beds may dry extremely quickly. Favor a mix with good water-holding capacity, use mulch, and install irrigation from the beginning. A lower bed may make more sense than a very exposed tall one if accessibility does not require height.
If the only space is concrete
Use a deeper self-contained bed, ensure water has a safe exit path, and remember that the surrounding hard surface can reflect heat. Choose a lighter, porous growing medium and monitor moisture closely. Do not block a building drain or direct runoff toward a foundation or doorway.
If you rent
A permanent timber or masonry bed may not be appropriate. Consider modular metal beds, large planters, fabric grow bags, or shallow movable frames if the lease allows them. Protect hard surfaces from staining and drainage damage. Design for disassembly so the garden does not become a moving-day demolition project.
If you have only a small budget
Spend first on the site, soil quality, and water access. A simple untreated wooden frame can produce the same vegetables as an expensive decorative kit while it remains structurally sound. Build one bed correctly rather than four beds you cannot afford to fill well. Bulk soil is often cheaper per cubic foot than many small bags, but include delivery charges in the comparison.
Frequently asked questions
How deep should a raised garden bed be?
It depends on what is underneath. On healthy native soil, a relatively low bed can work because roots can continue below the frame. On concrete or another impermeable surface, the bed must provide the full root zone. University of Maryland Extension recommends at least about 8 inches for crops such as leafy greens, beans, and cucumbers on hard surfaces, and about 12 to 24 inches for larger crops such as tomatoes, peppers, and squash.
Is 4 feet always the best width?
No. Four feet is common only because many adults can reach about two feet from each side. Use the width you can comfortably reach without stepping on the soil. A bed against a wall should be much narrower because it is accessible from only one side.
Should I put plastic under a raised bed?
Usually not when the bed sits on healthy ground. A solid plastic liner can interfere with drainage and root access. If you need a liner for a specific frame material or a hard-surface container, design proper drainage openings. For weed suppression, temporary cardboard or other methods may be more appropriate than creating a permanent waterproof bottom.
Can I fill a raised bed with compost only?
That is generally not the most balanced long-term approach. Compost is an amendment and a source of organic matter, but a productive raised bed often benefits from mineral soil or an appropriate soilless base depending on whether it sits over native soil or a hard surface. Excessive compost can create nutrient imbalances, so use a tested, purposeful mix rather than assuming more compost is always better.
How often should a raised bed be watered?
There is no universal schedule. Raised beds often dry faster than in-ground gardens, but frequency depends on weather, soil, mulch, plant size, depth, and irrigation method. Check moisture below the surface. If the root zone is still moist, wait; if it is dry, water deeply enough to wet the active roots.
Do raised beds need drainage holes?
A bottomless bed on permeable soil usually drains through the soil below and does not need holes in the frame walls. A bed with a solid bottom or one built as a container on concrete needs intentional drainage outlets so excess water can escape safely.
What is the biggest beginner mistake?
Building first and solving access, soil volume, and watering later. A bed can be too wide to reach, too deep to fill economically, too far from the hose, or too shaded to grow the intended crops. Mark the footprint, calculate soil volume, and test your reach before buying materials.
Final checklist before you plant
- The location receives enough sun for the crops you intend to grow.
- Water does not routinely pool around the bed.
- You can reach the center without stepping on the soil.
- Paths are wide and stable enough for the people and tools that will use them.
- The frame is square, level, and reinforced against outward soil pressure.
- The underlying soil has been assessed and tested where appropriate.
- The fill volume was calculated before purchasing soil.
- The soil mix contains a sensible balance of mineral or soilless material and mature organic matter.
- Drainage was tested after filling.
- Irrigation reaches the full planting area.
- Trellises and covers will not block access.
- There is enough headspace for mulch and future soil additions.
Where to begin
If you do only one thing today, mark the proposed bed on the ground at full size. Do not buy lumber yet. Walk around the outline, test your reach, watch the shadows, measure the hose run, and calculate the soil volume. That thirty-minute exercise catches more expensive mistakes than almost any product you can buy.
The most important mistake to avoid is treating a raised bed as a decorative container that can be filled with any convenient material. It is a long-term root environment. Build it so you can reach it, give excess water somewhere to go, use a soil mix that holds both moisture and air, and create a watering system you can maintain. Once those fundamentals are right, crop choice and garden style become much easier.
Sources and further reading
- University of Maryland Extension — Growing Vegetables in Raised Beds (updated March 26, 2026).
- University of Maryland Extension — Soil to Fill Raised Beds.
- Oregon State University Extension — Raised Bed Gardening.
- Oregon State University Extension — Watering Basics.
- Wikimedia Commons — Raised Vegetable Beds.jpg, AcornToOak, CC BY-SA 4.0.
- Wikimedia Commons — Raised vegetable bed 1.jpg, Kerstin Namuth, CC BY-SA 4.0.
- Wikimedia Commons — Vegetable garden with raised beds, Trimingham, Norfolk, Kolforn, CC BY-SA 4.0.