

 Thermal imaging can help reveal temperature differences that point to insulation gaps and air leakage. Photo: Karl Schillinger via Wikimedia Commons, CC BY-SA 4.0.
A home energy audit is a structured investigation of where a house uses energy, where it wastes energy, and which improvements are most likely to lower bills while improving comfort. It is not simply a list of products to buy. A useful audit connects evidence—utility data, room temperatures, equipment condition, drafts, moisture, operating schedules, and occupant habits—to a prioritized action plan.
This guide is designed for homeowners, renters, landlords, and first-time buyers who want a professional way to evaluate a home without immediately paying for major renovations. You will learn what you can safely inspect yourself, what should be handled by a qualified professional, how to estimate savings without making unrealistic promises, and how to separate high-impact improvements from expensive distractions.
The best result is not the lowest possible energy use at any cost. The best result is a home that is comfortable, healthy, durable, affordable to operate, and practical for the people who live in it. Energy efficiency should solve real problems: rooms that are too hot or cold, high seasonal bills, noisy equipment, condensation, drafts, poor air quality, and appliances that run longer than necessary.
Quick Answer: The Most Effective Order for Cutting Home Energy Costs
For most homes, use this order:
- Measure first. Collect at least 12 months of utility data and identify seasonal patterns.
- Fix safety and maintenance issues. Address damaged wiring, combustion risks, water leaks, blocked vents, and failing equipment before efficiency upgrades.
- Reduce uncontrolled air leakage. Seal accessible gaps around doors, windows, penetrations, attic hatches, and ducts without blocking required ventilation.
- Improve insulation where it is missing or compressed. Attics and accessible roof spaces are often practical starting points.
- Optimize heating, cooling, and water heating. Correct schedules, filters, airflow, setpoints, and maintenance before replacing equipment.
- Cut plug, lighting, and appliance waste. Replace frequently used lamps with LEDs and manage devices that run unnecessarily.
- Upgrade equipment only after reducing the load. A tighter, better-insulated home may need a smaller heating or cooling system.
- Evaluate renewable energy last. Solar can be valuable, but it is usually smarter to reduce avoidable consumption before buying generation capacity.
This sequence reflects a whole-house approach. A house is a connected system: sealing air leaks can change ventilation needs; insulation can reduce HVAC runtime; duct repairs can change room balance; and equipment size should reflect the home’s actual heating and cooling load.
Before You Begin: Set the Scope and Protect Your Safety
A visual and data-based audit is suitable for most residents. However, do not open energized electrical panels, disturb suspected asbestos, work on refrigerant systems, climb unsafe roofs, enter unstable crawl spaces, block combustion-air openings, or modify gas appliances without the appropriate training and authority. Stop immediately if you smell gas, see scorched wiring, find standing water near electrical equipment, detect a damaged flue, or experience symptoms that could indicate carbon monoxide exposure.
Homes with fuel-burning furnaces, boilers, fireplaces, water heaters, or stoves deserve extra care. Air sealing can improve efficiency, but aggressive sealing without evaluating combustion safety and ventilation can create hazards. A qualified home-performance professional can perform a blower-door test, pressure diagnostics, infrared inspection, and combustion-safety testing as part of a comprehensive assessment.
Gather these basic tools:
- Recent electricity, gas, heating-oil, district-energy, or water bills.
- A notebook, spreadsheet, or home-maintenance app.
- A flashlight and phone camera.
- A room thermometer and, ideally, a humidity meter.
- A tape measure.
- Removable painter’s tape for marking draft locations.
- A plug-in electricity meter, if compatible with your outlets and local electrical standard.
- Protective gloves, eye protection, and a dust mask for safe, accessible dusty areas.
Part 1: Establish Your Energy Baseline
Step 1: Collect 12 to 24 Months of Utility Bills
Begin with evidence. Download at least one full year of bills; two years is better because it helps distinguish a persistent pattern from an unusual season. Record the billing period, number of days, energy used, total cost, taxes, fixed fees, fuel adjustments, and rate plan.
Do not compare bills only by currency. Prices change. Compare consumption in kilowatt-hours, therms, cubic meters, liters, gallons, or other local units. A higher bill can result from a higher rate even when the home used less energy. Conversely, a lower bill can hide increased consumption if prices temporarily fell.
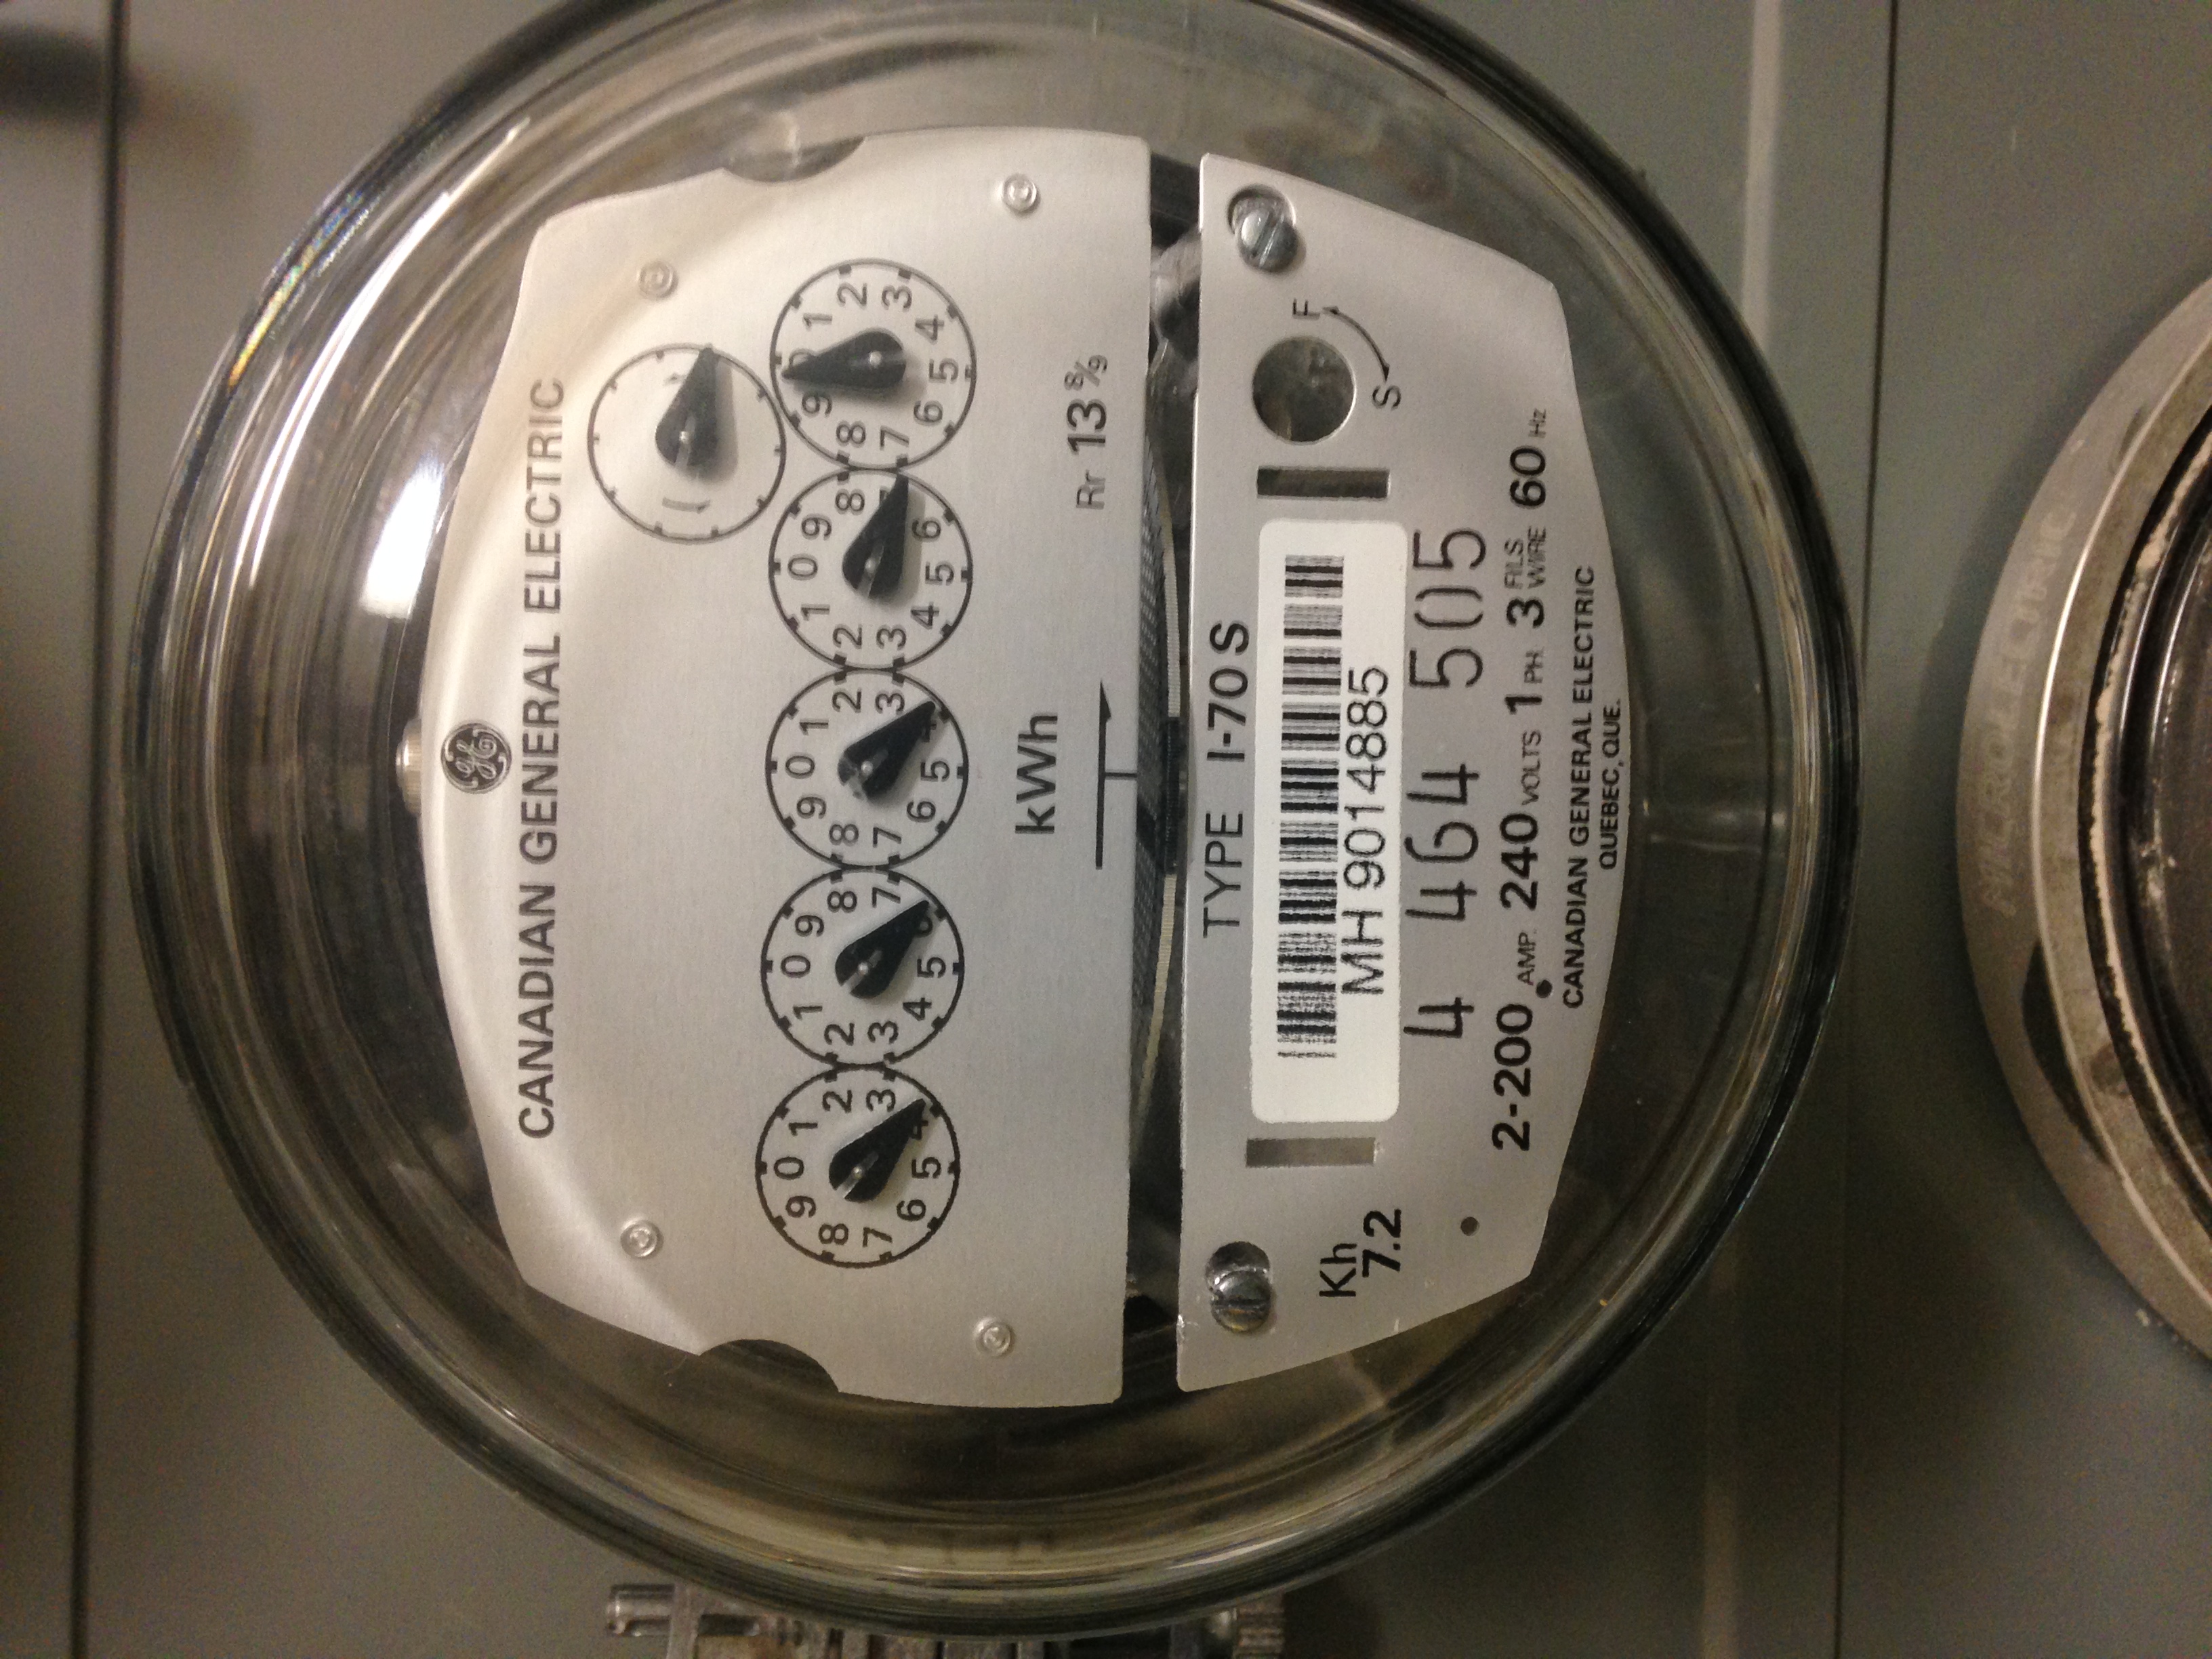 Meter readings and utility records provide the baseline needed to measure whether improvements actually work. Photo: NellieBly via Wikimedia Commons, CC BY-SA 3.0.
Create a simple table:
| Month | Billing Days | Electricity | Heating Fuel | Total Cost | Weather or Household Notes |
|---|---|---|---|---|---|
| January | 31 | 820 kWh | High | Record amount | Cold spell; guests stayed 10 days |
| April | 30 | 410 kWh | Low | Moderate | Mild weather |
| August | 31 | 960 kWh | None | High | Air conditioning ran daily |
Normalize the data by dividing consumption by billing days. This prevents a 35-day bill from appearing worse than a 28-day bill. Also note major changes such as a new baby, remote work, an electric vehicle, a pool pump, a tenant change, a broken appliance, or an unusually hot or cold season.
Step 2: Understand Your Rate Structure
Read the tariff section of the bill. Some utilities charge one flat rate per unit. Others use time-of-use pricing, seasonal rates, tiered blocks, demand charges, or separate delivery and generation fees. Your strategy depends on the rate.
Under time-of-use pricing, shifting laundry, water heating, vehicle charging, or dishwashing away from peak hours may reduce cost without reducing total energy consumption. Under tiered pricing, avoiding the highest consumption block may create disproportionate savings. Under a demand-based plan, several high-power appliances operating simultaneously can matter more than total monthly use.
Record fixed charges separately. Efficiency improvements reduce variable consumption, but they may not reduce the fixed monthly service fee. This distinction prevents exaggerated payback estimates.
Step 3: Separate Base Load From Weather-Driven Use
Your base load is the energy used regardless of outdoor temperature: refrigerators, routers, standby devices, lighting, cooking, electronics, pumps, and always-on equipment. Estimate it by examining mild-weather months when heating and cooling use is low.
If mild-month electricity use is still high, investigate appliances, water heating, pumps, dehumidifiers, server equipment, entertainment systems, or occupancy habits. If consumption rises sharply only during hot or cold months, the building envelope and HVAC system deserve priority.
Compare similar months across years. A sudden increase can indicate equipment failure, a thermostat change, a refrigerant or airflow problem, an electric resistance heater operating unexpectedly, a water leak affecting a well pump, or a household change. Do not assume every increase is caused by “bad insulation.”
Step 4: Define Comfort and Performance Problems Room by Room
Energy waste often appears first as discomfort. Walk through the house during normal operation and record:
- Rooms that are consistently warmer or colder than the thermostat location.
- Drafts near windows, doors, floors, electrical outlets, attic hatches, and fireplaces.
- Condensation on glass, walls, pipes, or ducts.
- Musty smells, visible mold, or unusually high humidity.
- HVAC systems that cycle rapidly or run almost continuously.
- Rooms with weak airflow or noisy vents.
- Sun-exposed rooms that overheat in the afternoon.
- Hot-water delays, temperature fluctuations, or pipes that lose heat quickly.
Measure room temperature at roughly the same height and away from direct sunlight, vents, exterior walls, and appliances. A one-time reading is less useful than a pattern. Record morning, afternoon, and evening readings for several days.
Step 5: Create an Energy Audit Map
Sketch each floor or print a basic plan. Mark:
- Windows and exterior doors.
- Heating and cooling equipment.
- Supply and return vents.
- Water heater and major hot-water routes.
- Attic and crawl-space access points.
- Electrical panel and utility meters.
- Large appliances and pumps.
- Drafts, moisture, temperature complaints, and visible insulation gaps.
Use a consistent code: blue for cold drafts, red for overheating, green for moisture, orange for equipment concerns, and a star for a high-priority safety issue. This map helps you see clusters. Three uncomfortable rooms on the same side of the house may share a duct, insulation, shading, or air-leakage problem.
Part 2: Inspect the Building Envelope
Step 6: Check Exterior Doors and Operable Windows for Air Leakage
On a windy day, feel around the edges of doors and windows. You may also use a thin tissue or lightweight strip of paper to detect movement. Avoid using open flames, incense, or smoke near curtains, combustible materials, children, pets, or suspected gas leaks.
Inspect weatherstripping for compression, cracks, gaps, paint buildup, and missing sections. Close a door or window on a sheet of paper; if the paper pulls out with little resistance, the seal may be weak. Look for daylight around door edges and damaged sweeps at the bottom.
Prioritize obvious gaps before replacing entire windows. A serviceable window with failed caulk or weatherstripping may be improved at a fraction of the cost of replacement. Window replacement makes more sense when frames are rotten, seals have failed, operation is unsafe, or replacement is already planned for structural reasons.
Step 7: Seal Stationary Gaps With the Correct Material
 Caulk is generally used for stationary joints, while weatherstripping is used on doors and windows that move. Photo: Achim Hering via Wikimedia Commons, CC BY 3.0.
Use caulk for stationary cracks between building components, such as gaps around fixed window frames, door frames, trim, and small penetrations. Use weatherstripping for moving components. Use expanding foam only where it is appropriate and where expansion will not deform frames, block drainage, contact excessive heat, or create a fire hazard.
Prepare the surface first. Remove loose material, dust, failed sealant, and moisture. Choose a product rated for the location, movement, temperature, ultraviolet exposure, and material compatibility. A bathroom sealant, exterior masonry sealant, fire-rated product, and low-expansion window foam are not interchangeable.
Do not seal intentional drainage openings, combustion vents, appliance exhausts, roof ventilation paths, or required fresh-air inlets. When uncertain, consult the manufacturer or a qualified building professional.
Step 8: Inspect the Attic Hatch and Ceiling Penetrations
Attic hatches, pull-down stairs, recessed lights, plumbing penetrations, wiring holes, bathroom fans, and dropped ceilings can create major leakage paths. From the living space, look for dirty insulation edges or dust patterns that suggest air movement. From a safely accessible attic, look for gaps around penetrations and areas where insulation is disturbed.
Weatherstrip the attic hatch and add rigid insulation to the hatch panel when appropriate. Use approved covers and clearances around heat-producing fixtures. Older recessed lights may not be rated for insulation contact. Do not bury electrical junction boxes that must remain accessible.
Bathroom and kitchen exhaust ducts should terminate outdoors, not in the attic. Indoor exhaust can deposit moisture into roof assemblies and insulation, causing mold, rot, and reduced performance.
Step 9: Evaluate Insulation Depth, Coverage, and Condition
 Insulation works best when it is continuous, dry, correctly installed, and not compressed by storage or foot traffic. Photo: Jason Dale via Wikimedia Commons, CC BY-SA 3.0.
Insulation should form a continuous thermal layer. Look for missing sections, compression, wind washing near eaves, animal damage, water staining, and uneven depth. Insulation that is wet or contaminated should not simply be covered with new material; identify and correct the moisture or pest problem first.
Do not rely on depth alone because materials have different thermal resistance per unit of thickness. Identify the material and compare the existing level with guidance for your climate zone and local building code. Climate matters: hot-humid, hot-dry, marine, mixed, cold, and very cold regions require different assemblies and moisture strategies.
Do not compress fiberglass batts to fit a smaller cavity. Compression can reduce intended performance. Batts should fit snugly without gaps, folds, or voids. Loose-fill material should be installed to a consistent settled depth and kept away from heat sources unless the assembly is specifically designed for contact.
Step 10: Inspect Walls, Floors, Rim Joists, and Crawl Spaces
Wall insulation is difficult to assess visually, but clues include cold wall surfaces, visible gaps around outlets, infrared patterns, and inconsistent indoor temperatures. A professional may use infrared imaging under suitable temperature conditions, small inspection holes, or other diagnostic methods.
In basements and crawl spaces, inspect rim joists, foundation penetrations, sill plates, floor insulation, moisture barriers, drainage, and ductwork. A damp crawl space is not merely an energy problem. Moisture can damage wood, insulation, indoor air quality, and equipment. Correct bulk water entry, drainage, and humidity before adding insulation.
Do not install interior insulation against a wet foundation wall without understanding the assembly. Trapping moisture can worsen deterioration. Local climate, foundation type, termite inspection requirements, flood risk, and vapor-control strategy all matter.
Step 11: Evaluate Duct Leakage and Insulation
Ducts located in attics, garages, crawl spaces, or other unconditioned areas can lose heated or cooled air before it reaches the room. Inspect accessible sections for disconnected joints, crushed flexible duct, torn insulation, loose boots, unsupported runs, and obvious leaks.
Use duct mastic or approved metal-backed tape for suitable duct joints; ordinary cloth “duct tape” often fails under heat, dust, and age. Do not seal over access panels, dampers, labels, or components that require service. Flexible ducts should be supported and routed with gentle bends rather than compressed or sharply kinked.
Room imbalance may also result from inadequate return-air paths, closed doors, improper duct sizing, dirty coils, blocked registers, or poor system design. A professional duct-leakage test and airflow measurement can distinguish leakage from design problems.
Part 3: Optimize Heating, Cooling, and Ventilation
Step 12: Document the HVAC System Before Changing It
Record the equipment type, fuel, model number, installation date, rated capacity, efficiency rating, service history, thermostat type, filter size, and zones. Photograph labels rather than guessing. Note whether the home uses a furnace, boiler, air conditioner, heat pump, mini-split, evaporative cooler, radiant system, or combination.
Oversized equipment can cycle frequently, create uneven temperatures, reduce dehumidification, and wear components. Undersized or failing equipment may run continuously. Runtime alone does not prove the system is too small; severe weather, poor insulation, low airflow, incorrect refrigerant charge, or a malfunctioning auxiliary heater can produce similar symptoms.
Step 13: Replace or Clean Filters Correctly
Inspect the filter according to the manufacturer’s schedule and household conditions. Homes with pets, construction dust, smoke, or high runtime may need more frequent checks. Use the correct size and airflow direction.
A higher filtration rating is not automatically better for every system. A restrictive filter can reduce airflow if the equipment and filter cabinet were not designed for it. Select a filter that meets indoor-air-quality needs while staying within the system’s allowable pressure drop. Ask an HVAC professional when upgrading filtration.
Keep return grilles and supply registers unobstructed. Do not close many vents in an attempt to save energy; this can increase pressure, reduce airflow, and create comfort problems. Zoning should be designed, not improvised by shutting random registers.
Step 14: Build a Realistic Thermostat Schedule
 A useful thermostat schedule reduces unnecessary heating or cooling while preserving comfort when the home is occupied. Photo: Shixart1985 via Wikimedia Commons, CC BY 2.0.
Write down when the home is occupied, asleep, empty, or used for remote work. Then create temperature settings that match those periods. Avoid extreme setbacks that cause discomfort, moisture problems, frozen pipes, excessive recovery demand, or heavy use of electric resistance backup heat.
Heat pumps may require a different setback strategy than furnaces because aggressive recovery can trigger auxiliary resistance heating in some systems. Follow equipment and thermostat guidance. Radiant floors and high-mass buildings also respond slowly, so small scheduled changes may work better than large swings.
Smart thermostats can automate schedules, detect occupancy, provide runtime data, and offer remote control. Choose a model compatible with the HVAC system and wiring. The value comes from correct configuration, not from the word “smart.” A sophisticated thermostat set to hold an inefficient temperature all day will not create meaningful savings.
Step 15: Inspect the Outdoor Unit and Airflow Path
 Outdoor heat-pump and air-conditioning units need clear airflow, correct drainage, and professional maintenance. Photo: Mueller felix via Wikimedia Commons, CC BY-SA 4.0.
Turn off power according to manufacturer instructions before basic cleaning. Remove leaves, lint, vegetation, and stored items that block airflow around the outdoor unit. Maintain required clearances. Do not bend fins, spray electrical components, or open refrigerant circuits.
Look for unusual ice, oil staining, vibration, rattling, damaged insulation on refrigerant lines, or water draining toward the foundation. Heat pumps can develop frost during cold-weather operation and use a defrost cycle, but persistent heavy ice may indicate an airflow, drainage, control, or refrigerant problem.
Schedule professional service when performance declines, energy use changes unexpectedly, the system makes new noises, rooms become difficult to condition, or the equipment is overdue for maintenance.
Step 16: Evaluate Ventilation and Indoor Humidity
An efficient home still needs controlled ventilation. Kitchens, bathrooms, laundry areas, and combustion appliances must exhaust correctly. Confirm that fans vent outdoors and that exterior dampers open. Clean accessible grilles and follow manufacturer instructions for heat-recovery or energy-recovery ventilator filters.
Measure relative humidity in several rooms. Persistent high humidity can increase cooling demand, encourage mold, and make occupants feel warmer. Very low humidity can cause discomfort and material shrinkage. The appropriate target varies with climate, season, building assembly, and health needs.
Do not respond to humidity by sealing or ventilating blindly. Moisture may come from leaks, unvented cooking, indoor clothes drying, foundation dampness, oversized cooling equipment, blocked exhausts, or outdoor air. Identify the source.
Part 4: Reduce Water-Heating Energy
Step 17: Identify the Water Heater’s True Operating Cost
Record the water-heater type, fuel, tank size, age, temperature setting, installation condition, and daily household demand. Electric resistance tanks, heat-pump water heaters, gas tanks, tankless systems, solar thermal systems, and district systems have different operating characteristics.
Check for visible leaks, corrosion, soot, damaged venting, missing covers, error codes, or water around the base. These conditions require prompt attention. Never modify gas pressure, combustion controls, relief valves, or electrical wiring without qualified expertise.
Many energy authorities suggest a storage-water temperature near 120°F or 49°C for typical homes as a balance between energy use and scald prevention, but the correct setting depends on local health guidance, appliance requirements, plumbing design, household vulnerability, and legionella risk management. Follow the manufacturer and qualified local guidance rather than applying one universal number.
Step 18: Cut Hot-Water Waste Before Replacing Equipment
Repair dripping hot-water faucets. Install efficient showerheads and faucet aerators where pressure and local rules allow. Use cold or warm laundry cycles when suitable. Run full dishwasher loads rather than hand-washing large quantities under continuously running hot water.
Insulate accessible hot-water pipes according to code and manufacturer guidance, especially the first sections leaving a storage tank. Do not cover controls, valves, labels, flues, or components that must dissipate heat. A recirculation loop can improve convenience but may waste energy if it runs continuously; use a timer, demand control, or smart control when compatible.
When replacement is necessary, compare total installed cost, energy use, maintenance, available space, electrical capacity, venting, climate, household demand, and local incentives. A heat-pump water heater can be efficient but may cool and dehumidify the surrounding space, produce sound, and require adequate air volume and condensate drainage.
Part 5: Audit Appliances, Lighting, and Plug Loads
Step 19: Measure the Devices That Run the Longest
Start with runtime, not wattage alone. A small device operating 24 hours a day can use more energy than a high-power device used for a few minutes. Use a compatible plug-in meter for refrigerators, entertainment systems, computers, dehumidifiers, aquariums, office equipment, and other plug-connected loads.
Record watts while operating, standby watts, and hours of use. For cycling appliances, measure over several days. Do not use a plug-in meter on hardwired equipment, incompatible voltage, damaged outlets, or loads above the meter’s rating.
Look for “always-on” clusters: modem, router, network storage, speakers, game console, television, set-top box, chargers, printer, and decorative lighting. Some devices need continuous power; others can be controlled by a switched power strip, smart plug, or schedule.
Step 20: Upgrade the Most Frequently Used Lighting First
 LED upgrades produce the best return when they replace lamps that operate for many hours. Photo: Karl Baron via Wikimedia Commons, CC BY 2.0.
List every lamp and fixture, then rank by daily operating hours. Replace the most frequently used inefficient lamps first. Match brightness in lumens rather than assuming the same wattage. Choose the desired color temperature, color quality, dimmer compatibility, enclosed-fixture rating, and wet-location rating.
ENERGY STAR guidance states that certified LED bulbs can use far less energy and last much longer than traditional incandescent lighting. Actual savings depend on the lamp being replaced, operating hours, electricity price, and product quality.
Do not install a bulb with a wattage or heat output above the fixture rating. Flickering may result from an incompatible dimmer, loose connection, failing driver, voltage issue, or defective product. Electrical symptoms should be investigated rather than ignored.
Step 21: Audit Refrigerators and Freezers
Refrigerators run continuously, making poor operation expensive. Check door gaskets by closing the door on a sheet of paper. Clean accessible coils according to the manufacturer. Maintain ventilation clearances. Confirm that the doors close fully and that food packages do not block internal airflow.
Use a refrigerator thermometer. Settings that are unnecessarily cold increase energy use, while unsafe temperatures can spoil food. Follow food-safety guidance for your country and the appliance manual. Excess frost, frequent cycling, hot cabinet surfaces, unusual noise, or water leaks may indicate a maintenance problem.
An old secondary refrigerator in a hot garage may use significant energy while storing little. Measure it before assuming it is worth keeping. If replacement is necessary, compare appropriately sized efficient models rather than buying the largest unit available.
Step 22: Improve Laundry and Kitchen Habits
Wash full loads when appropriate, select water levels correctly, and use lower-temperature cycles for garments that do not require hot washing. Clean dryer lint filters after use and inspect exhaust ducts. Long drying times may indicate an obstructed vent, overloading, poor washer extraction, a damaged moisture sensor, or equipment failure.
Air-dry items when practical and safe. Use a dryer’s sensor cycle rather than a long fixed timer when the sensor works correctly. Do not vent a clothes dryer indoors; moisture and combustion products can create serious problems.
In the kitchen, match cookware to burner size, use lids, avoid excessive preheating, and use smaller appliances for small portions when they are more efficient for the task. Run the dishwasher when full and use air-dry or eco settings when suitable.
Part 6: Use Smart Monitoring Without Creating New Problems
Step 23: Select Monitoring Tools That Answer a Specific Question
Technology is useful when it turns uncertainty into action. A whole-home energy monitor may reveal daily patterns, but installation at the electrical panel should be performed only by a qualified person where required. Smart plugs can measure individual devices but must match voltage, current, and appliance type.
Choose tools based on a question:
- “What causes the overnight base load?” Use circuit or plug monitoring.
- “Why did cooling use rise?” Compare thermostat runtime, weather, filters, and equipment condition.
- “Is the old freezer expensive?” Measure it for at least several days.
- “Does time-of-use pricing help?” Track when major loads operate.
- “Did air sealing reduce runtime?” Compare weather-normalized consumption and comfort before and after.
Secure connected energy devices with unique passwords, current firmware, multifactor authentication when available, and a separate guest or IoT network where practical. Energy savings should not create avoidable cybersecurity exposure.
Step 24: Evaluate Solar Readiness After Efficiency Work
 Solar sizing becomes more accurate after avoidable energy waste has been reduced and future electric loads are considered. Photo: Esthee2010 via Wikimedia Commons, CC BY-SA 4.0.
Solar panels can reduce purchased electricity, but they do not repair air leaks, moisture problems, failing equipment, or poor comfort. First reduce waste and establish a reliable consumption baseline. Then assess roof condition, orientation, shading, structural capacity, electrical service, local interconnection rules, tariffs, export compensation, insurance, warranties, and installer quality.
Account for future changes. A household planning an electric vehicle, heat pump, induction range, home office, or accessory dwelling unit may need more electricity later. At the same time, insulation and HVAC improvements may reduce consumption. Use several scenarios rather than one optimistic sales estimate.
Compare cash purchase, financing, lease, and power-purchase agreements carefully. Evaluate total payments, escalation clauses, transfer terms, maintenance responsibility, production guarantees, roof-removal costs, and ownership of incentives. Do not sign based only on a monthly-payment comparison.
Part 7: Turn Findings Into a Financially Sound Action Plan
Step 25: Rank Every Improvement by Safety, Cost, Savings, and Confidence
Create a master list and assign each item four scores:
| Factor | Question | Scoring Idea |
|---|---|---|
| Safety/Urgency | Could delay create fire, gas, moisture, health, or structural risk? | 1 low to 5 immediate |
| Expected Impact | How much energy, comfort, or durability benefit is likely? | 1 small to 5 major |
| Cost | Can it be done with maintenance money or does it require capital? | 1 expensive to 5 low-cost |
| Confidence | Is the diagnosis supported by measurements or only a guess? | 1 uncertain to 5 verified |
Safety items come first even when they do not save energy. Next, prioritize low-cost, high-confidence measures: correcting schedules, fixing failed weatherstripping, sealing verified gaps, repairing disconnected ducts, cleaning filters, resolving excessive runtime, and eliminating unnecessary always-on loads.
For capital projects, calculate simple payback:
Simple payback = Net project cost ÷ Estimated annual savings
Net cost should include labor, permits, disposal, financing, maintenance, and incentives you are reasonably certain to receive. Annual savings should use realistic energy prices and conservative performance assumptions. Simple payback does not capture comfort, durability, health, resale value, or future rate changes, so use it as one decision tool rather than the only one.
For projects with long lives, compare lifecycle cost. A cheaper appliance that uses more energy and fails sooner may cost more over time. Conversely, a premium product with features you will never use may not justify its price.
A 30-Day Home Energy Improvement Plan
Days 1–3: Build the Baseline
- Download utility data.
- Normalize consumption by billing days.
- Identify the mild-weather base load.
- Write down rate-plan details.
- List household and equipment changes.
Days 4–7: Complete the Safety and Comfort Walkthrough
- Map drafts, moisture, hot and cold rooms, noise, and airflow problems.
- Photograph equipment labels.
- Check alarms, vents, filters, drains, and visible wiring condition.
- Schedule professionals for any safety concern.
Week 2: Fix Low-Cost Operational Waste
- Create realistic thermostat schedules.
- Clean or replace filters correctly.
- Clear outdoor-unit airflow.
- Reduce unnecessary hot-water use.
- Turn off or schedule avoidable plug loads.
- Replace the most-used inefficient lamps with compatible LEDs.
Week 3: Address Verified Envelope Problems
- Replace failed weatherstripping.
- Caulk suitable stationary gaps.
- Seal and insulate the attic hatch safely.
- Repair accessible duct disconnections and failed seals with approved materials.
- Get professional advice for insulation, moisture, combustion safety, or major leakage.
Week 4: Plan Capital Improvements
- Request written proposals with equipment models and scope.
- Ask contractors how sizing was calculated.
- Compare lifecycle costs and warranties.
- Verify current permits, incentives, and utility rules.
- Set a three-, six-, and twelve-month measurement plan.
Home Energy Audit Priority Matrix
| Finding | Typical Priority | First Action | Professional Help? |
|---|---|---|---|
| Gas smell, damaged flue, or carbon monoxide alarm | Emergency | Leave the area and follow emergency guidance | Yes, immediately |
| Standing water near electrical equipment | Emergency | Avoid contact and isolate safely | Yes |
| Disconnected attic duct | High | Repair and seal correctly | Often recommended |
| Failed door weatherstripping | High-value low-cost | Replace with compatible material | Usually no |
| Missing attic insulation | High | Air-seal first, then insulate | Recommended for complex attics |
| Dirty HVAC filter | High-value maintenance | Install correct replacement | No, unless airflow issues remain |
| Old secondary freezer | Measure first | Monitor energy for several days | No |
| High cooling bill in one sunny room | Investigate | Check shading, air sealing, ducts, and insulation | Maybe |
| Solar proposal before efficiency work | Deferred | Reduce waste and model future loads first | Qualified installer later |
Common Mistakes That Make Energy Audits Less Useful
Buying Products Before Identifying the Cause
A cold room may be caused by duct imbalance, missing insulation, an air leak, a closed damper, poor window performance, or low airflow. Buying a space heater treats the symptom and may increase the bill.
Comparing Bills Without Comparing Consumption
Currency totals combine usage, rates, fees, and taxes. Track energy units and billing days to measure performance.
Sealing Every Opening
Some openings provide drainage, ventilation, combustion air, or appliance exhaust. Seal only verified uncontrolled leaks using materials appropriate to the assembly.
Adding Insulation Before Fixing Moisture
Wet insulation performs poorly and can hide leaks or damage. Correct roof, plumbing, drainage, and humidity problems first.
Replacing HVAC Without Load Calculations
Using the old equipment size as the automatic replacement size can preserve an original sizing mistake. Ask for a recognized load calculation and duct assessment.
Using Unrealistic Savings Claims
Actual savings depend on climate, energy price, starting condition, installation quality, equipment use, and occupant behavior. Use conservative ranges and verify results after the project.
Ignoring Comfort and Indoor Air Quality
A project that lowers energy use but creates humidity, stale air, noise, or temperature imbalance is not a complete success. Track comfort and health indicators alongside consumption.
Assuming Smart Devices Save Energy Automatically
Automation helps only when schedules, sensors, compatibility, and user behavior are configured correctly. Unnecessary connected devices can add standby load, complexity, and cybersecurity risk.
Writer’s Opinion
The most valuable part of a home energy audit is not the equipment list. It is the discipline of connecting each proposed expense to a verified problem. Homeowners are often presented with isolated solutions: new windows, a larger air conditioner, solar panels, a smart thermostat, spray foam, or a premium appliance. Any of those products might be useful, but none should be the automatic first answer.
I believe the strongest energy plan begins with three questions: Where is energy being used? What physical or operational condition causes that use? What is the least expensive reliable intervention that solves the underlying problem without creating a new one? That process protects the homeowner from both under-investing and over-investing.
Air sealing and insulation deserve special attention because they affect comfort every hour of the year, but they must be approached as building-science work rather than random application of foam. Moisture, ventilation, combustion safety, climate, and material compatibility matter. A carefully sealed attic bypass can be valuable. Covering a leak, vent, or unsafe electrical condition with foam is not.
Measurement after the upgrade is equally important. A project is not proven by a product label or contractor promise. Compare weather, consumption, runtime, indoor temperature, humidity, and comfort over time. When savings fall short, the data helps identify whether the cause is installation quality, changed behavior, rate increases, extreme weather, or an incorrect original diagnosis.
Finally, the best energy-efficient home is not one where occupants are afraid to use it. Efficiency should support normal life. The goal is to remove waste—not to make people uncomfortable, create unsafe temperatures, or turn every family activity into a calculation.
Frequently Asked Questions
Can I perform a home energy audit myself?
You can complete a useful preliminary audit by analyzing bills, mapping comfort problems, inspecting accessible areas, checking filters, finding obvious gaps, measuring plug loads, and documenting equipment. Professional testing is recommended when you need blower-door measurements, infrared diagnostics, combustion-safety testing, duct leakage testing, equipment sizing, or investigation of hidden moisture and insulation.
How long does a DIY home energy audit take?
A basic walkthrough may take two to four hours, but a meaningful audit uses data collected over several days or weeks. Utility analysis, room-temperature tracking, appliance monitoring, and contractor evaluation take longer than the visual inspection.
What is usually the cheapest energy-saving improvement?
Low-cost opportunities often include correcting thermostat schedules, maintaining HVAC filters, replacing failed weatherstripping, sealing verified small gaps, switching frequently used lamps to LEDs, reducing unnecessary standby loads, and changing laundry or hot-water habits. The best option depends on the home’s starting condition.
Should I replace windows first?
Not automatically. Windows may be a priority when frames are damaged, seals have failed, operation is unsafe, or replacement is already needed. In many homes, air sealing, attic work, duct repair, shading, and HVAC maintenance provide better early value. Diagnose before replacing.
How do I know whether insulation is sufficient?
Identify the material, condition, coverage, and thermal resistance, then compare it with local climate-zone and building-code guidance. Uneven, wet, compressed, or wind-washed insulation can underperform even when the average depth appears adequate.
Does turning the thermostat off save the most energy?
Not necessarily. Extreme temperature changes can create comfort, humidity, frozen-pipe, or equipment-recovery problems. Use moderate setbacks appropriate to the climate, building, occupants, and HVAC type. Heat pumps and radiant systems may need specialized strategies.
Are smart thermostats worth it?
They can be valuable for households with predictable schedules, frequent absences, or a need for runtime data and remote control. Savings depend on compatibility and configuration. A standard programmable thermostat can also work well when used consistently.
How often should HVAC equipment be serviced?
Follow the manufacturer’s schedule and local professional guidance. Inspection is especially important when performance changes, energy use rises unexpectedly, noise or odors appear, drainage fails, or the system has not been maintained for an extended period.
Can closing vents in unused rooms reduce bills?
Closing many vents can increase duct pressure, reduce airflow, create leakage, and harm system performance. Use designed zoning or obtain professional advice rather than treating supply registers as independent on-off controls.
What is a blower-door test?
A blower door uses a calibrated fan to create a controlled pressure difference between indoors and outdoors. The test measures air leakage and helps locate uncontrolled pathways. It should be performed with appropriate safety procedures, especially in homes with combustion appliances.
Do solar panels eliminate the need for energy efficiency?
No. Solar generates electricity but does not correct drafts, moisture, poor airflow, failing equipment, or excessive demand. Efficiency can reduce the required solar-system size and improve comfort independently of generation.
How soon should I check whether upgrades worked?
Check immediate issues such as drafts, temperature balance, noise, and equipment operation within days. Evaluate consumption across comparable weather and billing periods. Larger projects may require a full heating or cooling season for a fair assessment.
What records should I keep?
Keep utility data, audit notes, photos, equipment labels, maintenance records, proposals, permits, warranties, invoices, incentive documentation, commissioning reports, filter sizes, thermostat settings, and before-and-after measurements. These records improve maintenance and future resale decisions.
Final Home Energy Audit Checklist
- At least 12 months of utility consumption collected.
- Billing days and rate structure recorded.
- Base load separated from weather-driven use.
- Comfort, moisture, airflow, and noise problems mapped.
- Safety issues identified and escalated appropriately.
- Doors and windows inspected for failed seals.
- Stationary gaps evaluated for correct caulking.
- Attic hatch and ceiling penetrations inspected.
- Insulation condition and coverage documented.
- Crawl-space, basement, and rim-joist moisture checked.
- Accessible ducts inspected for leakage and damage.
- HVAC equipment labels and service history recorded.
- Filters, registers, and outdoor airflow checked.
- Thermostat schedule matched to occupancy and equipment type.
- Ventilation and indoor humidity reviewed.
- Water-heating system and hot-water waste evaluated.
- Major plug loads measured or estimated.
- Frequently used lighting prioritized for LED upgrades.
- Refrigeration, laundry, and cooking practices reviewed.
- Monitoring tools selected for specific questions.
- Solar considered only after efficiency and future-load planning.
- Projects ranked by safety, impact, cost, and confidence.
- Payback estimates use conservative assumptions.
- Professional scopes and equipment sizing documented.
- Before-and-after measurement plan scheduled.
Conclusion
A professional-quality home energy audit begins with measurement, not shopping. Collect utility data, understand the rate plan, map comfort problems, inspect the building envelope, document HVAC and water-heating systems, measure long-running appliances, and rank improvements by evidence and urgency.
Complete low-cost maintenance and control improvements first. Seal verified air leaks safely, improve insulation where the assembly supports it, repair ducts, optimize thermostat schedules, reduce hot-water waste, install efficient lighting in high-use locations, and eliminate unnecessary always-on loads. Use qualified professionals for electrical, combustion, refrigerant, structural, moisture, and complex building-envelope work.
After each change, measure the outcome. Track energy units, not only bills. Compare similar weather, record comfort and humidity, and investigate when results do not match expectations. This approach turns energy efficiency from a collection of promises into a practical management system that can lower operating costs, improve comfort, and protect the home for years.