

How to Get Your Phone Back
 Phone recovery begins by identifying the situation correctly: misplaced, stolen, withheld, under repair, or held as evidence. Photo via Pexels.
Losing access to a phone can feel like losing a wallet, a key ring, a camera, a work computer, and part of your identity at the same time. The correct way to get it back depends on why you no longer have it. A phone left in a rideshare requires a different response from a phone stolen at a station. A device held by a school, employer, parent, repair shop, police property unit, or former partner creates different practical and legal questions. Acting as though every case is simple theft can make recovery slower, damage evidence, or create a confrontation that puts you at risk.
This guide provides a complete, modern recovery system for 2026. It covers iPhone and Android tracking, remote locking, carrier and SIM protection, police reports, lost-and-found communication, safe collection, school and workplace policies, consumer disputes with repair businesses, phones held as evidence, insurance claims, data recovery, account security, and prevention. It is designed to help you make decisions in the right order: locate first when safe, secure immediately when risk exists, document every contact, and escalate through the proper channel instead of trying to seize the device back yourself.
Immediate safety rule: A map pin is not permission to enter private property, follow a suspected thief, arrange a solo meeting, or use force. If the location or person creates danger, give the information to police or a trusted security team. Your phone can be replaced; your safety cannot.
Quick answer: Call the phone, check nearby places, use Apple Find My or Google Find Hub, mark the device as lost, display a safe callback number, and save screenshots of the location and device details. If theft is possible, contact your carrier, protect the SIM and accounts, file a police report, and never confront the person shown on the map. If another organization is holding the phone, request the written rule, receipt, release date, and appeal process. If police seized it, obtain the property receipt and communicate with the evidence unit or your lawyer. Erase the phone only when recovery is unlikely and the risk to your data is greater than the value of continued tracking.
Part 1: Identify Why You Do Not Have the Phone
1. Put the situation into one recovery category
Before changing passwords or erasing anything, choose the most accurate category:
- Misplaced nearby: The phone is probably in your home, car, office, bag, or another familiar place.
- Left with a business or driver: It may be at a restaurant, hotel, airport, rideshare vehicle, school office, gym, or store lost-and-found.
- Stolen or taken without consent: Someone removed it, refuses to return it, or the location is moving in a suspicious way.
- Temporarily confiscated: A school, employer, parent, venue, or institution is holding it under a rule or disciplinary process.
- Under repair or involved in a payment dispute: A shop, carrier, insurer, or seller has possession.
- Held by police or a court: It was seized, booked as property, or retained as evidence.
- Controlled by an abusive or coercive person: A partner, relative, or household member is using access to the phone as a way to monitor, isolate, threaten, or control you.
Write the category and the last confirmed time you possessed the device. This one-minute decision prevents contradictory actions. For example, a remote erase may protect data after a theft but can reduce your ability to track the device. Calling repeatedly may help when it is under a sofa but alert a thief that you are monitoring the phone.
2. Build a precise last-seen timeline
Record the last time you physically used the phone, the last app or call, where you traveled, who was present, and when the device last appeared online. Check card transactions, transportation receipts, photographs, smart-watch notifications, car Bluetooth history, and location history that you lawfully control. Ask, “Where was I when I last completed an action that required the phone?” rather than relying on the moment you first noticed it was missing.
A useful timeline might read: “6:42 p.m. paid at café; 6:47 p.m. answered a message outside; 7:05 p.m. entered rideshare; 7:26 p.m. arrived home; noticed missing at 7:40 p.m.” That level of detail gives a business, driver, police officer, or insurer something searchable.
3. Gather identifying information before contacting anyone
Prepare the make, model, color, case, lock-screen image, phone number, serial number, IMEI or MEID, carrier, purchase receipt, and a description of unique damage or accessories. The box, carrier account, Apple Account, Google Account, purchase email, insurance portal, or device-management page may show these details. Do not publish the full IMEI or serial number on social media. Share it only with the carrier, insurer, police, manufacturer, or another party that legitimately needs it.
4. Decide whether the main priority is location or data security
If the device is probably nearby and protected by a strong passcode, locating it may be the immediate priority. If it was unlocked when taken, someone knows your passcode, your SIM can receive financial verification codes, or the phone contains highly sensitive work, health, legal, or personal data, account security may need to come first. You can often lock the phone while continuing to track it, but remote erasure is a later and more final decision.
Part 2: Search Nearby Without Creating a Bigger Problem
 A controlled nearby search is faster when you use sound, connected accessories, and a written last-seen route instead of searching randomly. Photo via Pexels.
5. Call the phone once from a trusted number
Call once and listen in the last places you visited. If a stranger answers, avoid giving your home address, account password, screen code, or unnecessary identifying information. Ask where the phone can be left with staff or collected in a public place. A legitimate finder does not need your passcode to return it.
Do not keep calling every minute. Repeated calls drain battery, interfere with a finder trying to contact you, and may prompt a thief to power the phone off. After one or two attempts, switch to the device’s official lost mode.
6. Use connected devices to narrow the area
A smartwatch, wireless earbuds, vehicle system, tablet, laptop, or home router may reveal whether the phone remains nearby. If your watch still shows a live Bluetooth connection, walk slowly through rooms and note where the connection drops. Check whether the phone automatically connected to home Wi-Fi, car Bluetooth, or a known hotspot. Do not use third-party “phone finder” websites that request your Apple or Google credentials; many are phishing pages.
7. Search in zones, not in circles
Divide the area into zones: clothing and bags, furniture, charging locations, bathroom and kitchen surfaces, vehicle, entryway, work area, and outdoor path. Complete one zone before starting another. Use a flashlight at floor level because glass screens and camera lenses reflect light. Check between car seats, under seat rails, inside reusable bags, behind furniture, laundry, coat linings, and any place where you set items down while carrying something else.
8. Contact businesses with searchable details
Call the exact location and provide the time range, table or room number, device description, case color, and your callback number. Ask staff to check both the public lost-and-found and employee handoff log. Airports, hotels, hospitals, transit systems, and large venues may use online claim forms rather than telephone searches. Keep the claim number.
Never send a screenshot that reveals your Apple Account email, Google Account details, home address, or full device identifier unless an official form specifically requires it.
9. Use rideshare or delivery-app lost-item tools
Open the ride or order in the official app and use its lost-item process. Describe the phone without accusing the driver. Drivers often cannot answer while working, and the location shown by a tracking service may lag or reflect where the phone was discovered. Use the platform’s communication relay rather than posting the driver’s name, plate, or home location publicly.
Part 3: Recover an iPhone with Apple Find My
10. Open Find My from a trusted device
Use the Find My app on another Apple device signed into your Apple Account, or visit Apple’s official Find My web interface from a trusted browser. Apple states that Find My can locate a missing device, play a sound, mark it as lost, or erase it if you believe it cannot be recovered. Avoid links delivered by text messages claiming “your stolen iPhone was found.” Thieves commonly send fake iCloud sign-in pages to steal credentials and remove Activation Lock.
11. Read the map as evidence, not perfect truth
Check whether the location is current, approximate, or the last known position. Note the timestamp, battery state, and movement. Save screenshots with the time visible. GPS, Wi-Fi positioning, Bluetooth networks, building density, and delayed reporting can move the pin away from the exact room or address. Do not accuse a household or business based solely on a circle covering several properties.
12. Play a sound only when the phone is probably nearby
Use Play Sound when the device is in a safe, familiar environment. It can help even when the phone is muted. Avoid triggering sound if you believe a thief is carrying the device, police are coordinating recovery, or the phone is hidden in a situation where alerting someone could increase risk.
13. Mark the iPhone as lost
Lost Mode locks the device and allows you to display a message and contact number. Use an alternate number that does not expose a vulnerable person or private home line. A simple message works best: “This phone is lost. Please call or text 555-0100. No questions asked.” Do not offer a large reward in the first message or provide your address.
Apple advises stolen-device users to mark the device as lost quickly. If you have AppleCare+ with Theft and Loss, do not remove the phone from Find My or your Apple Account before the claim is fully approved, because doing so can affect the claim and remove Activation Lock protection.
14. Protect your Apple Account from recovery scams
Never give a finder your passcode, Apple Account password, verification code, recovery key, or a code sent to another trusted device. Apple does not need you to disclose those secrets to confirm ownership. If a message says the phone has been located and asks you to sign in, open Find My independently instead of tapping the link.
15. Use Stolen Device Protection and account changes intelligently
If the thief may know your iPhone passcode, review Apple Account security from a trusted device. Stolen Device Protection can require biometric authentication and security delays for sensitive changes in unfamiliar locations. Remove unknown trusted devices, review account recovery information, and change credentials when necessary. However, do not remove the missing iPhone itself from the account while you still need Activation Lock, tracking, or a theft-and-loss claim.
16. Erase only after comparing recovery and privacy risks
Remote erase is appropriate when sensitive information is at serious risk and recovery appears unlikely. Before erasing, save the serial number, IMEI, map screenshots, and police-report information. Understand the consequences shown by Apple before confirming. Keep the device associated with your Apple Account so Activation Lock remains in place unless an insurer or authorized process instructs otherwise.
Part 4: Recover an Android Phone with Google Find Hub
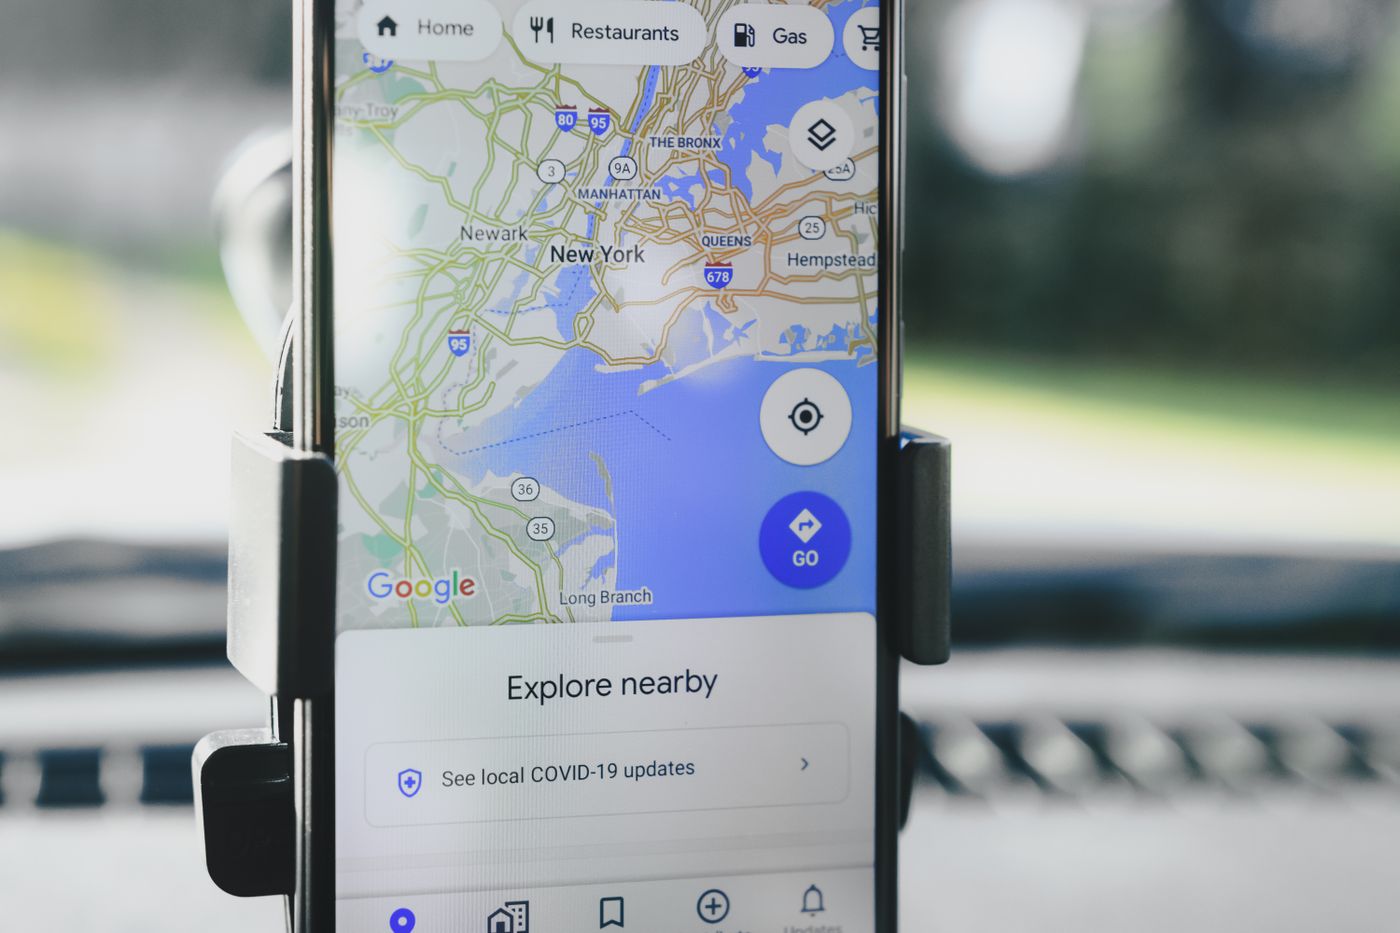 Location services are most useful when you preserve timestamps and treat the map as a lead rather than an invitation to confront someone. Photo via Pexels.
17. Sign in to Google Find Hub through an official route
Google’s current Android recovery service is Find Hub. Use the official Find Hub app or Google’s device-finding website from a trusted device. Google explains that supported Android devices can be located, secured, rung, or erased remotely. Recent encrypted locations and the crowdsourced Find Hub network may help locate a phone even when it is not currently connected in the usual way.
18. Confirm that you selected the correct device
People often have old phones, tablets, watches, or multiple devices under one Google Account. Verify the model, device name, battery, network, and last activity before sending any command. Save a screenshot of the device details. If a work profile or enterprise-management system is installed, notify the organization’s IT or security team before erasing business data.
19. Use the ring function for a nearby device
Ring the phone when you believe it is nearby or in a cooperative business. If the location is moving or appears at an unknown property, do not use sound as a substitute for police assistance. The device may be in a vehicle, apartment building, repair facility, or lost-and-found room rather than with the person shown closest to the pin.
20. Secure the phone and add return information
Use the secure-device or lost-device option to lock the phone and display a callback message. Choose a number you can answer from another device. Do not display your email password, address, or a message that confirms valuable contents. If the phone was unlocked or had no screen lock, securing it should happen immediately.
21. Understand offline and powered-off location limits
Google says the Find Hub network may use encrypted recent locations and nearby Android devices to help find supported hardware. Some compatible phones can remain findable for a period after being powered off. Availability varies by model, settings, battery state, region, and account configuration. Record what the interface actually says rather than assuming a missing live location means the tracking system failed.
22. Erase the Android device only when needed
Erasing protects local data but can end or reduce later device-finding capabilities. Before using it, record the IMEI, serial number, last location, timestamps, carrier account, and police report. If the device contains regulated work data, follow your employer’s incident-response instructions. After an erase, account-based device protection may still require the prior Google Account during setup, depending on the device and configuration.
Part 5: Respond When the Phone Was Stolen
23. Do not travel to the map pin alone
A location pin can lead to a residence, parking structure, market, transit station, or apartment building. Do not knock on doors, block a vehicle, follow someone, or arrange a private exchange. Call local police, explain that a stolen phone is reporting a location, and provide the report number, device identifiers, timestamps, and screenshots. Police response policies differ, and tracking data alone may not establish legal authority to search a property, but it is still useful evidence.
24. File a police report with facts that can be verified
Provide the last confirmed possession, theft location, time range, device description, phone number, IMEI or serial number, tracking screenshots, witness information, video sources, and any messages from the person holding it. Distinguish what you observed from what the app inferred. Ask for the incident or report number and the method for adding new location updates.
Do not claim robbery if the phone was simply missing, and do not identify a suspect based only on a broad map circle. Accurate language improves credibility and reduces harm to innocent people.
25. Contact the carrier and protect the line
Tell the carrier the device is lost or stolen. Ask about suspending service, replacing the SIM or eSIM, blocking the device identifier, preserving voicemail, and keeping your number. A carrier block can reduce use on participating networks, but it does not physically recover the device or guarantee it cannot be used for parts, Wi-Fi access, or in another market.
Ask how the carrier handles pending account changes and number-port requests. Add or strengthen the account PIN. A thief who controls your unlocked phone and SMS messages may try to reset banking, email, or social accounts.
26. Protect the email account that controls everything else
Your primary email often resets every other account. From a trusted device, review active sessions, recovery addresses, forwarding rules, recent security events, and unfamiliar app access. Change the password if the phone was unlocked, the passcode was known, or browser sessions expose the account. Sign out suspicious sessions without disabling the official device-location service unnecessarily.
27. Secure financial, password, and identity apps
Contact banks and card issuers when payment apps or cards could be accessed. Freeze cards in mobile wallets as appropriate, review transactions, and notify the institution through its official number. Revoke or rotate password-manager access according to the provider’s recovery process. If identity theft occurs, use the FTC’s official IdentityTheft.gov recovery system in the United States.
28. Preserve messages from anyone offering to return it
Save screenshots, telephone numbers, usernames, payment requests, meeting locations, and exact wording. Do not pay a “shipping fee,” provide a verification code, remove the device from your account, or sign into a link sent by the person. A common theft pattern is to pressure the owner into removing Activation Lock by threatening to sell or erase the phone.
29. Arrange a safe return only when risk is low
If a cooperative finder contacts you, use a staffed public location such as a police-station lobby, hotel desk, transit lost-and-found, or business counter. Bring proof of ownership but keep account passwords private. Take another adult when appropriate. If the person demands money beyond a reasonable, lawful return expense, changes locations repeatedly, threatens you, or asks you to enter a vehicle or residence, stop the exchange and involve police.
Part 6: Get a Phone Back from a School, Employer, Parent, Partner, or Venue
 When an institution or another person is holding the phone, a calm written request and documented policy usually work better than confrontation. Photo via Pexels.
30. Ask for the exact rule and expected return time
Use neutral language: “Please show me the policy authorizing the phone to be held, who currently has custody, and when it will be returned.” Request a receipt or written acknowledgment identifying the device and condition. School and workplace rules vary widely. The goal is to establish custody, duration, and an appeal path—not to argue about every issue at the front desk.
31. Separate ownership from the organization’s conduct rules
Owning the phone does not necessarily prevent a school, employer, court, venue, or secure facility from temporarily enforcing a lawful device rule. At the same time, a policy does not automatically permit indefinite retention, access to private contents, damage, or use unrelated to the stated purpose. Ask whether the rule addresses possession, storage, search, or data access; these are separate questions.
32. Use the proper appeal chain
For a school, move from teacher or administrator to the designated dean, principal, district office, or student-policy appeal. For an employer, use the supervisor, HR, security, union, or formal grievance process. For a venue, ask for the security manager and incident number. Keep the request focused: proof of ownership, date taken, current custodian, policy section, and requested return date.
33. Ask for essential access while the dispute is reviewed
If the phone contains a digital transit pass, medical information, two-factor authentication, childcare contacts, accessibility tools, or work credentials, explain the specific need. Ask whether staff can supervise retrieval of an essential number, SIM, authentication transfer, or medical data without giving unrestricted access to the device. Avoid exaggerating; specific needs are easier to accommodate.
34. Handle a parent-held phone according to age, ownership, and safety
For minors, parents or guardians often control the service plan and may impose device rules, but the exact legal situation depends on jurisdiction, ownership, court orders, and family circumstances. Use a calm plan: acknowledge the rule, ask what behavior or time period will lead to return, and propose measurable conditions. Do not take the device secretly, threaten property damage, or use another person’s password.
If withholding the phone prevents emergency help, isolates you from safe adults, supports stalking, or occurs alongside threats or abuse, use a safer device to contact a trusted adult, counselor, advocate, or emergency service. The issue is then personal safety, not ordinary screen-time discipline.
35. Respond to a partner or former partner who refuses to return it
Do not meet alone if there has been violence, stalking, coercive control, threats, or weapon access. Preserve written requests and proof of ownership. Ask police, a lawyer, court, advocate, or civil standby process about safe property retrieval. Change account access from a safe device, review location sharing, and avoid sudden changes that could trigger danger without a safety plan.
36. Document condition when the phone is returned
Before leaving the return location, photograph the phone, case, screen, ports, and accessories. Note whether it powers on, whether the SIM is present, and whether there are signs of damage or attempted access. Do not argue on site; obtain names and documents, then use the institution’s damage-claim, grievance, consumer, or legal process.
Part 7: Recover a Phone from a Repair Shop, Carrier, Seller, or Insurer
 Repair disputes are easier to resolve when you have the intake receipt, estimate, serial number, approval limit, and written release terms. Photo via Pexels.
37. Find the intake agreement and repair authorization
Review the estimate, diagnostic fee, approved work, data-loss disclaimer, abandonment period, parts policy, warranty, and promised completion date. Compare the serial number or IMEI on the receipt with your records. A clear dispute letter should quote the agreement rather than say only, “They stole my phone.”
38. Request a written status and itemized balance
Ask what work was completed, what parts were installed, who authorized additional charges, what amount is due, and what is required for release. Set a reasonable written deadline. Do not threaten staff or attempt to remove the device from a workbench. Repair businesses may have lawful rights related to authorized charges in some jurisdictions, while customers have consumer-protection rights against unauthorized work or deceptive retention.
39. Dispute unauthorized charges with evidence
Provide the original estimate, messages, call records, payment receipts, and the maximum amount you authorized. Ask the business to identify the authorization for extra work. Escalate to the company’s owner, franchise office, marketplace, payment provider, state or local consumer-protection agency, or small-claims process as appropriate. A chargeback can address payment but does not automatically produce physical return of the phone, so pursue the property issue separately.
40. Protect data before and after repair
Whenever possible, back up and erase a phone before service, remove payment cards, and use a repair or maintenance mode supported by the manufacturer. After return, inspect account sessions, device-admin apps, accessibility permissions, VPNs, unknown profiles, and installed certificates. Change sensitive passwords if you handed over an unlocked device or disclosed the passcode.
41. Follow insurer instructions without surrendering account protection too early
Insurance and theft-loss claims often require proof of ownership, a police report, carrier suspension, or continued device association. Follow the insurer’s official portal and keep every reference number. Apple specifically warns theft-and-loss customers not to remove a stolen iPhone from the Apple Account or Find My until the claim is fully approved. Similar programs may have their own conditions.
Part 8: Get Back a Phone Held by Police or a Court
 A phone held by police must be recovered through the property or evidence process, not by repeatedly visiting a front desk without the release authority. Photo via Pexels.
42. Identify whether the phone is booked property or evidence
Property held for safekeeping after an arrest may follow a different release process from a device seized under a warrant, consent search, probation condition, border process, or evidence hold. Find the property receipt, case number, item number, agency, officer, and court. If you received no receipt, request one in writing.
43. Contact the correct property or evidence unit
The arresting officer, detective, prosecutor, property clerk, and court may have different roles. Ask the evidence unit what authorization is required: investigator release, prosecutor approval, court order, case disposition, identification, proof of ownership, appointment, or notarized authorization. Keep the name of each person, date, and response.
44. Use a lawyer when the phone relates to a criminal investigation
Do not explain the contents, unlock the phone, give a passcode, or consent to a search merely to speed up return without understanding your rights and obligations. Laws concerning device searches, warrants, biometric unlocking, retention, and return vary and can change. A criminal-defense lawyer can address both access to the device and preservation of the legal case.
45. File the correct motion or petition when informal requests fail
Depending on jurisdiction, a lawyer may seek return of property, suppression, preservation, a copy of necessary data, or another court remedy. In U.S. federal cases, Rule 41(g) is one possible procedure for a person aggrieved by unlawful deprivation of property, but its suitability depends on the case. Do not copy a generic motion from the internet without checking the court, case status, and local rules.
46. Retrieve the device before the disposal deadline
Release notices may contain a limited pickup period. Bring the required identification, receipt, authorization, and appointment confirmation. Inspect the phone and obtain a release record. If the device is damaged, missing a SIM, or not yours, note the issue before signing an unconditional acknowledgment.
Part 9: Recover Your Digital Life When the Physical Phone Does Not Return
47. Restore your number safely
Ask the carrier for a replacement SIM or eSIM and confirm that the old one is disabled. Add a strong account PIN and review number-port protection. Test incoming calls and account-recovery messages. Warn close contacts that messages from the old device may be fraudulent until account control is confirmed.
48. Restore from a trusted backup
Set up the replacement phone using an Apple iCloud, Google, computer, enterprise, or app-specific backup you recognize. Verify the backup date before overwriting newer information. Reinstall apps from official stores, not copied packages or links sent by someone offering recovery help.
49. Rebuild two-factor authentication before closing old sessions
Use saved recovery codes, a hardware security key, trusted device, backup phone number, or the provider’s identity process. Move authenticator accounts carefully and confirm access before deleting old records. Prioritize email, password manager, carrier, banking, government, health, work, and cloud-storage accounts.
50. Review account sessions and privacy settings
Look for unfamiliar logins, devices, location sharing, email forwarding, payment cards, social-media sessions, messaging desktop links, and cloud albums. Sign out unknown access and document suspicious events. If private images or messages are threatened, do not pay or negotiate impulsively; preserve evidence and use police, platform reporting, a lawyer, or a specialized victim-support service.
51. Keep tracking and claim records organized
Create one folder containing the police report, serial and IMEI, carrier case, insurer claim, tracking screenshots, purchase receipt, correspondence, replacement cost, and account-security actions. A clean record prevents contradictory statements and helps if the phone later appears, an insurer asks questions, or unauthorized activity develops.
Part 10: Build a Phone-Recovery System Before the Next Loss
52. Turn on official finding features now
Enable Apple Find My or Google Find Hub, location services required for recovery, offline-finding options supported by the device, and a strong screen lock. Test the service from another trusted device. Google notes that a PIN, pattern, or password is important for Find Hub network recovery. Apple’s Find My network and Activation Lock are most effective when configured before loss.
53. Record identifiers outside the phone
Store the model, color, phone number, serial, IMEI, carrier, insurer, purchase date, and receipt in an encrypted password manager or secure household record. Do not keep the only copy as a photograph on the phone itself.
54. Use a lock-screen return method that protects privacy
A medical or emergency-contact feature can help, but avoid displaying a full home address. Consider a dedicated recovery number, trusted relative, or email alias. The finder should be able to contact you without learning how to access your accounts.
55. Strengthen the passcode and account recovery
Use a strong device passcode rather than a simple pattern or familiar date. Turn on biometric authentication, carrier account PINs, two-factor authentication, and stolen-device protections. Store recovery codes securely and ensure a trusted contact cannot independently take over the account.
56. Back up information that cannot be replaced
Automate backups for photographs, contacts, messages where supported, authenticator recovery, notes, health data, and important files. Periodically verify that the backup can be restored. A backup does not retrieve the phone, but it prevents the loss from becoming permanent.
57. Create a household recovery card
Write a simple sequence everyone can follow:
- Call the device once.
- Open the official Apple or Google finder.
- Mark it lost and add the recovery number.
- Screenshot location and device information.
- Contact the venue or transport provider.
- If stolen, notify police and carrier.
- Protect email, financial, and authentication accounts.
- Never confront a suspected thief.
Practice finding one device from another. Recovery tools are hardest to learn when the account password is forgotten and the phone receiving the verification code is the missing device.
Situation-by-Situation Scripts
Script for a business lost-and-found
“I believe I left a [model and color] phone in your location between [times]. It has a [case description] and [non-sensitive distinguishing feature]. Could you check the lost-and-found and staff handoff log? My claim callback number is [alternate number]. I can show proof of ownership when collecting it.”
Script for a cooperative finder
“Thank you for contacting me. Please do not try to unlock the phone. Could you leave it with the staffed desk at [public location], or meet inside [police-station lobby/business]? I will bring proof that it is mine. I will not ask you to travel to my home.”
Script for a school or employer
“Please provide the policy section authorizing retention, the name of the current custodian, the device condition, and the date and conditions for return. The phone is a [model/serial ending]. I am requesting its return on [date] or written instructions for the appeal process.”
Script for a repair shop
“Your receipt dated [date] authorized [work] up to [amount]. Please send an itemized status, any additional authorization you rely on, the total required for release, and a pickup time. I dispute charges not included in the signed authorization and request preservation of the device and its data while the dispute is reviewed.”
Script for police property
“I am requesting the release status of item [property number], a [phone description], associated with case [number]. Please identify whether it is safekeeping property or evidence, the person authorized to approve release, required documents, and any deadline before transfer or disposal.”
Common Mistakes That Make Recovery Harder
- Following a live location into a dangerous place.
- Removing an iPhone from the Apple Account before a theft claim is approved.
- Giving a finder the screen passcode or account verification code.
- Clicking a texted “device found” link instead of opening the official service independently.
- Erasing the phone before recording identifiers and location evidence.
- Posting the full IMEI, serial number, address, or alleged thief online.
- Assuming a school, employer, shop, or police department follows the same rules everywhere.
- Using threats or force instead of a receipt, written demand, complaint, or court process.
- Ignoring the SIM, email, password manager, and financial accounts while focusing only on the hardware.
- Paying a stranger who promises to “hack” or trace the phone.
Frequently Asked Questions
Can police recover a phone using Find My or Find Hub?
Tracking screenshots can help, but police authority and response depend on the facts, local policy, location accuracy, and applicable law. A pin at a residence does not automatically permit entry or search. File a report, provide identifiers and updates, and do not attempt recovery yourself.
Should I erase my phone immediately?
Not always. First lock it, preserve evidence, and assess whether data risk outweighs the chance of recovery. Erase quickly when the phone was unlocked, contains highly sensitive data, or account compromise is occurring. Understand that erasure may reduce future tracking.
Can someone use my phone after I block the IMEI?
A network block can limit cellular use on participating networks, but it does not guarantee the phone cannot use Wi-Fi, be dismantled for parts, altered, or taken to another market. Keep account locks and device protections active.
What if the phone location keeps changing?
Save timestamped screenshots and give them to police. Do not follow the device. Movement may indicate a person, vehicle, delivery route, transit facility, or delayed network report.
Can a school keep a phone overnight?
Policies and laws differ. Ask for the written rule, receipt, custodian, return condition, and appeal route. A parent or guardian may need to collect it. Urgent medical, accessibility, transportation, or safety needs should be explained specifically.
Can a repair shop refuse to return a phone?
The answer depends on the agreement, authorized charges, local lien and consumer law, and the facts. Request an itemized written basis, dispute unauthorized work, and use consumer-protection or court procedures rather than taking the device by force.
How do I get a phone back from an ex?
Make a written request, preserve proof of ownership, and use a safe public exchange, police assistance, civil standby, lawyer, or court process. Do not meet alone when there is abuse, stalking, or violence. Secure accounts from a safer device.
Will changing my Apple or Google password stop tracking?
Account changes can affect sessions and recovery access. Use the provider’s official security guidance and confirm that Find My or Find Hub remains available. Remove unauthorized access without removing the missing device from the account prematurely.
Official Resources
- Apple Find My Support
- Apple: How to Find a Lost iPhone or iPad
- Apple: What to Do If an iPhone or iPad Was Stolen
- Google: Find, Secure, or Erase a Lost Android Device
- Google: Be Ready to Find a Lost Android Device
- FTC: How to Protect Your Phone
- FTC IdentityTheft.gov
Final Recovery Plan
During the first ten minutes, retrace the last confirmed route, call once, use the official finding service, and preserve screenshots. During the first hour, mark the phone lost, contact the location or transport provider, and protect the line and primary email if theft is possible. During the first day, file the police or institutional report, notify the carrier and insurer, document every reference number, and arrange only a safe return. If the phone remains unavailable, restore the number and data to a replacement device, review every important account, and keep Activation Lock or Android account protection active.
The strongest recovery strategy is not a clever trick. It is a sequence: classify the problem accurately, use official tools, preserve evidence, protect accounts, communicate in writing, and involve the authority that actually controls release. That approach gives you the best chance of recovering the hardware without sacrificing your safety, privacy, insurance claim, or legal position.