

How to Create a Complete Home Maintenance Plan That Prevents Expensive Repairs in 2026
 A useful maintenance plan turns the whole home into a series of visible, repeatable inspections. Photo by RDNE Stock project via Pexels.
A home rarely develops an expensive failure without giving some kind of earlier warning. The warning may be a faint water stain, a filter that becomes dirty unusually fast, a gutter that overflows in one corner, a refrigerator that cycles constantly, a window that no longer closes squarely, or a smoke alarm that has quietly reached the end of its rated life. The problem is that these clues appear in different rooms, at different times, and often seem too small to justify immediate attention.
A complete home maintenance plan solves that problem by replacing memory and guesswork with a repeatable system. Instead of waiting for something to break, you inspect the property on a schedule, record changes, rank problems by urgency, complete low-risk tasks, and call qualified professionals before minor defects spread into structural damage, equipment failure, mold, fire, or a major insurance claim.
This guide uses a practical WikiHow-style approach for 2026. It shows you how to create a property profile, locate emergency controls, organize maintenance records, inspect the building every month, protect the home from water, maintain heating and cooling equipment, examine the roof and exterior, test safety devices, plan seasonal work, and decide what you can safely do yourself. The process is designed for ordinary homeowners, new buyers, landlords managing a small property, and long-term occupants who want fewer surprises.
The recommendations below draw on current public guidance from ENERGY STAR, the U.S. Environmental Protection Agency, the Consumer Product Safety Commission, FEMA, and product manufacturers. Local building codes, climate, construction type, equipment instructions, insurance conditions, and warranty terms can change what your own home requires. Always follow the most specific current instructions for the exact product or assembly.
Safety first: Do not work on energized electrical equipment, fuel-burning appliance interiors, refrigerant systems, structural roof areas, suspected asbestos, unstable ladders, active mold contamination, pressurized plumbing, or any component that exceeds your training. Shut down the relevant utility when the manufacturer requires it. Use licensed professionals for regulated or high-risk work.
Part 1: Build a Reliable Maintenance System Before You Start Repairing
1. Create a one-page profile of your home
Start with the facts that determine what must be maintained. Record the year the home was built, approximate square footage, number of levels, foundation type, roof material and estimated age, exterior cladding, window type, heating and cooling systems, water-heater type, plumbing supply materials, electrical service size, sewer or septic system, and whether the property has a sump pump, well, pool, solar system, fireplace, generator, irrigation, elevator, security system, or other specialized equipment.
Add the names and model numbers of major systems. Photograph each equipment data plate clearly. Include the furnace, heat pump, air conditioner, water heater, refrigerator, dishwasher, washing machine, dryer, range, garage-door opener, smoke alarms, carbon-monoxide alarms, sump pump, and any whole-house ventilation or water-treatment equipment.
This profile becomes the first page of your maintenance file. It allows you to buy the correct filters, identify compatible replacement parts, confirm equipment age, find manuals quickly, and give contractors useful information before a service visit.
2. Gather warranties, manuals, invoices, and previous inspection reports
Collect paper and digital records in one place. Useful documents include the purchase inspection, roof warranty, HVAC commissioning report, appliance manuals, permits, service invoices, pest reports, waterproofing records, renovation plans, paint colors, flooring product details, and photographs taken before walls or ceilings were closed.
Scan important paper records. Name each file consistently, such as 2026-04-15-HVAC-Spring-Service.pdf. Store a copy in a secure cloud account and another copy offline. Do not rely on a contractor portal that may disappear years later.
Review the warranty conditions. Some manufacturers require documented professional service, specific filters, approved cleaning products, registration, or action within a limited period. A maintenance plan should preserve warranty rights rather than accidentally void them.
3. Make a room-by-room asset inventory
 Basic tools, protective equipment, labels, and a written plan make routine maintenance easier to complete correctly. Photo by Tima Miroshnichenko via Pexels.
Walk through every room and list the items that need inspection or service. Include windows, exterior doors, exhaust fans, plumbing fixtures, shutoff valves, drains, caulked joints, appliances, electrical receptacles, ceiling stains, floors, handrails, cabinets, and visible supply or return vents.
Continue outside. Record gutters, downspouts, roof penetrations, siding, trim, decks, stairs, railings, grading, foundation cracks, exterior faucets, irrigation valves, trees close to the structure, fences, gates, outdoor lighting, and drainage inlets.
You are not trying to diagnose every defect on the first walk. The purpose is to create a complete inspection route so that hidden corners are not forgotten. A small apartment may have 40 items; a detached house may have several hundred. Group them into systems rather than treating them as one overwhelming list.
4. Use three maintenance categories
Label each item as one of the following:
- Observe: Check the condition and record changes, such as a foundation crack, roof stain, or appliance noise.
- Service: Perform a recurring task, such as replacing a filter, cleaning a dryer lint screen, or flushing an approved drain.
- Professional: Schedule trained inspection or regulated work, such as combustion testing, refrigerant service, chimney evaluation, or electrical-panel repair.
This prevents a common mistake: assuming that every maintenance item is a DIY task. A good plan includes knowing when not to touch something.
5. Create a maintenance calendar that matches your climate
Use four layers of scheduling:
- Monthly: A short inspection of leaks, alarms, filters, drains, and visible changes.
- Seasonal: Exterior, HVAC, drainage, freeze, storm, or heat preparation.
- Annual: Professional service, deep cleaning, safety review, and record updates.
- Age-based: Replacement planning for roof coverings, sealants, alarms, appliances, batteries, hoses, and equipment.
Do not copy a generic calendar without adapting it. A desert home, coastal apartment, snow-country house, and humid basement property have different priorities. Place seasonal tasks four to six weeks before the harsh weather begins, when contractors are easier to schedule and repairs are less urgent.
Part 2: Prepare for Emergencies Before Routine Maintenance
6. Locate and label every main shutoff
Find the main water shutoff, gas shutoff if applicable, electrical service disconnect, individual appliance shutoffs, irrigation shutoff, and any well or pump control. Confirm that every responsible adult knows where they are. Attach durable labels and keep the correct tool nearby when a special wrench is required.
Do not force a corroded valve merely to test it. If the main water valve is inaccessible, leaking, seized, or unidentifiable, hire a plumber to correct it. A working shutoff can turn a burst supply hose from a major flood into a manageable cleanup.
Photograph the normal position of controls. Write the utility emergency numbers in the maintenance file. For gas odors, electrical arcing, smoke, or other immediate danger, leave the area and contact emergency services or the utility instead of attempting an improvised repair.
7. Learn how to isolate smaller plumbing failures
Identify shutoff valves for toilets, sinks, washing machines, dishwashers, refrigerators, water heaters, and outdoor faucets. Operate only valves that the manufacturer or plumber says may be exercised safely. Replace valves that cannot be reached or closed without tools during an emergency.
Place water-sensitive equipment and stored valuables above basement floors. Consider leak sensors near water heaters, laundry machines, dishwashers, refrigerators with water lines, sump pits, and under-sink cabinets. EPA WaterSense notes that household leaks can waste water and may cause serious property damage; modern flow-monitoring devices can provide another layer of warning.
8. Build a basic response kit
Keep a flashlight, batteries, absorbent towels, bucket, wet vacuum where appropriate, adjustable wrench, screwdrivers, utility knife, heavy gloves, eye protection, dust masks, plastic sheeting, painter’s tape, labels, and phone charger in a known location. Include the correct spare HVAC filters and alarm batteries if your devices use replaceable batteries.
The kit is for controlling simple, low-risk situations while qualified help is arranged. It is not a substitute for electrical, gas, structural, fire, sewage, or hazardous-material expertise.
Part 3: Complete a 30-Minute Monthly Home Check
9. Follow the same inspection route every month
Start at the main entrance, move through each level in the same direction, then inspect the exterior. Consistency helps you notice change. Carry your phone and take comparison photographs from the same angle.
Look, listen, smell, and touch only safe surfaces. Notice new stains, peeling paint, musty odors, warm receptacle covers, buzzing equipment, slow drains, dripping valves, loose railings, pest evidence, damaged weatherstripping, and unusual appliance cycling.
Do not rely on memory. Record “no change” for monitored items. A dated sequence of photographs can show whether a crack is stable, a stain is expanding, or a deck board is deteriorating.
10. Check ceilings, walls, cabinets, and floors for moisture clues
Inspect below bathrooms, around windows, under sinks, behind toilets, around the water heater, beside the washing machine, near the dishwasher, and where exterior walls meet floors. A small yellow mark can indicate a roof leak, plumbing leak, condensation, or an old repaired stain; the pattern and timing matter.
Feel for dampness only when there is no electrical hazard. Use a moisture meter as a comparison tool, not as proof of the cause. When water is actively entering, stop the source if it is safe, protect the area, document the damage, and arrange professional assessment.
EPA guidance emphasizes that moisture control is the key to mold control. Wet building materials should be addressed promptly, and the source of the water must be corrected rather than covered with paint.
11. Review the water meter for hidden use
Choose a period when nobody is using water and all automatic equipment is off. Record the water meter, wait, and check for movement according to the utility’s instructions. A changing meter can indicate a leak, but irrigation, ice makers, water softeners, humidifiers, and automatic refill systems must be considered.
Watch for toilets that run intermittently, faucets that drip, pressure-relief discharge, and irrigation zones that remain wet. EPA WaterSense advises investigating unusually high winter water use and provides current home-maintenance and leak-detection guidance.
12. Inspect the HVAC filter and condensate area
Check the filter every month during heavy heating or cooling use. ENERGY STAR recommends monthly checks and replacement when dirty, with replacement at least every three months as a general minimum for many systems. The correct interval depends on the equipment, filter type, pets, occupancy, air quality, construction dust, and manufacturer instructions.
Verify the airflow arrow before installing a filter. Do not substitute a higher-resistance filter without confirming that the system can handle it. Reduced airflow can increase energy use and damage equipment.
Look around the condensate drain and equipment base for water, rust, algae, staining, or a full drain pan. A blocked condensate drain can damage the home and affect humidity. Do not open service panels or handle electrical components.
13. Test smoke and carbon-monoxide alarms according to instructions
Use the test button and follow the manufacturer’s procedure. CPSC recommends monthly testing and annual battery replacement for alarms that use replaceable batteries, while sealed-battery products follow their own instructions. Check the manufacture or replacement date because alarms do not last indefinitely.
Smoke alarms should generally be installed on every level, inside bedrooms, and outside sleeping areas; carbon-monoxide alarms should be on each level and outside sleeping areas, subject to product instructions and local codes. Never disable an alarm because of nuisance activation. Correct the placement, ventilation, cooking, battery, contamination, or device problem.
14. Check dryer airflow and lint control
Clean the lint screen before or after every load. During the monthly walk, verify that the dryer exhaust flap opens while the dryer operates and that the exhaust is not blocked. Inspect the accessible transition duct for crushing, disconnection, or excess lint.
CPSC advises keeping the exhaust vent unrestricted and cleaning lint from the vent pipe at least annually. Use the dryer manufacturer’s approved duct materials. Stop using the dryer if it overheats, smells scorched, takes much longer to dry, or the exhaust path appears unsafe.
Part 4: Control Water Before It Becomes Structural Damage
 Persistent leaks, corroded fittings, and pressurized plumbing repairs belong with a qualified plumber. Photo by Bulat843 via Pexels.
15. Inspect supply hoses and appliance connections
Look at washing-machine hoses, dishwasher connections, refrigerator water lines, faucet supplies, toilet connectors, and water-heater connections. Replace damaged, kinked, corroded, bulging, or leaking components with products approved for the application. Follow appliance and insurer requirements for replacement intervals.
Do not overtighten fittings. A connection can fail because of improper installation, excessive pressure, vibration, freezing, chemical exposure, or age. If you see green corrosion, rust, mineral deposits, dampness, or a deformed hose, arrange correction before it bursts.
16. Keep sink and vanity cabinets inspection-friendly
A packed cabinet can hide a slow leak for months. Keep plumbing visible and place a removable tray or leak sensor below vulnerable joints. Avoid storing paper products directly against supply lines.
Check the faucet base, drain, trap, disposal, dishwasher hose, filtration equipment, and cabinet floor. Dry the area and use a tissue to identify a very slow leak. Do not use chemical drain cleaners as routine maintenance; they can damage materials and create hazards for anyone who later opens the plumbing.
17. Maintain bathroom sealants and ventilation
Inspect caulk around tubs, showers, backsplashes, sinks, and penetrations. Failed sealant can allow water behind finishes, but caulk is not a repair for a leaking waterproofing assembly. Remove and replace deteriorated sealant only with a compatible product and proper surface preparation.
Confirm that the bathroom fan exhausts outdoors, not into an attic or wall cavity. Clean the accessible grille and use the fan during bathing and long enough afterward to control moisture. Persistent condensation, peeling paint, soft surfaces, or musty odors require investigation beyond cosmetic cleaning.
18. Review the water heater area
Follow the exact manufacturer maintenance schedule. Look for corrosion, moisture, soot, damaged venting, blocked combustion air, a leaking relief-valve discharge, or an overflowing drain pan. Never cap a relief-valve pipe, change safety controls, or test unfamiliar valves without the correct procedure.
Heat-pump water heaters may require air-filter and condensate maintenance. Fuel-burning units require trained inspection of combustion, venting, and gas connections. Keep combustible storage away from the equipment and preserve the clearances stated in the manual.
19. Manage basement and crawl-space moisture
Inspect after heavy rain. Look for efflorescence, damp walls, standing water, rust, musty odor, condensation, wood decay, pest activity, and wet insulation. Check that downspouts discharge away from the foundation and that ground slopes do not direct water toward the home.
Do not finish a damp basement before correcting moisture. EPA’s current remodeling guidance specifically recommends resolving leaks and moisture problems first. Depending on the cause, the solution may involve gutters, grading, drainage, plumbing, ventilation, vapor control, waterproofing, or foundation repair.
Part 5: Maintain Heating, Cooling, and Ventilation
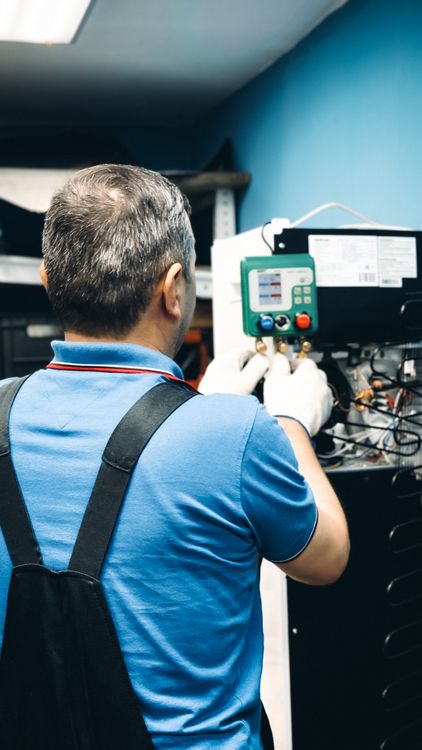 Annual pre-season service should include measurements and safety checks that cannot be replaced by a visual homeowner inspection. Photo by Bulat843 via Pexels.
20. Schedule professional service before peak season
ENERGY STAR recommends annual pre-season checkups, with cooling service in spring and heating service in fall. A proper visit should be more than a quick visual glance. The contractor should follow the manufacturer’s procedures and evaluate thermostat operation, electrical connections, moving parts, condensate drainage, system controls, airflow, refrigerant performance where applicable, and combustion safety for fuel-burning systems.
Book before the first heat wave or cold spell. Keep the service report and ask the technician to record measured values, not only “system operating.” Measurements create a baseline that helps identify gradual decline.
21. Keep outdoor equipment clear without damaging it
Remove leaves, cottonwood, grass, and debris from around an outdoor condenser or heat-pump unit while maintaining manufacturer clearances. Do not bend fins, spray electrical areas, enclose the unit tightly, or place landscaping where it blocks airflow or service access.
Check that the equipment remains level and that condensate or roof runoff does not erode the base. Ice buildup, unusual noise, damaged insulation, or repeated breaker trips require professional diagnosis.
22. Inspect visible ductwork and registers
Look for disconnected joints, crushed flexible duct, damaged insulation, rust, condensation, and gaps where registers meet walls or floors. Do not use ordinary cloth “duct tape” for permanent HVAC sealing. ENERGY STAR recommends professional evaluation of the whole duct system, airflow balance, repairs, sealing with appropriate materials, insulation in unconditioned spaces, and combustion-safety testing after significant duct work.
Keep supply and return grilles open and unobstructed unless the system designer says otherwise. Closing many registers can create pressure problems rather than saving energy.
23. Track comfort symptoms instead of changing equipment blindly
Record rooms that are too hot, too cold, humid, drafty, or noisy. Note the time of day, weather, door position, sun exposure, and system cycle. The cause could be insulation, air leakage, duct imbalance, equipment sizing, thermostat location, shading, or occupant behavior.
This record gives a contractor useful diagnostic information and prevents premature replacement of equipment that is not the true cause.
Part 6: Protect the Roof, Gutters, Exterior, and Foundation
 Roof drainage should move water away from the building without overflowing, backing up, or eroding the foundation area. Photo by Revive Wash via Pexels.
24. Inspect the roof from the ground after severe weather
Use binoculars or a camera zoom from a safe location. Look for missing, lifted, cracked, curled, displaced, or stained roofing; damaged flashing; loose gutters; sagging areas; debris; branch impact; and changes around chimneys, skylights, vents, and roof edges.
Do not walk on the roof unless you are trained, equipped, authorized, and the roof is suitable. Roof surfaces can be fragile, steep, wet, hot, icy, or easily damaged. Hire a qualified roofer for close inspection and repair.
Inside the attic, when safe to enter, look for daylight where it should not appear, damp sheathing, rusted fasteners, stained insulation, mold-like growth, or wet framing. A roof leak may travel before becoming visible on a ceiling.
25. Clean and maintain gutters and downspouts
Inspect during rain from the ground when possible. Water should flow freely without spilling behind the gutter, overflowing at joints, or discharging beside the foundation. Clean leaves and debris at an interval appropriate for nearby trees and storms.
FEMA flood-protection guidance recommends maintaining gutters, downspouts, and splash pads so roof water flows away from the home. Ready.gov also advises keeping roofs and gutters clear of debris.
Ladder work is a major fall hazard. Use a professional service when access is not unquestionably safe. Never lean from a ladder, work alone at height, or place a ladder on unstable ground.
26. Check grading and drainage after heavy rain
Walk the perimeter and note ponding, erosion, overflowing drains, downspout washout, or water moving toward the foundation. Keep soil, mulch, and landscaping from bridging moisture or termite clearances required by the building.
Redirecting downspouts, repairing grading, clearing a blocked drain, or correcting a low area can be more valuable than repeatedly treating interior symptoms. Obtain professional drainage or structural advice when settlement, foundation movement, retaining-wall problems, or recurring basement water is present.
27. Inspect siding, trim, masonry, and penetrations
Look for loose boards, open joints, rot, peeling coatings, cracked masonry, failed sealant, rusting fasteners, insect holes, and gaps around cables, pipes, lights, and vents. Determine whether an opening is an intentional drainage or ventilation detail before sealing it.
Repair the underlying water path before repainting. Paint can protect sound materials, but it cannot stabilize rotted wood, stop active leaks, or correct flashing defects.
28. Maintain decks, steps, porches, and railings
Push and pull railings carefully to detect looseness. Look for soft wood, cracked connections, corroded fasteners, separating ledger boards, settlement, slippery surfaces, and changes where the deck connects to the home.
Structural deck failures can be severe. A ledger, beam, post, or stair problem should be assessed by a qualified professional. Do not hide deterioration under coatings or attach new boards to unsound framing.
Part 7: Maintain Doors, Windows, and the Weather Barrier
 Sealant must be compatible with the joint, properly prepared, and placed without blocking intentional drainage paths. Photo by Erik Mclean via Pexels.
29. Operate every window and exterior door
Open, close, lock, and inspect each unit. Look for binding, failed hardware, damaged screens, cracked glass, condensation between panes, deteriorated weatherstripping, water staining, and soft trim. A window that suddenly becomes difficult to operate can indicate hardware failure, paint buildup, swelling, or building movement.
Keep egress windows usable. Do not add security devices that prevent emergency escape. Lubricate only with products approved by the manufacturer.
30. Distinguish air sealing from water management
Interior drafts may come from failed weatherstripping or gaps around the rough opening. Exterior water control depends on flashing, drainage, cladding, and sealant details. Applying caulk to every visible gap can trap water or block weep openings.
Use compatible backer rod and sealant where appropriate, follow joint dimensions, clean the surface, and respect movement. Large or recurring leaks require building-envelope diagnosis rather than repeated cosmetic caulking.
31. Check garage separation
Inspect the door from an attached garage to the home, weatherstripping, self-closing function where required, and visible wall or ceiling damage. Do not cut unapproved openings through the separation. Keep fuel, paint, and chemicals stored according to product instructions and local fire requirements.
Never run a vehicle or fuel-burning equipment in an attached garage. Carbon monoxide can enter the home even when a garage door is open.
Part 8: Maintain Life-Safety Systems
32. Create an alarm map and replacement schedule
List every smoke and carbon-monoxide alarm, its location, power source, model, installation date, and recommended replacement date. Test monthly according to instructions and record the result.
CPSC recommends smoke alarms on every level, inside bedrooms, and outside sleeping areas, plus carbon-monoxide alarms on each level and outside sleeping areas. Local codes and product instructions control exact placement. Buy devices meeting current applicable safety standards from trustworthy sellers and check CPSC recalls or warnings.
33. Inspect fire extinguishers without assuming they replace escape
Confirm that each extinguisher is accessible, undamaged, within its service or replacement period, and appropriate for the location. Follow the manufacturer’s inspection instructions. Household members should know that evacuation and emergency calls come first; an extinguisher is only for a small, early fire when there is a safe exit behind the user.
Practice a home fire escape plan. Keep exits clear, confirm that windows open, and choose an outdoor meeting point.
34. Service fireplaces, chimneys, and fuel-burning equipment
Arrange trained inspection and cleaning at the interval required for the appliance, fuel, and usage. Look for damaged doors, missing screens, cracked firebrick, unusual soot, staining, loose vent connections, and blocked air openings.
CPSC advises annual inspection and service of home heating systems, chimneys, and vents by a trained technician. Carbon-monoxide alarms add protection but do not replace correct installation and maintenance.
35. Review generator and storm safety
Never operate a portable generator inside a home, garage, basement, shed, or near openings. CPSC advises using generators outdoors at least 20 feet from the home with exhaust directed away. Use only properly designed transfer equipment installed by qualified professionals; never backfeed power through a household receptacle.
Before storm season, confirm safe storage of fuel according to regulations, battery condition, extension-cord ratings where permitted, and the manufacturer’s maintenance schedule.
Part 9: Inspect Electrical and Appliance Warning Signs
36. Look for conditions that require an electrician
Arrange professional evaluation for repeated breaker trips, flickering associated with loads, warm or discolored receptacles, buzzing, burning odors, damaged cords, loose outlets, sparks, shocks, missing covers, water near electrical equipment, or unapproved wiring.
Do not replace breakers with larger ratings, bypass ground-fault or arc-fault protection, use extension cords as permanent wiring, or open service equipment. Keep the electrical panel accessible and clearly labeled.
37. Test GFCI and AFCI protection as instructed
Use built-in test buttons at the interval stated by the manufacturer and local guidance. A device that will not test, reset, or remain set needs qualified evaluation. Do not assume that receptacles downstream are protected without verification.
38. Clean appliance areas and inspect ventilation
Vacuum refrigerator coils only when the manual permits and the appliance is safely disconnected. Clean range-hood filters, dishwasher filters, washing-machine dispensers, dryer lint systems, and accessible appliance vents according to instructions.
Leave ventilation clearances around refrigerators, freezers, water heaters, and mechanical equipment. An appliance that runs continuously, leaks, overheats, smells unusual, or makes new mechanical noise should be assessed before complete failure.
Part 10: Use a Seasonal Maintenance Calendar
39. Complete spring tasks
- Schedule cooling-system service before hot weather.
- Inspect roof and exterior after winter storms.
- Clean gutters and confirm downspout discharge.
- Test sump pumps using the manufacturer’s method.
- Inspect exterior faucets, irrigation, decks, stairs, and railings.
- Check grading, foundation drainage, and signs of pests.
- Wash or replace approved ventilation and appliance filters.
- Review emergency supplies before storm season.
40. Complete summer tasks
- Check HVAC filters monthly during heavy use.
- Keep outdoor equipment free of vegetation and debris.
- Watch for condensation, high humidity, and slow drains.
- Inspect irrigation for overspray against walls or foundations.
- Check caulk and paint in dry weather.
- Look for roof or attic heat-related deterioration without entering unsafe spaces.
- Inspect screens, door hardware, and exterior lighting.
41. Complete fall tasks
- Schedule heating-system, chimney, and vent inspection.
- Clean gutters after leaf drop.
- Prepare exterior plumbing for freezing conditions.
- Inspect weatherstripping and window operation.
- Confirm smoke and carbon-monoxide alarm dates and batteries.
- Service generators and snow equipment according to instructions.
- Trim hazardous branches using qualified tree professionals.
- Check attic evidence of summer roof leaks before cold weather.
42. Complete winter tasks
- Monitor pipes in vulnerable areas during freezes.
- Keep combustion-air and exhaust openings clear of snow or debris.
- Watch for ice dams, gutter damage, and roof loading from the ground.
- Check indoor humidity and condensation.
- Inspect after storms for roof, siding, and drainage damage.
- Keep portable heaters clear and use them exactly as directed.
- Review the maintenance budget and schedule spring contractors early.
Part 11: Prioritize Repairs and Control Costs
43. Rank every finding by consequence, not appearance
Use four priority levels:
- Emergency: Active fire, gas odor, dangerous electrical condition, structural instability, major water flow, sewage, or immediate life-safety risk.
- Urgent: Active roof leak, failed sump pump during wet weather, nonworking alarm, loose railing, blocked vent, or equipment condition likely to worsen quickly.
- Planned repair: Deteriorated sealant, aging hoses, minor exterior coating failure, slow drain, or an appliance approaching the end of support.
- Monitor: Stable cosmetic crack, old stain confirmed dry, minor wear, or a condition with no current functional change.
Appearance alone is a poor guide. A small plumbing leak behind a cabinet may deserve higher priority than a large cosmetic wall crack that has remained stable for years.
44. Estimate the full cost of delay
Consider secondary damage, emergency rates, lost use, temporary accommodation, mold remediation, spoiled contents, energy waste, permit costs, and warranty loss. Preventive work is most valuable when it interrupts a chain of damage.
Do not replace functioning major components solely because a generic lifespan chart says they are old. Combine age with condition, measured performance, repair history, efficiency, safety, support, and replacement lead time.
45. Obtain comparable contractor proposals
For significant work, ask each contractor to inspect the same scope and describe the cause, proposed method, materials, exclusions, permits, warranty, cleanup, schedule, and payment terms. The cheapest proposal may omit diagnosis or necessary preparation; the most expensive may include upgrades you do not need.
Verify licenses, insurance, references, complaints, and manufacturer certifications where relevant. Avoid pressure to sign immediately after an inspection. Never pay a large unprotected cash deposit without understanding local consumer-protection rules.
46. Keep DIY work within a written boundary
A reasonable homeowner boundary may include replacing accessible filters, cleaning approved grilles, testing alarms, cleaning safe ground-level drains, replacing simple weatherstripping, labeling shutoffs, and documenting conditions.
Move the task to a professional when it involves height, structural loads, hidden water pathways, electricity, gas, combustion, refrigerant, pressurized piping, sewage, hazardous materials, permits, or a warranty requiring authorized service.
Part 12: Document the Home and Improve the Plan Every Year
 High-level, structural, and difficult-access maintenance should be assigned to trained workers using suitable protection. Photo by Philippe WEICKMANN via Pexels.
47. Maintain a permanent service log
For each task, record the date, condition, action, cost, contractor, materials, model numbers, warranty, photographs, and next due date. Record “inspected—no defect found” as well as repairs. This history supports troubleshooting, resale disclosure, warranty claims, budgeting, and insurance documentation.
48. Photograph the home systematically
Once a year, photograph every room, mechanical space, exterior elevation, roof from the ground, utility area, and valuable installed feature. Capture serial numbers and overall condition. Store the images securely outside the home.
Comparison photographs are especially useful for foundation cracks, roof wear, corrosion, water stains, deck movement, erosion, and appliance conditions.
49. Review recalls and end-of-support notices
Search official manufacturer and government databases for major appliances, alarms, electrical products, child-safety products, generators, and equipment. A product can appear functional while having a serious safety warning.
Register important products with the manufacturer using a dedicated household email address. Keep purchase proof and model information.
50. Hold an annual maintenance review
At the same time each year, review completed tasks, recurring defects, equipment age, upcoming warranties, storm damage, utility use, planned renovations, and the next year’s budget. Update the home profile after replacements or remodeling.
Ask three questions:
- Which problems returned after repair, suggesting that the root cause was missed?
- Which system is likely to create the largest disruption if it fails next year?
- Which low-cost task can reduce the risk of that failure now?
A Practical 30-Day Setup Plan
Days 1–3: Build the file
Record the home profile, equipment model numbers, warranties, shutoffs, emergency numbers, and current contractor contacts.
Days 4–7: Complete the baseline walk
Inspect every room and the exterior. Photograph existing stains, cracks, corrosion, roof conditions, drainage, and equipment. Do not begin random cosmetic repairs until the source of each defect is understood.
Days 8–10: Correct immediate safety gaps
Address missing or nonworking alarms, blocked exits, inaccessible shutoffs, unsafe cords, loose railings, and active leaks using qualified help where required.
Days 11–15: Stabilize moisture risks
Repair dripping fixtures, investigate meter movement, clear safe drainage paths, inspect appliance hoses, and schedule roof, plumbing, or foundation work for active water problems.
Days 16–20: Organize HVAC and appliances
Obtain correct filters, schedule seasonal service, clean approved appliance components, and document unusual noise, cycling, temperatures, or drainage.
Days 21–25: Build the seasonal calendar
Place tasks in your digital calendar with reminders four weeks early. Add contractor booking dates, not only the final service date.
Days 26–30: Create the budget and review routine
Rank findings, obtain proposals, create an emergency reserve target, and choose a fixed monthly inspection day. The plan succeeds when it is easy to repeat, not when it is perfect on paper.
Special Considerations for Renters, Condominiums, and Landlords
Renters should document defects promptly in writing, follow the lease, avoid unauthorized repairs, and preserve photographs and communications. Know which emergency controls are accessible and how to contact property management after hours.
Condominium owners must distinguish between unit responsibility and association responsibility. Windows, balconies, plumbing branches, roofs, exterior walls, alarms, HVAC equipment, and insurance boundaries vary by governing documents. Report common-element water problems quickly even when the visible damage appears inside one unit.
Landlords should use the same documented inspection route for each property, respect notice and access laws, respond to habitability and safety issues promptly, and avoid relying on tenants to diagnose technical causes. A standardized turnover inspection should not replace ongoing preventive maintenance.
Common Maintenance Mistakes to Avoid
- Waiting for equipment failure before learning the model number or shutoff location.
- Painting over stains without identifying the moisture source.
- Using caulk as a universal repair for flashing, drainage, or structural movement.
- Installing the most restrictive HVAC filter without airflow verification.
- Closing many registers to save energy.
- Ignoring a slow toilet, small drip, or occasional meter movement.
- Walking on roofs or using ladders without training and proper safety conditions.
- Restoring power repeatedly after a breaker trips.
- Disabling alarms because they create nuisance warnings.
- Using extension cords as permanent wiring.
- Hiring only by price without a defined scope.
- Failing to document service that a warranty requires.
- Completing cosmetic renovations before fixing basement, roof, or plumbing moisture.
- Buying parts from photographs instead of verifying model and specification.
- Creating a long checklist that nobody can realistically repeat.
Frequently Asked Questions
How much time should routine home maintenance take?
A focused monthly walk can take 30 to 60 minutes after the system is organized. Seasonal work may take several hours, while professional service is scheduled separately. The goal is consistent observation, not constant renovation.
How much should I budget?
No single percentage fits every property. Budget based on the age and condition of the roof, HVAC, water heater, exterior, plumbing, appliances, and specialized systems. Separate predictable replacement savings from an emergency reserve.
Should I use a home-maintenance app?
An app can help with reminders, documents, and photographs, but a spreadsheet, calendar, and secure folder can work equally well. Choose a system you can export and keep if the service closes.
Which task prevents the most expensive damage?
Water control is often among the highest priorities: roof drainage, plumbing leaks, appliance hoses, foundation runoff, condensate, and bathroom moisture. Life-safety systems and dangerous electrical or combustion defects always take priority over financial savings.
How often should HVAC filters be replaced?
Inspect monthly during heavy use and follow the equipment and filter instructions. ENERGY STAR gives a general minimum of every three months for many systems, with earlier replacement when visibly dirty.
Can I clean gutters myself?
Only when access and ladder conditions are genuinely safe and you have appropriate training and equipment. Many homes require a professional because falls can cause severe injury.
What should I do with an old water stain?
Confirm whether it is dry, monitor it, investigate the source, and photograph it. Do not repaint until the cause has been resolved and damaged materials have been assessed.
Do smoke and carbon-monoxide alarms need replacement if they still beep during testing?
Yes, when they reach the replacement age specified by the manufacturer. The test button checks only specific functions and does not make the sensor last indefinitely.
Is preventive maintenance worth it in a newer home?
Yes. New homes can have installation defects, settlement, warranty deadlines, clogged drains, failed sealants, appliance issues, or landscaping that directs water incorrectly. Early documentation also makes warranty claims stronger.
What is the most important maintenance habit?
Act on change. A new odor, stain, sound, temperature pattern, crack, leak, or equipment behavior deserves documentation and appropriate investigation. Familiarity should not turn a developing problem into background noise.
Writer’s Perspective: Maintenance Is a Decision System, Not a Chore List
The most effective homeowners are not necessarily the people who can repair everything themselves. They are the people who notice change early, understand the limit of their skills, preserve evidence, and choose the right response before urgency removes their options.
A maintenance calendar should therefore be short enough to use but detailed enough to protect the building. Monthly inspections catch change. Seasonal work prepares the home for weather. Professional service measures what the homeowner cannot safely measure. Records connect one year to the next.
The strongest plan also avoids “maintenance theater”—busy work that feels responsible but does not reduce meaningful risk. Repainting a stain, adding fragrance to a musty room, replacing equipment without diagnosis, or sealing a random exterior opening may hide the evidence while the root problem continues. Good maintenance follows cause and consequence.
Final Home Maintenance Checklist
- Home profile and equipment model numbers recorded.
- Main water, gas, and electrical controls identified and labeled.
- Monthly inspection route scheduled.
- Active leaks and moisture sources investigated.
- HVAC filter checked and seasonal service booked.
- Gutters, downspouts, grading, roof, and exterior reviewed.
- Windows, doors, railings, decks, and stairs operated and inspected.
- Smoke and carbon-monoxide alarms mapped, tested, and dated.
- Dryer vent and appliance ventilation checked.
- Electrical warning signs escalated to a qualified electrician.
- Records, photographs, warranties, recalls, and contractor reports organized.
- Repairs ranked as emergency, urgent, planned, or monitor.
- DIY boundaries written clearly.
- Annual review and replacement budget scheduled.
Official Resources Used for This Guide
- ENERGY STAR Heating and Cooling Maintenance Checklist
- ENERGY STAR: Heat and Cool Efficiently
- EPA WaterSense Home Maintenance
- EPA Leak Detection and Flow Monitoring Devices
- EPA Remodeling and Indoor Air Quality
- CPSC Carbon-Monoxide Alarm Guidance
- CPSC Smoke, CO Alarm, and Dryer Safety Guidance
- FEMA: Protect Your Home from Flooding
- Ready.gov Low- and No-Cost Preparedness
This article provides general educational information. Construction, maintenance, safety, warranty, and legal requirements vary by location and product. Use qualified professionals and current official instructions for work that exceeds your training.